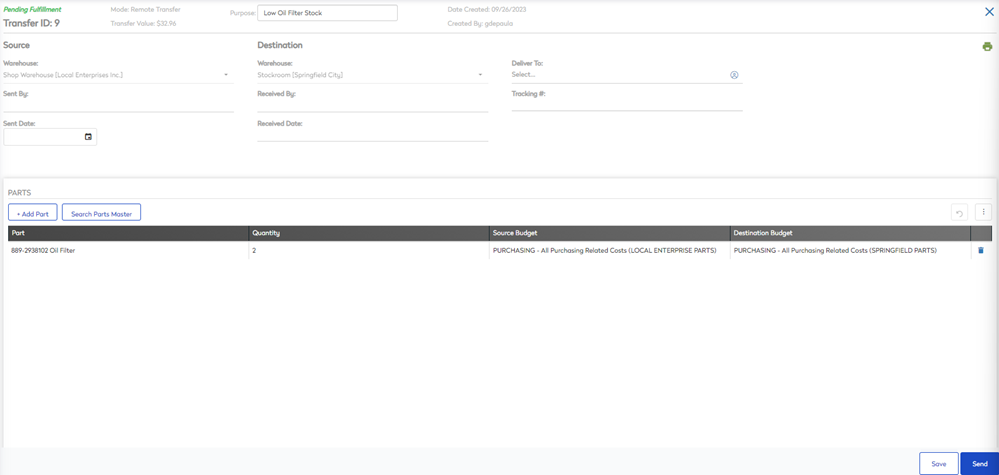
Add Parts to a Transfer
Add parts to a created transfer to track which parts are moving from one warehouse to another.
To add parts to a Transfer, follow the steps below:
- Navigate to Transfers. The Inventory Transfer Management screen displays.

- Click on a Transfer. The Transfer screen displays.

- Click the + Add Part button. A new line populates in the parts list on the transfer screen.
- In the search parts field, enter a search term. The search results populate.

- Select a part from the search results to add to the transfer.
- From the quantity field, enter the quantity or use the spinbox to pick a number.
- From the Source Budget drop-down, select a source budget from the source warehouse.
- From the Destination Budget drop-down, select a destination budget from the destination warehouse.
- Click the Save button.
The part has now been added to the transfer.
Source Warehouses credit budget accounts the value of the transfer (as if they were returning inventory to a supplier).
Destination Warehouses expense budget accounts the value of the transfer (as if they were purchasing inventory from any other supplier).
Search Parts Master
Search Parts Master allows you to add a part in a different way. By using search parts master, you have the ability to view more details about the part prior to adding to the transfer.
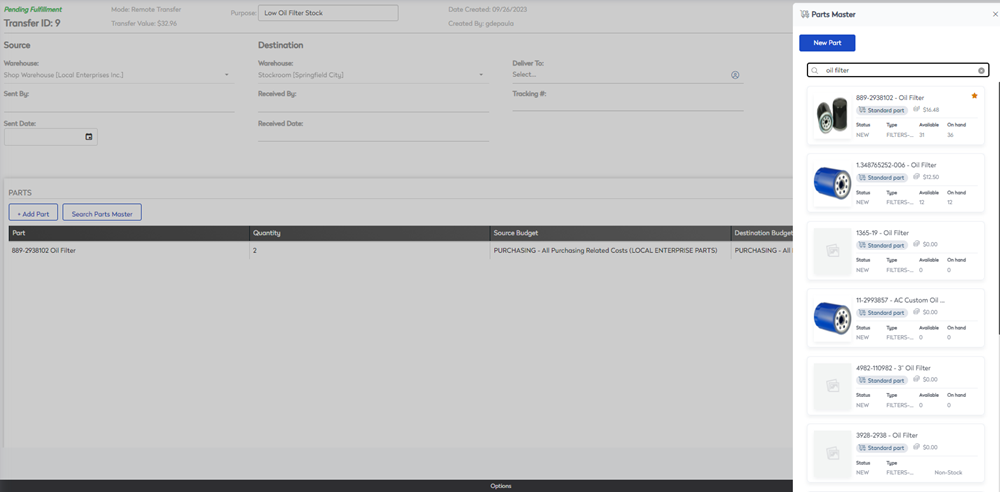
- Click the Search Parts Master button. The Parts Master panel displays.

- From the Search parts master field, enter a search term. The search results populate.
- Select a part from the search results to add to the transfer. The selected part appears in the parts list of the transfer screen.
- From the quantity field, enter the quantity or use the spinbox to pick a number.
- From the Source Budget drop-down, select a source budget from the source warehouse.
- From the Destination Budget drop-down, select a destination budget from the destination warehouse.
- Click the Save button.
The part has now been added to the transfer.
Send the Transfer
Once all parts are listed on the transfer and ready for fulfillment, send the transfer to the destination.
- Click on the Send button.
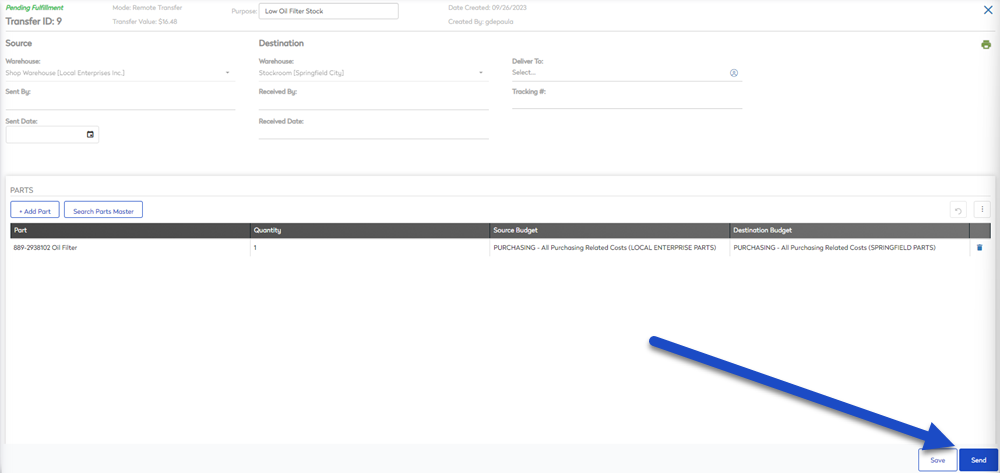
The transfer is now sent and ready to be received by the destination warehouse.
Remember to add the packing slip. Click the print packing slip  icon
icon