Create an Asset
When a new asset is purchased, you will need to create an asset record so that it can be maintained. When you create an asset, you first need to complete the required information and then later the additional information can be completed.
Watch the Video
Audio: Sound Video Length: 0:55 minute
Learn more
- Navigate to Assets. The Asset Management screen displays.
- Click on the New Asset button. The Create Asset form displays.
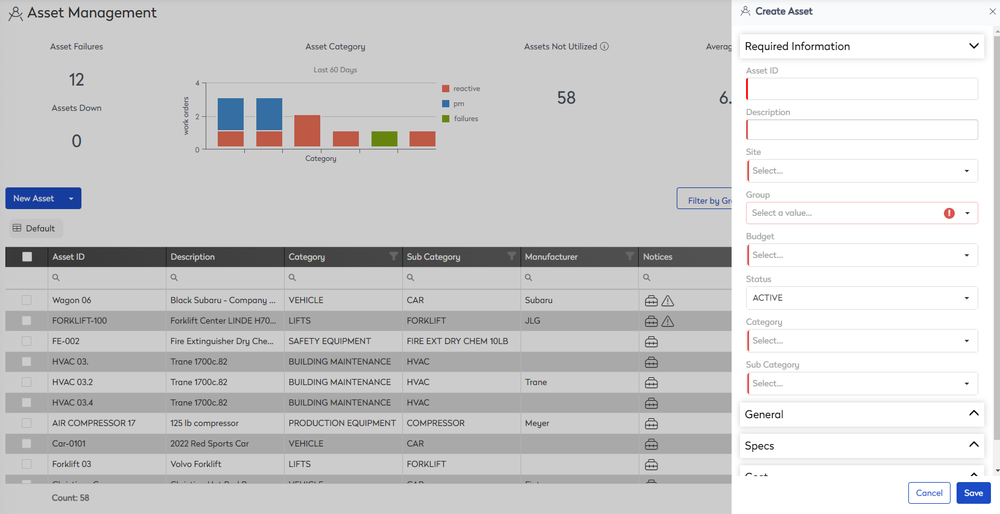
- Complete the required information:
| Field | Description |
|---|---|
|
Asset ID field |
Enter the Asset identifier and this must be a unique number. For example, Truck 001, Truck 002 and so on. |
|
Description field |
Enter a short description of the asset. You can use letters, numbers, or a combination of up to 24 characters. For example, 2017 White Chevrolet Silverado |
| Site drop-down | Select a site that the asset belongs to. |
|
Group drop-down |
Select an asset group and this describes where an asset belongs, who uses it, and what they use it for. The Group field is used for reporting and sorting purposes and is defined during configuration. For example, an asset group can be used to describe a location or a department that the asset belongs to. |
|
Budget drop-down |
Select the budget assignment and the budget is used to collect transactions. The budget assignments is defined during configuration. |
|
Status drop-down |
Select the status either Active, Inactive, Scrapped, or Sold. |
|
Category drop-down |
Select the asset category, which is the broadest description of an asset. For example, Vehicles. Also, asset categories are tied to asset Sub Categories. The Category field is used for reporting and sorting purposes and is defined by your Administrator during set up. |
|
Sub Category drop-down |
Select the asset sub-category, which is a narrower, but still generic description of an asset. These describe what type of assets are available for that category. For example, Truck is a sub-category in the Vehicles category. The Sub Category field is used for reporting and sorting purposes and is defined by your Administrator during set up. |
Now that you have completed the required information, you can click the Save button or you can continue on and complete the additional information below.
- Click General's expand
 icon.
icon.
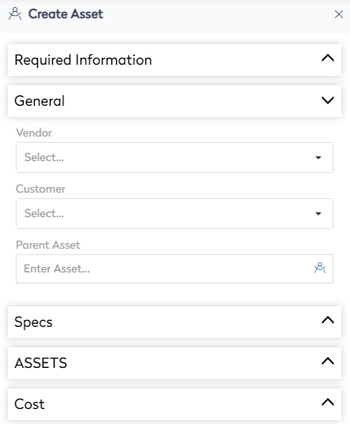
- Complete the general information:
| Field | Description |
|---|---|
| Vendor drop-down | Select the vendor who supplied the asset. |
| Customer drop-down | Select the customer that the asset belongs to. For example, if you perform maintenance on customer-owned equipment. |
| Parent Asset field | Either select from the list or search for the parent asset. |
- Click Spec's expand
 icon.
icon.
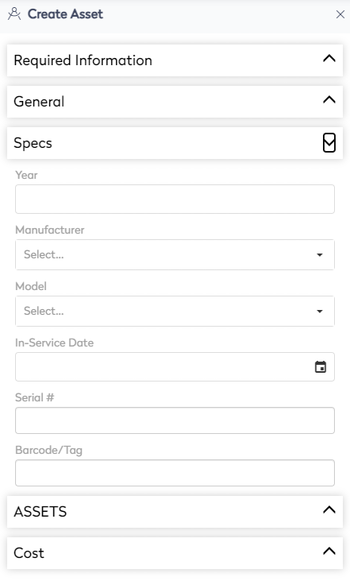
- Complete the specification information:
| Field | Description |
|---|---|
|
Year field |
Enter in the asset's year. |
|
Manufacturer drop-down |
Select the manufacturer of the asset. Manufacturers defined by your Administrator during set up. |
|
Model drop-down |
Select the model of the asset. Models defined by your Administrator during set up. |
|
In-Service Date calendar |
Select the in-service date. |
|
Serial # field |
Enter the serial number of the asset. |
|
Barcode/Tag field |
Specify a custom barcode using your company naming convention. System-generated and custom barcodes can both be used. |
- Click Assets's expand
 icon.
icon.
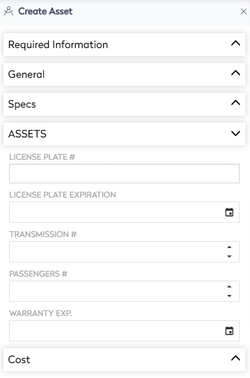
- Complete the asset information:
| Field | Description |
|---|---|
| License Plate # field | Enter the license plate number. |
| License Plate Expiration calendar | Select the license plate expiry date. |
| Transmission # field | Enter the transmission number. |
| Passengers # field | Enter the number of passengers. |
| Warranty Epx. Calender | Select the warranty expiry date. |
- Click Cost's expand
 icon.
icon.
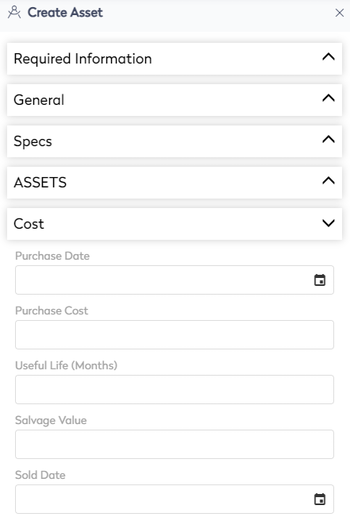
- Complete the cost information:
| Field | Description |
|---|---|
|
Purchase Date calendar |
Select the date the asset was purchased. |
|
Purchase Cost field |
Enter the amount that was paid for the asset. |
|
Useful Life (Months) field |
Enter the amount of expected life in months for the asset. |
|
Salvage Value field |
Enter the expected value of the asset. |
|
Sold Date calendar |
Select the date the asset was sold. |
- When you have completed the information, click the Save button.
