Set up Workflow for Purchase Orders
Level: Administrator
All changes to your Work Order Settings will impact ALL users.
Your Administrator can set up a workflow that a work order will follow from creation to completion.
- Select the Settings icon located in the menu.
- Select Module Settings then Purchase Orders.
- Click the Workflow tab. The Workflow tab displays.
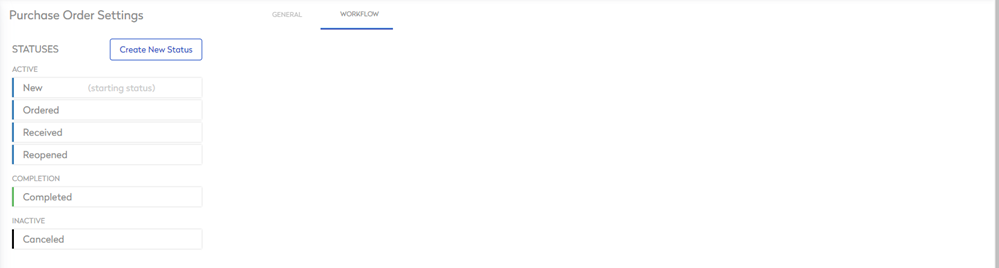
The default workflow contains the following:
Active
- New
- Ordered
- Received
- Reopened
Completion
- Completed
Inactive
- Canceled
Set up a simple Workflow
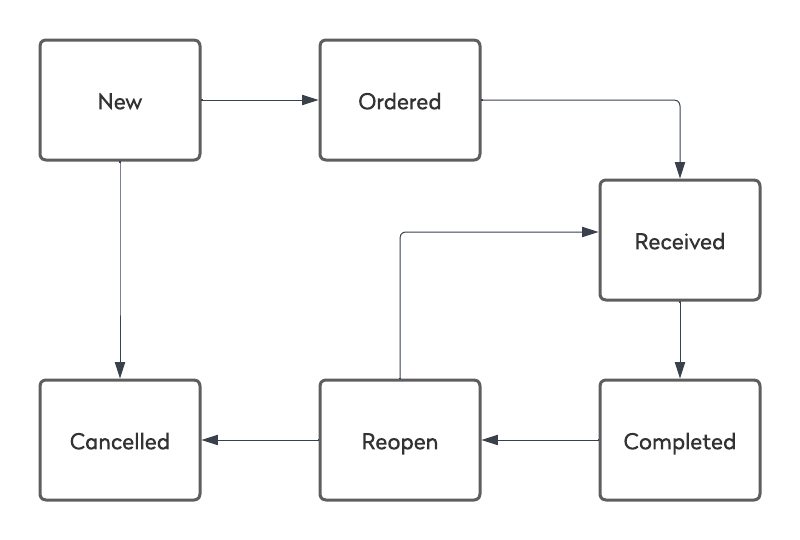
The workflow is easier to explain with an example, so let's set up this simple workflow. Below is an example of a simple workflow that includes New, Ordered,Received, Completed, Reopen, and Canceled.
Rename a Status
You can rename a status, in this example, the Active status will be renamed to Open.
- Click on the status.
- Hover on the status to see the More Actions icon.
- Click the More Actions
 icon. A popup menu displays.
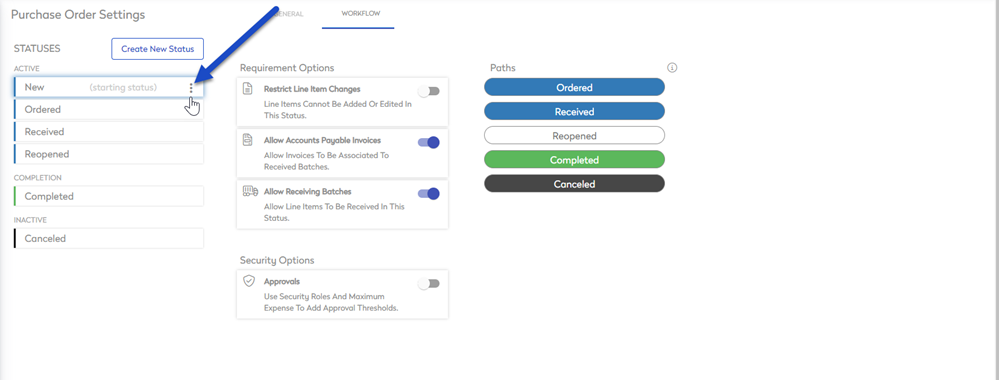
- Click the Rename menu item. The status name is highlighted and becomes editable.
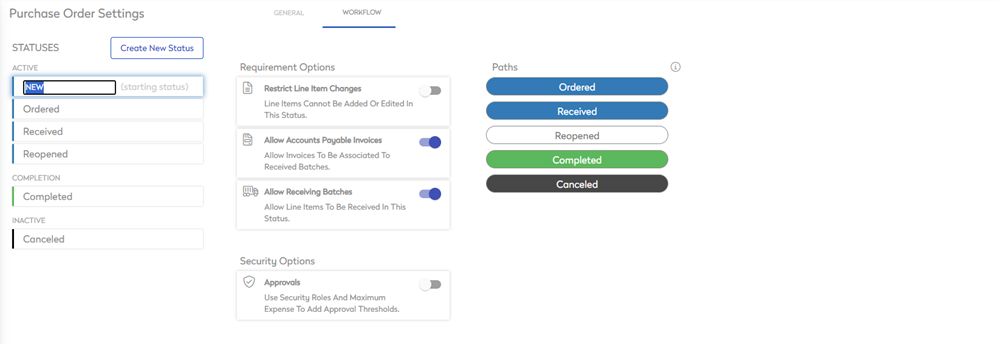
- In the Name of status being renamed field, enter the name.
- Click anywhere on the screen to save the new name automatically.
The status name is saved.
Create a New Status
You can create a new status, in this example, the In Progress status is created.
- Click the Create new status button. The Choose a status type dialog displays.
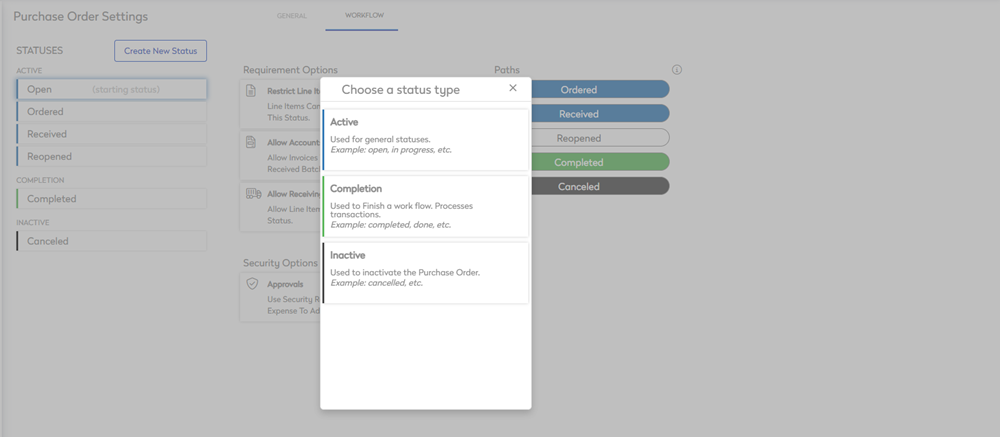
- Select the status type, either:
- Active - used for general statuses.
- Completion - used to finish a workflow.
- Inactive - used to make the purchase order inactive.
The Name your new status form displays.
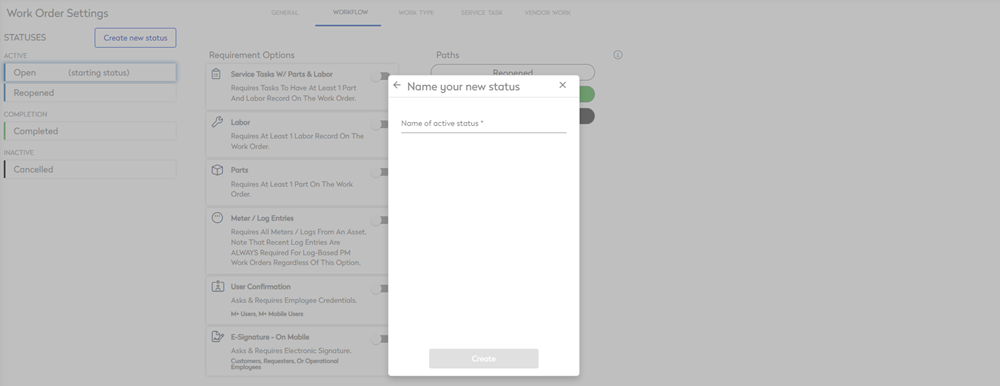
- In the Name your new status field, enter in the status name.
- Click the Create button.
The status is created.
Define the Workflow for each Status
You need to define where the status will flow to the next status.
For example:
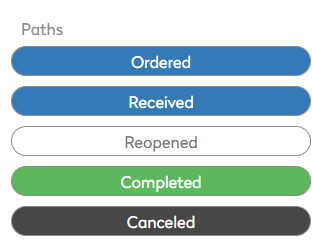
| Status | Path | |
|---|---|---|
| ACTIVE |
OPEN |
ORDERED RECEIVED COMPLETED CANCELLED |
| ACTIVE |
ORDERED |
RECEIVED COMPLETED CANCELED |
| ACTIVE |
RECEIVED |
COMPLETED |
| ACTIVE | REOPENED |
COMPLETED
|
| COMPLETION |
COMPLETED |
REOPENED |
| INACTIVE |
CANCELED |
- Click the status and requirement options and paths displays.
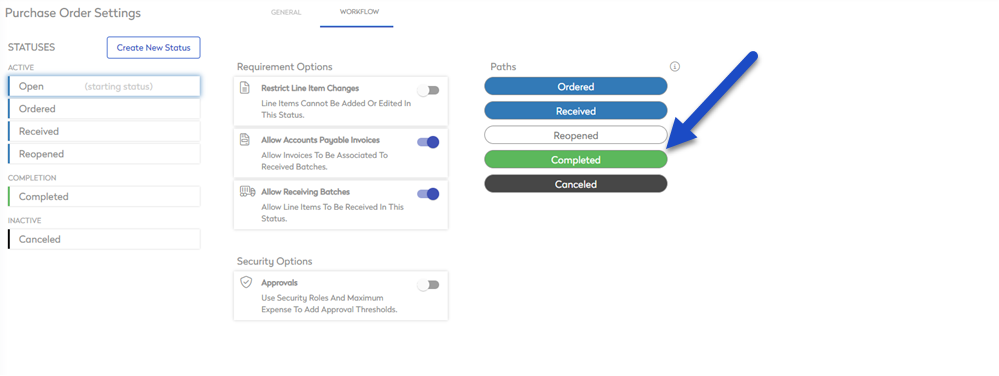
- Click the path you want this status to flow to.
The path will highlight and save.
- Repeat steps 1 to 2 to complete the flow for each status.
Define the Workflow Requirement Options
You will see that each status has requirement options. In this example, the RECEIVED status's requirements will be defined.
- Click the status and requirement options and paths displays.

The following requirements can be toggled on:
- Restrict Line Item Changes - Line items cannot be added or edited in this status.
- Allow Accounts Payable Invoices - Allow invoices to be associated to received batches.
- Allow Receiving Batches - Allow line items to be received in this status.
- Approvals - Use security roles and maximum expense to add Approval Thresholds.
Let's turn on the approvals.
- Click the Approval toggle to ON.
- Click the Edit
 icon. The Thresholds Per Role dialog.
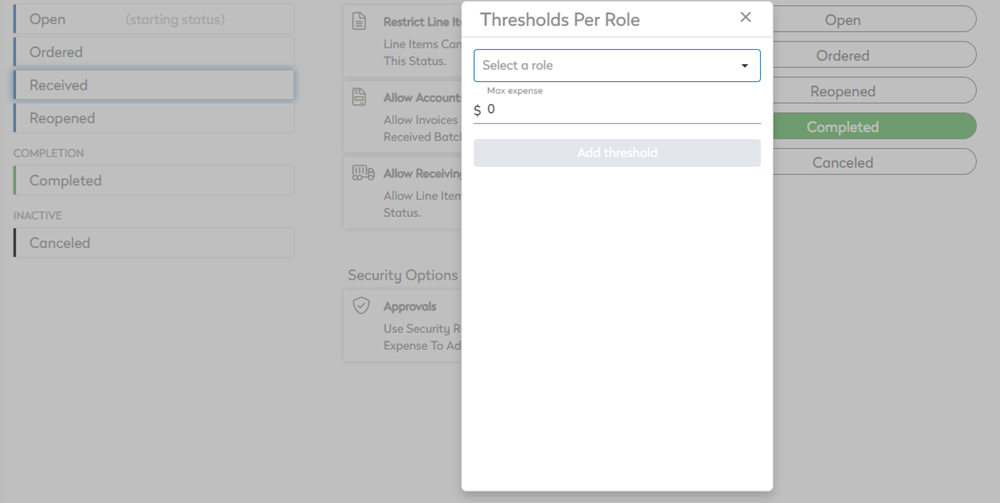
- From the Select a role drop-down, select either Administrator, Full User, or Read Only.
- In the Max expense field, enter the amount. This is the threshold amount that will trigger the approval, for example, when the purchase order for $5,001 then the approval will be triggered and if the work order is $5,000 then the approval is not triggered.
- Click the Add threshold button. The threshold is saved.
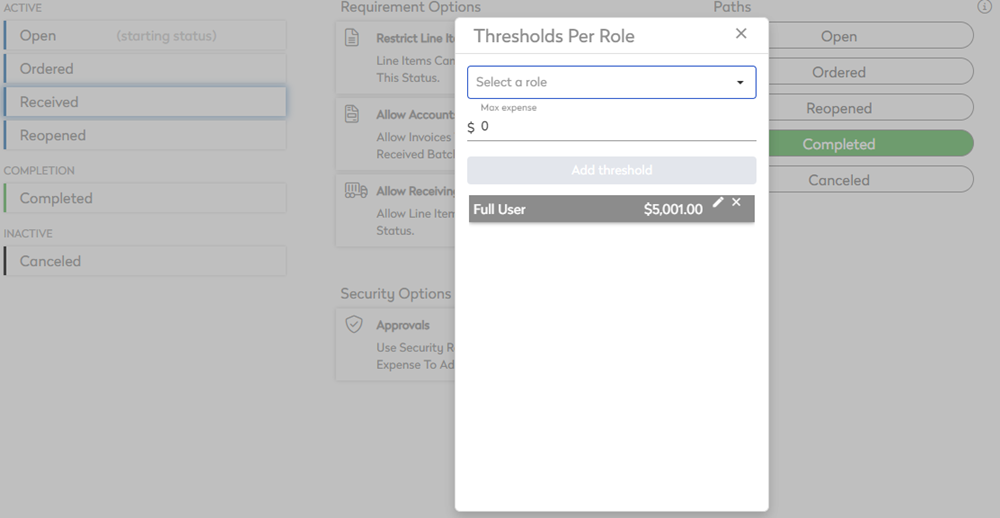
- Repeat steps 4 to 6 to add another approval threshold.
- When you are finished click the X icon to close the dialog.