Set up an Axle Schema for Tire Tracking
The Category settings is where the default Axle Schema is defined for each asset subcategory with Tire Tracking enabled. This is useful when you have the same axle schema for multiple vehicles.
Steps
Complete the following steps:
- Step 1. Enable Tire Tracking
- Step 2. Set a default Axle Schema
Step 1. Enable Tire Tracking
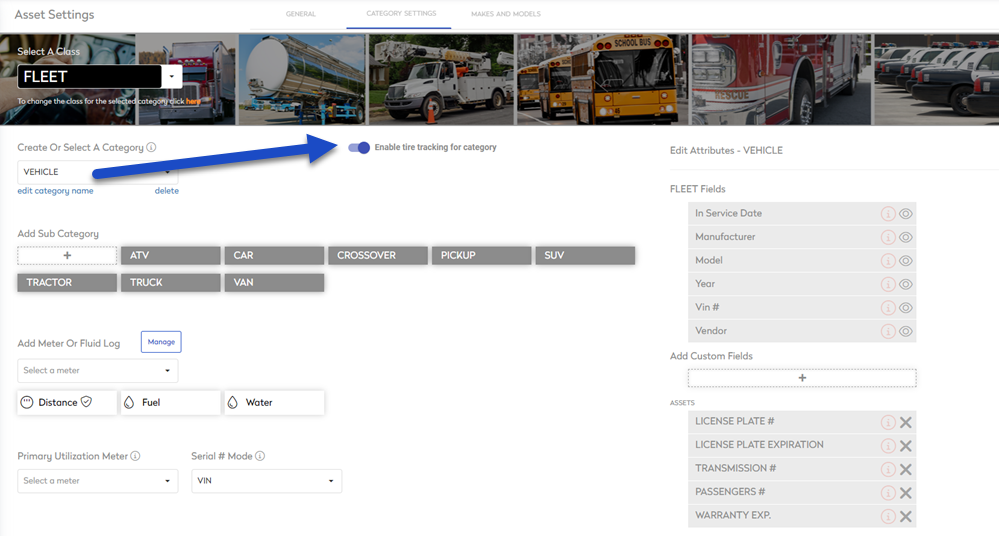
- Navigate to Settings > Module Settings > Assets > Category Settings.
- From the Class drop-down, select a Class.
Tire tracking is only available for Categories under the FLEET or MOBILE EQUIPMENT Classes.
- From a Category drop-down, select a Category.
- Ensure tire tracking is toggled on for each desired Category under that Class.
Step 2. Set a default Axle Schema

- Click an existing subcategory or create a subcategory. In this example we clicked a subcategory and the form displays.
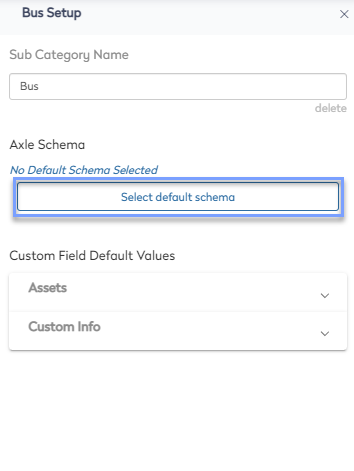
- Click the select default schema button. The axle configuration dialog displays.
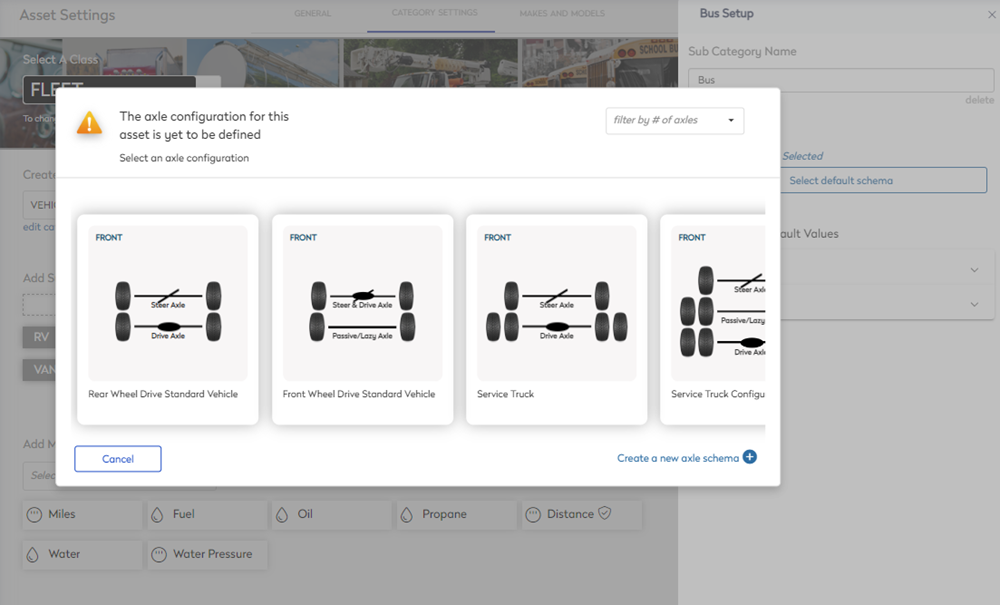
- Click one of the default axle schemas or create a new axle schema. The set as default dialog displays with the message "set this schema for all assets with the same sub-category?".
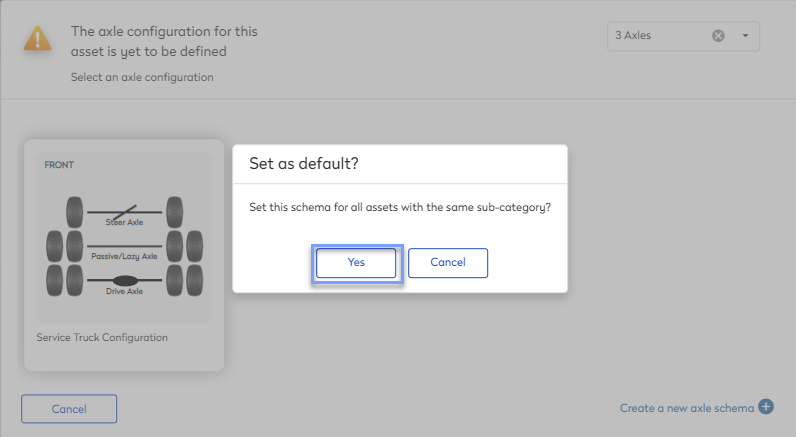
- Click the Yes button to set the default schema for the subcategory. The default schema is set and automatically saved.
Now that the default axle schema is set, assets associated with the subcategory will automatically follow the selected default axle schema.