
Review the Asset
Eptura Asset app
The Asset listing lets you open an asset and display the asset details.
- From the menu, tap Assets icon and the listing displays.
- Tap the Asset you want to open and review.

The asset details screen contains the following:
- (A) Status
- (B) Work, History, and Details tabs
- (C) Add icon that lets you add attachments, add comment, or create a work order.
Change Status
| When you want to change the status, tap the current status and then select either Active, Inactive, Scrapped, or Sold. |  |
Add Menu
|
When you tap the Add icon the menu displays:
|
 |
Add Attachment
|
Tap the Add icon and then select from the menu Add attachment. Select the attachment type, either:
|
 |
Add Comment
|
Tap the Add icon and then select from the menu Add comment. In the comment field, enter a comment (up to 500 characters). Tap the Save |
 |
 icon and the comment is added.
Create Work Order
|
Tap the Add icon and then select from the menu Create work order. In the Site field, use the default. In the Asset field, use the default, as you want to create a work order for this asset. Tap the Next button. |
 |
|
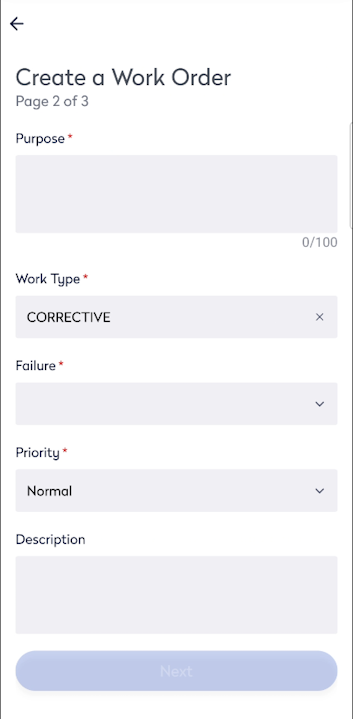
In the Purpose field, enter purpose of the work order (up to 100 characters). From the Work Type field, select either Corrective, Predictive, or Preventive. From the Failure field, select the failure from the list. From the Priority field, select either Minor, Normal, Major, or Critical. In the Description field, enter a description for the work order. Tap the Next button. |
 |
|
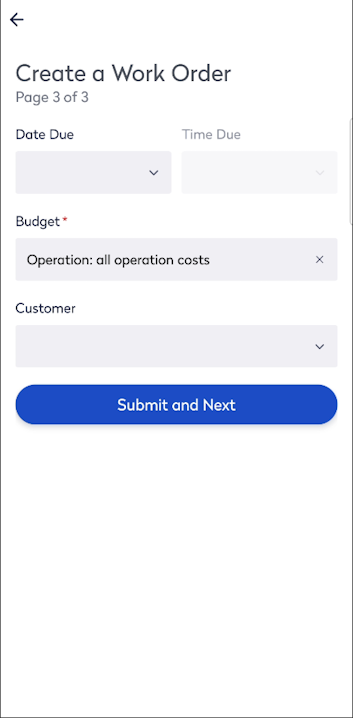
From the Date Due picker, select a date and then select a time. From the Budget field, either use the default or select a budget. If needed, from the Customer drop-down, select a customer. Tap the Submit and Next button. |
 |
|
If needed, you can add photos, tap the + icon, and then select either Take photo or Photo library. Or you have the option to tap the Skip button to skip uploading photos. |
 |
|
The new work order has been added to your queue. Now you can either tap Go to the New Work Order or tap Back to My Work, and this returns you to the Asset Details screen. |
 |