Create a new Employee
Level: Administrator
When an employee joins your company, you can create new employees to be users of Eptura Asset.
Access Employee & Users
- Navigate to Settings.
- Under the Administration heading, click Employees & Users. The Employee Management screen displays.
- Click the Create New Employee button and the Contact Profile form displays the following tabs to complete:
Step 1. Complete the Employee Type tab
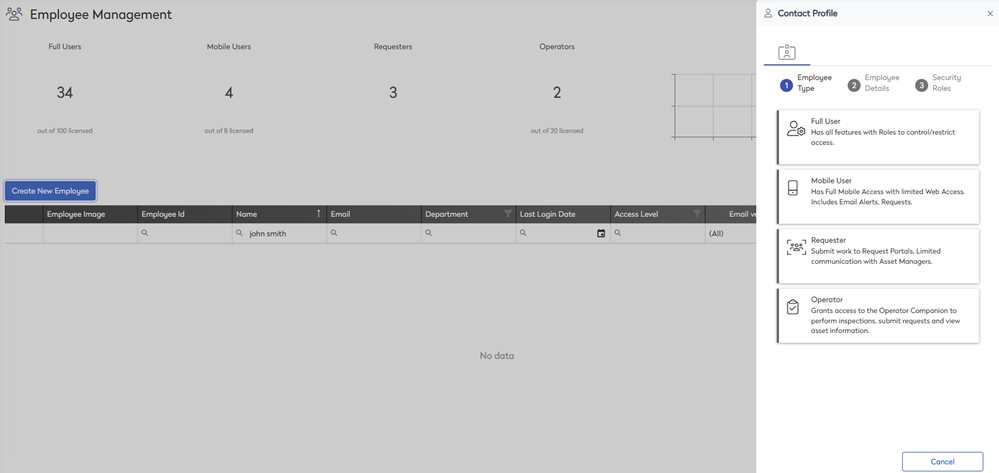
- In the Employee Type panel, select a type (this is a license type):
- Full User - Has all features with Roles to control/restrict access.
- Mobile User - Has full mobile access with limited web access. Includes Email Alerts and Requests.
- Requester - Submit work to Request Portals. Limited communication with Asset Managers.
- Operator - Grants access to the Operator Companion to perform inspections, submit requests, and view asset information.
After you select an employee type, the Contact Profile form displays.
Step 2. Complete the Employee Details tab
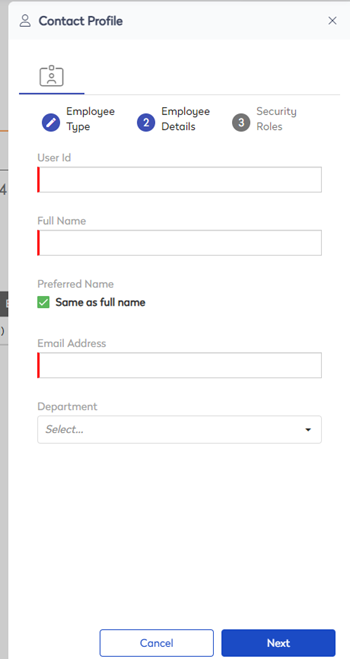
- In the User Id field, enter the unique identifier of the employee.
- In the Full Name field, enter the full name of the employee.
- Uncheck the Same as full name check box and then enter the employee's preferred name.
- In the Email Address field, enter the email address of the employee.
- In the Department field, enter the department the employee belongs to.
- Click the Next button.
Step 3. Complete the Security Roles tab
You will need to grant the user access to the sites/entities they need.
Your sites are set up by your Administrator.
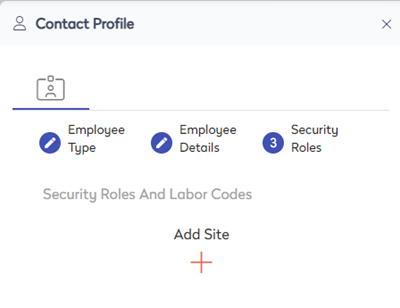
- Click the Add
 icon.
icon. - From the Site drop-down, select the site and then the site displays.
- From the Role drop-down, select either: Administrator, Full User, Read-Only, and No Access. Learn more about the roles, in Security Roles and Roles Management.
- Repeat steps 1 to 3 to add all the required sites for this employee.
- Click the Save button and the employee is saved and the Contact Profile form displays.