Create a new Invoice
There are a few different ways that invoices can be created in Eptura Asset.
- Invoices can be generated from work orders when the work is completed. Learn more in Generate an Invoice from a completed Work Order.

- You can turn estimates directly into invoices for part sales or other examples where work orders are not required. Learn more in Convert an Estimate into a Work Order.

- Or you can create a new invoice manually from the invoice module. See below to learn how to create a new invoice manually.

Watch the Video
Audio: Sound Video Length: 4:32 minutes
Watch the video in ...
Disclaimer: This video is translated from English using an AI tool; you may notice that the length of the speech may be slightly out-of-sync with the user interface recording.
Learn more
Create a new Invoice manually
Let's create a new Invoice.
- Navigate to Invoices.
- Click the New Invoice button and the New Invoice tab displays.

- Complete the following:
| Field | Description |
|---|---|
|
Entity drop-down |
List the site responsible for the work being performed (This is auto-generated if you only have one Site/Entity). |
|
Customer drop-down |
Client name, for whom the Invoice is being generated. |
|
Budget drop-down |
This is an account that was specifically created to track invoices. It is NOT one of your maintenance budgets. |
|
Price Point drop-down |
The markup percentage on parts and labor. The default price points are set up by your Administrator. |
|
Sales Tax drop-down |
Can be applied to services, parts, or both. |
|
Purpose field |
Reason for the invoice being generated. |
|
Asset field |
Either enter the asset name into the field or click the Search Assets
We recommend you list the assets when you create the invoice. This will save you time as it will auto-generate the majority of the required fields. |
 icon to display the advance search.
- Either the click the following:
- Create Invoice button; this creates the invoice and you can then update the invoice later.
- Create & Open button and this opens the invoice where you can make updates, email the invoice to the customer, or print it.
Review and Update the New Invoice
The Invoice has been created; now you can complete the details and then send it to your customer.
- (A) Invoice current status and number.
- (B) When the invoice is active, you can change or add customers, edit the purpose, price point, or asset.
- (C) You can add new line items to the invoice and when you click the New Line item button, this lets you add parts, labor, and other costs.
- (D) The Save button lets you save any changes you have made.
- (E) Estimate toolbar includes View Details, Email Estimate, and Print Estimate.

You can either add a new link for:
- Parts
- Labor
- Other Costs
If you want to remove a line, then hover over the line item and then click the Remove  icon.
icon.
Add Part
- Click the New Line button.
- Click the Add Part item and the new line item is added.

- The required fields are automatically populated and you can complete the fields.
Add Labor
- Click the New Line button.
- Click the Add Labor button and the Add Service Tasks dialog displays.

- Search or browse for the service task.
- Select the service task.
- Click the Add to Invoice button.

Add Other Costs
- Click the New Line button.
- Click the Add Other Costs button and the Add Service Tasks dialog displays.

- The required fields are automatically populated and you can complete the fields.
Save
If you are still working on the invoice, then click the Save button to save any changes.
Send
Your invoice can now be printed or sent to your customer electronically.
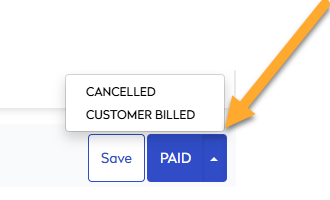
Change the Invoice Status
Depending on the Invoice workflow, then you may have the choice to Cancel the Invoice, change the status to Customer Billed, or change the status to Paid.