Set up the Vendor Portal
Level: Administrator
The Vendor Portal is a way for your vendor to add information to a work order through their mobile device or desktop.
- Vendors can update work order they are assigned to.
- No vendor license or login is required.
- Vendors can add notes, photos, signature, and invoices.
- Easy tracking and communication with your vendor on a project.
Watch the Video
Audio: Sound Length: 02:08 mins
Watch the video in ...
Disclaimer: This video is translated from English using an AI tool; you may notice that the length of the speech may be slightly out-of-sync with the user interface recording.
Learn more
Enable Work Assignment
Before you can use the Vendor Portal, make sure the vendor has there Vendor Record's setting "Can Be Assigned To Work" setting checked on; see Update Vendor's Details.
Vendor Work Order From
The Vendor Works settings define what fields are included in a work order that is assigned to the vendor. Use work type settings to configure what fields a vendor sees when viewing a work order from the vendor portal.
- Navigate to Settings.
- Under the Module Settings heading, click Work Orders. The Work Order Settings screen displays.
- Click the Vendor Work tab. The Vendor Work tab displays.
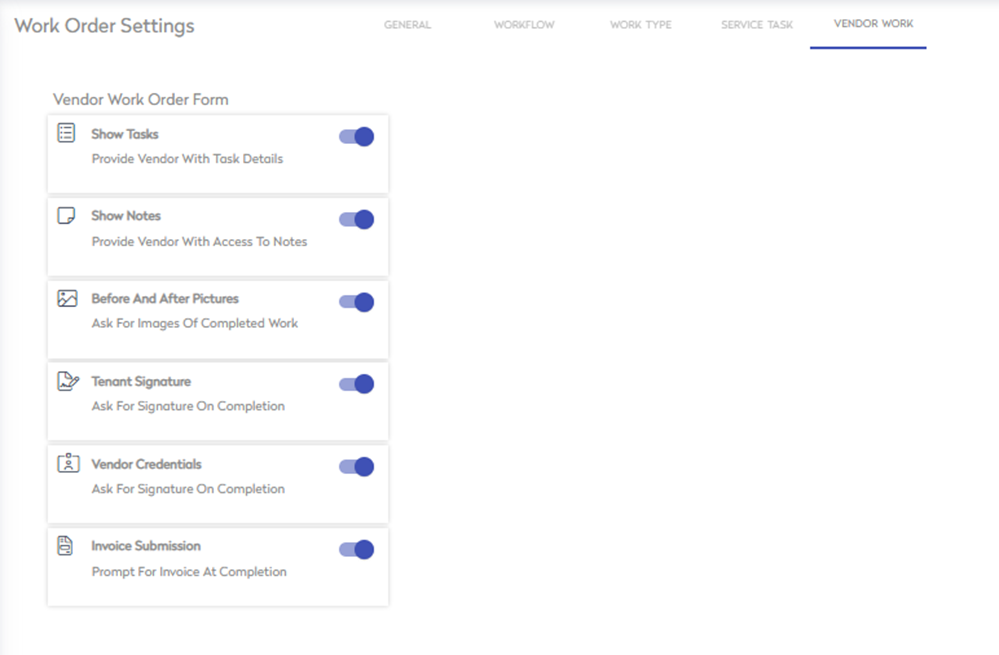
This contains settings to enable and disable fields from the Vendor Portal:
- Show Tasks - Enable to show task details on vendor work order.
- Show Notes - Enable to show notes on vendor work order.
- Before and After Pictures: - Enable to ask vendor for images of completed work.
- Tenant Signature - Enable to ask for a customer signature upon completion of work order.
- Vendor Credentials - Enable to ask vendor for signature upon completion of work order.
- Invoice Submission - Enable to prompt for upload of Invoice PDF upon completion of work order.
The settings save automatically.
Vendor Portal Example
Below is an example of the Vendor Portal that displays what a Vendor sees when assigned a Work Order. Learn more about the portal in, Using the Vendor Portal.
