Set up an Axle Schema for Tire Tracking
You will learn how to set up an axle schema for an asset type, and this allows tires to be installed on vehicles so that they can be tracked for wear and warranty. This is useful when you have the same axle schema for multiple vehicles.
Watch the Video
Audio: Sounds Length: 3:49 minutes
Watch the video in ...
Disclaimer: This video is translated from English using an AI tool; you may notice that the length of the speech may be slightly out-of-sync with the user interface recording
Learn More
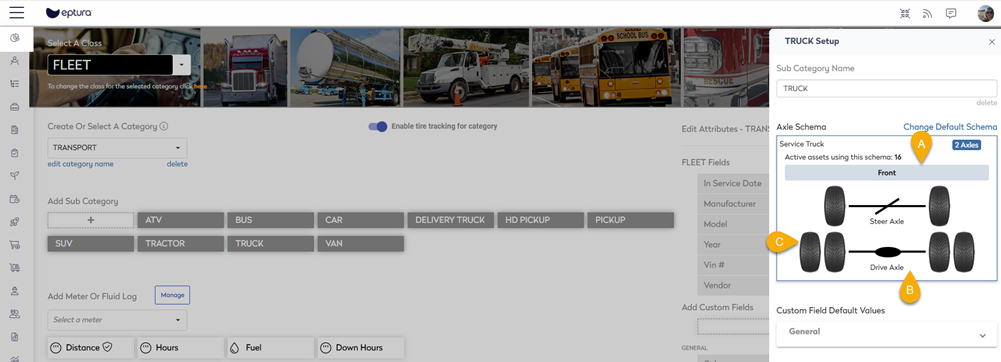
Axle Schema Overview
An axle schema is a simple diagram that represents the axle and wheel configuration of a vehicle. It will show the (A) front of the vehicle, (B) the steering, and (C) drive axles, and the number of tires on each axle.
Steps
Complete the following steps:
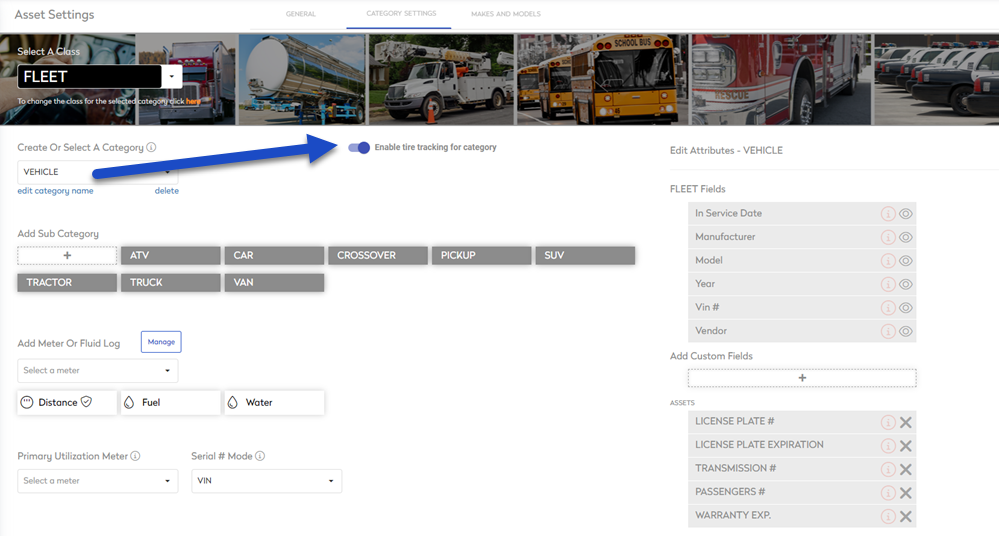
Step 1. Enable Tire Tracking for a Category
- Navigate to Settings.
- Under the Module Settings, click Assets and the Asset Settings screen displays.
- Click the Category Settings tab.
- From the Select A Class drop-down, select either Fleet or Mobile Equipment class. These are the only classes you can set up Tire Tracking for.
- From the Create Or Select A Category drop-down, select a Category.
- For each category that requires tires, then click the tire tracking toggle to ON.
Step 2. Set the default Axle Schema
- Click an (A) existing subcategory or you can create a subcategory. The subcategory edit form displays.
- Click the (B) Select default schema button.

- The axle configuration dialog displays and there are 3 default axle schemas already in Eptura Asset:
- Rear Wheel Drive Standard Vehicle
- Front Wheel Drive Standard Vehicle
- Service Truck
The diagrams display the number of wheels used in each configuration. If you vehicle doesn't match a default schema, then you can create a new axle schema.

- You can either click a default axle schemas and the "Set as default?" dialog displays with the message "Set this schema for all assets with the same sub-category?".

- Click the Yes button the default schema is set for the sub category and automatically saved.

If you need to change this, then click (A) Change Default Schema and select a different schema.
Next Steps
- After the axle schema is set, you can add the tires to your inventory and then install them onto your vehicle.