Set up Service Tasks for Invoice
Level: Administrator
This is the same Service Task library as seen in the Work Order Settings. As it is a shared library, editing in either location, will be visible in the other.
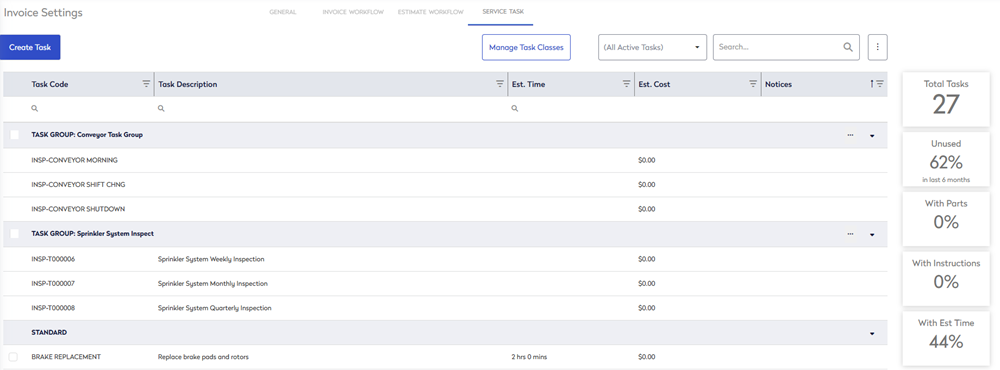
- Navigate to Settings > Module Settings > Invoices.
- Click the Service Task tab.
Create a new Service Task
If needed, you can create a new task.
- Click the Create Task button and the Task Details form displays.

- In the Code field, enter the name of the task.
- The Active toggle is on by default or you can click it and toggle it to Inactive.
- In the Description field, enter the details of the task.
- From the Class drop-down, select the class of the task.
- In the Estimated Time, select the hours and minutes.
- In the Estimated Cost field, enter the monetary amount.
- From the Invoice Labor Rate, select the labor rate.
- Click the Save button.
Edit a Service Task
- Select the Service Task you want and the Task form displays.
- In the Details tab you can edit the fields as described above.
- Click the Bill of Materials tab.
When you add a part here, then Eptura Asset will suggest what type of part needs be used when performing the service. It can be a different part each time you provide the service, depending on what asset you worked on. The actual part number will be named on the work order. Then the next time you perform the service on that Asset, the application will remember what part was used, and make that the suggested part.
Add a Part
If needed, you can add a part.
- Click the Add + icon.

The line form displays.

- From the Part Type drop-down, select the part type.
- In the Qty field, enter the quantity to be used.
- From U of M drop-down, select the unit of measurement.
- In the Note field, enter a short note.
- Click the Save button and the part is added.
- Click the Notes tab.

- You can enter the Task Instructions, add an attachment, such as images, or a URL link.