Update Part with More Details
This lets you add more part details, branding information, and more.
- For the part you want to update, click the part and the Part Details screen displays.
- Click the Part Details
 icon and the Details tab displays and this contains the following icons:

Details tab
You can update the following fields:
| Field | Description |
|---|---|
|
Part # |
Enter the unique part number. |
|
Serialized |
Check the Serialized check box if you want the part to track warranty information and serial numbers. |
|
Description |
Enter the description of the part. |
|
Type |
Select the type of part. |
|
Brand |
Select the brand of the part. |
|
Brand Model |
Select the brand model of the part. |
|
Status |
Select the status of the part. |
|
Custom Fields |
Any custom fields that are set up will display here |
Vendors tab
This lets you add or remove your part vendor(s).
- Click the Vendors
 tab.
tab. - Click the Add
 icon.
icon.
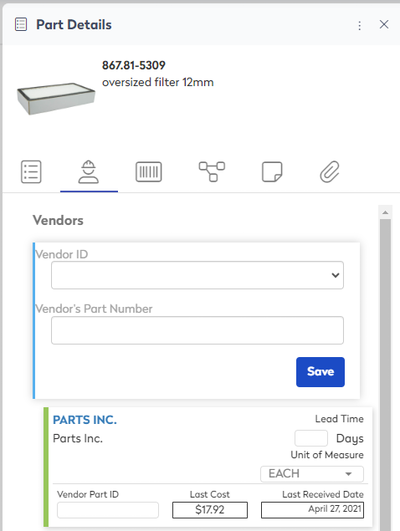
- From the Vendor ID drop-down, select the vendor.
- In the Vendor's Part Number field, enter the part number.
- Click the Save button.
If you want to remove a vendor, click the Remove  icon. The message "Vendor will be removed form this part vendors list" displays. Click the Remove button to confirm the removal.
Barcodes tab
If you use barcodes to identify your part, then you can add or remove the barcodes.
- Click the Barcode
 tab.
tab. - Click the Add Barcode button.

- In the Barcode field, enter the barcode number.
- From the Vendor drop-down, select the vendor.
If you want to remove a barcode, click the Remove icon and the barcode is removed.
Component - Warranty Rules tab
If your part has been converted to a Component, then this tab will display and you can add warranty information.
Remember to update warranty Information to an active component, it must be marked as serialized.
- Click the Component - Warranty Rules
 tab.
tab.
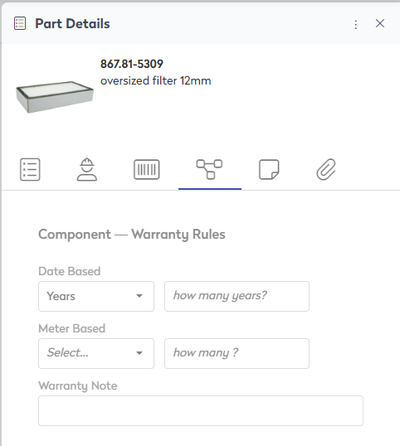
Date Based
- From the Date Based drop-down, selected either: Years, Months, or Days.
- In the Number field, enter the number.
Meter Based
- From the Meter Based drop-down, select the measurement.
- In the Number field, enter the number.
Warranty Note
- In the Warranty Note field, enter the warranty information.
Notes tab
- Click the Notes
 tab. The New Pubic Note dialog displays.

- Click the Add Note button and the New Public Note dialog displays.
- In the description field, enter the note.
- Click the Add Note button and this will save the note to your Part.
If you want to delete a note, click the Delete icon.
Attachments tab
- Click the Attachments
 tab.
tab.

Attachments
You can add an attachment by either:
- Drag and drop the file to the designated area.
- Click the Add Attachment button, select the file, and then click the Open button to upload it.
Links
- If you want to add a link, then click the Add Link button. The Add Attachment Link dialog displays.
- In the Attachment Link field, enter the link.
- Click the Upload Link button.