Set up General Settings for Certification
Level: Administrator
In the General Settings tab, is where your Administrator can set up the Certification statuses and custom fields which can be defined as required or optional.
- Navigate to Settings.
- Under the Administration heading, click Certifications and the Certification Settings screen displays.
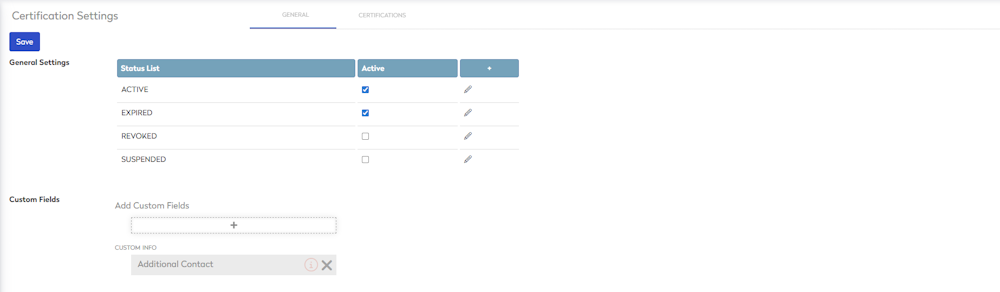
The General tab displays by default, and this contains:
- General Settings
- Custom Fields
General Settings
By default, the General tab displays the following columns:
- Status List - This shows the names of all current statuses of your assets, for example, ACTIVE, EXPIRED, REVOKED, or SUSPENDED.
- Active - This indicates whether the status is in use or not in the system.
- Active status
 icon - this indicates the status is used in the system.
 - Inactive status
 icon - this indicates the status is inactive in the system but it can still have work orders created, but their PMs (on their Maintenance Plans) will not come to be included on the PM Management board (thus, not be eligible to be automatically turned into a work order).
- Active status
Create a New Status
- Click the Add
 icon and a new status line will appear.

- In the Status field, enter the name of the status. By default, the new status is an Active status.
- Click the Save button.
Make a Status Inactive
- For the status you want to make inactive, uncheck the Active check box.
- Click the Save button.
Edit a Status Name
- For the status you want to edit, click Edit
 icon.
icon. - Change the status name.
- Click the Save button.
Delete a Status
- For the status you want to delete, click Edit icon.
- Click the Delete
 icon.
icon. - Click the Save button.
Custom Fields
You can add custom fields, reorder them in the list, or remove custom fields.
Add a Custom Field
- Click on the Add + icon and the Custom Fields dialog displays.

- Select all custom fields to be added. If the custom field you want is not in the list then, see Create or Edit Custom Fields.
- Click the Add button at the bottom of the window.
Make a Custom Field mandatory or optional
- To make the field mandatory when creating/editing an Asset, click the Not Required
 icon and change it to Required
  icon.
icon.
Reorder the Custom Fields
- Hover over the custom field.
- Click the Move
 icon and drag the custom field up or down to change the order.
Remove a Custom Field
- Click the X icon to remove the custom list from the list.