Return Parts (Purchase Order)
When parts need to be returned to the vendor, you can create a Return Purchase Order to track the return and decrease your inventory levels.
Watch the Video
Audio: Sound Length: 1:54 minutes
Learn more
Step 1. Create the Return
- Navigate to Purchase Orders.
- Click the arrow to the right of the New Purchase Order icon, and select New Return.
- Complete the following fields:
| Field | Description |
|---|---|
|
Warehouse |
Which warehouse wants to return the parts. |
|
PO # |
A unique purchase order number. The PO # is either automatically generated or you create it yourself, depending on how the purchase order module is configured in the module settings. You cannot use a purchase order number that has already been assigned. |
|
Vendor |
Who you are returning the parts to. |
|
Budget |
Which budget will be credited for the returned parts. |
|
Status |
The current status of the purchase order is displayed in the top left corner of the page. To change, select the appropriate status in the bottom right corner of the page. |
|
Sales Tax |
The sales tax used for this purchase. The initial sales tax setting is the default value for the selected vendor. To override the default setting, select NO TAX or a custom value created in the Vendor Module Settings. |
|
Date |
Date of the purchase order. To override the default date, type a different date in the field or click the calendar icon in the Date field. |
|
Ship To |
Name of the entity, the item is being shipped to. |
- Click the Create &Open button to open the return and then add the parts.
Step 2. Add the Parts to the Return
- Click the New Line Item button and then select Add Parts. A new line item displays.
- Search for the part name, if it is a recently used part or a warehouse favorite, it will display in the list. If you don't see the part, then select the "Search parts master list "and then you can search all your parts.
- For the part, you can enter the quantity to be returned.
- Click the Save button.
- After you have added the parts, click the Return Line Items.

The Returns dialog displays.
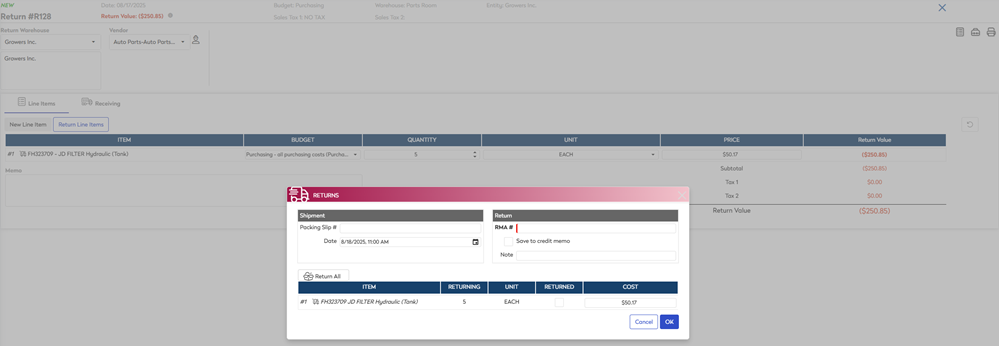
Shipment
- In the Packing Slip # field, enter the packing slip number.
- For the date, select the date of the shipment.
Return
- In the RMA # field, enter the RMA (Return Merchandise Authorization) number.
- If you are getting a credit with the vendor instead of a refund, then check the Save to credit memo check box and then in the CM# field enter the credit memo number.
- If you want to return parts in batches, then check the Returned check box for the items.
When you have finished, click the OK button and the return value will display on the screen in the uppper-left.
Step 3. Complete the Return
Click the Completed status button to close out the return. The parts will be deducted from your inventory and the return value will appear in your budget transactions.