Create a New Tire Record
After setting up the part types for tires, then a new Tire Record can be created. This is where information about the tire, including the brand, description, and size is entered.
Watch the Video
Audio: Sound Length: 1:38 minutes
Watch the video in ...
Disclaimer: This video is translated from English using an AI tool; you may notice that the length of the speech may be slightly out-of-sync with the user interface recording.
Learn more
- From the menu, click Inventory and the Part Details screen displays.
- Click the New Part button and the Part Type form displays.
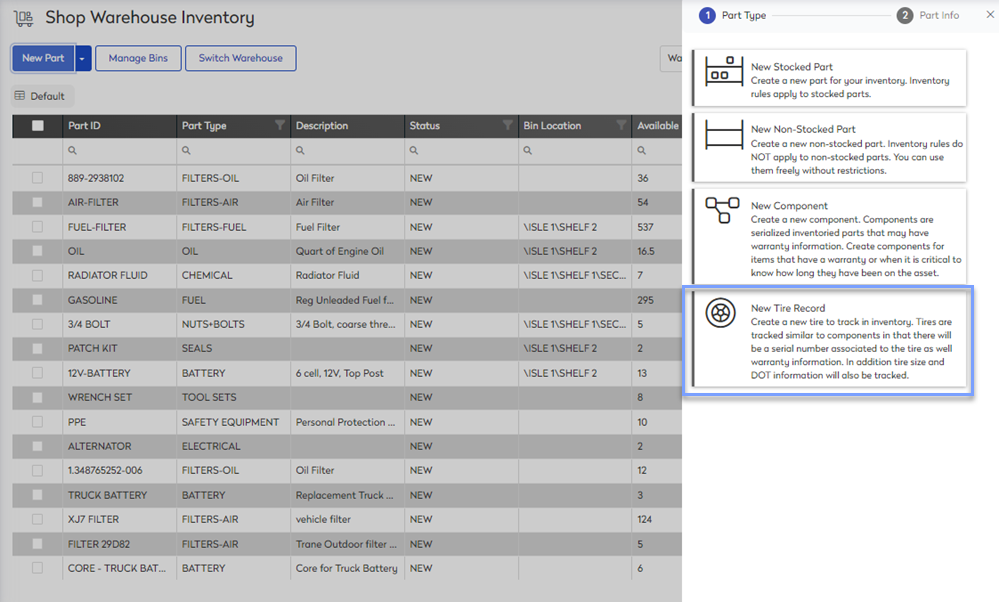
- Click the New Tire Record and the New Tire Record form displays.
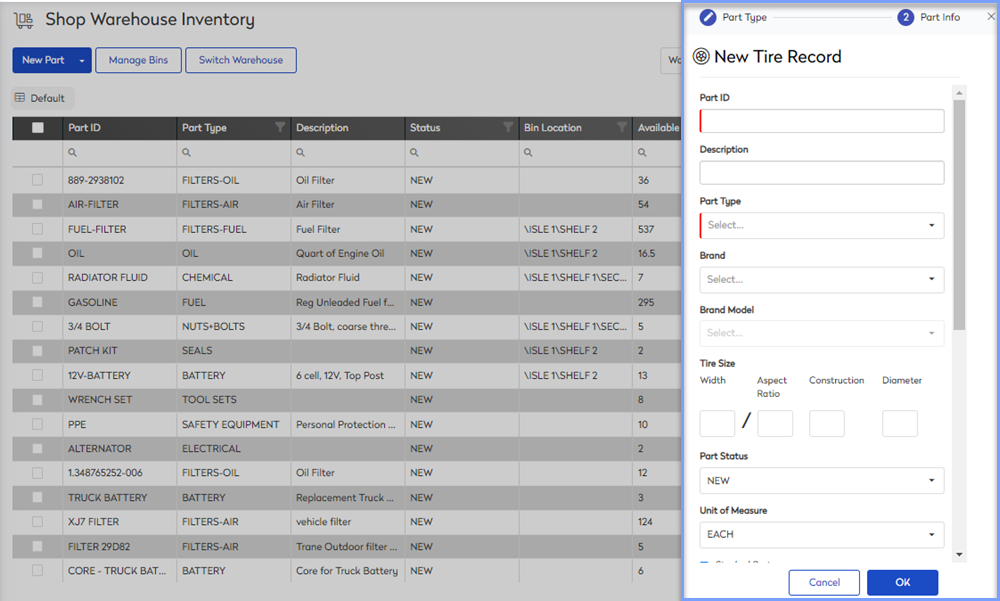
- Complete the following:
| Fields | Description |
|---|---|
| Part ID | Enter a unique part number. You can develop your own part ID system, or you can use the manufacturer’s ID. |
| Description | Enter the description of the tire. |
| Part Type | Select the part type called Tires. |
| Brand |
Select the brand. Brands are set up by your Administrator, see Set up the Inventory - Brands and Models Settings. |
| Brand Model |
Select the brand model. Brand Models are set up by your Administrator, see Set up the Inventory - Brands and Models Settings. |
| Tire Size | |
| Width | Enter the tire's size. |
| Aspect Ratio | Enter the tire's aspect ratio. |
| Construction | Enter the tire's construction. |
| Diameter | Enter the tire's diameter. |
| Part Status | Select the part's status. |
| Unit of Measure | Select the unit of measure. |
| Stocked Part | This is checked by default, if the part is not a stocked part, then uncheck it. |
| Starting Qty | Enter the starting quantity. |
| Cost | Enter the cost of the part. |
| Warehouse Part | The part is marked by default; if the part is not a warehouse part, then click the star to de-select it. |
| Add Image |
|
| Add Link |
|
| Component - Warranty Rules | |
| Date Based |
|
| Meter Based |
|
| Warranty Note | In the Warranty Note field, enter the warranty information. |
When finished, click the OK button and the part is created.