Budget Transactions
When you want to find the budget transactions for a particular budget account, you can view or create these.
View Budget Transactions
When you want to view the budget transactions, you can access these.
- From the menu, click Settings.
- Under the Administration heading, click Budget Transactions.
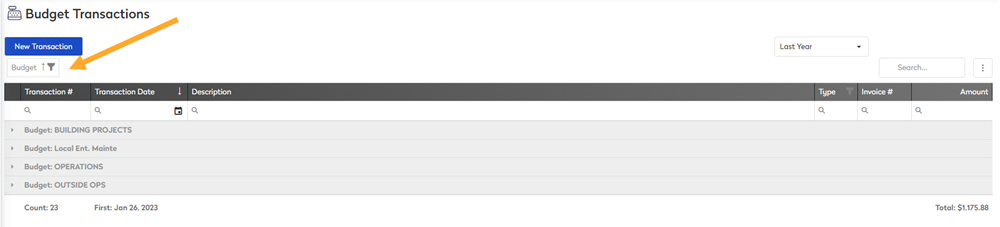
The transactions display for the current year.

(A) Search
Search allows you to find any field within the Transactions list.
(B) Filter
You can change the filter to either Current Year, Last Year, or All.
(C) More Actions
The More Actions icon contains:
- Reset Grid - When you have altered the grid displays, such as added columns, etc then this lets you reset the grid view back to the default.
- Toggle List Grouping - You may want to group the list by a column.
- Export all data - This will download the transactions list to an XLSX file.
- Column Chooser - This lets you add or remove columns form the grid view.
(D) Column Search
When you enter a column search for a transaction, it will display only those transactions for the search criteria.
Reorder Columns
You may want to change the columns order (or the sort order).
- To reorder the columns, then drag and drop the column to its new location.
- To sort, click the column's header to sort ascending or descending.
Toggle List Grouping
- Click the More Actions icon.
- Select Toggle List Grouping.
- Drag and drop a column header to the group by.

The transaction list is toggled by group.
Column Chooser
- Click the More Actions icon.
- Select Column Chooser and the column chooser displays.
- Drag and drop the columns you want onto the grid view.

Create Transaction
You can create a transaction as an expense or credit.
- Click the New Transaction button and the Create Transaction form displays.

- Complete the following:
| Field | Description |
|---|---|
| Entry Date | Leave as the default date or select from the calendar picker the entry date. |
| Budget | From the drop-down, select the budget. |
| Type | From the drop-down, select either Expense or Credit. |
| Amount | Enter the transaction amount. |
| Description | Enter the description of the transaction. |
| Vendor | From the drop-down, select the vendor. |
| Invoice # | Enter the invoice number. |
| Invoice Date | Select from the calendar picker the invoice date. |
| Check # | Enter the check / cheque number. |
| Check Date | Select from the calendar picker the check / cheque date. |
| Transaction Date | Select from the calendar picker the transaction date. |
- When finished, click the Post Transaction button and the transaction is saved.