Customize the Customer List View
The list view is where you can see the full list of your customers. You can arrange the layout of the grid according to your own needs.
Watch the Video
Language: English (US) Video Length: 2:15 minutes
Watch the video in ...
Disclaimer: This video is translated from English using an AI tool; you may notice that the length of the speech may be slightly out-of-sync with the user interface recording.
Learn more
The columns are:
- Customer ID
- Customer Name
- Preferred Name
- Status
- Phone #
- Label
- Website
- Customer Address
The list view is where you can find your customers and adjust your view to suit your needs.
Search
Search allows you to find any field within the Customers list.
- In the Search field, enter the search term and the search results automatically populate. The example below shows results populated for springfield.

Column Search
When you search for vendors, it will display only those vendors for the search criteria. Each column contains the search, and this will let you focus on the items you want.

Column Sort
- Click the column heading to sort ascending or descending.

Filter Active Customers
The Active Customers drop-down helps you view customers by active or inactive status.
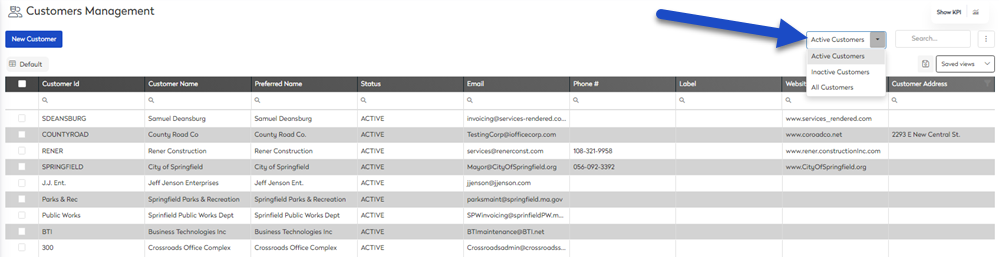
- Click on the Active Customers drop-down.
- Select one of the following:
- Active Customers
- Inactive Customers
- All Customers
- The customers list is automatically filtered.
Column Filter
When you click the Filter  icon, a menu will appear showing you the items you can select.
image
Saved View - Filter a Column Example
When viewing the Customers list, you may want to change the customer columns and sort order. The Save View let's you set up the customer listing and then save it for next time.
This is best explained using an example. I want to create a saved list view for customers that are associated to springfield.
Step 1. Reorder Columns
- Drag and drop the Customer Name column to the front of the list
Step 2. Filter the Column
- Click on the search field within the Customer Name column.
- Type springfield into the search field.
- The Customer Name column is filtered to display all Customers containing springfield

Step 3. Save your View
- Click the save
 icon. The create new view dialog displays.
 - In the View Name field, enter the name of the saved view.
- Select a who can access this view option, either:
- Private- Don't share this view with anyone.
- Everyone - Share this view with everyone.
- Security Roles - Share this view with specific roles in your organization.
- Teams - Share this view with specific teams in your organization.
- Click the Save View button.
Display your Saved View
The next time you want to use the saved view you can display it.
- Click the Saved views drop-down. The saved views pop-up displays.
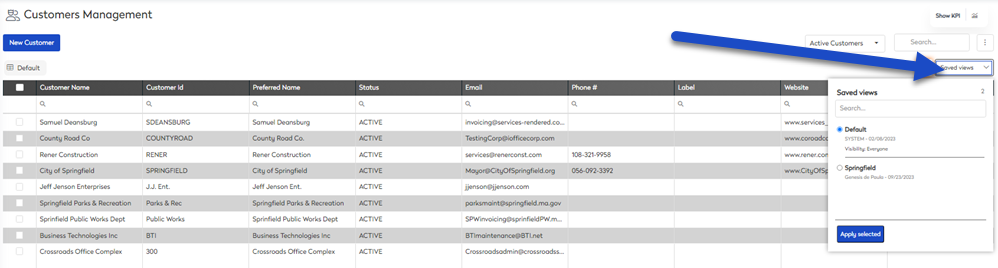
From this you can see a list of saved views, and the default view.
- Select a saved view.

Remember, you can share a view that is private to you. Click the share  icon
icon
- Click on apply selected. The saved view displays.