Set up Service Tasks for Work Orders
Level: Administrator
All changes to your Work Order Settings will impact ALL users.
Watch the Video
Audio: Sound Length: 04:10 mins
Learn more
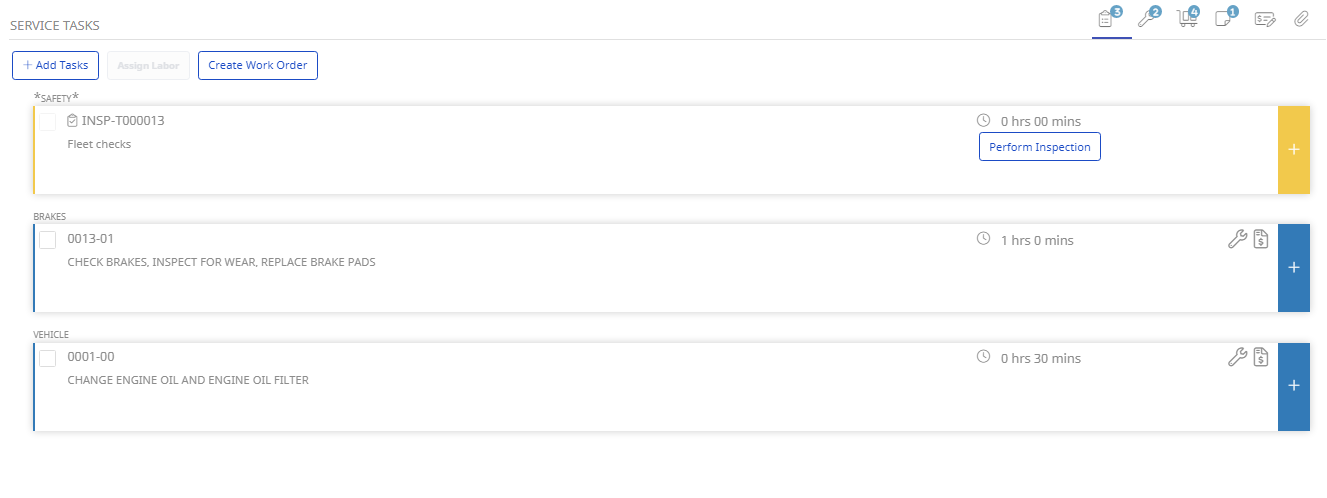
A service task is a single essential activity that needs to be accomplished within a certain time frame.
Some of the more common types of service tasks are:
- PM Task lists - where you can add a task to a PM
- Industry specific procedural codes
- Repair codes (can be specific to your corporation, or generic in nature)
- Component Codes (VMRS codes, CPT codes, etc.)
If the task is a common one, it can appear in multiple PM's and Work Orders. Therefore, a task is not bound exclusively to a single work order.
When created, wherever the task appears, it will always contain the same:
- Description
- Estimated Time to complete
- Suggested Parts list (Bill of Materials)
- Instructions
In Work Orders, a task is a single step, found in the work order. While some work orders have a single task, most usually have multiple tasks (or steps) that need to be completed, to satisfy the requirements of the maintenance manager.
Create a new Task
- Navigate to Settings.
- Under the Module Settings heading, click Work Orders. The Work Order Settings screen displays.
- Click the Service Task tab. The Service Task tab displays.
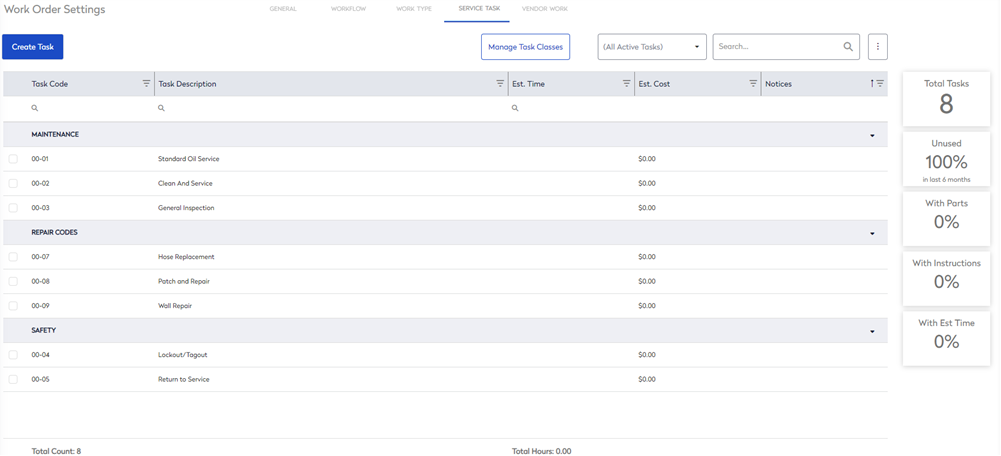
- Click the Create Task button. The Task Details form displays.
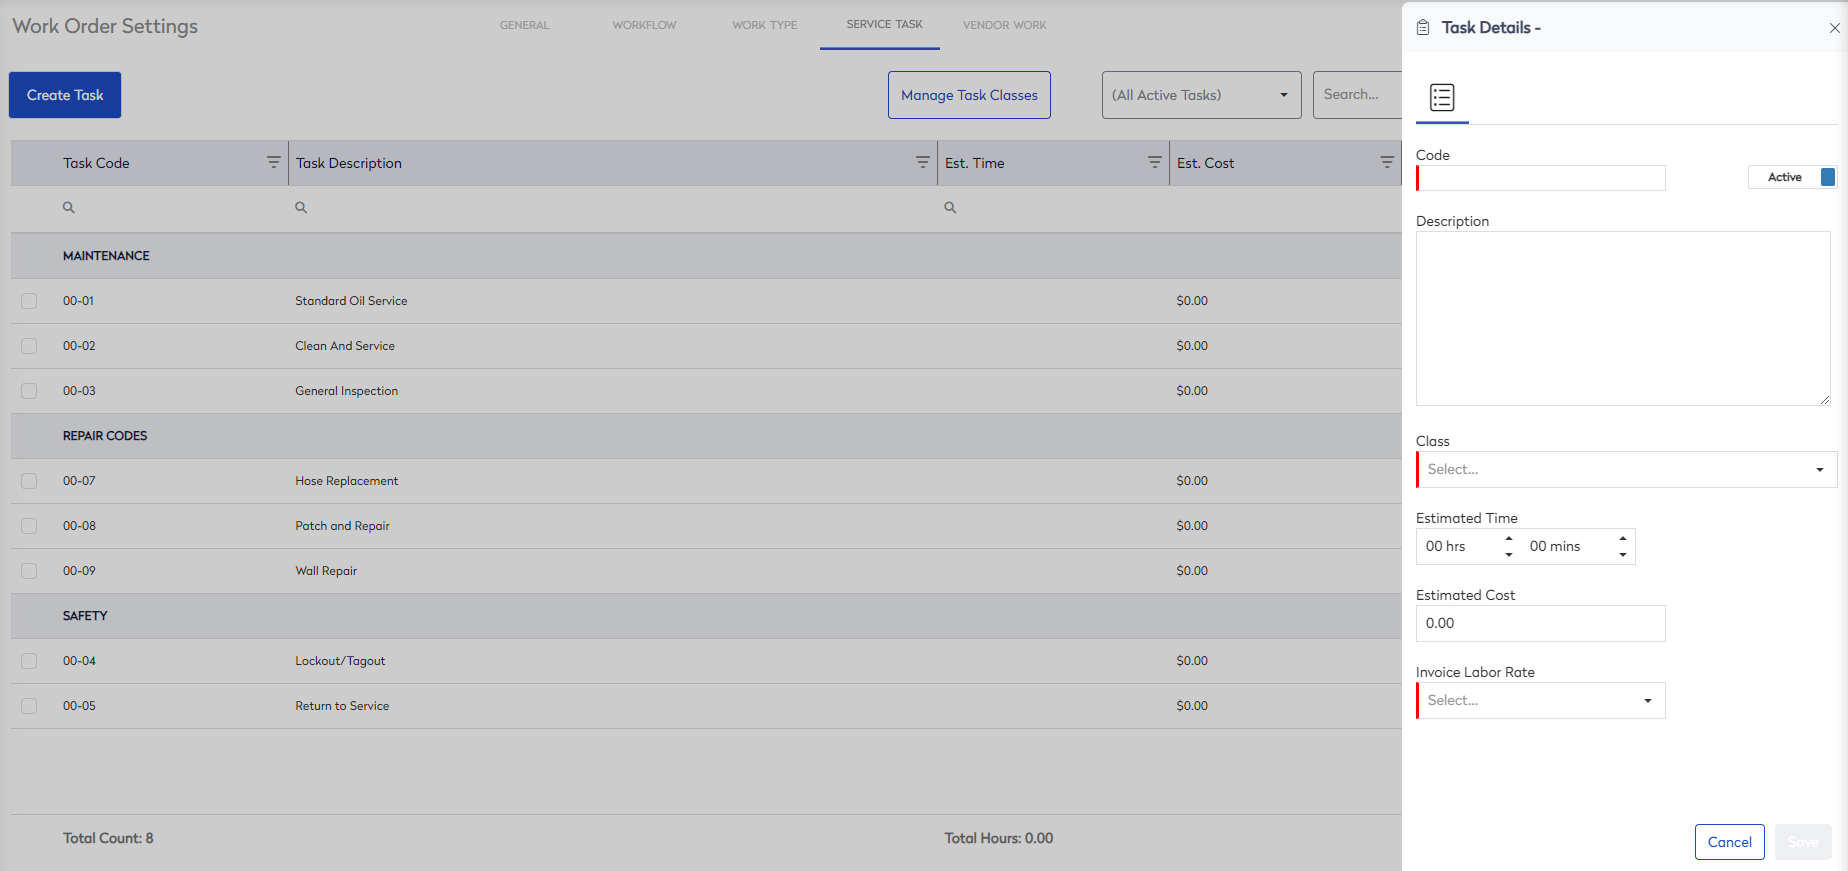
The required fields are Code, Class, and Invoice Labor Rate.
- In the Task Code field, enter the unique alphanumeric code. This is used to identify a task and make sure the name is meaningful to your employees.
- In the Description field, enter a brief description of what is expected, when performing this task.
- From the Class drop-down, select a class. While all tasks can belong to the same list, Task Class helps you organize all your tasks into different groups or classifications.
- In the Estimated Time field, enter the hours and minutes it will take on average to complete this task. When you fill this out this will help estimate the total amount of time needed to complete a PM, and plan accordingly.
- In the Estimated Cost field, enter the cost.
- Click the Save button.
Create a Task Group
A task group allows you to add multiple Service Tasks to a Work Order at once.
- For the tasks you want to group, check the tasks checkboxes.
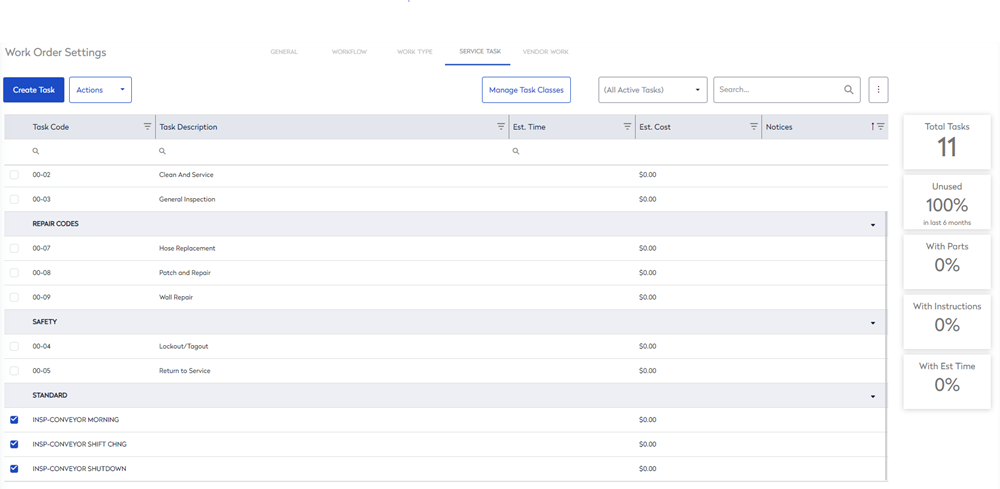
- From the Actions drop-down, select Create Task Group.

The Service Task Group dialog displays.
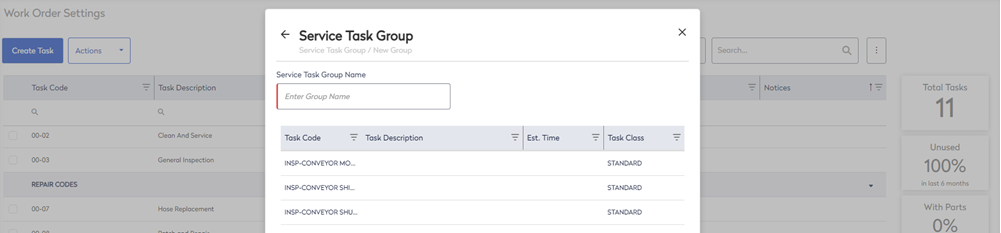
- In the Service Task Group Name field, enter the name of the group.
- Click the Create Service Task Group button.
The Task Group is now ready to add to a Work Order or PM.
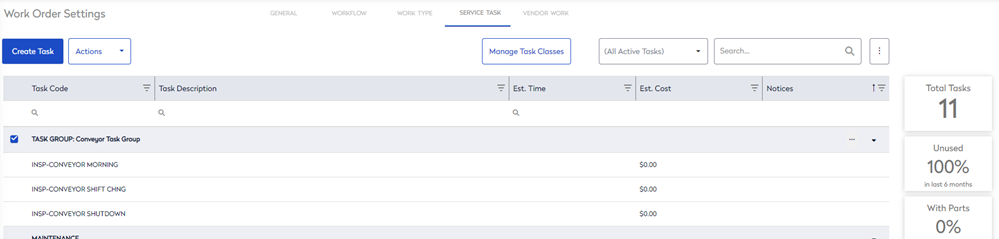
To edit or delete the Task Group, select the More Actions icon to the right of the Task Group and select Edit or Delete.

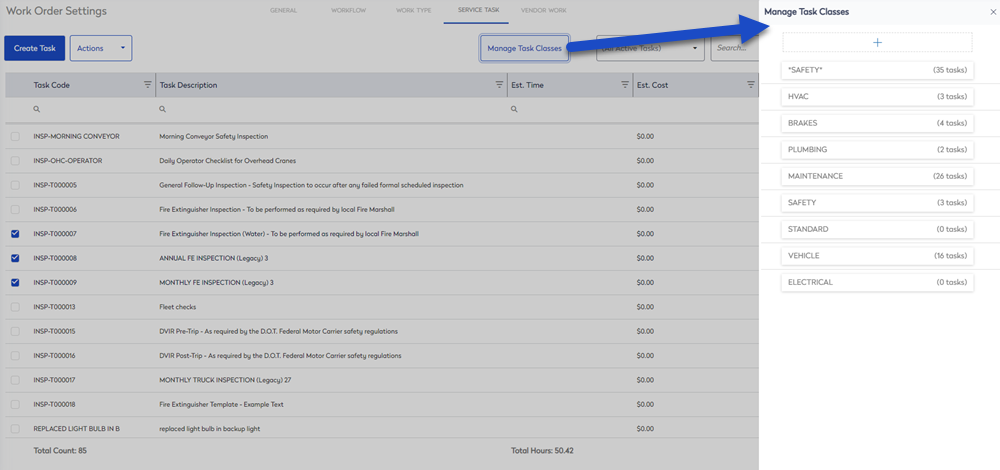
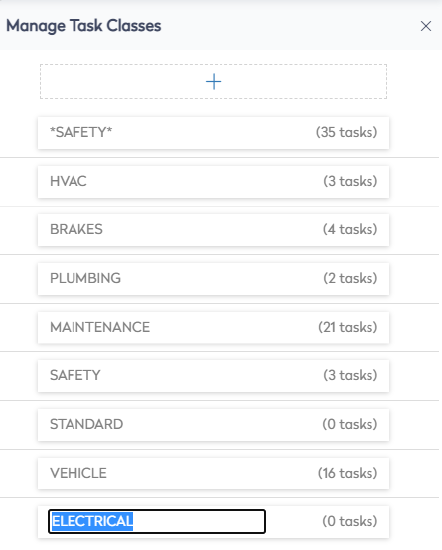
Manage Task Classes
This lets you organize all your tasks into different groups or classifications. Remember the order of the Task Class list will be reflected in the Work Order.
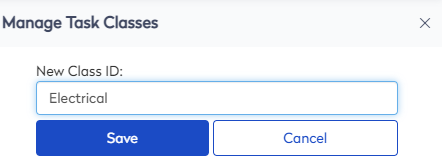
Create a Task Class
-
Click the Manage Task Classes button. The Manage Task Classes form displays.
-
Click the Add
 icon.
icon.
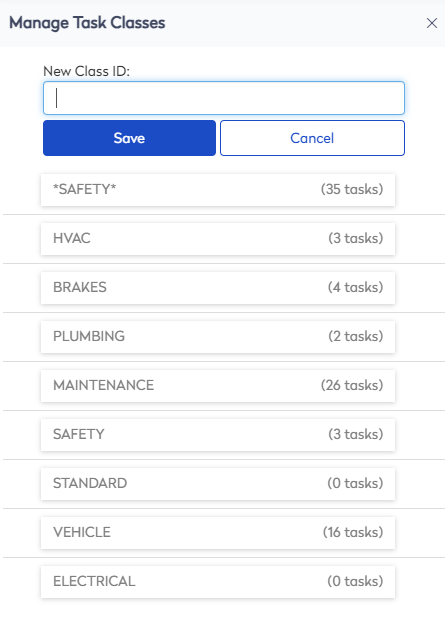
- In the New Class ID field, enter the class id.
-
Click the Save button.
Delete a Task Class
A Task Class can only be deleted if there are no associated Tasks.
- Hover over the task class.
- Click the Delete
 icon. The class is automatically deleted.

Rename a Task Class
- Click the task class.
- In the Class ID field, enter in the new name.
- Click off the name and it is automatically saved.
Reorder Task Classes
Task Classes appear in the arranged order within the Work Order Settings when associated to a Work Order.
- Drag and drop the task classes to reorder the list.
- The list is automatically saved.
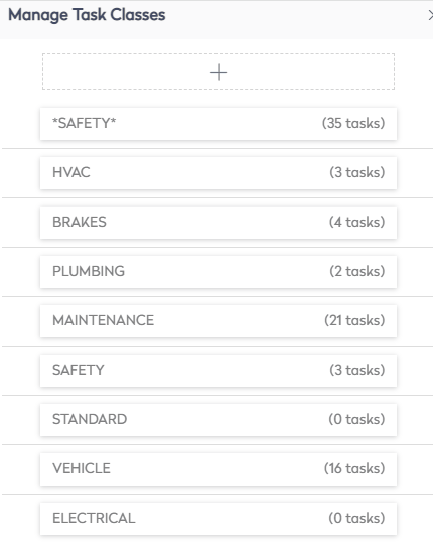
This will be reflected on the Work Order too.
Creating a new Task