Set up Work Type for Work Orders
Level: Administrator
All changes to your Work Order Settings will impact ALL users.
Work type settings determine work order requirements per work type such as failure mode, invoicing, and customers.
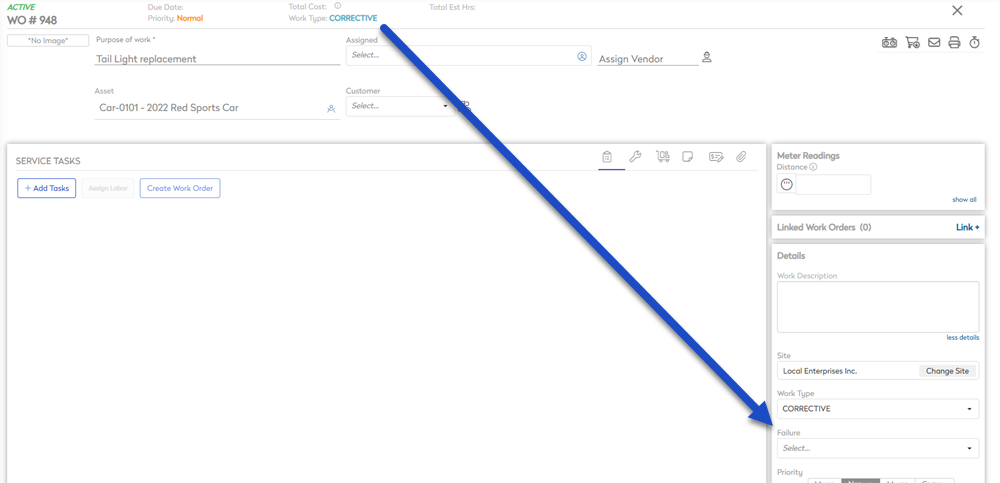
The work type will display in the work order, for example, below is a corrective work order where failure is a required field as defined in work type settings.
Edit settings for an existing Work Type
You can edit existing work type and the default settings are Corrective, Predictive, and Preventive.
- Navigate to Settings.
- Under the Module Settings heading, click Work Orders. The Work Order Settings screen displays.
- From the Work Type drop-down, select either:
- Corrective
- Predictive
- Preventive
- From the Failure Mode drop-down, select either:
- Not Applicable
- Optional
- Required at Creation
- Required at Completion
Remember the failure codes, such as vandalism, part failure, are set up on the Work Order Setting tab.
- For the Do you want to invoice for this Work Type question, select No to change this to Yes.
- For the Require a Customer question, select No to change this to Yes.
- If you want to add, edit, or remove a custom field, see the section below.
- Click the Save button.
Create settings for a new Work Type
If you need a new work type then this can be created and the settings defined.
- Navigate to Settings.
- Under the Module Settings heading, click Work Orders. The Work Order Settings screen displays.
- Click the Work Type tab. The Work Type tab displays.
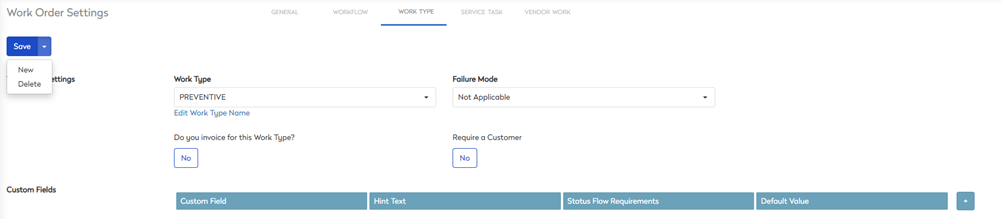
- From the Save drop-down, click New.

- In the Work Type field, enter the name of work type.
- From the Failure Mode drop-down, select either:
- Not Applicable
- Optional
- Required at Creation
- Required at Completion
- For the Do you want to invoice for this Work Type question, select No to change this to Yes. When this is enabled, then an invoice is automatically generated. For more information about Invoices, see Set up your Invoices.
- For the Require a Customer question, select No to change this to Yes. When this is enabled, then the customer field must be completed on work orders.
- Click the Save button.
The new work type settings is saved and now you can add custom fields.
Add, Edit, or Remove Custom Fields
You can add, edit, or remove custom fields to capture any additional information that is not within the default fields.
- Click the Add
 icon. The Custom Fields dialog displays.
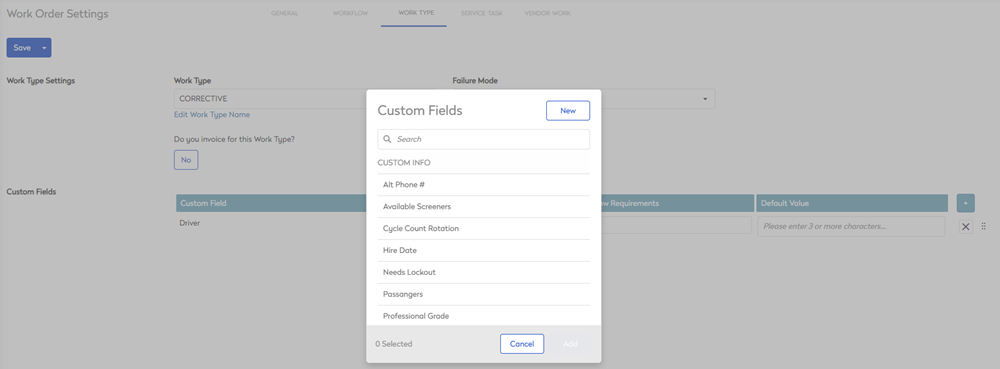
- Either select a custom field from the list or click the New button to create the new custom field.
- Click the Add button. The custom field displays in the list.
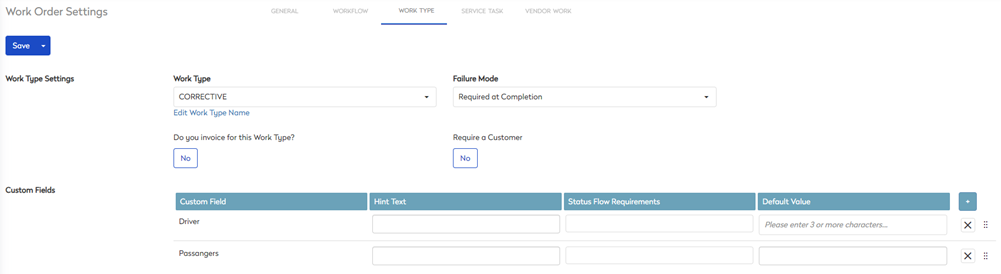
- In the Hint Text field, enter a brief description of the purpose of the custom field or what information is required.
- In the Status Flow Requirements field, select one or many checkboxes:
- New
- Active
- Completed
- Reopened
- Waiting for parts
- Canceled
- In the Default Value field, enter the display value of the custom field.
The values are automatically saved.
You can reorder the customs fields, drag and drop the reorder  icon or you can remove the custom field, click the Remove
  icon.
icon.