Create a New Inspection Template
Inspections are the most common for of Preventive Maintenance and typically involve a list of tasks and check-points to avoid costly breakdowns.
Use this feature to:
- Easily prepare planned reoccurring inspections for your maintenance schedules. After the inspection template is created, then it can be added to a Maintenance Plan as a task. Learn more in Add Tasks to a Maintenance Plan.
- Create Templates so that On-demand inspections are available at a moments notice.
- Establish To-Do Lists and Critical Checklists.
Inspection templates are divided up into the following main sections:
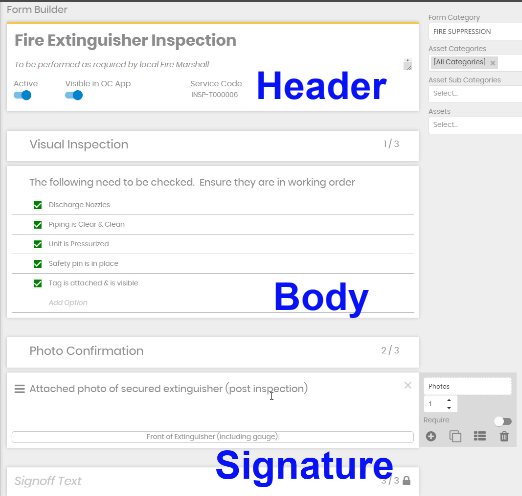
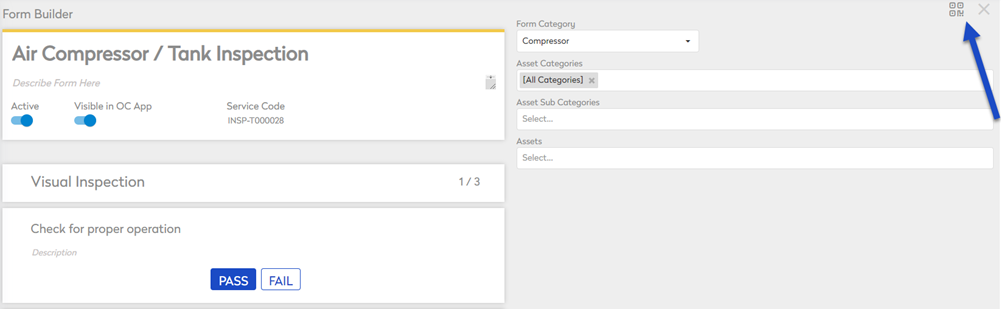
Header: Contains the assigned description of the Inspection, and the assigned Service Code.
Body: The options for the person conducting the inspection are:
- To Do List: A list of tasks to be performed, see Create a To Do List.
- Failure Checklist: Items to be marked if one is found to be deficient, see Create a Failure Checklist.
- Pass / Fail: Single standard per item. It either passes or fails. See Create a Pass / Fail Section.
- Photos: Pictures of the working or damaged equipment. See Add Photos to an Inspection Template.
- Meter / Log Entry: Record Mileage, Hours, Fuel, Temp., etc. See Add Meter / Log Entries to an Inspection Template.
- Text Entry - See Add Text Entries to an Inspection Template.
Signature: Final inspection verdict of:
- Safe/Unsafe
- Pass/Fail
- Operable/Inoperable
Additionally, the inspection template can be made available for the recommended Assets, Asset categories, or Types of Assets.
Steps
Complete the following steps:
- Step 1. Create a new Inspection Template
- Step 2. Complete the Inspection Template Name and Details
- Step 3. Complete the Sections and Question / Action
- Step 4. Add more Sections and Questions / Actions
- Step 5. Complete the Signoff Text
- Step 6. Make the template available for the Assets
- Step 7. Print the QR Codes for the Operator Companion App
Step 1. Create a new Inspection Template
To create an Inspection Template, follow the steps below:
- From the menu, click Settings.
- Under the Libraries section, click Inspection Templates.
- Select an Inspection Category or create a new Inspection Category.
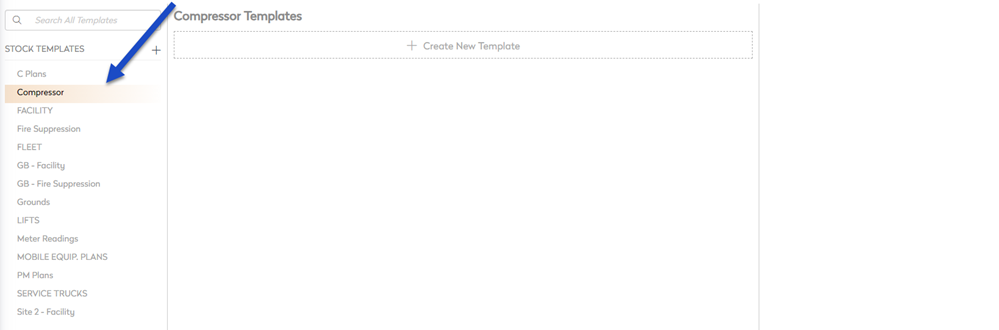
- Click the + Create New Template button and the Form Builder displays.
Step 2. Complete the Inspection Template Name and Details

- In the Untitled Form field, enter the name of the inspection.
- In the Describe Form Here field, enter the description.
- By default, the Active toggle is ON and this means the template is available for use.
- By default, the Visible in OC App toggle is ON and means the template is visible in the Operator Companion Application.
Step 3. Complete the Sections and Question / Action
When you have completed the name, then the rest of the form displays.
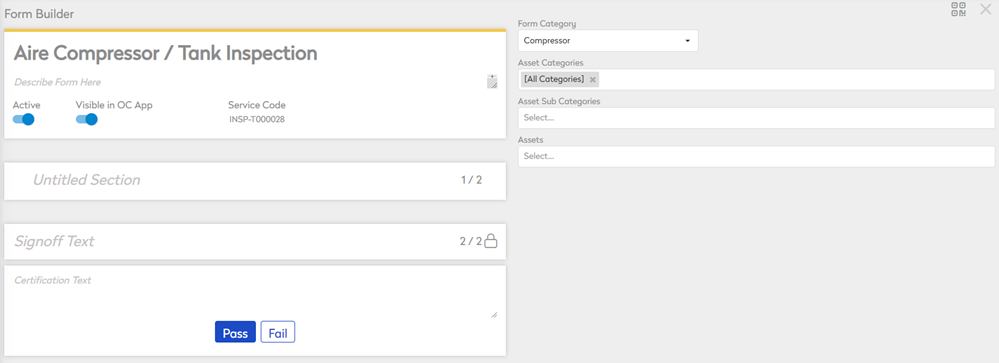
The Service Code displays and if needed, you can edit this field. This code is used to identify the inspection when it is added to a PM or Work Order.
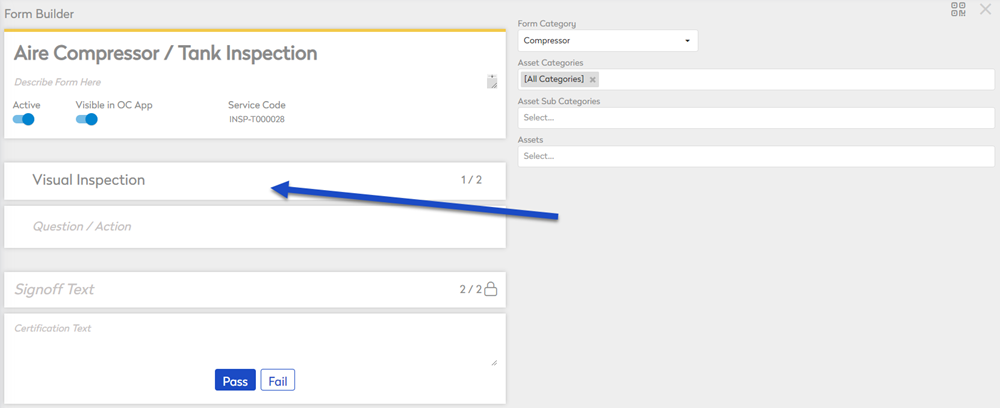
- In the Untitled Section field, enter what will be performed during the inspection.
- Next, in the Question / Action field, enter the tasks to include in the inspection.
When you enter the task, the Task menu will pop-out.
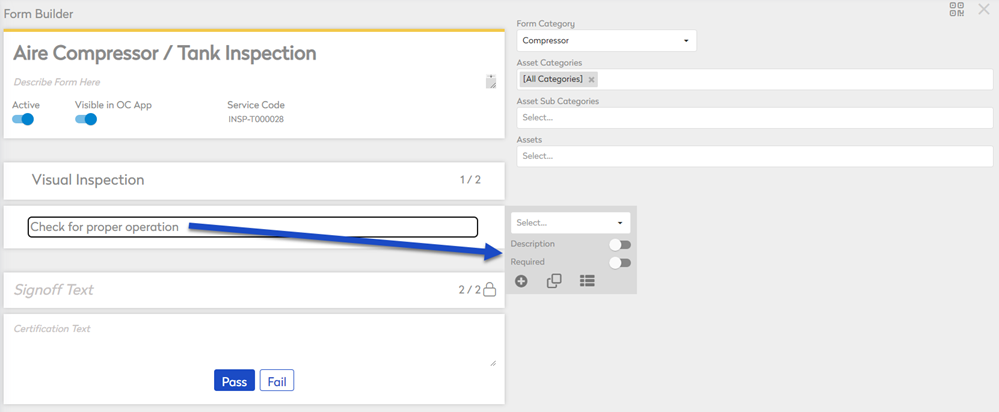
- From the Select drop-down, select either:
- To Do List
- Failure Checklist
- Pass/Fail
- Photos
- Meter / Log Entry
- Text Entry
- Optional - Click the Description toggle to ON, if you want to add a description to the task.
- Optional - Click the Required toggle to ON, if you want the task to be required.
Question and Actions Format Examples
Below are examples that you can explore and use in your inspection forms.
To Do List
A list of tasks to perform during Inspection. Learn more in Create a To Do List.

Failure Checklist
A list of items being inspected, indicating which items failed Inspection. Learn more in Create a Failure Checklist.

Pass / Fail
A list of checkpoints indicating overall Pass or Fail. Learn more in Create a Pass/Fail.

Photos
Photos of Inspection submitted upon completing the Inspection. Learn more in Add Photos to an Inspection Template.

Meter/Log Entry
Meter reading or Log entries to complete the Inspection. Learn more Add Meter/Log Entry to an Inspection Template.

Text Entry
Text explanation of findings to describe results of the Inspection. Learn more in Add Text Entry to an Inspection Template.

Step 4. Add more Sections and Questions / Actions
When you have the Question / Action selected, then you will see icons.
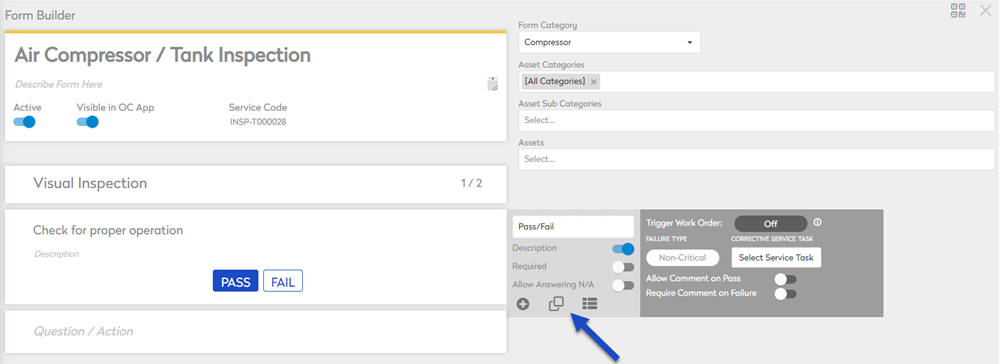
Click one of the following icons to build out your inspection template:
 Add a new task to a section icon
 Create a copy of this task icon
 Add a new section icon
Step 5. Complete the Signoff Text
- In the Signoff Text field, enter the signoff text. For example, Confirmation Signature.
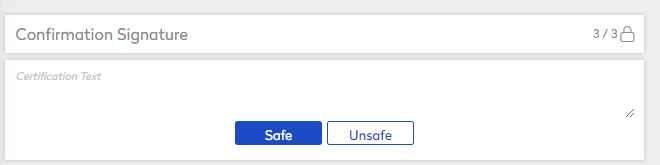
- Click the Certification Text field to display the menu pop-out.
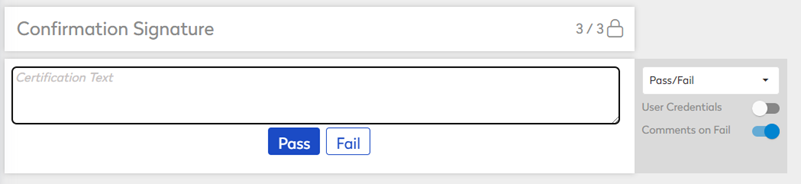
- From the Pass/Fail drop-down select either:
- Pass/Fail - this is the default settings
- Safe/Unsafe
- Operable/Inoperable
The Inspection Template is now complete and ready for use on a PM or Work Order.
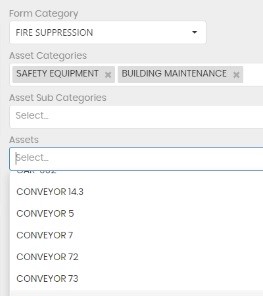
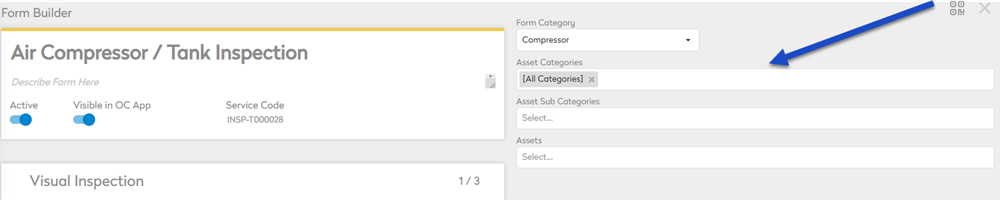
Step 6. Make the template available for the Assets
After the Inspection has been created, it can be made available for the recommended assets, asset categories, or types of assets.
By default, Inspection Templates are available for use with all asset categories.
- From the the Asset Categories drop-down and search for an asset category and then select it. You can select multiple asset categories.
- Repeat this for the Asset Sub-Categories and Assets fields.
Step 7. Print the QR Codes for the Operator Companion App
The QR Code icons let you select a printer so that you can print the QR Code Labels.