Tire Tracking Overview
Tire tracking enables you to gain deeper insights into the wear and costs of your fleet tires.
- In Eptura Asset, tires are a special part type with tire size, serial number, warranty, and Department of Transportation information.
- Tires are installed on assets so their age and wear can be tracked along with the usage of the asset.
- Monitoring the age and department of transport information is not only important for compliance but ensures the safety of drivers and prevents damage to equipment.
- Create axle schemas for your different vehicle types to track tire position on your vehicles.
- Generate reports to track tire aging by year or by asset.
Watch the Video
Audio: Sound Length: 05:53 mins
Prerequisites
Steps Overview
To get started tracking your tires, complete these steps:
- Define an axle schema for a vehicle sub category. This tells the system what the wheel and drive configuration of your vehicle is.
- Add tires to your inventory. Tire records work as a special part type with information that allows Eptura Asset to track them.
- Install tires on your vehicle. This is done through a work order and can only be done after the previous two steps have been completed.
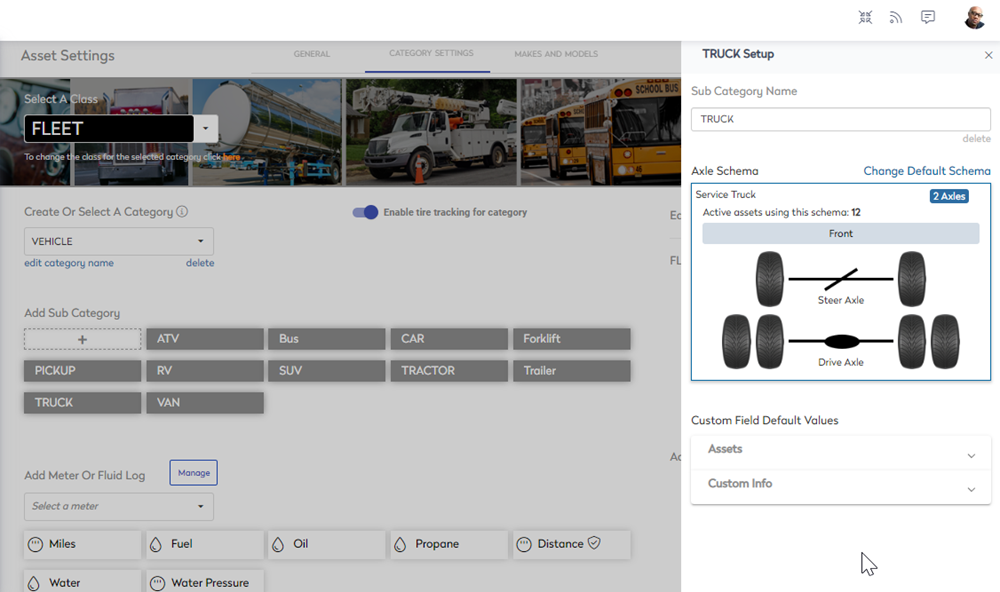
Step 1. Define an Axle Schema for a vehicle sub category
Asset Settings
Before you can track and manage tires in the application, an axle schema must be defined for the vehicle sub categories and then the tires must be added as parts to your inventory as a new tire record.
There are default axle schemas pre-populated in the application; additionally you can create a new schema. For example, the truck sub-category has the Service Truck Axle Schema assigned. This means that all vehicles associated with the truck sub-category will also have the service truck axle schema set as the default.
Learn more in the Set up an Axle Schema for Tire Tracking.
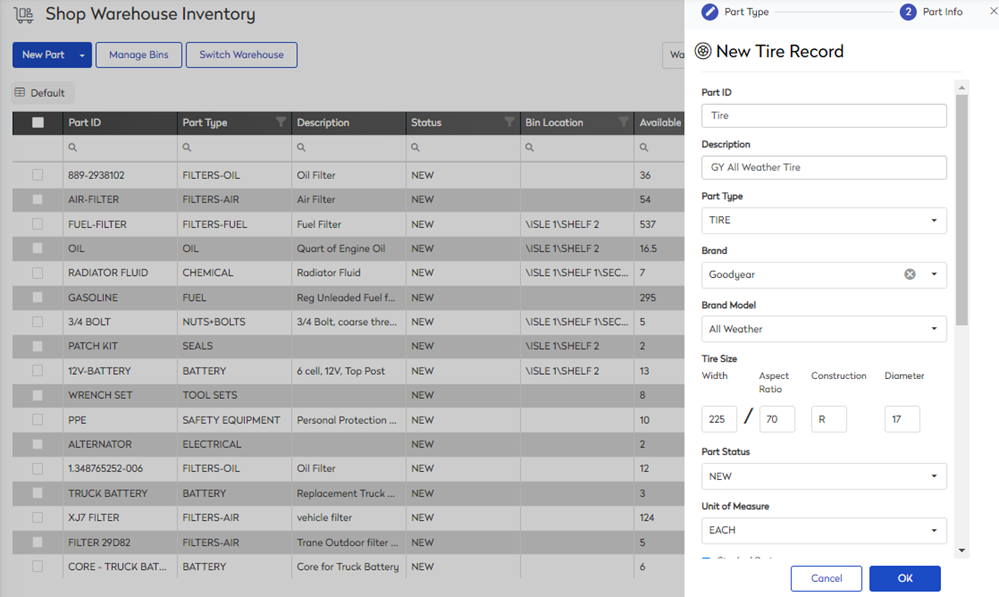
Step 2. Add Tires to Inventory
Inventory Settings and Inventory Module
Before you can add a tire record, the Tire Part Types must be defined in inventory settings. Then tires can be added to the Inventory module and the New Tire Record form lets you enter any brand and tire size information to identify the tires in your inventory.
Learn more in Create a New Tire Record.
Step 3. Install Tires on Vehicle
Work Order Module
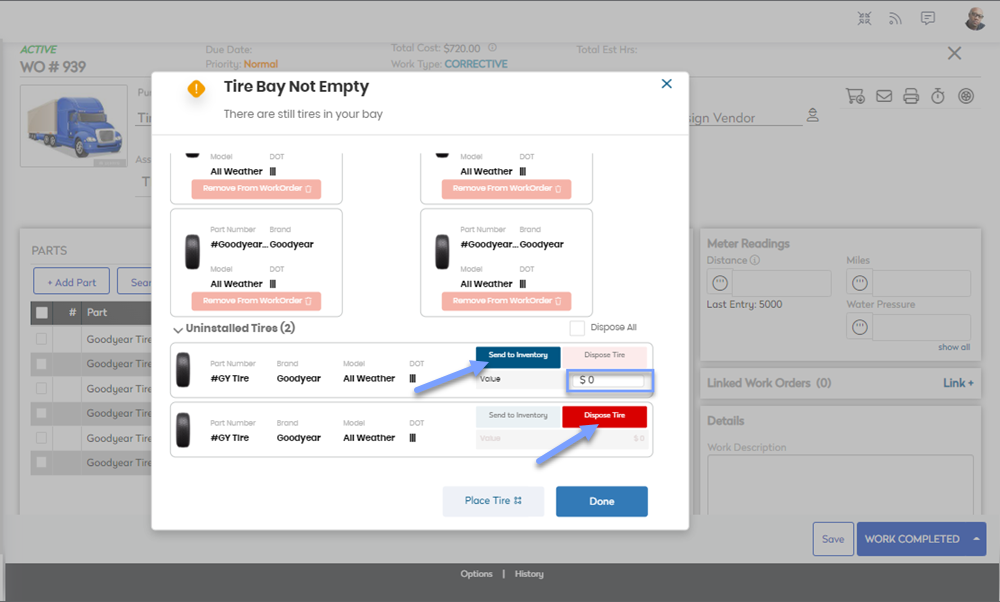
The Tire Manager is found in the Work Order and this allows for easy drag-and-drop installation and removal of tires from the tire bay to the vehicle.
Learn more in Manage Tires from a Work Order.
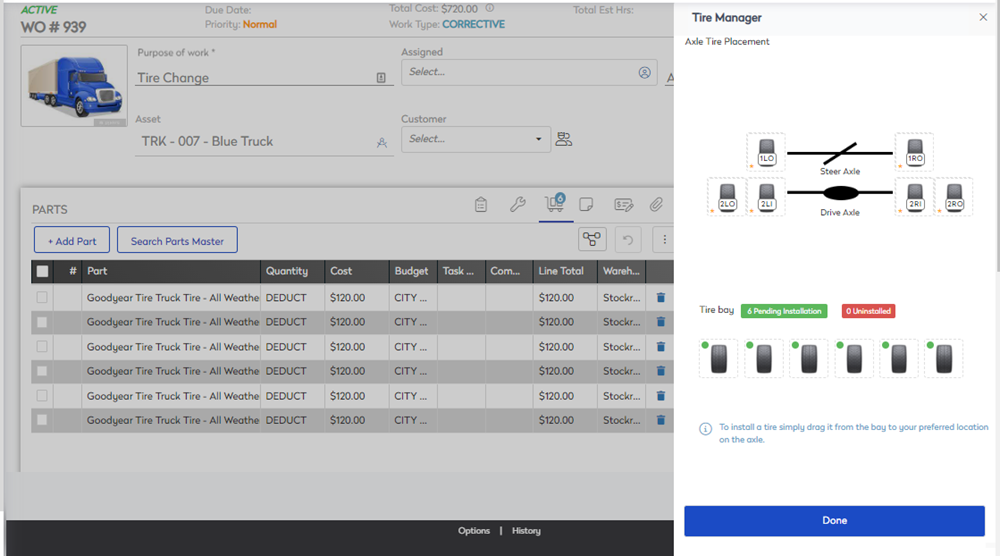
The Tire Manager efficiently tracks which tires have been installed and how many kilometers (or miles) since the install based on the meter readings entered. Use the tire manager to dispose of any unused tires, or return them to inventory with the updated value.
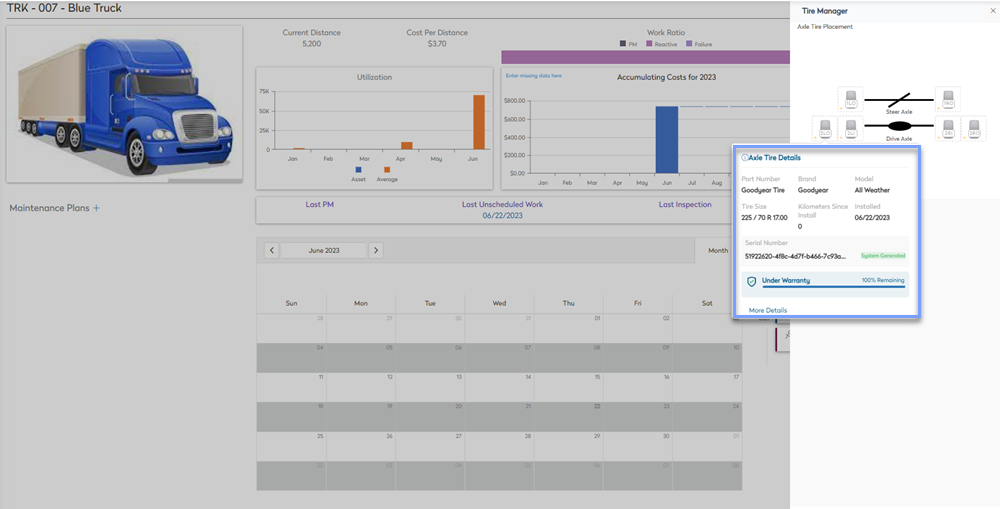
View Tires in the Asset Details
Asset Module
When an asset has tires installed, you will see the Tire Tracking icon in the Asset Details screen. When you click the Tire Tracking icon, you will see the Tire Manager.
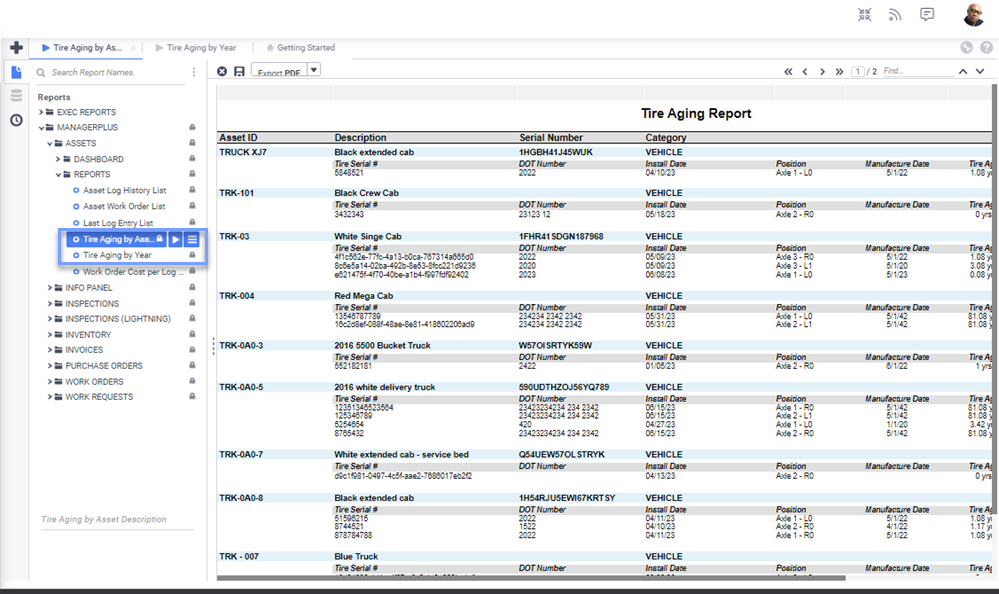
Tire Aging Reports
BI Module
Use these reports to monitor tire aging and gather data for tire tracking purposes these reports are accessible from the BI module.
- Tire Aging by Year
- Tire Aging by Asset