OneLogin Integration
Customer IT / SpaceIQ Onboarding Team
SpaceIQ supports integration with the OneLogin identity management system. This details how to configure the OneLogin integration for SpaceIQ.
The following OneLogin integration features are supported:
- Pushing New Users - New users created through OneLogin will also be automatically created in the SpaceIQ application.
- Pushing Profile Updates - Updates made to users' profiles through OneLogin will be pushed to SpaceIQ.
- User Deactivation - Whenever a user is deactivated or disabled through OneLogin that user will also be deactivated in SpaceIQ. (This involves removing the users' data and deleting their account.)
- Download Users from Third Party Apps - New users created in the third-party application will be downloaded and turned into new AppUser objects, for matching against existing SpaceIQ users.
- Logout Redirect - This redirects an end-user when they log out of SpaceIQ back to the OneLogin application, where they can continue working.
It is not possible to import (or pull) new users or profile updates from within SpaceIQ. The information must be pushed from OneLogin.
Contents
Prerequisites
You will need OneLogin admin privileges to complete this integration, and for the SpaceIQ setup, you must have a SpaceIQ Admin or an IT role.
Integration Activities
Step 1. Active the OneLogin Integration in SpaceIQ
From the SpaceIQ application, complete the following steps:
- In the top-right corner, click on your Profile Name, and then click on Settings.

- From the left menu, click Integrations.

- From the Third Party Integrations area, click the READ MORE link.
The Integrations screen displays.
You can search for OneLogin in the Search field or navigate to the OneLogin tile. To navigate, complete the following:
- From the left menu, click Provisioning & SSO.
- For OneLogin, click the Activate button.
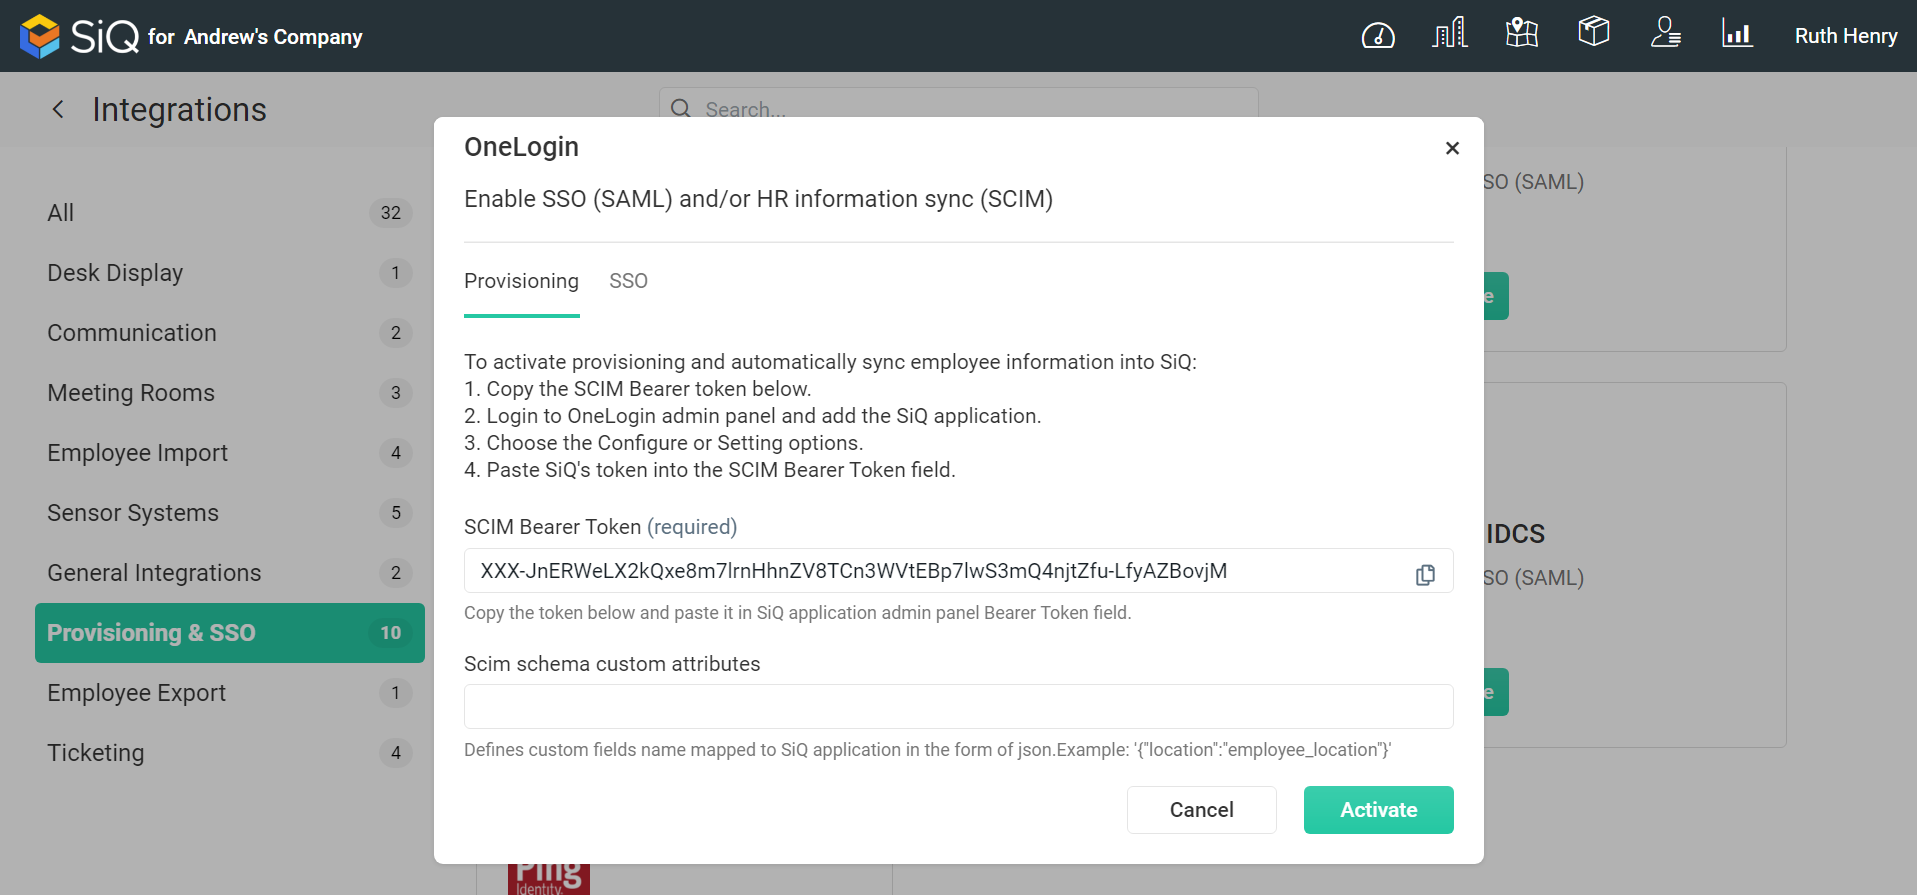
The OnLogin dialog displays the Provisioning tab and the SSO tab.
Provisioning Tab
For the SCIM BearerToken field, copy the token to a secure location for later use.

SSO Tab
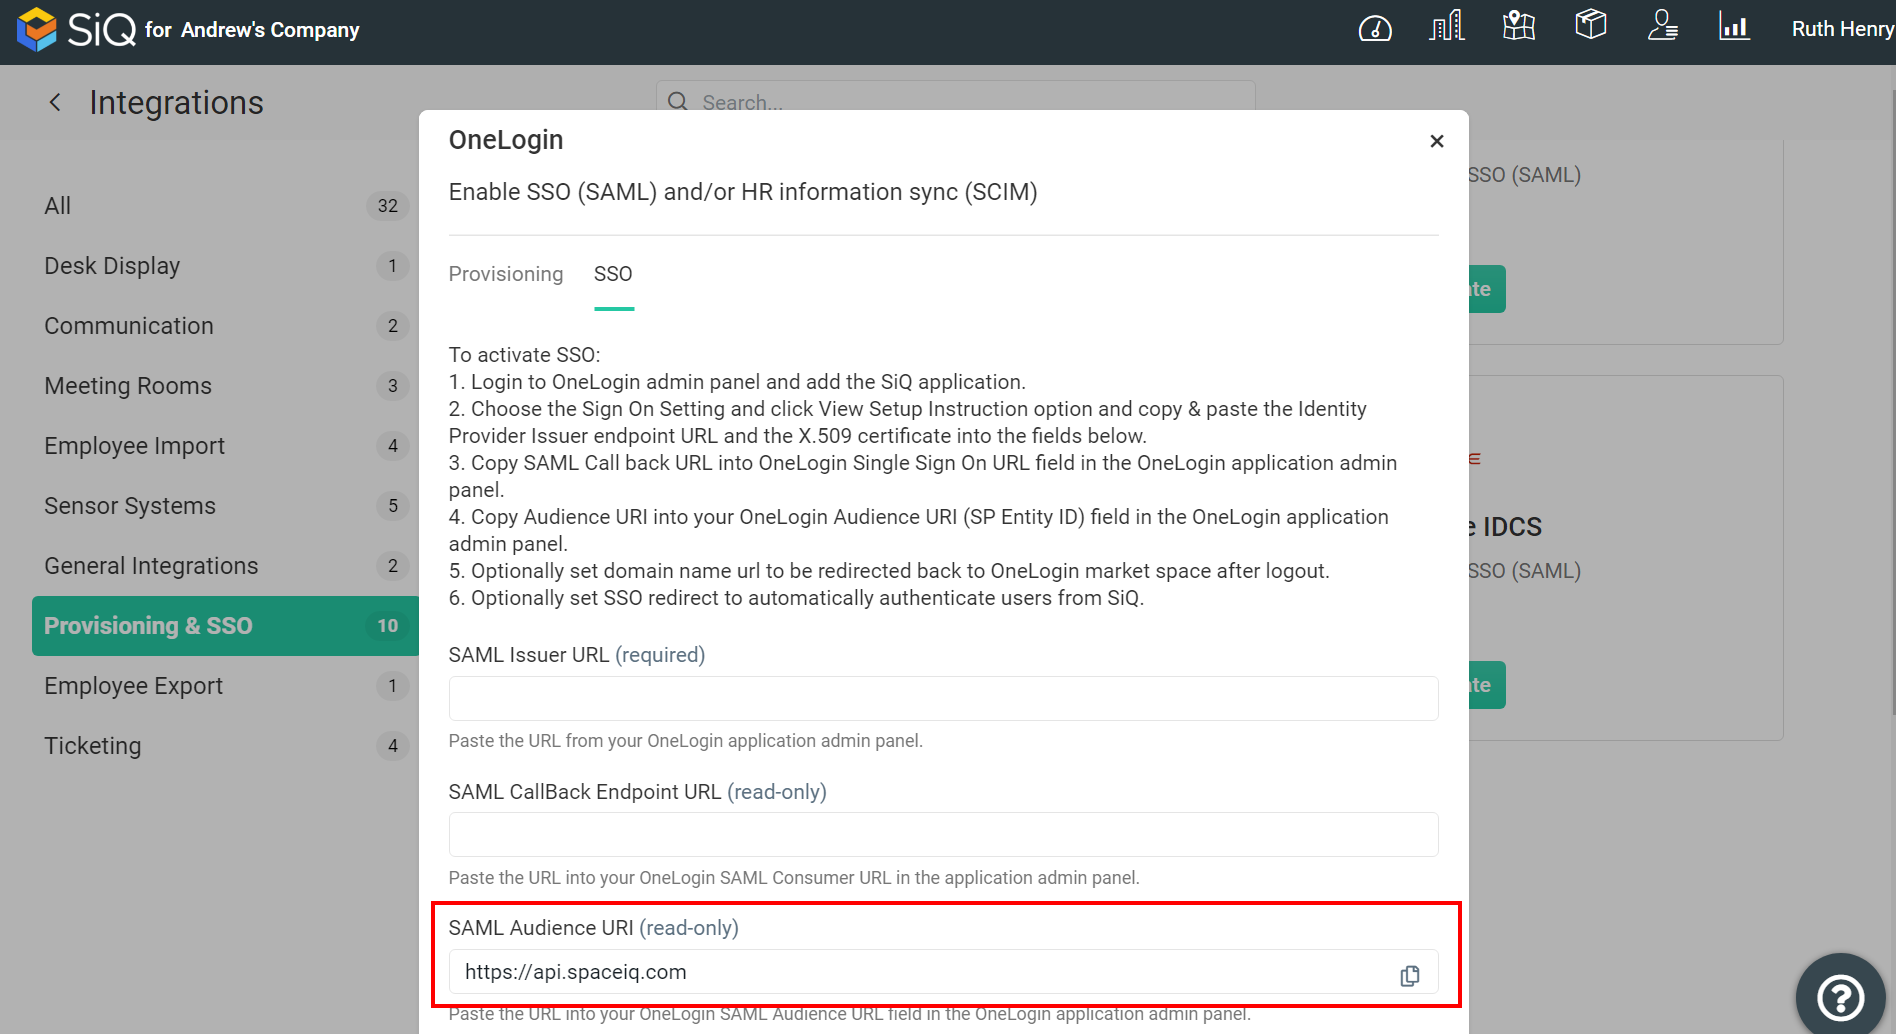
If you want to enable Single Sign On, you'll see additional options under the SSO tab. Any blank fields will need to be populated with data from OneLogin, which we will discuss in greater detail below.

For the SAML Audience URI field, copy the URI for use in setting up the integration within OneLogin.
The SSO Redirect URL field must be populated with OneLogin's SAML 2.0 Endpoint (HTTP), to take advantage of the SiQ initiated SSO Login Flow. Also, for the Logout Redirect feature, you will want to fill in your company's OneLogin domain URL portal, for example, https://example.onelogin.com/app/portal:

Step 2. Add the new SpaceIQ app to OneLogin
Inside OneLogin, click on the Apps tab [1], then click on Find Apps [2]: Search for SpaceIQ [3], and when you find it look for the small add link to the right [4]:

To setup the integration with SSO.
Navigate to the SSO tab [1].
Copy and paste the SAML 2.0 Endpoint (HTTP) value [2] back to the SpaceIQ SSO Redirect URL field.
The Issuer URL [3] must be copied to SpaceIQ's SAML Issuer URL field.
Expand the X.509 Certificate details by clicking on View Details [4]. There you will see the certificate, which you will copy and paste as well back into the SpaceIQ X.509 Certificate field.
When you are done, click Activate in SpaceIQ.
.jpg?revision=1)
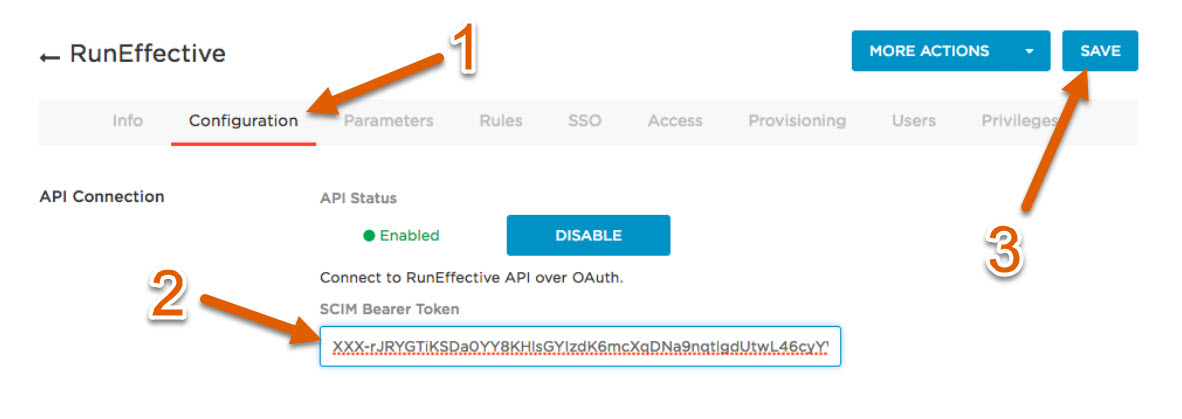
Navigate to the Configuration tab in OneLogin [1].
Copy/paste the SCIM Bearer token from SpaceIQ into the corresponding OneLogin field [2].
Cick the Save button in the top right corner [3].

Troubleshooting
- Users without a First Name and/or a Last Name in their SpaceIQ profiles cannot be imported as new users.
- OneLogin Users without a department will be created with a default department named “__No_Department__".
- If a department also has teams or sub-departments, SpaceIQ will expect Organizations/Divisions to contain Team/Sub-Department names.
For example:
Organization: Engineering, with Department: QA
