Set up Lease Events and Notifications
Lease events are important milestones in the life of a lease. You can create various events within your lease record, including renewals, subleases, terminations, and other events. Within each event record, you add a description, date, and amount for reference; you can also upload and store a lease and other relevant documents.
You can also add an SpaceIQ notification to remind you of relevant lease dates and lease events. All admins receive lease notifications by default, but you can create a recipient list to receive notifications instead.
This article will show you how to add a lease event and set up lease event notifications.
Content
View Lease Events
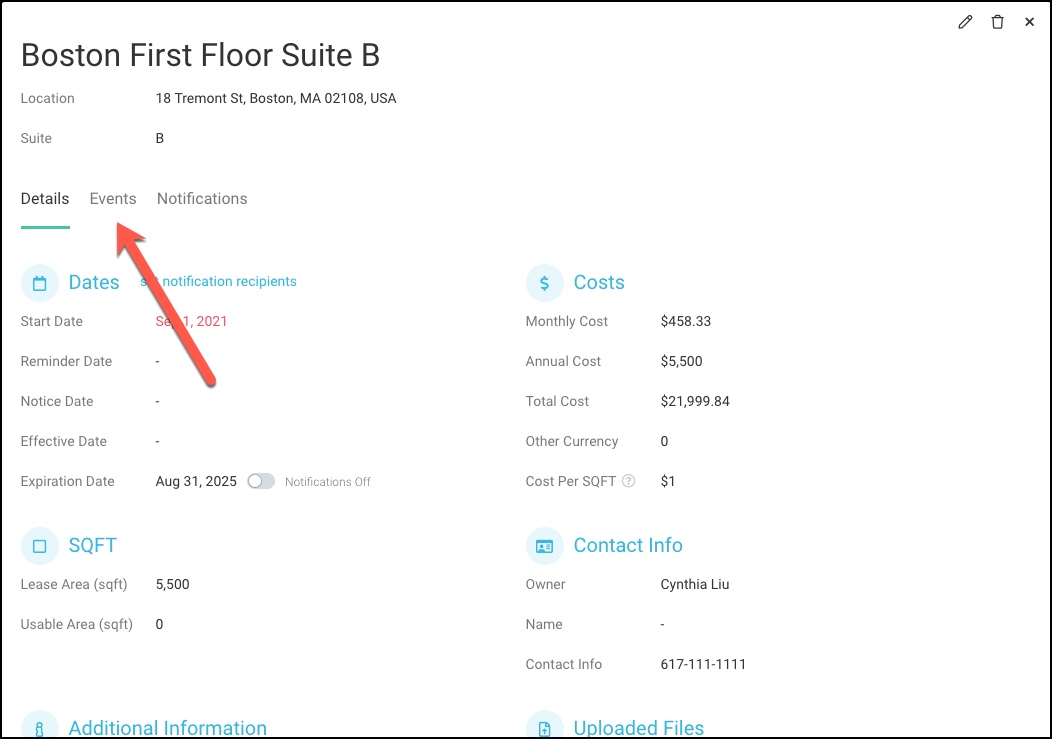
Navigate to Manage Leases and click on the name of a lease. An information page opens will all the lease information stored. Next to the Details tab, click the Events tab.
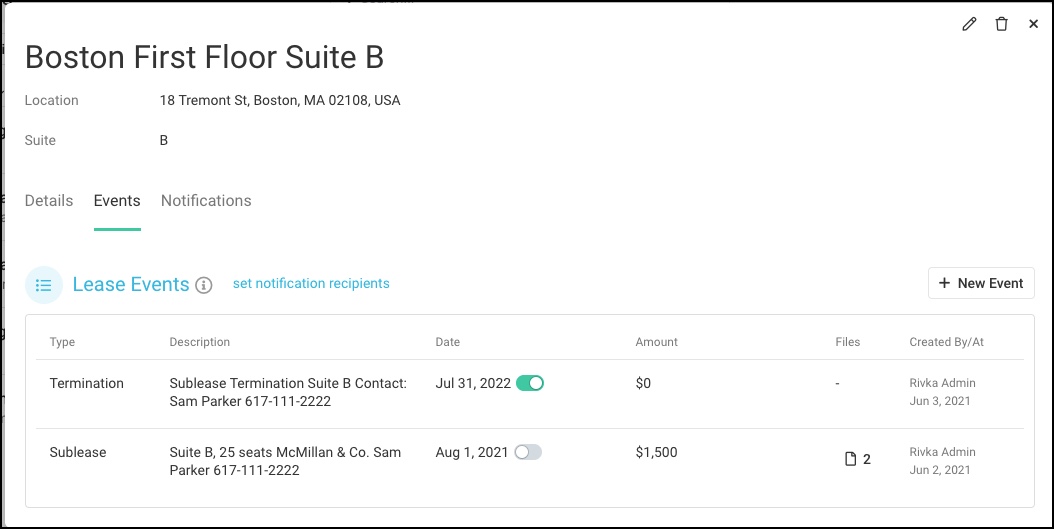
All existing lease events are listed on this tab. If you want to add a Leave Event, click + New Event. Otherwise, click on an existing lease event to open it.
Add a Lease Event
On the Events tab, click + New Event.
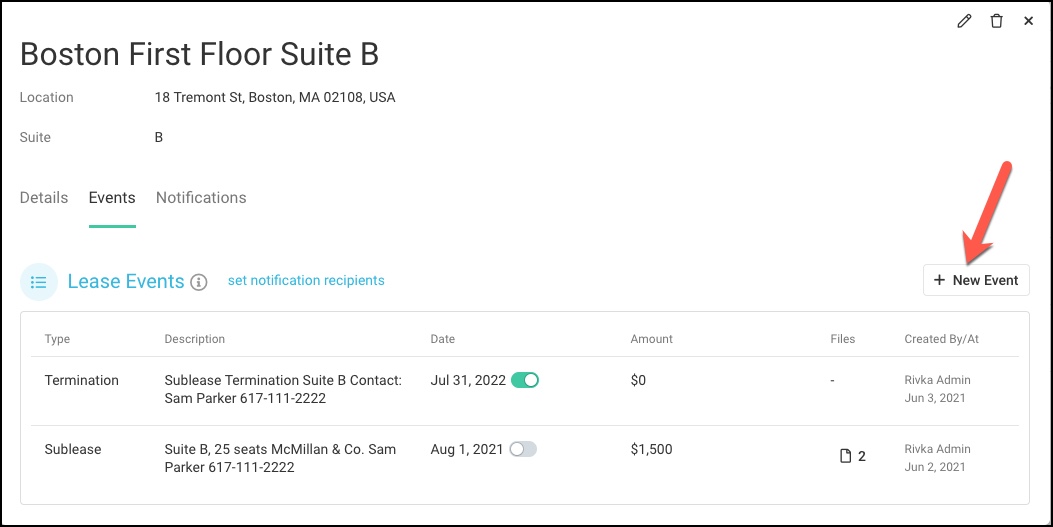
The new Lease Event displays.
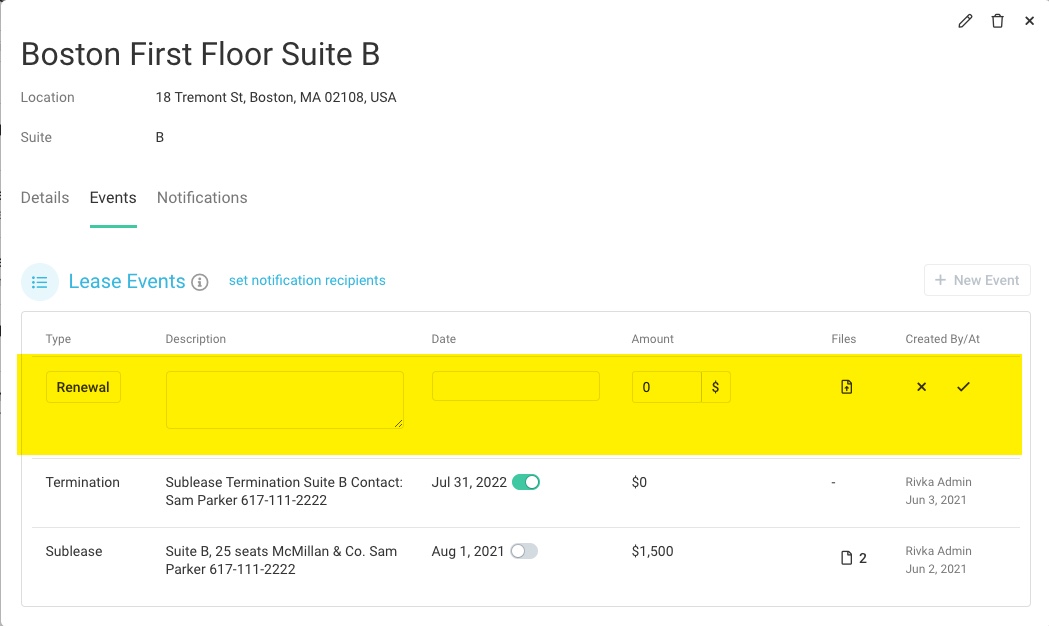
Complete the following:
- Select Renewal, Sublease, Termination, or Other from the Type drop-down.
- In the Description field, enter the description.
- From the calendar picker, select the date.
- In the Amount field, enter the lease amount. The default currency is $; to change this, click $ dropdown and either $, $/SQFT, SQFT, or Other.
- If you want to upload one or more files, click the File icon, and then either drag and drop or browse to select a file to upload it.
- In the Created By/At field, click the Tick icon to save the lease event.
You will see who created the event and the time on the saved record.
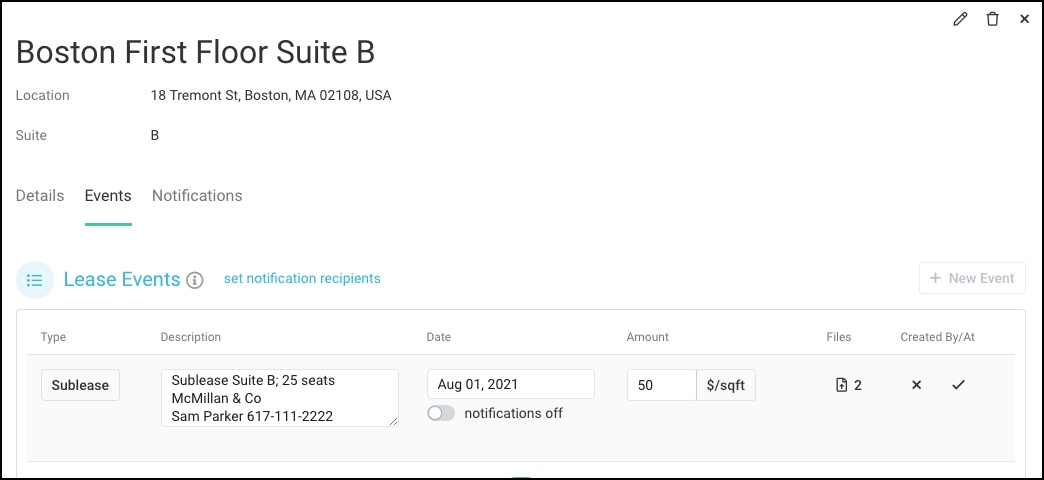
Edit or Delete a Lease Event
Hover over the Created By/At field to reveal an edit and delete button.
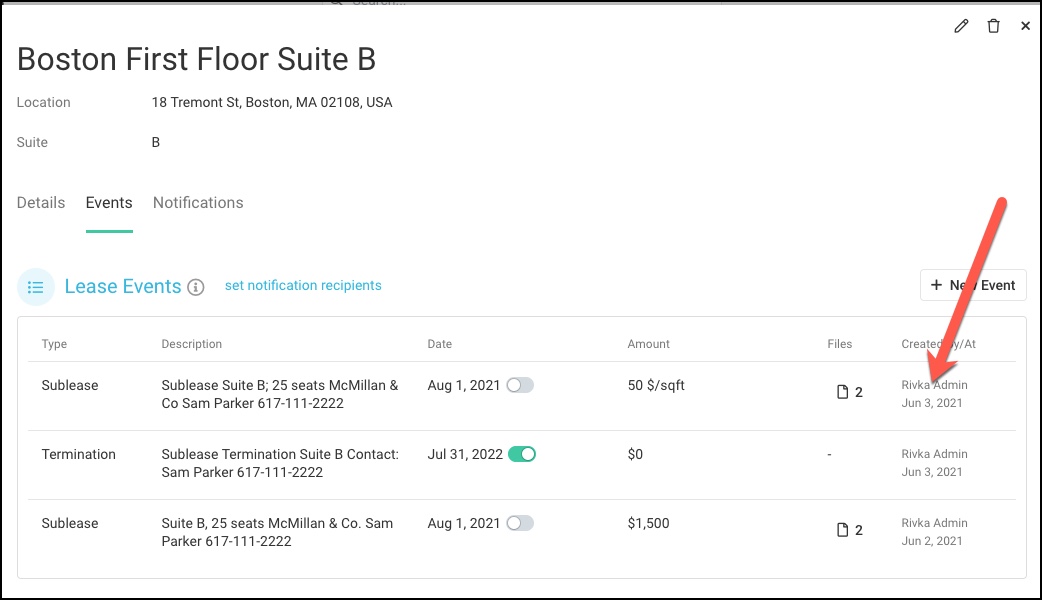
Either click the Edit icon to edit the lease event or click the Delete icon to delete.

Lease Notifications: Date and Events
You can enable and disable notifications for all lease dates and events. Admins receive all enabled notifications by default, but you can create a recipient list instead. Notifications are sent 60, 30, 15, and 1 day before the event expiration date.
Set up the Notification Recipient List
Event notifications are set up within a Lease Event record.
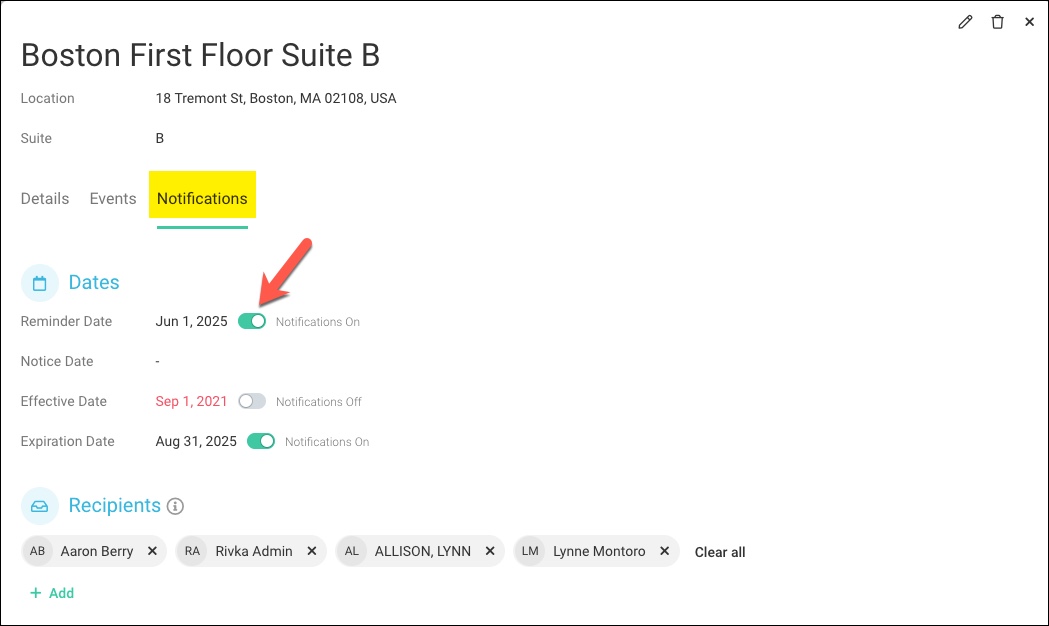
If you are on the Events tab, click on set notification recipients, or if you are on the Details tab, click the Notifications tab, located next to the Events tab.
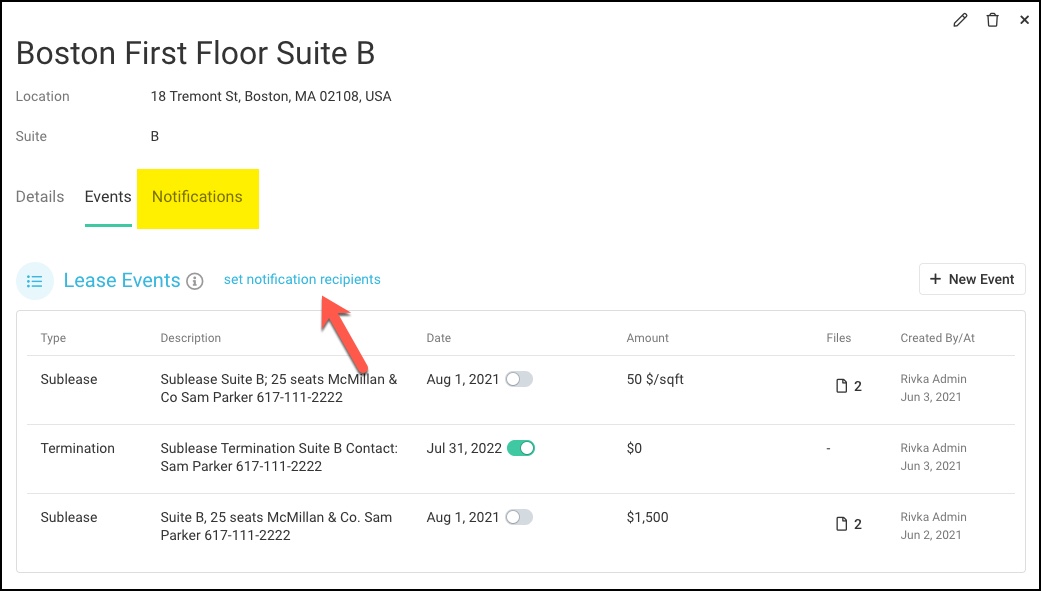
Notifications are sent out in proximity to the lease event Expiration Date. Toggle Notifications ON.
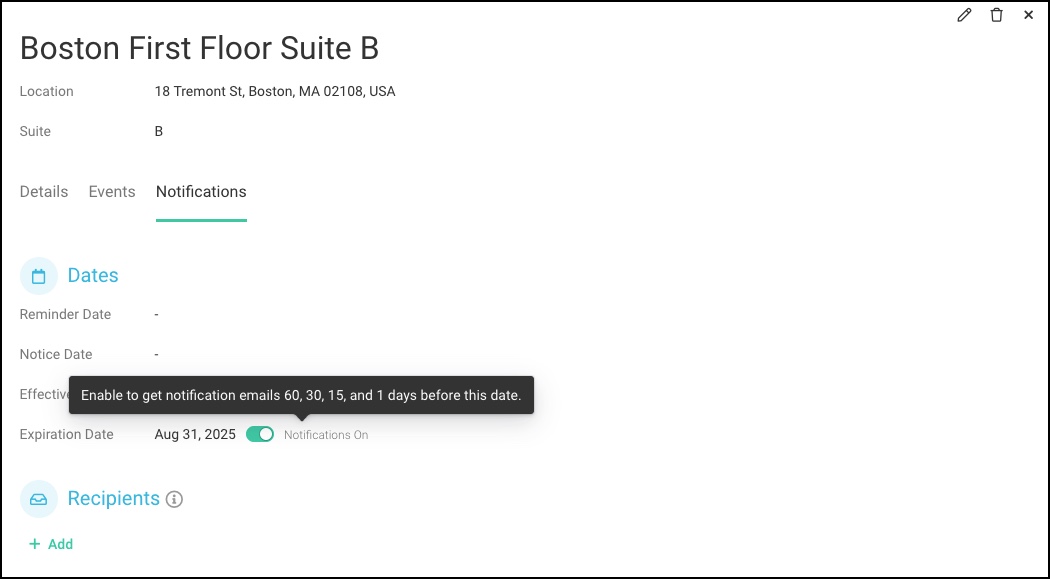
You will see confirmation that notifications have been enabled.
Add Recipients
You'll create a group of recipients in the Notification tab; you'll have the option to turn notifications on and off for this group.
Select the Notifications tab.
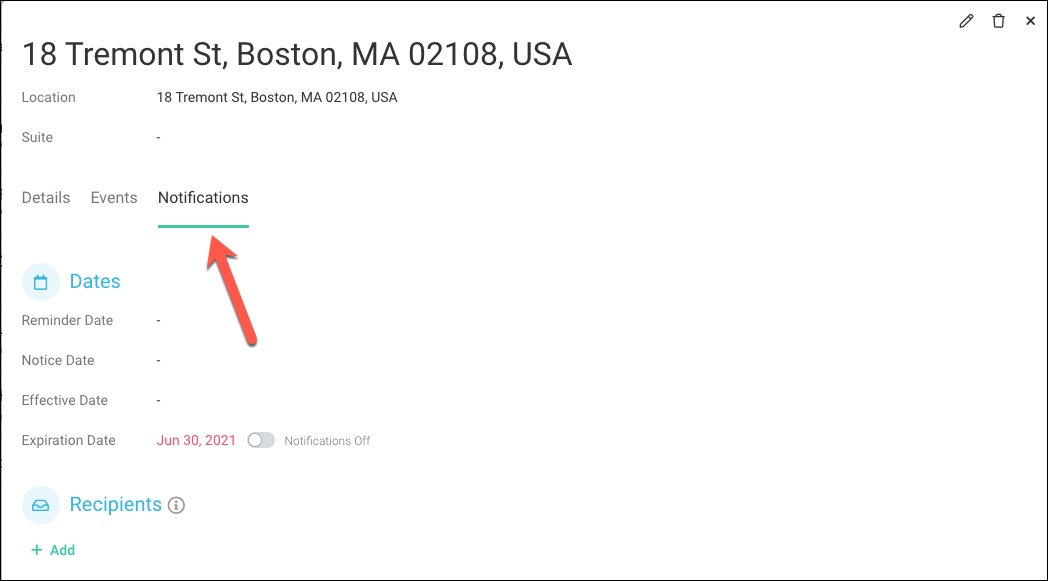
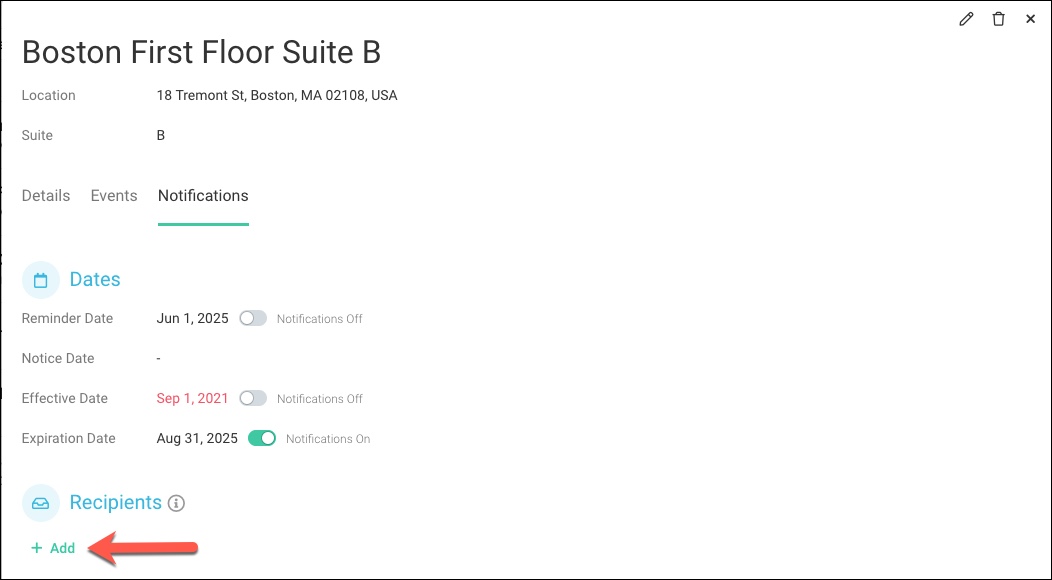
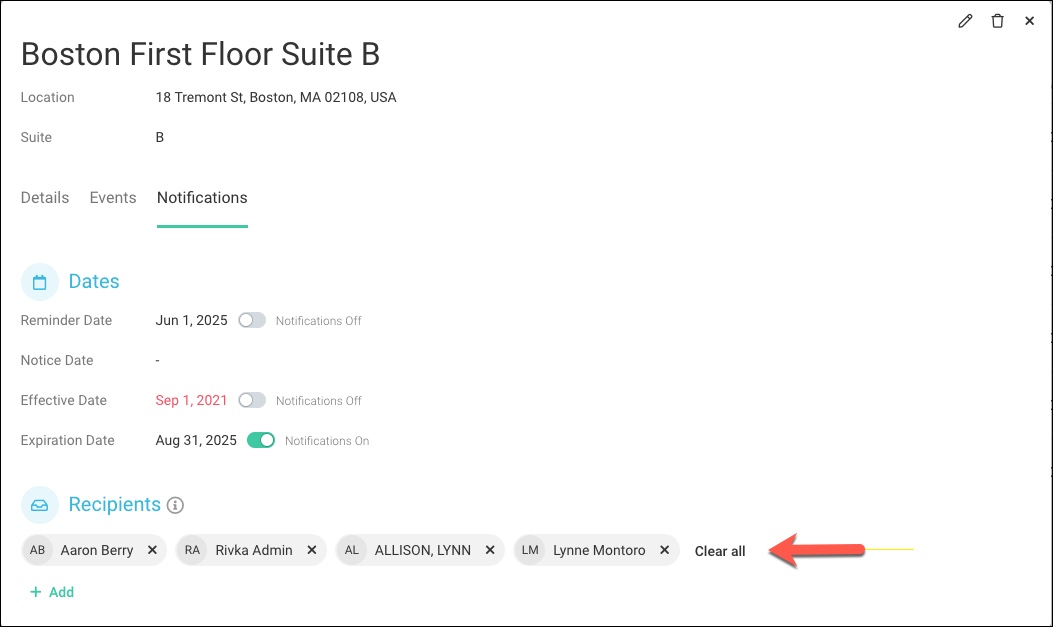
In the Recipients section, click + Add.
You can add an admin or employee in the SpaceIQ system to your notification list. Type into the Search field or scroll down to find an employee, then select the employee's checkbox. You can search and select multiple employees to put on the recipient list. When finished, click outside the selection box to close it.
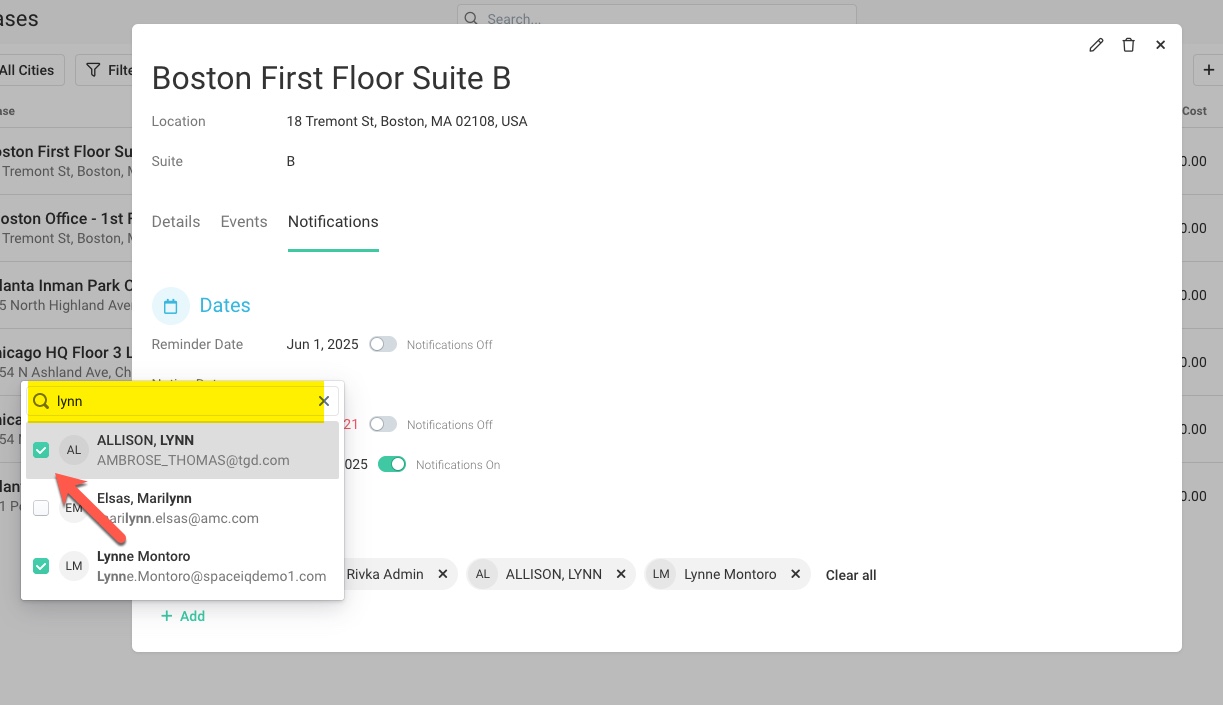
View the Recipients you've selected. Click x next to an employee to remove them from the list.
Enable or Disable Lease Notifications
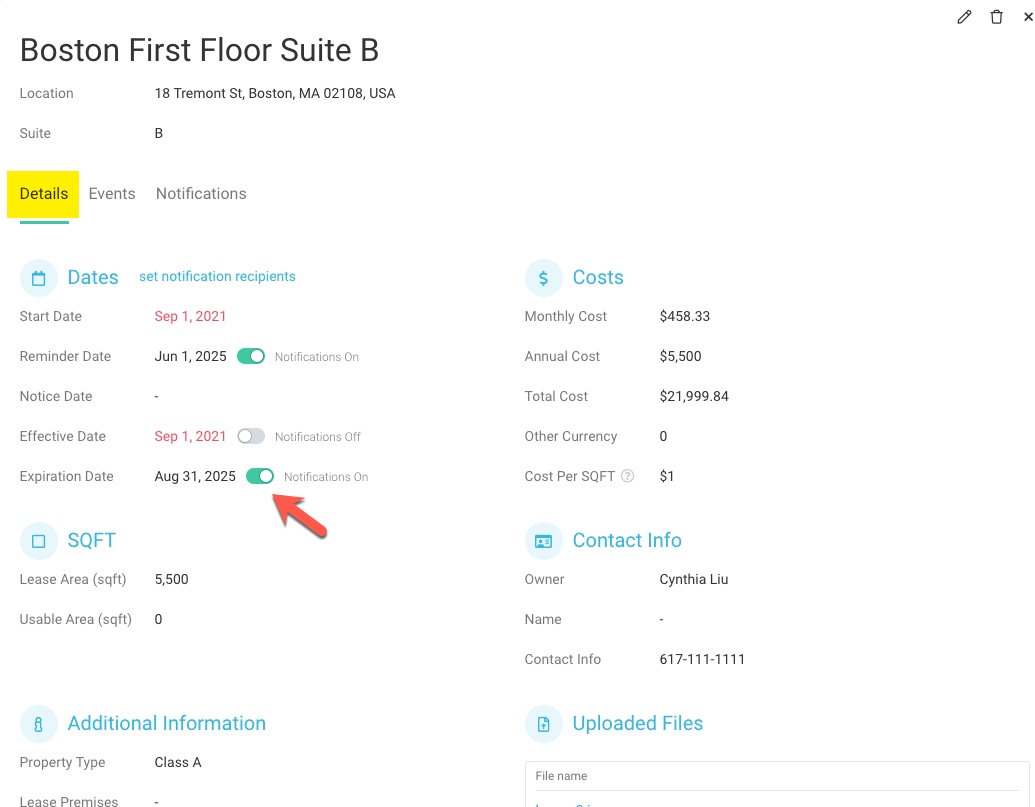
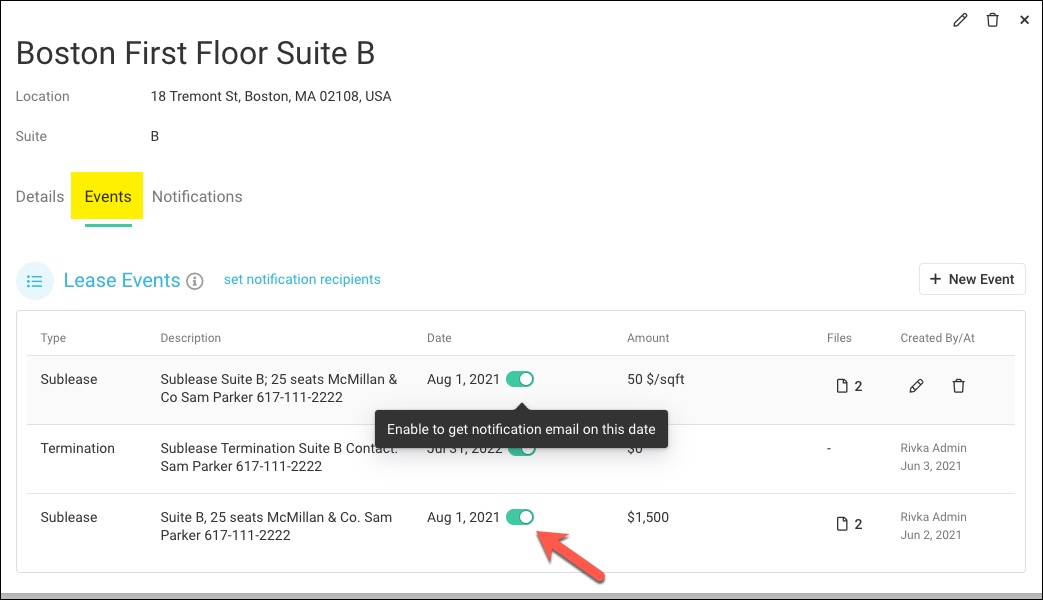
You can enable and disable notifications for Reminder Date, Notice Date, Effective Date, or Expiration Date on the Details and Notifications tabs. In addition, you can enable and disable notifications for all Lease Events on the Events tab.
Details Tab
Toggle the Notifications setting to ON next to each relevant date.
Events Tab
Toggle the on-off setting next to each Lease Event Date. Hover over a toggle to view more information.
Notifications Tab
Review the Dates list on the Notification tab and toggle notifications on and off.
