Floorplan Preparation
Overview
SpaceIQ allows customers to import floor plans into the product during and after onboarding. The floor plan will be published as a PNG image file that will be uploaded into SpaceIQ, and the following details of what preparation can be completed to the source file:
- .DWG Source File and Blocks Preparation
- .DWG Source File and Preparation
- .PDF Source File and Preparation
- .PNG Source File and Preparation
The information in this article can be downloaded in PDF format at the end of this article.
Important Note: When you update the floor plan, then make sure you use the same size/scale as the previous floorplan as you want the dots to line up with the seats. We recommend the PNG is published using the SpaceIQ Paper Size from AutoCAD.
.DWG Source File and Blocks Preparation
A .DWG, or CAD file, is the preferred floor plan as it is the easiest to clean and then set up for blocks. Then you can use the SpaceIQ AutoCAD Plugin to upload the .DWG file.
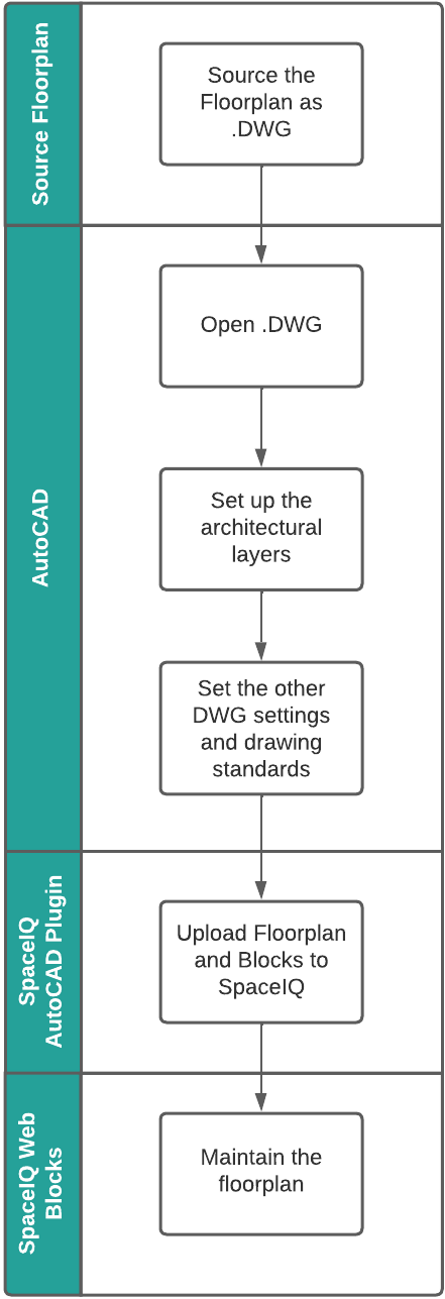 |
Process Summary
|
.DWG Source File and Preparation
A .DWG, or CAD file, is the preferred floor plan as it is the easiest to clean and then published as a PNG image ready to be imported into SpaceIQ.
Important Note: If you do not have access to a .DWG file you can request a .DWG file from your furniture vendor, Architect, Landlord, or Estate Broker.
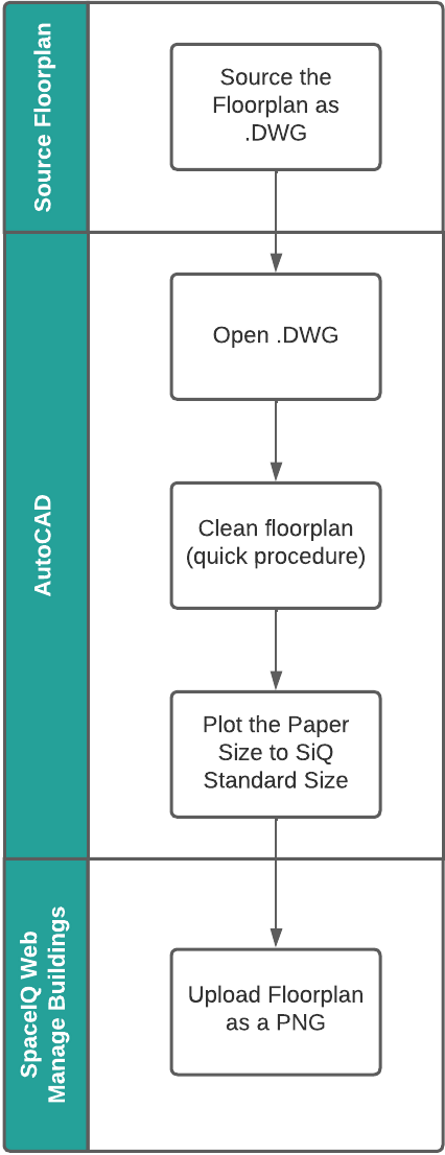 |
Process Summary
|
.PDF Source File and Preparation
A PDF is a file type provided by customers, and it can be cleaned and then published as a PNG image ready to be imported into SpaceIQ.
Important Notes:
- If you want to convert a PDF to a PNG, you can use a free online tool to complete the conversion.
- Before PDF can be cleaned, you must verify with the Onboarding team the file can be converted to a DWG file. If a PDF cannot be converted, this normally means the PDF provided is not a true PDF but an image of a PDF. If this is the case, then PDF will be imported as an image file (PNG), and no cleaning up can be conducted on these types of files.
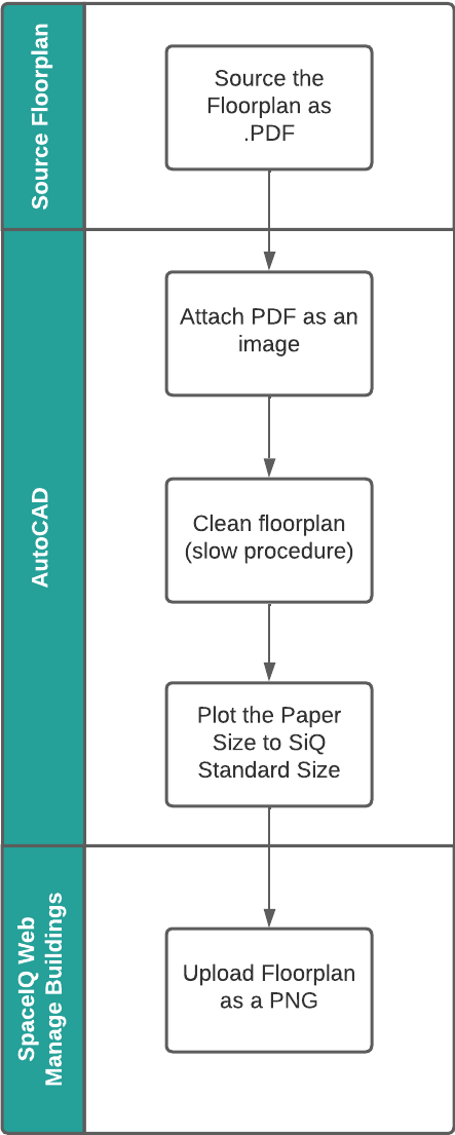 |
Process Summary
|
.PNG Source File and Preparation
A PNG is the least common of all file types by customers and the PNG files are used when a customer cannot obtain a DWG or PDF file for that specific building or floor.
Important Note: The PNG files are unable to be cleaned and are imported as is.
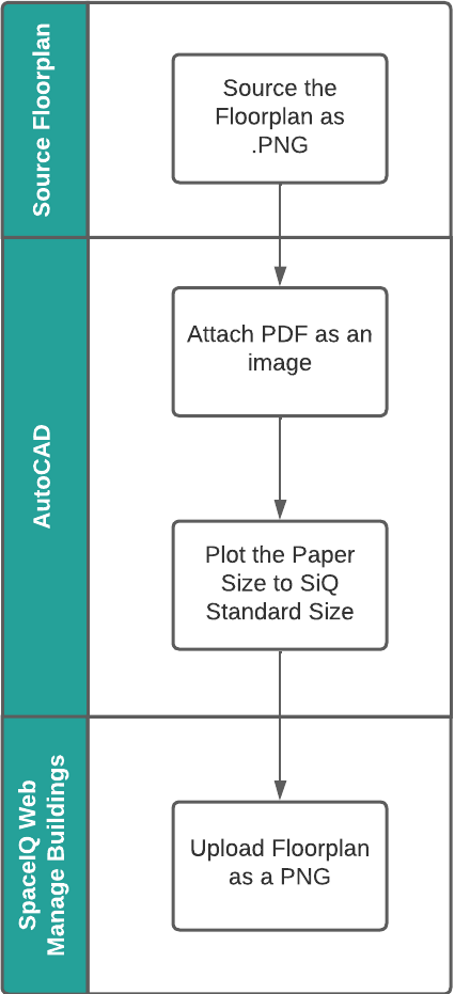 |
Process Summary
|
Floorplan Source File Details
This section includes:
File Name Convention
For all the File Types use the following naming conventions. This way we can identify the building & floor the drawing relates to.
- [Building_Name]_[Floor_Name].dwg
- [Building_Name]_[Floor_Name].pdf
- [Building_Name]_[Floor_Name].png
Seat Nomenclatures (Numbering)
Seat nomenclatures or Space Names are text objects containing a unique identifier, e.g., Meeting Room names (South Beach Conference Room) or Workstation numbers (W.001, W.002).
Unique Identifiers
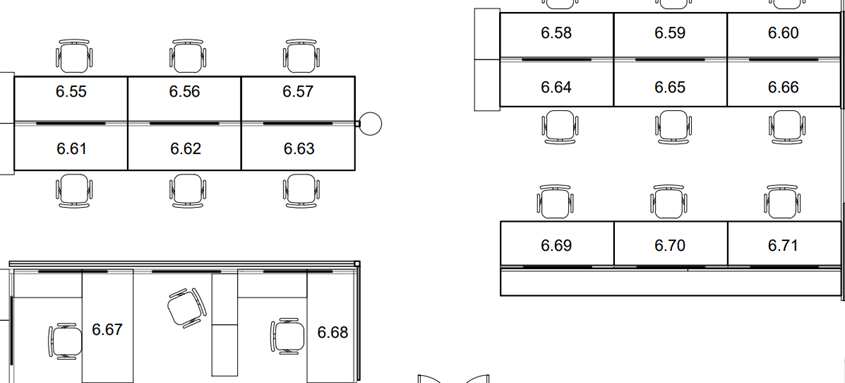
If your business identifies their desks and offices with unique space names, then provide them in either a .DWG, .PDF, or .PNG file. For example:
No Unique Identifiers
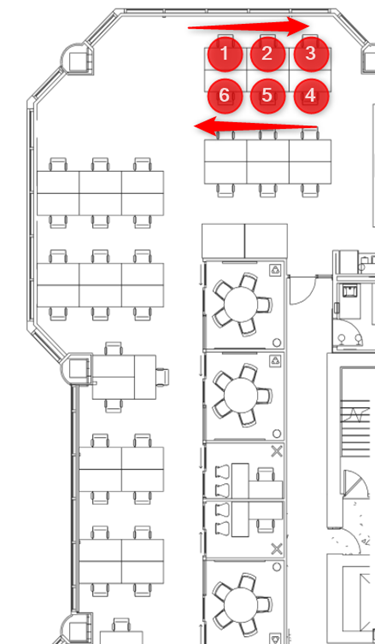
If you do not have unique identifiers for desks and offices, then we will label the desks and offices numerically 1-xxx from left to right on the floor plan, for example:
Seating Charts
Seating charts are important during Implementation because they are used to identify where each employee sits within the portfolio. Seating charts can either be provided in a .csv or visually represented in a .DWG, .PDF, or .PNG.
Bulk Import Employees to their Assigned Desks
If your business uses unique identifiers of the offices and spaces, then you can provide us with a .CSV file that lists the employees and their associated desks. This will let us seat all employees quickly via a Move Plan import and is particularly useful if you have over 200 employees. See Add Employees to Seats via the Move Import.
Manually seat Employees on their Assigned Desk
If your business cannot provide a .CSV file, then the alternative is to provide an image file with the employees’ names and seat numbers. This can be a time-consuming manual process to assign the employees to their assigned desks. See Manage Allocation and Seats Overview.
.DWG File and AutoCAD Preparation for Blocks
Most .DWG files will follow the BOMA Standard. BOMA is the standard for measuring buildings; refer to BOMA International, and European floor plans will require a different standard.
This section includes:
- Floorplan Terminology
- File Format
- Architectural Layers
- Other DWG Settings
- US Drawing Standards
- International Drawing Standards
Floorplan Terminology
| Term | Description |
|---|---|
|
BOMA |
Building Owners and Managers Association (BOMA) approved the standard of measuring office buildings. |
|
REBNY |
The REBNY method is the standard method in and around New York City. |
|
Revit |
Autodesk Revit is building information modeling software for architects, landscape architects, structural engineers, MEP engineers, designers, and contractors developed by Autodesk |
File Format
Files can be provided in any AutoCAD format (used in AutoCAD 2013 – AutoCAD 2020).
Architectural Layers
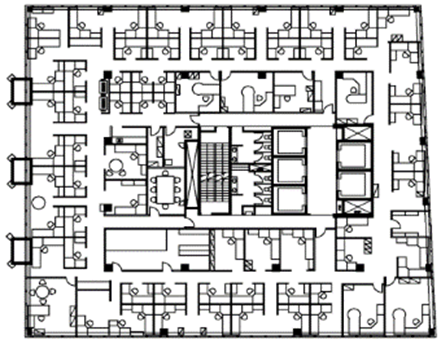
Make sure the architectural components of the floor (walls, furniture, etc.) are on the .DWG and SpaceIQ will use the Architectural layers as the "background-image" of the floor plan.
For example:
We recommend you keep the plottable layers consistent across all floors and you can use the following pre-set list of layers. For example, your set of architectural layers may include:
- ARCH-EXT-WALLS
- ARCH-INT-WALLS
- ARCH-FURN
- ARCH-WS
- ARCH-OTHER
Let SpaceIQ know which layers you want to see on the Floor Map.
Other DWG Settings
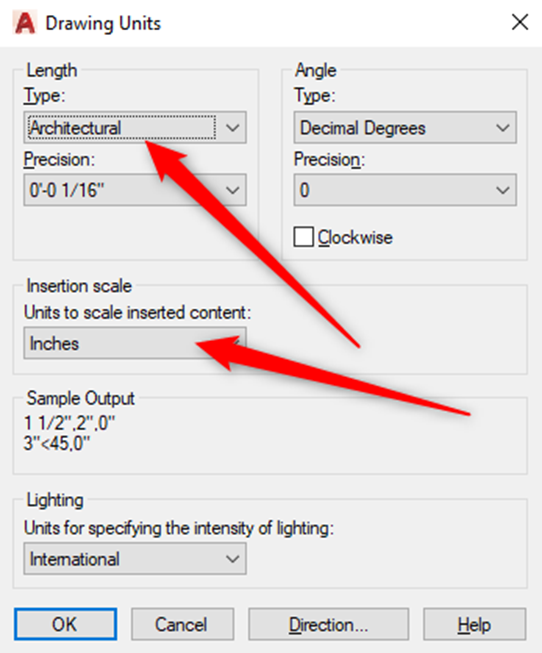
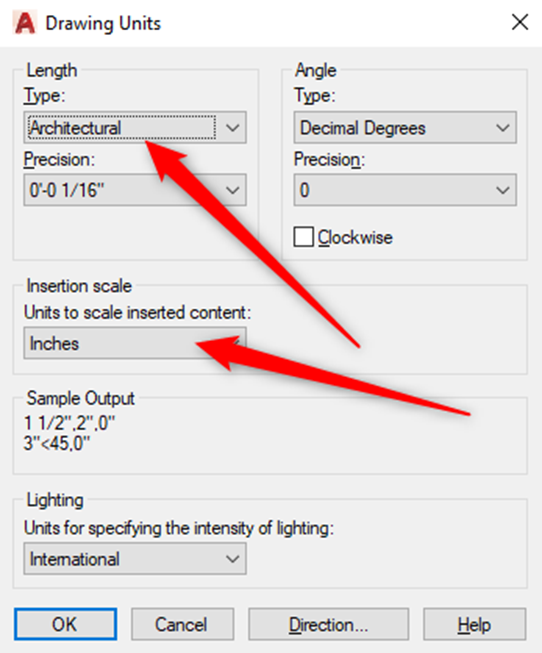
Drawing Units: Ensure the drawing units are set to Architectural/Inches and are set consistently across all your CAD plans.
Layer 0: This layer will be included.
External References (XRefs): All External References must be bound or provided in the .DWG file set.
US Drawing Standards
Below is the guidance for US drawings.
- Ensure drawing units are in architectural and inches.
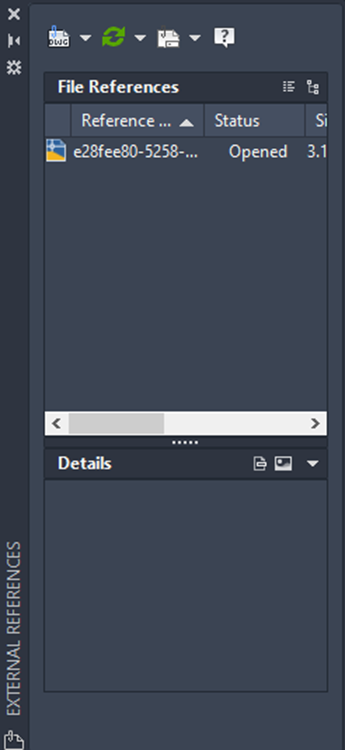
- Ensure all Xrefs are attached to the DWG. (Specifically walls & furniture) To check this you can type “External References” in AutoCAD and a window will display where you can see all Xrefs attached to the DWG.
International Drawing Standards
Below is the guidance for International drawings.
- Ensure drawing units are in architectural and inches.
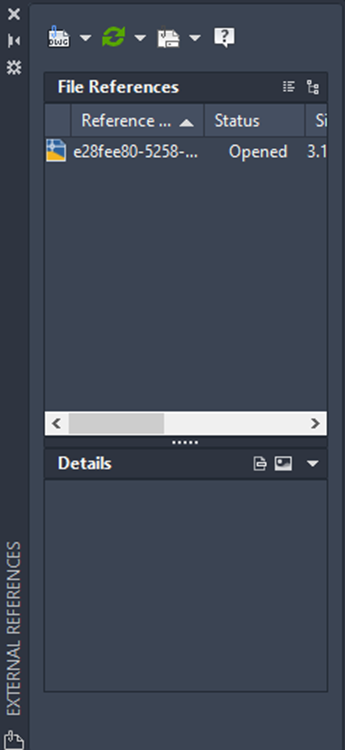
- Ensure all Xrefs are attached to the DWG. (Specifically walls & furniture) To check this, you can type “External References” in AutoCAD, and a window will display where you can see all Xrefs.
Download SpaceIQ Floor Plan Preparation PDF
Download the PDF - SiQ_Floor_Plan_Preparation_2021Nov11.pdf
