Add Meeting Room icon to the Floor Map
You can add a Common space type to the floor map such as a meeting room and then the meeting room can be set up for that the employees can book them.
Prerequisites
If you want your employees to be able to book a meeting room you must have a Calendar Integration set up. The integration will populate the Data Drawer's Select Calendar drop-down with the meeting room's calendar.
Follow the Steps
Step 1. Add the Meeting Room icon
From the Floor Map, complete the following:
Click the Map Editor ![]() icon. The Map Editor displays.
icon. The Map Editor displays.
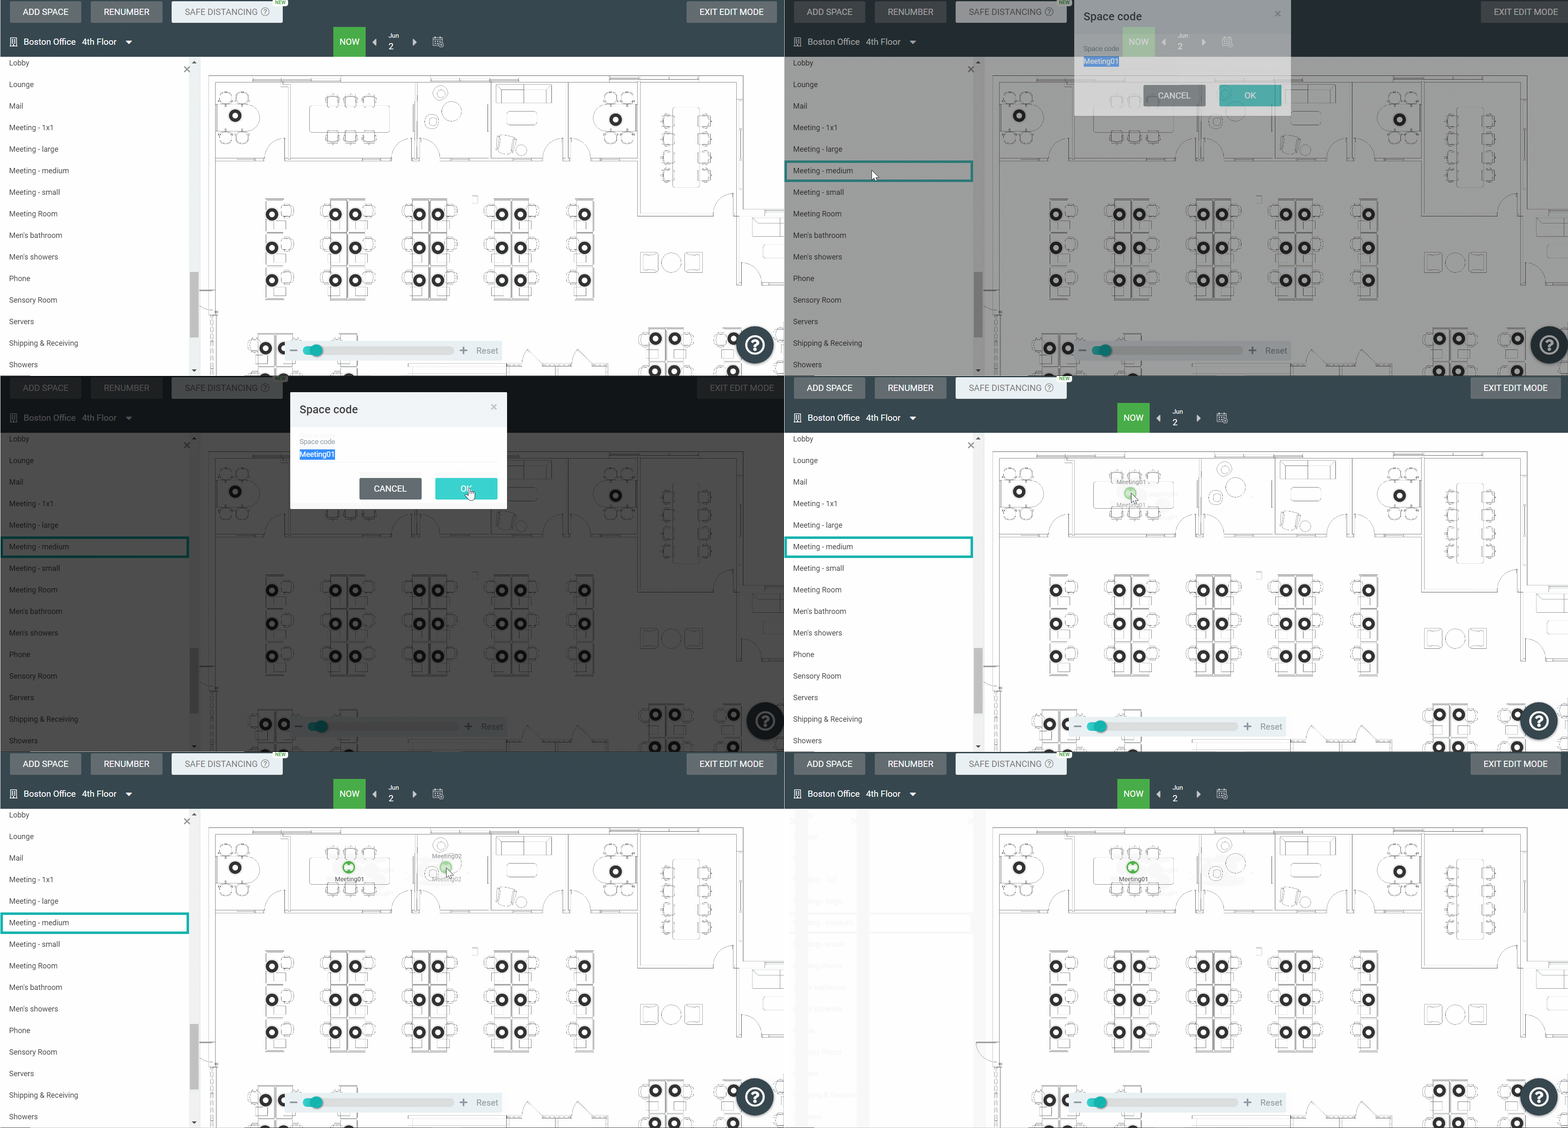
Click on the ADD SPACE button. The space drawer displays.
Scroll down to the Common spaces.
![]()
Select the type of Space you want to add to the floor map. For example, Meeting - medium. The Space code dialog displays.
In the Space code field, enter the space code. For example Kitchen01.
Remember, the space codes are unique identifiers.
![]()
Click the OK button.
Click on the floor map to add the space icon.
When finished press the Esc key.

If the meeting room has a name, then this can be added and this will let employees search for the meeting room. For details, see Update Space Labels.
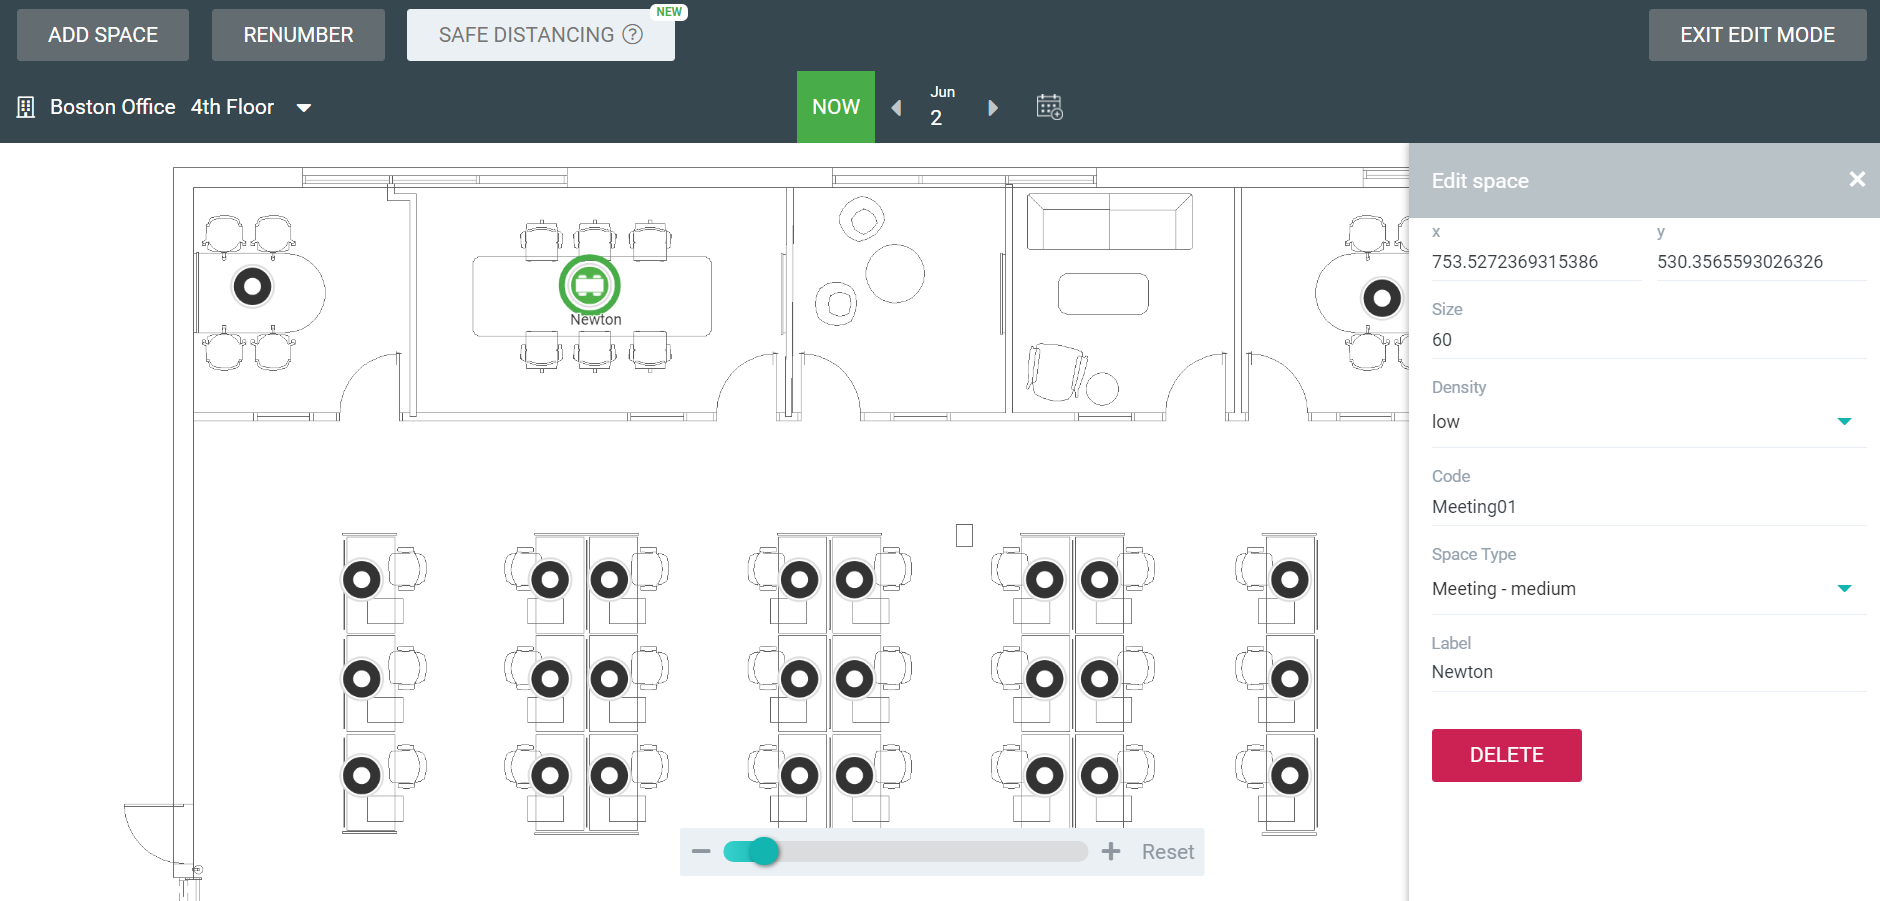
Click on the meeting room icon. The data drawer displays.
In the Label field, enter the name of the space. Remember to choose a name that will be easy for employees to find when they search.

The label is saved and displayed on the floor map.
If you need to correct the alignment of the Space icons, see Manage Space or Pin icons.
Step 2. Add the Meeting Room Calendar
For your employees to book the meeting room, the Meeting Room icon must have the Meeting Room Calendar set.
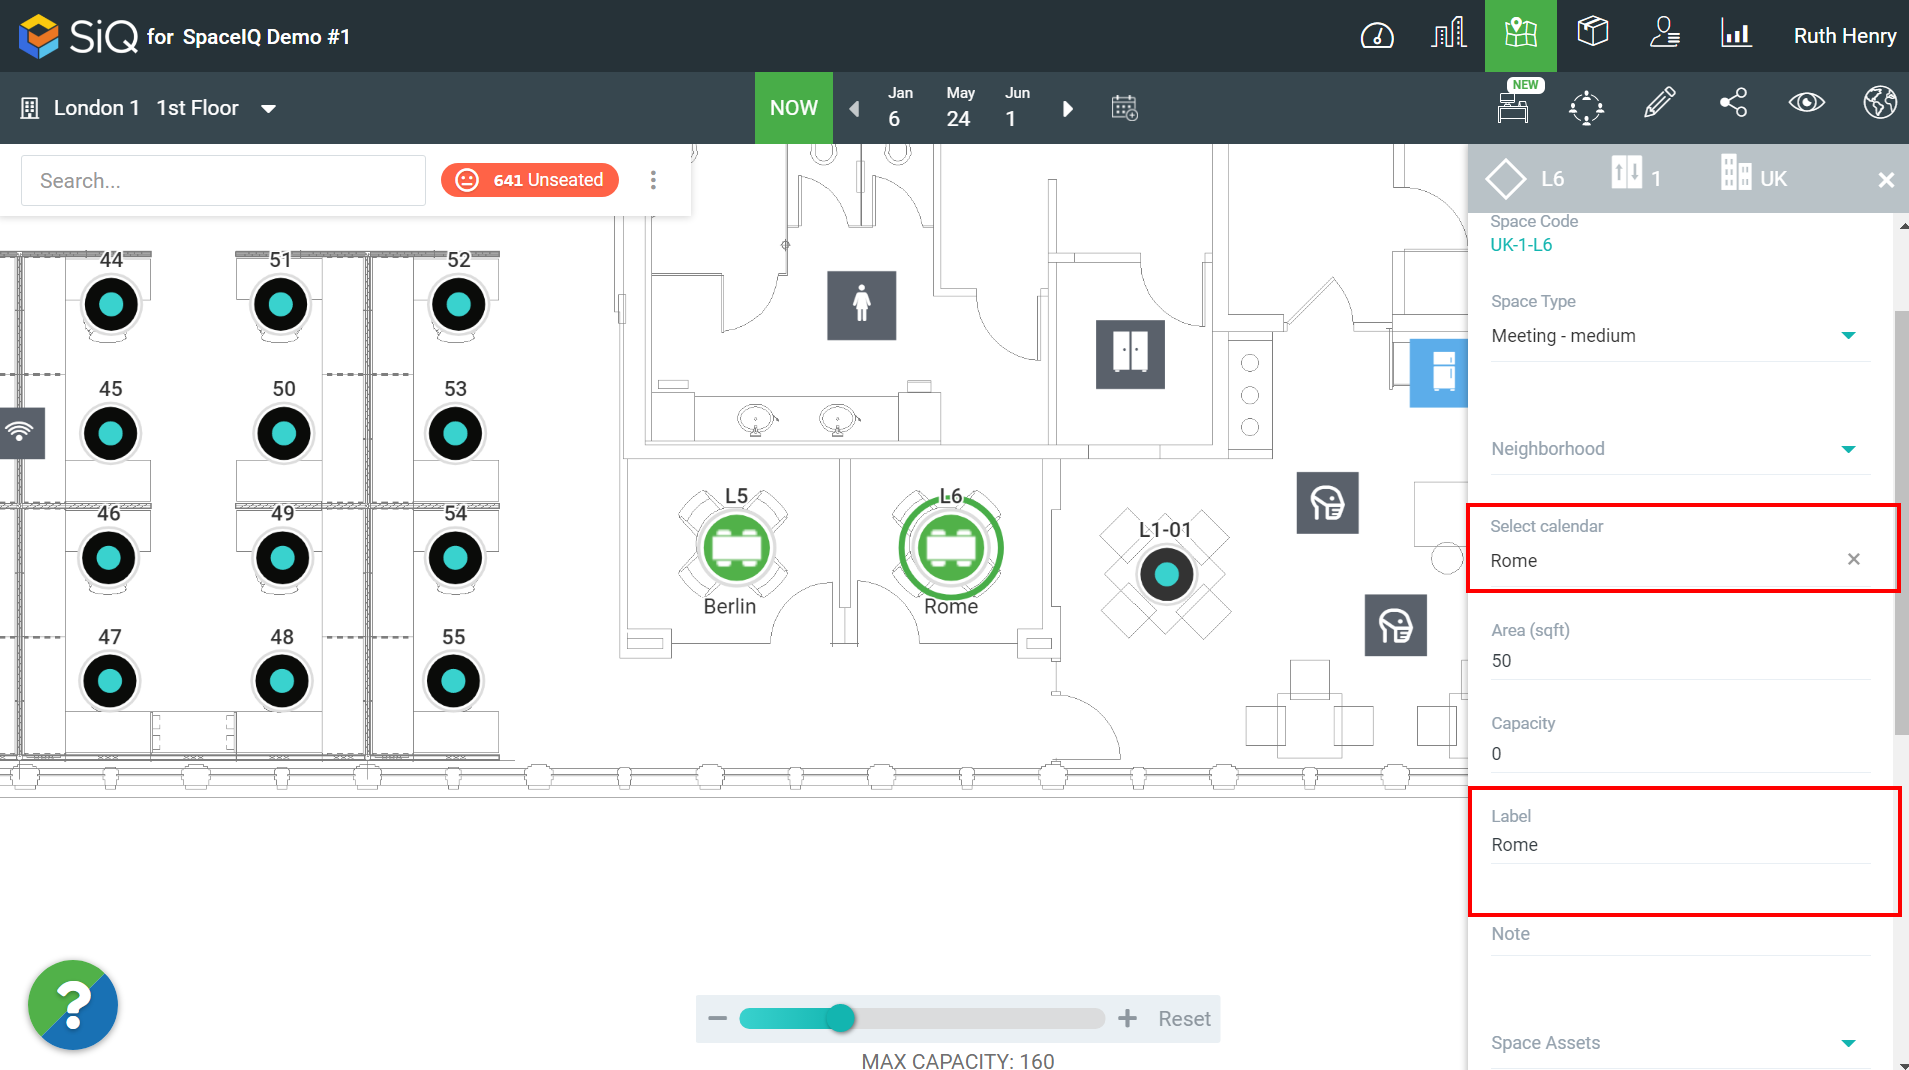
From the Floor Map, click on the meeting room icon. The data drawer displays.

From the Select calendar drop-down, select the meeting room's calendar. The Calendar drop-down is populated from the Calendar Integration.
The updates are automatically saved.
Click x on the upper right to close the data drawer.
