Badge Integration
Badge reporting can give your business insight into the attendance of a building. SpaceIQ has reporting based on attendance per building and department(s).
This integration is managed via SFTP. SpaceIQ will pick up the file every 30 mins and update SpaceIQ as needed. You can upload as many file(s) as needed.
![]()
Contents
Integration Activities
Step 1. Set up the Employees
All employees must be configured with badging information and imported via Employee Import. Therefore, set up an Employee Import that includes the column:
- Badge - Employee's Badge ID.
For more details, see Understanding the Employee Import Data.
Step 2. Set up the Badge Readers in SpaceIQ
Badge Readers must be configured on the Floor Map in SpaceIQ and each Badge Reader must be configured with a unique code. This will identify the location where a person entered the building and left the building. The same code will be reported by the Badge Reader at the customer’s buildings.
Add a Device icon and set it up as a Badge Reader
- Navigate to the Floor Map
 icon.
icon. - Select the building and floor you are working on.
- Click the Map Editor
 icon. The Map Editor displays.
 - Click the ADD SPACE icon. The space drawer displays.
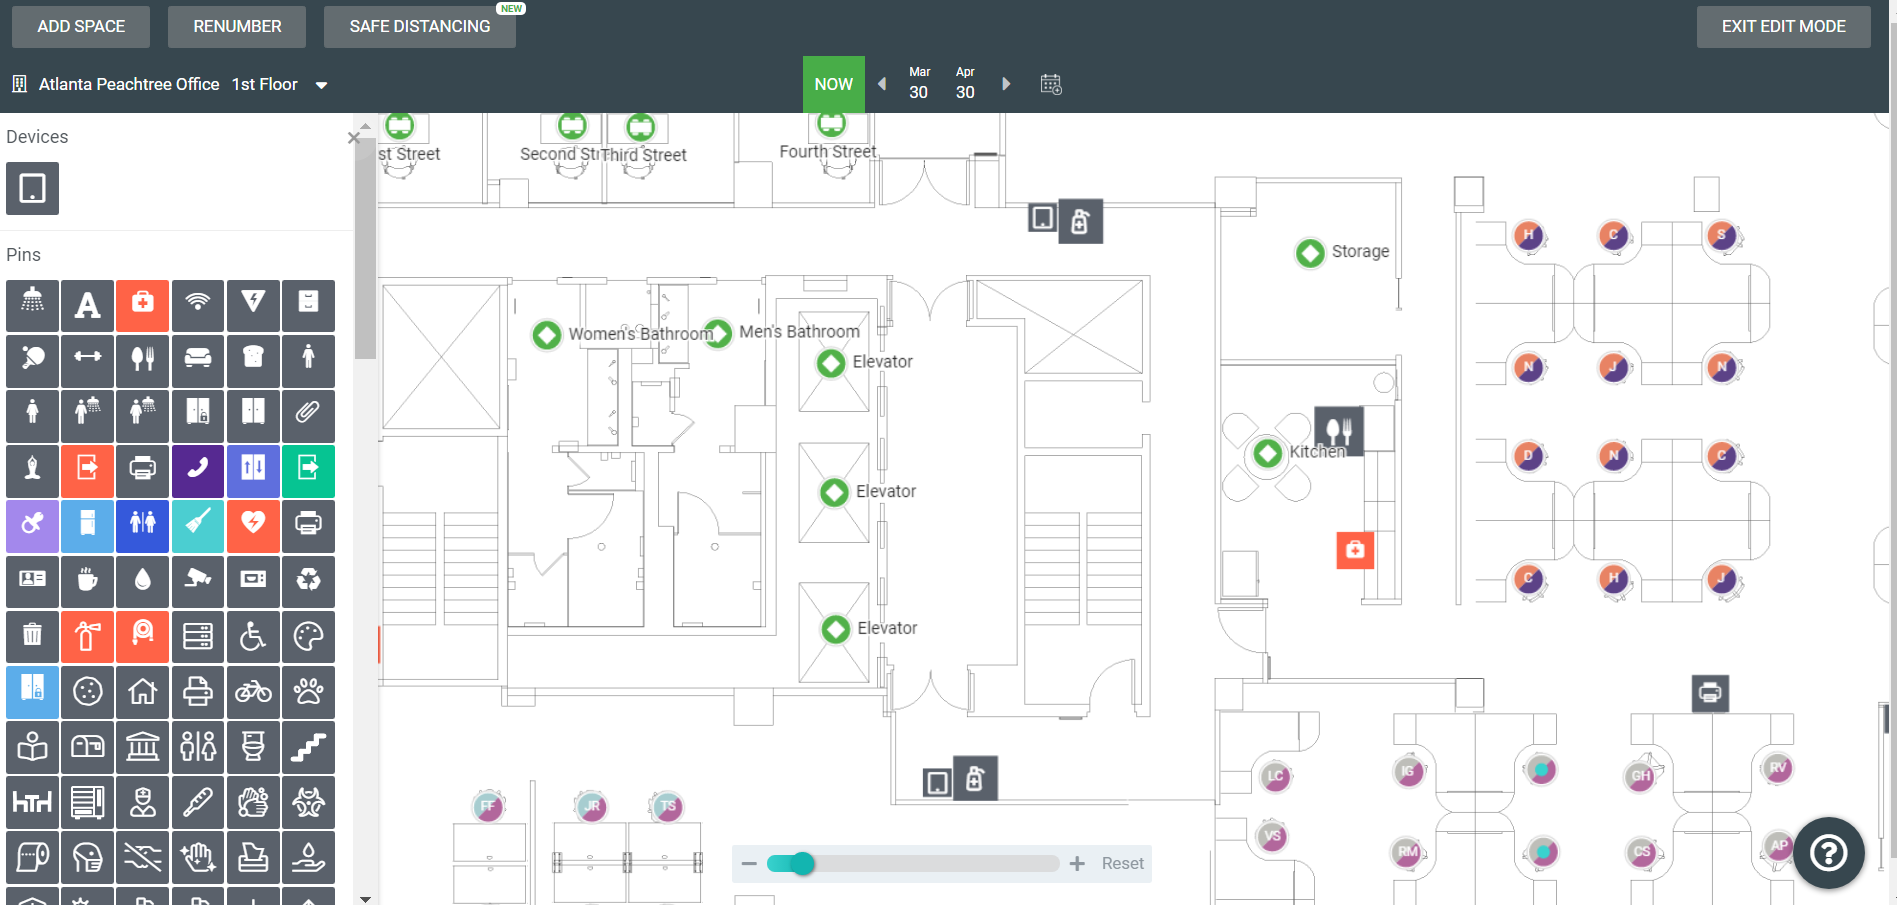
- Click the Device
 icon and drop it at the precise location on the map where the physical Badge Reader is located. Note: Click Esc to leave the Add Space mode.
 - On the Floor Map, click the Device icon. The data drawer displays.
- If you just added a device, the default Device Type will be a meeting room. From the Device Type drop-down, select Badge Reader.
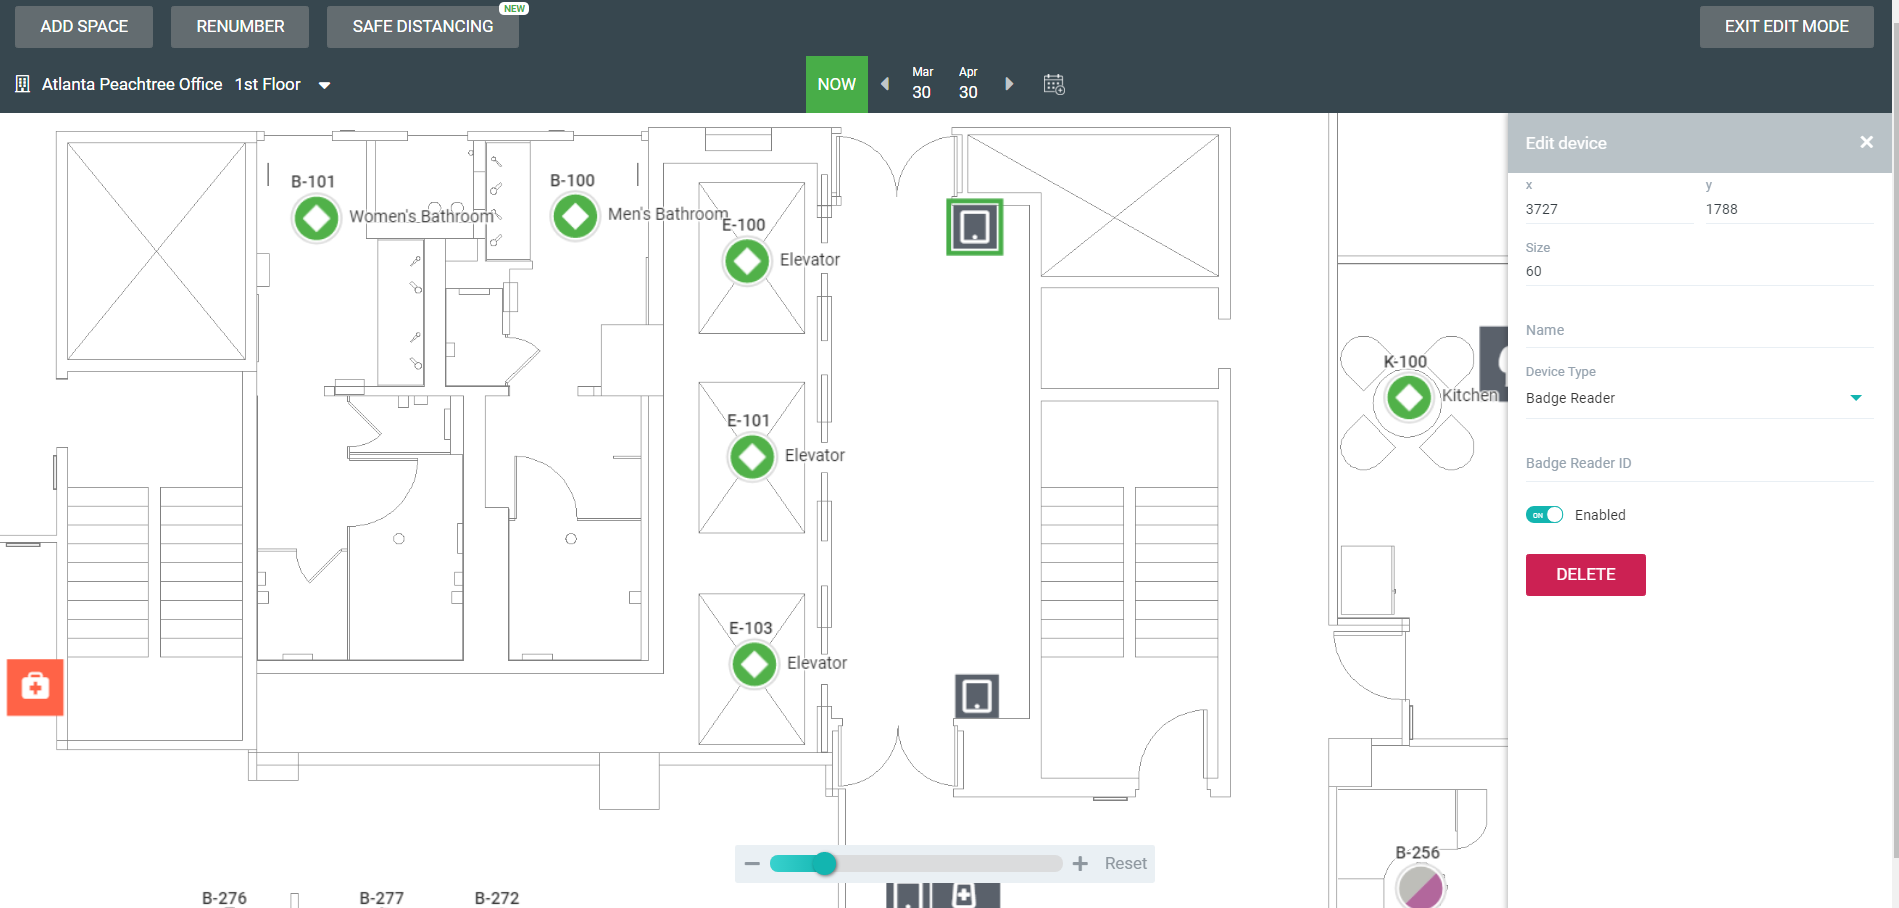
- In the Badge Reader ID field, enter the unique code to identify this Badge Reader.
- Repeat steps 6 to 8 for the other Badge Readers on the floor map.
Any changes you make in the Data Drawer are saved automatically.
Step 3. Set up the Badging File
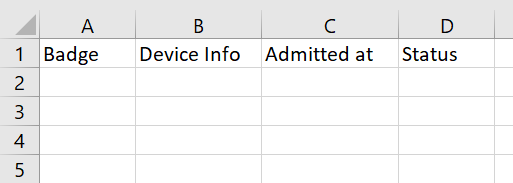
Set up a data file in a CSV format and include the following:
- Badge - Employee's Badge ID.
- Device Info - Device ID set up on the floor map in SpaceIQ.
- Admitted at - Date and time the employee used the badge reader.
- Status - Status of the employee's reading (Accepted or Denied).
For example:
Step 4. Activate Badging Integration in SpaceIQ
From the SpaceIQ application, complete the following steps:
- In the top-right corner, click on your Profile Name, and then click on Settings.

- From the left menu, click Integrations.
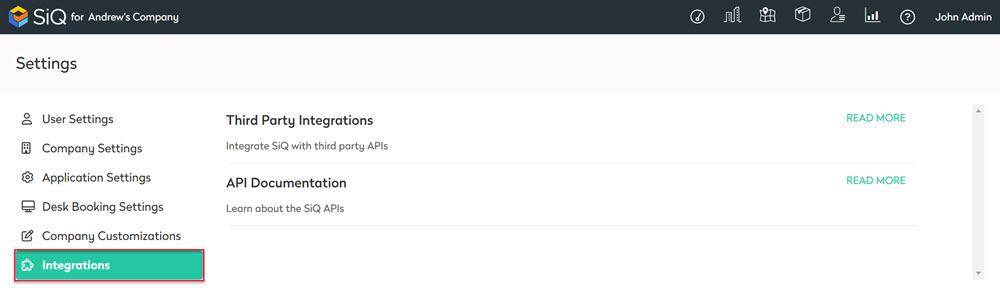
- From the Third Party Integrations area, click the READ MORE link.
The Integrations screen displays.
You can search for Badging and IoT in the Search field or navigate to Badging and IoT tile. To navigate, complete the following:
- From the left menu, click Sensor Systems.
- For Badging and IoT, click the Activate button.
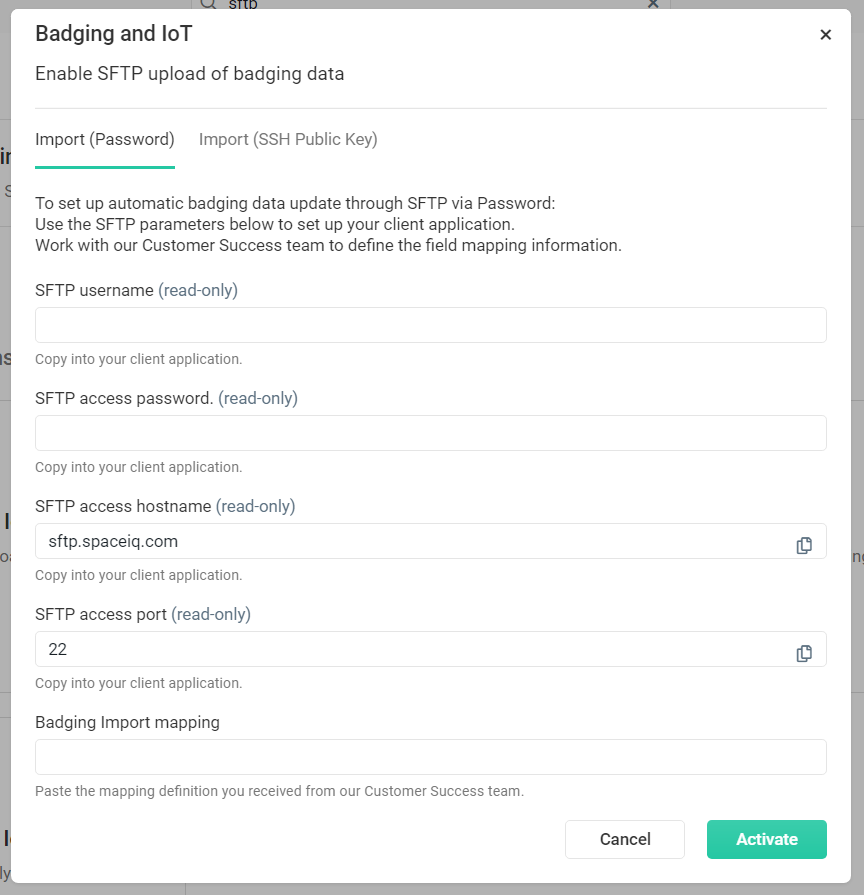
The Badging and IoT dialog displays an Import (Password) tab and an Import (SSH Public Key) tab.
Depending on the authentication method you want to use, select either:
- Import (Password) tab
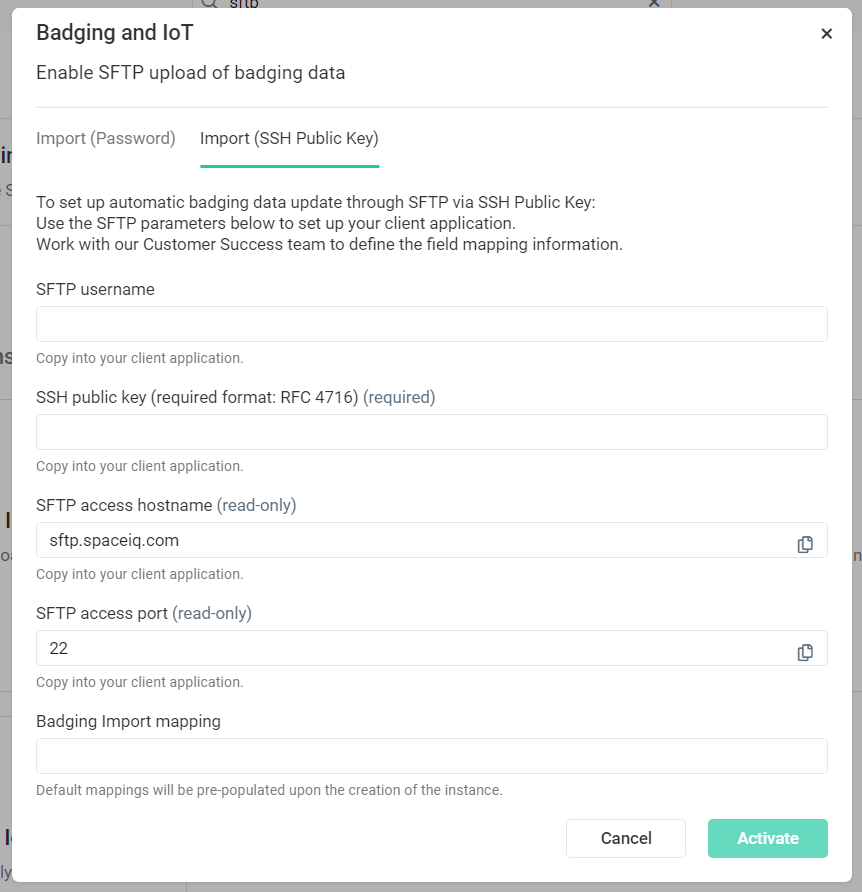
- Import (SSH Public Key) tab
In both cases, SpaceIQ will provide connection details (e.g. hostname, port) that you will use to configure your SFTP client.
SpaceIQ will perform the following actions based on your selection:
- Import (Password) - SpaceIQ will generate a unique username and password for you to use with your SFTP client.
- Import (SSH Public Key) - SpaceIQ will generate a unique username and expect you to supply the SSH Public key you would like to use. You will need to configure your SFTP client with both. Steps to generate Public Key are listed in the section below.
Also, you can customize your mapping if you need to or use the same one that SpaceIQ uses. That completes the setup.
In the Badging Import mapping field, enter the mapping code. For example:
{"badge_info":"badge_info","device_info":"device_info","admitted_at":"admitted_at","status":"status"}
Import (Password) tab
Import (SSH Public Key) tab
Click the Activate button to complete the process.
Generate Public & Private Key
Run the ssh-keygen command in the terminal and answer the questions when prompted. The defaults are acceptable for most use cases.
ssh-keygen -trsa -f ~/.ssh/spaceiq.access.key
The generated keys should now be located in your local directory:
- private key is in the ~/.ssh/spaceiq.access.key file.
- public key is in the ~/.ssh/spaceiq.access.key.pub file.
Next, convert private key to PEM format by using ssh-keygen command:
ssh-keygen -p -m PEM -f ~/.ssh/spaceiq.access.key
Next convert public key to RFC 4716 format and configure SFTP with a public key:
Important Note: Make sure you include the --- BEGIN SSH2 PUBLIC KEY ---- and the ---- END SSH2 PUBLIC KEY ----
ssh-keygen -e -f ~/.ssh/spaceiq.access.key.pub| egrep -v Comment
Example:
  ---- BEGIN SSH2 PUBLIC KEY ----

AAAAB3NzaC1yc2EAAAADAQABAAABAQD22Yep70fGl9dSqX1xf2vJzeDgQL9rL3MiIvB7Kf

N0hG6s3JjiFl0PCrcSWUrGO+2QqAE4MLlbL/YQQcKU9RPphyIk/XIPVaptYPr3uKveniLl

JUaM8dr+KT8cJxaV4QCrCAUiWhXNgku3CacegkVLAQKVCDdaaFSvHTaEBoqFSDz7rjxCp+

NT7R+EyW1FEZFiLGJIyGpY5/pFbaB8GKVBfstNVv1bkhQenc/eb1GCXF7Na9koTYnu33yG

D+f0IjUCjnIpKbyOkzo3yTXAWPNNKpr4BlyTV4bN38r5PnNfyH6ttwma6iBRfz/MSOITgS

D0hGgzTPTQJawpRYBp3dmL

---- END SSH2 PUBLIC KEY ----
Reports
The building-level data will populate the following Badging Insights reports: