Okta Custom Attribute Mapping
Customer IT / SpaceIQ Onboarding Team
Okta's SpaceIQ application has been enhanced to support user-defined custom attributes, which enables Okta to import more than 20 attributes to SpaceIQ . These attributes must be created and mapped manually.
This article describes how to complete the custom attribute mapping for SpaceIQ.
This article is written against the Classic UI and for more information on custom attributes, see the official documentation from Okta - Add custom attributes to an Okta user profile.
Contents
Prerequisites
You must have Okta administrator permissions in order to perform this custom attribute mapping.
The Okta Integration needs to be completed first, and the article Employee Attribute Mapping contains details of the variables.
Mapping Activities
Step 1. Define Attribute
From Okta, complete the following:
- From the menu, click Applications. The Admin Dashboard (Classic UI) displays.
- Click on your SiQ Application.

- Click the Provisioning tab.
- In the left menu, make sure the To App is selected.
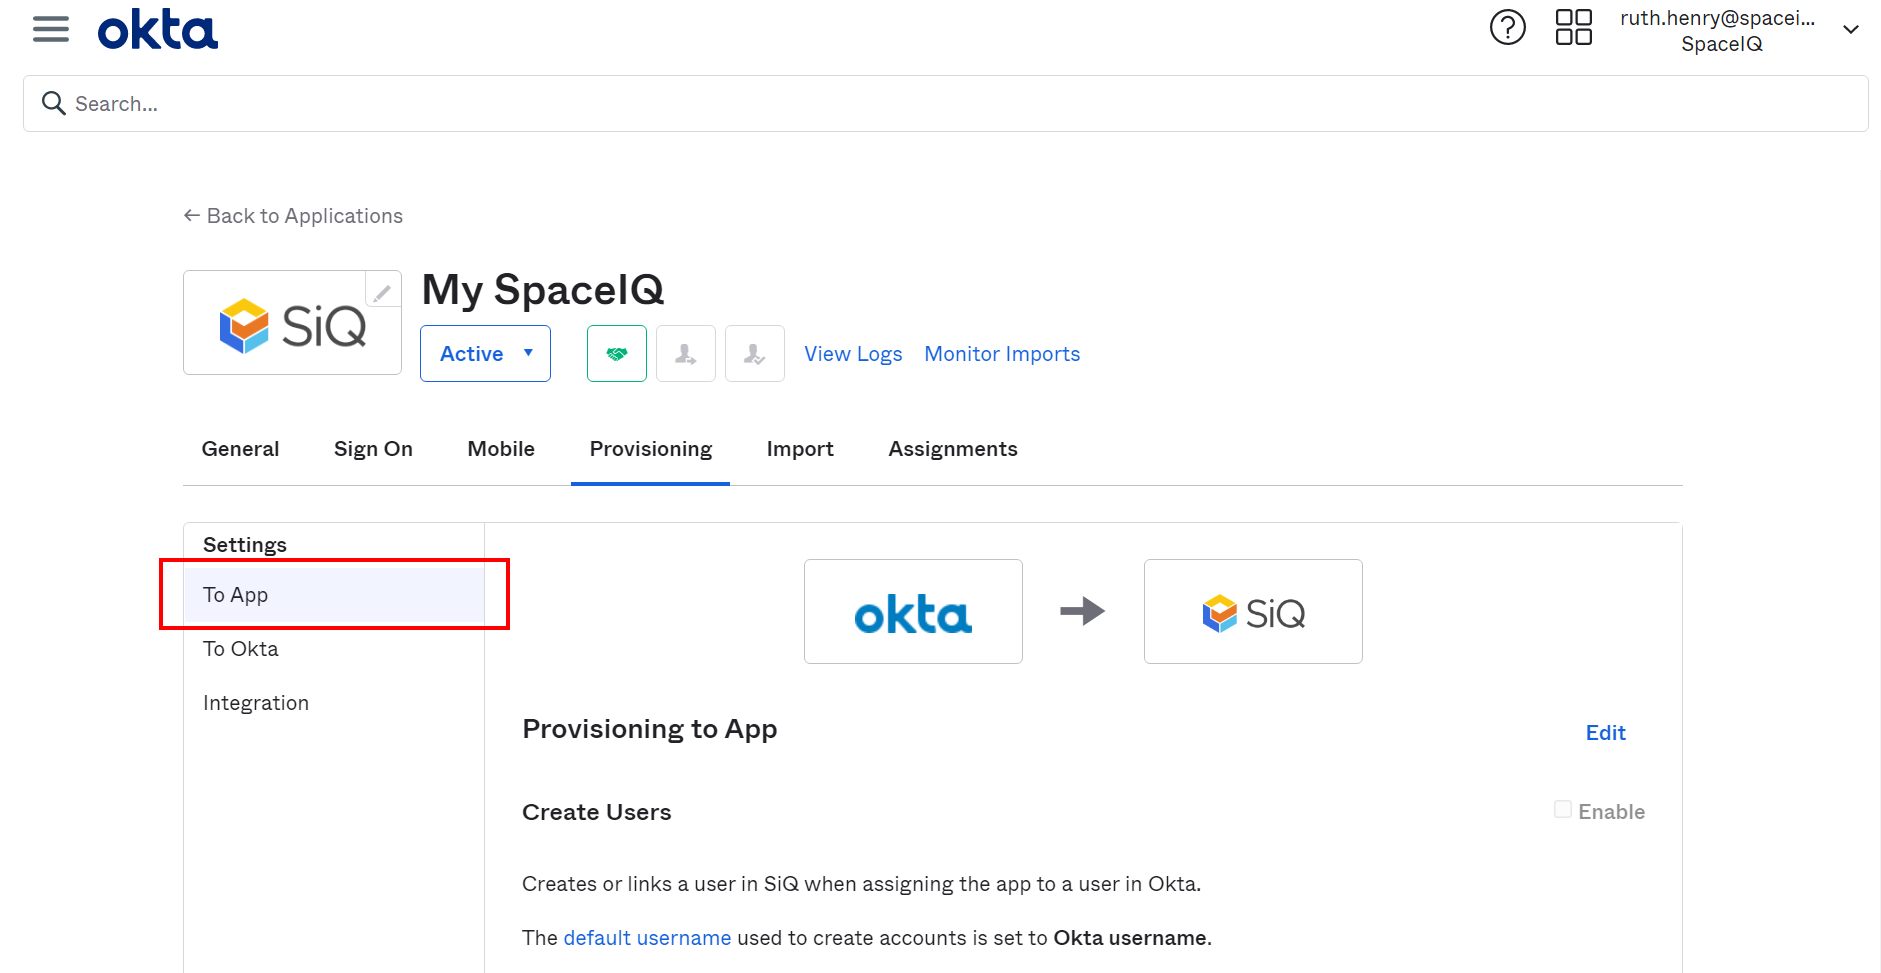
- Scroll down to the <SiQ app name> Attribute Mappings area.
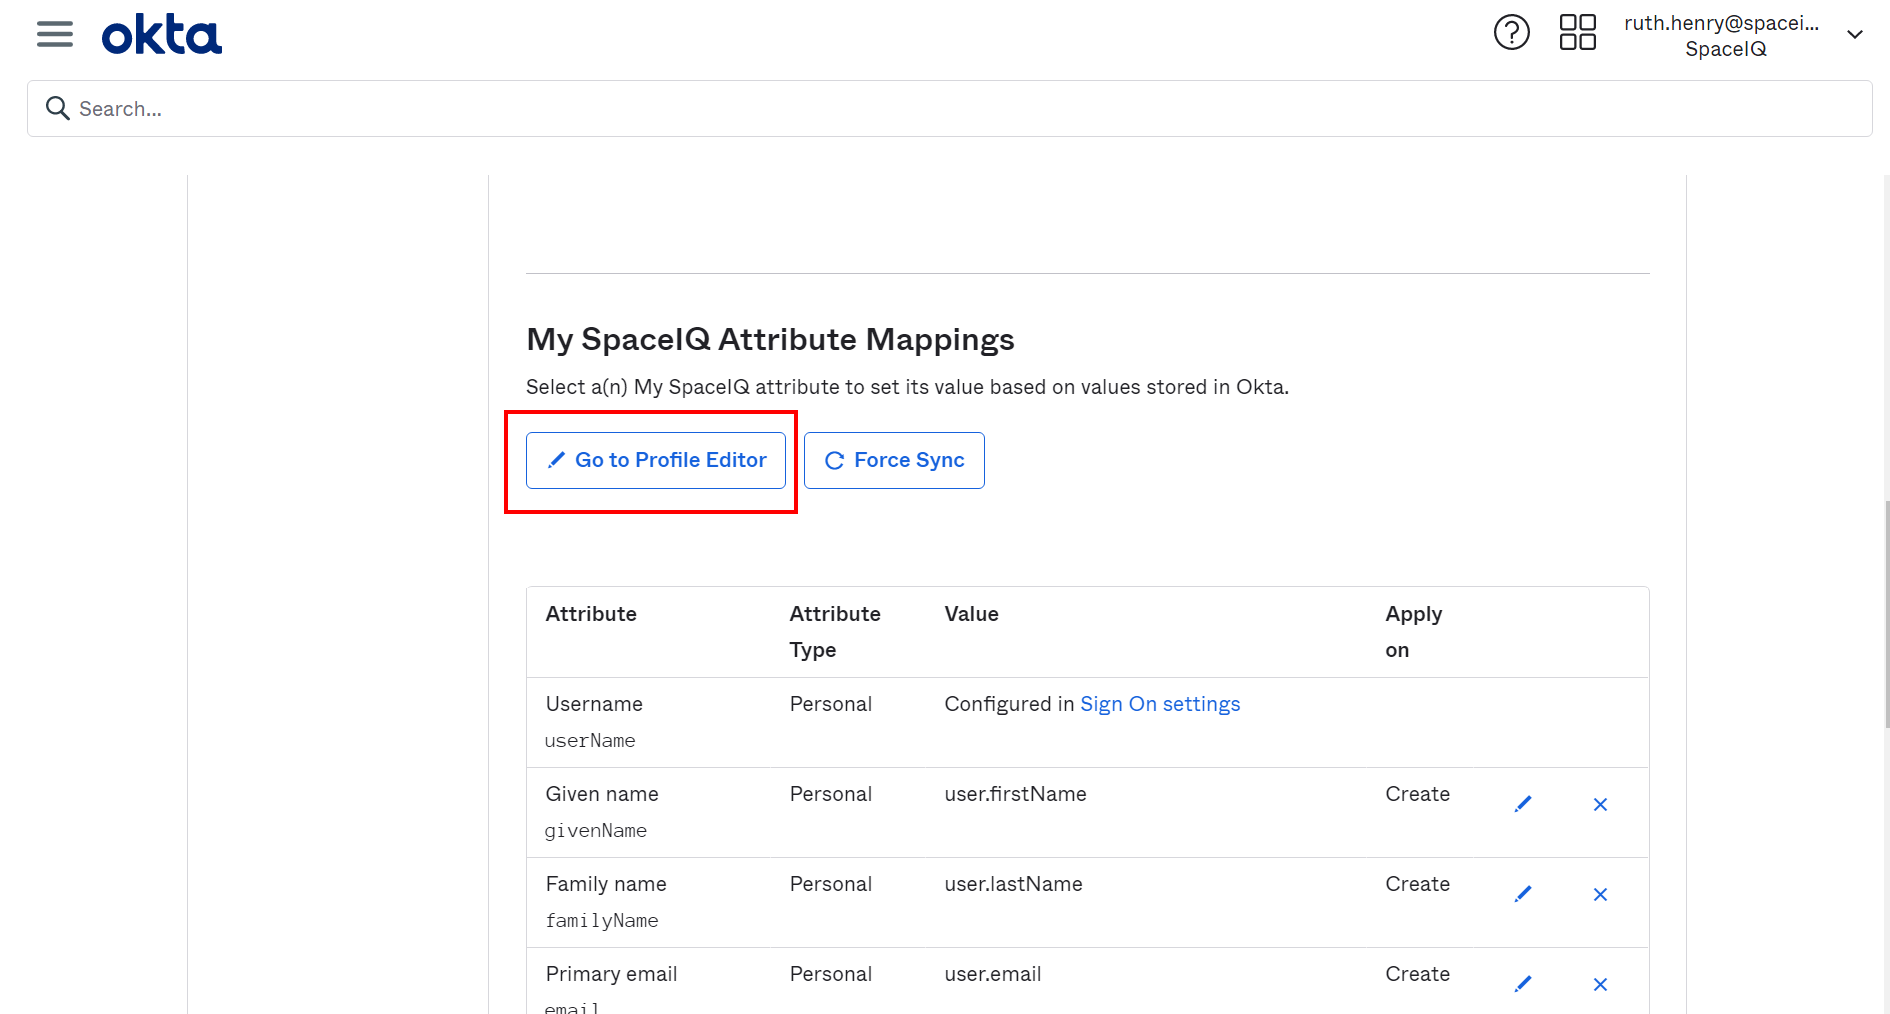
- Click the Go to Profile Editor button. The Profile Editor displays.
- Click the + Add Attribute button. The Add Attribute dialog displays.
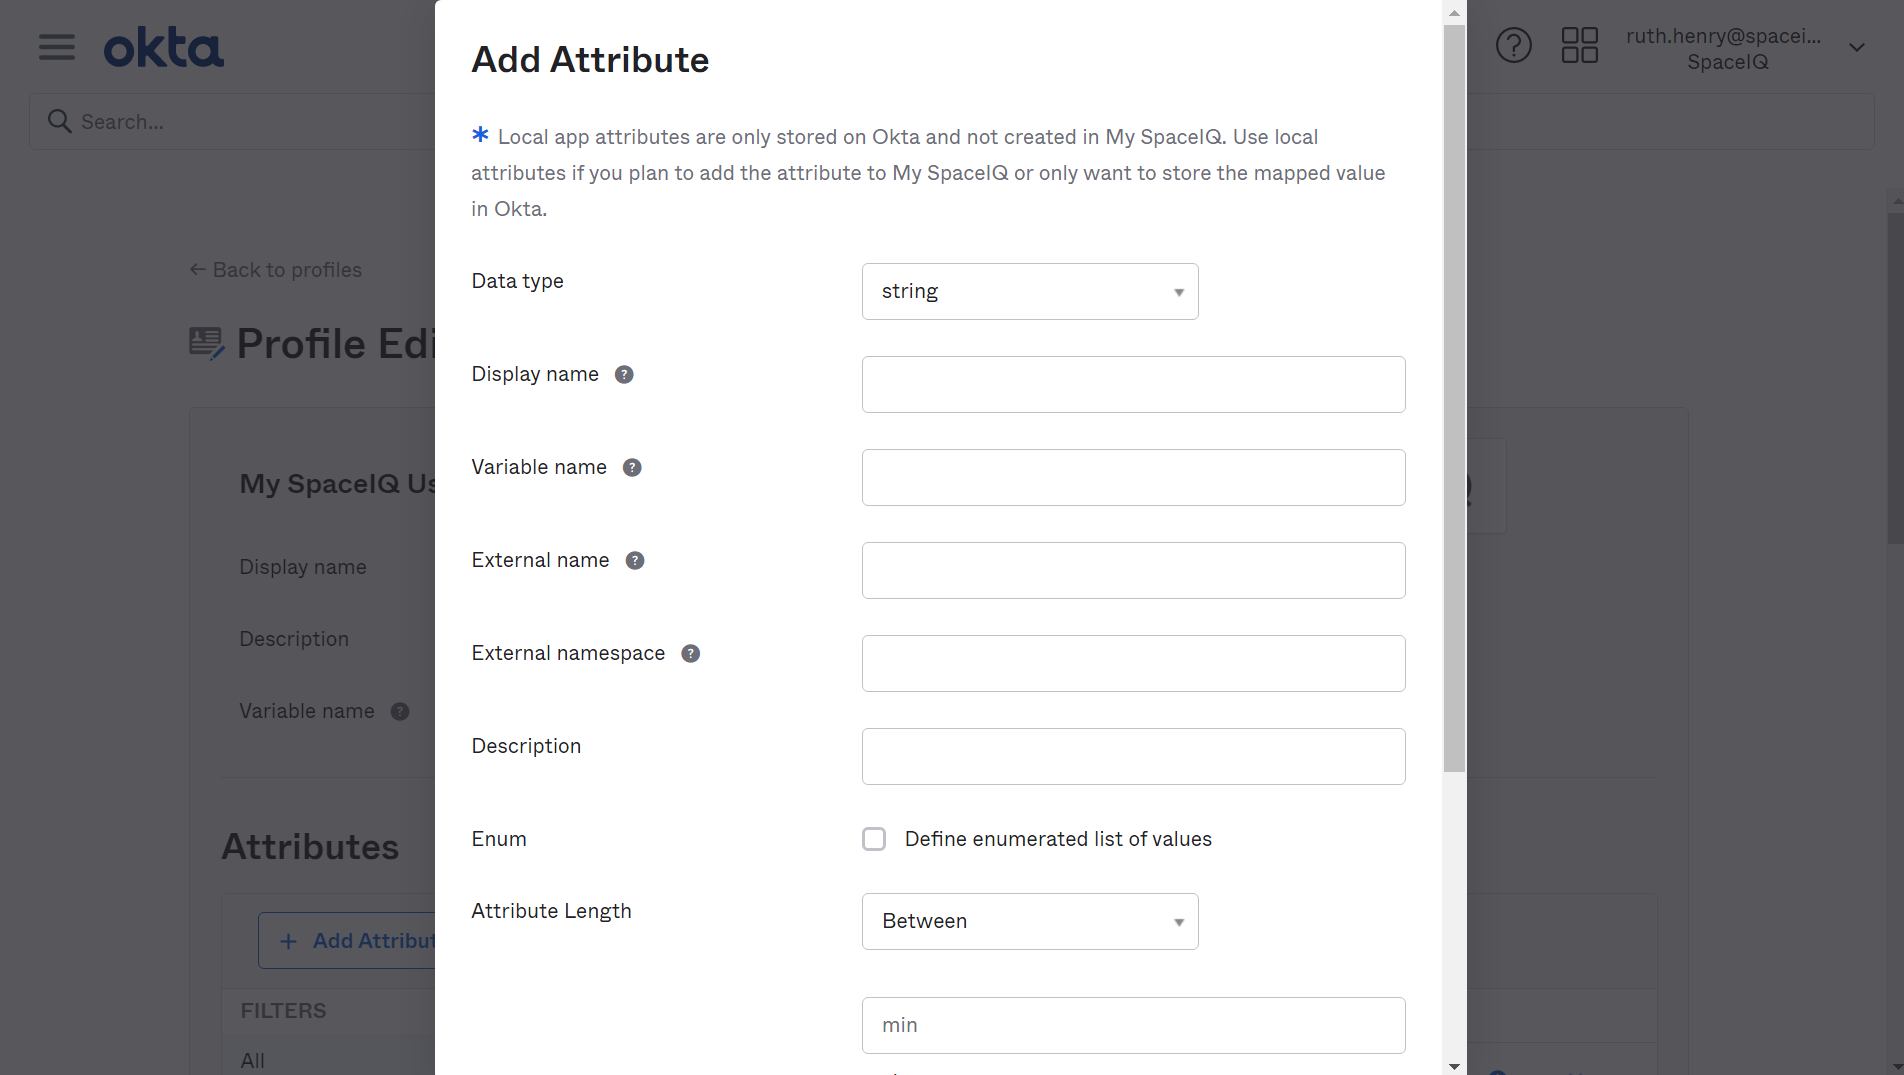
- Complete the following:
- From the Data type drop-down, select string.
- In the Display name field, enter a readable label for your attribute. For example, Badge Number, Title, etc.
- In the External name field enter the name of the attribute in the IdP assertion or Profile API such as SAML attribute name. Separate words with an underscore rather than spaces. For example starte_date, badge_number, etc.
- In the External namespace field, enter urn:ietf:params:scim:schemas:extension:enterprise:2.0:User.
- In the Description field, enter the purpose and function of the attribute field.
- For the Enum check box, leave this unchecked.
- Optional - Set the attribute lengths and the attribute required check box.
- Check the User personal check box.
- Click the Save button.
Step 2. Map Attribute
With the attribute defined, you can now map the attribute.
From the Profile Editor, complete the following:
- Click on the Mappings button. The <SiQ app name> Profile Mappings.
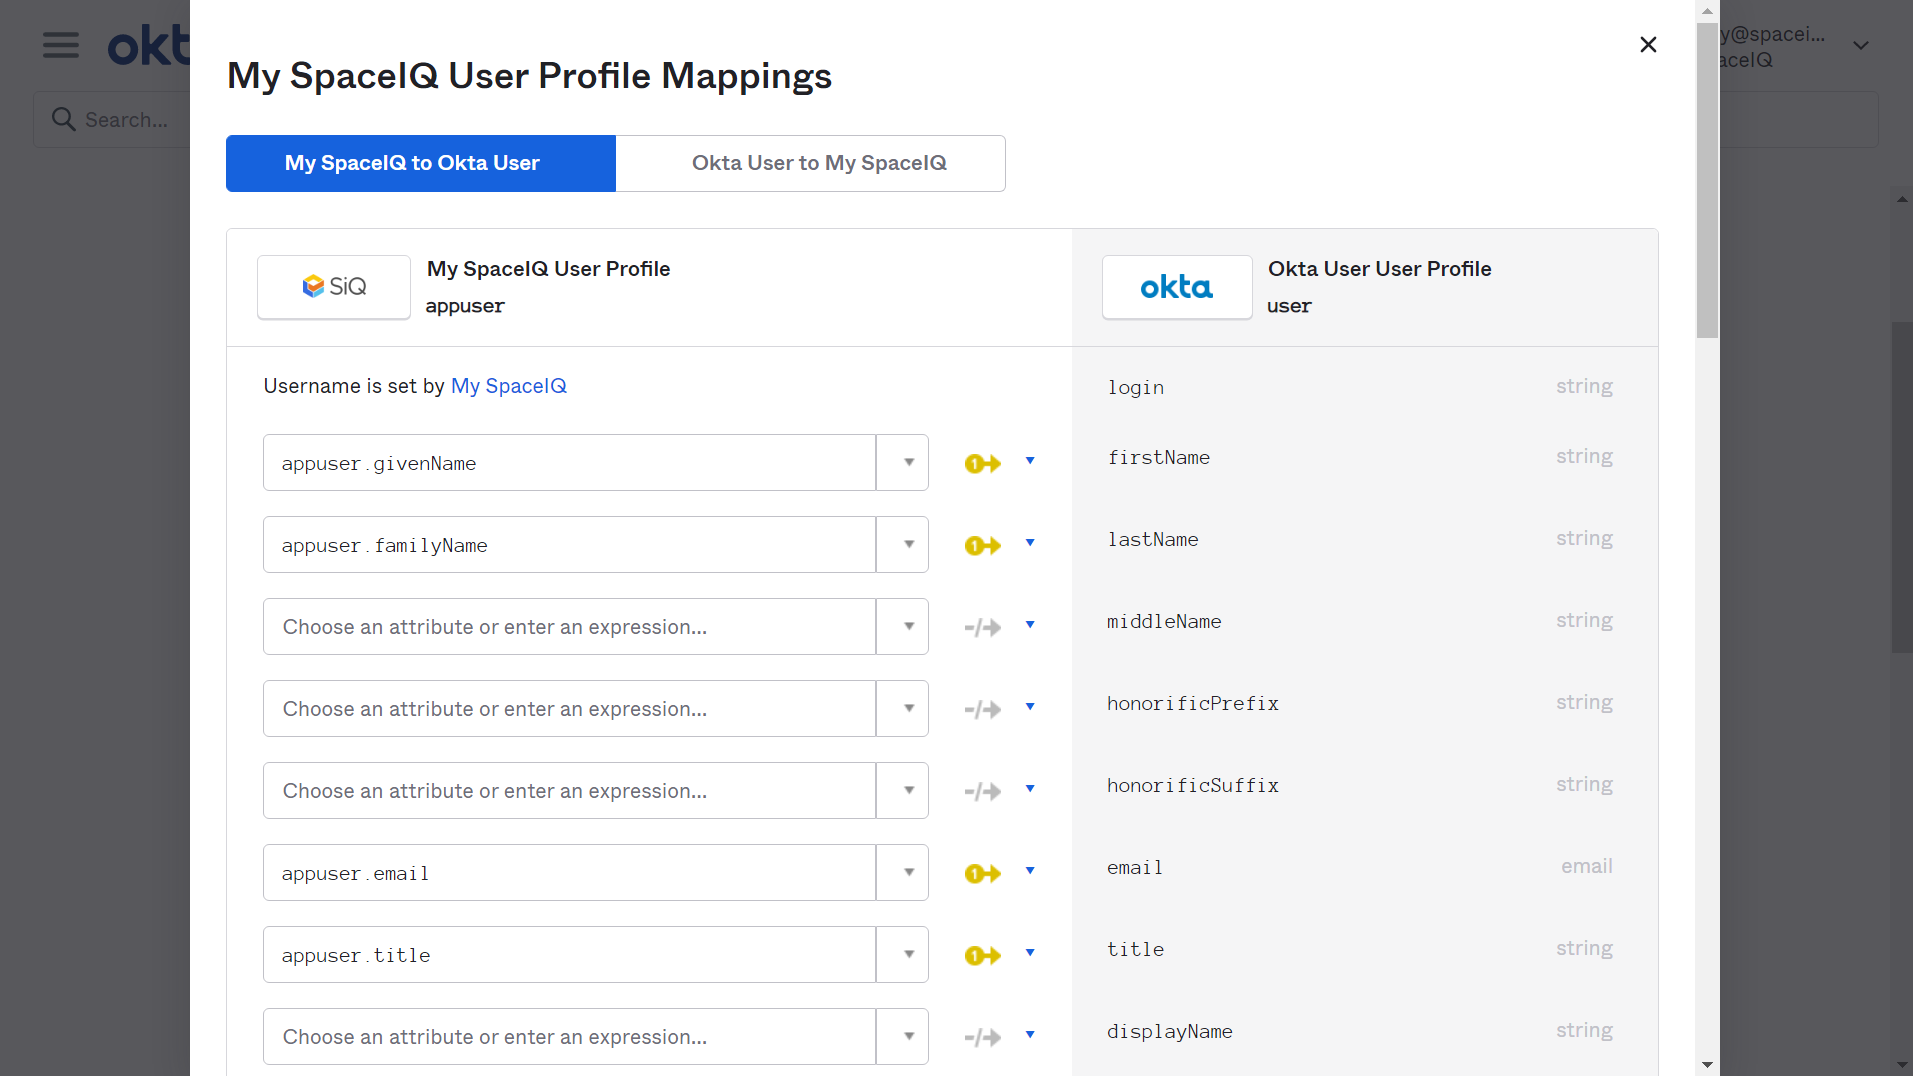
- Make sure the <SiQ app name> to Okta User tab is selected.
You will see the <SiQ app name> attributes on the left and the Okta attributes on the right.
- Scroll down until you find a newly added attribute with the entry Choose an attribute or enter an expression in the drop-down.
- From the entry, Choose an attribute or enter an expression drop-down; either select from the list or enter an expression.
- Click the <SiQ app name> tab.
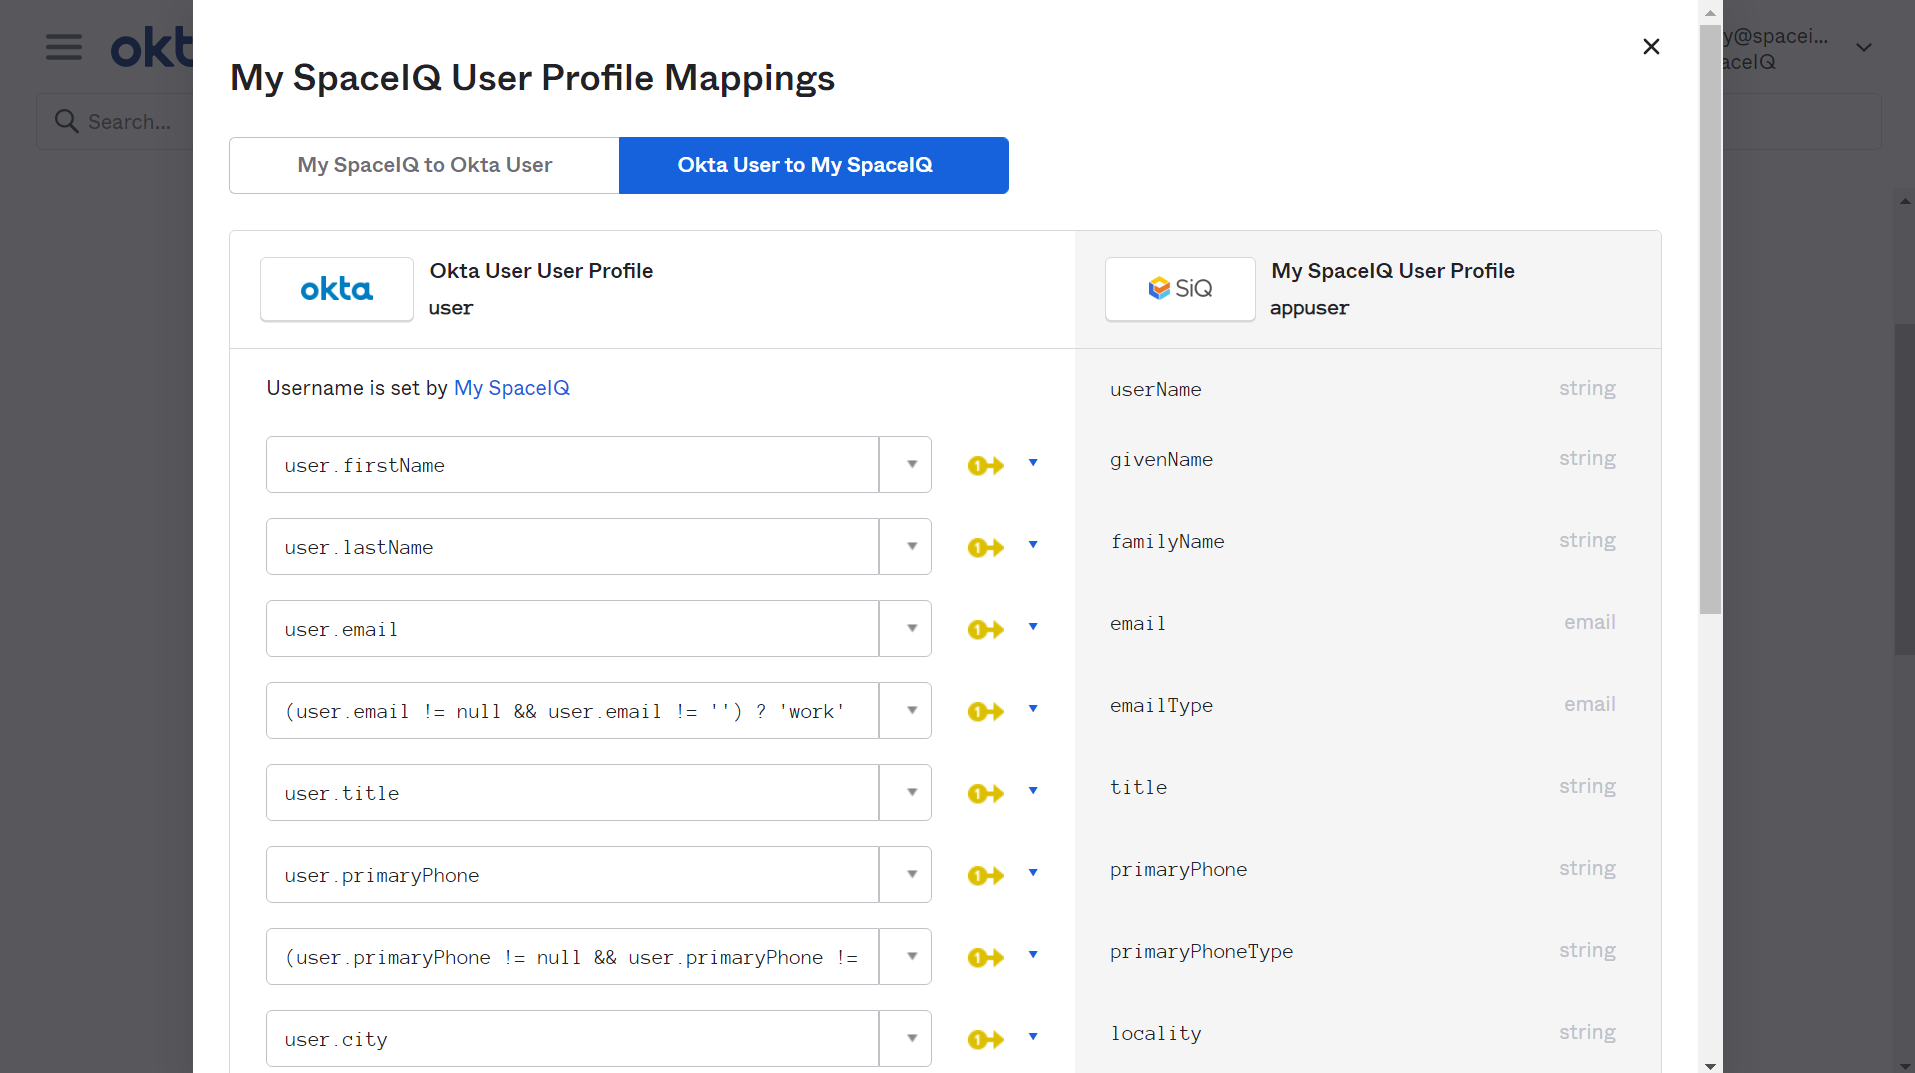
- Repeat steps 3 to 4.
- Optional - If you want to see the mappings for an Okta User, then in the Preview field, enter the Okta User Name.
Click the x to clear the user name.
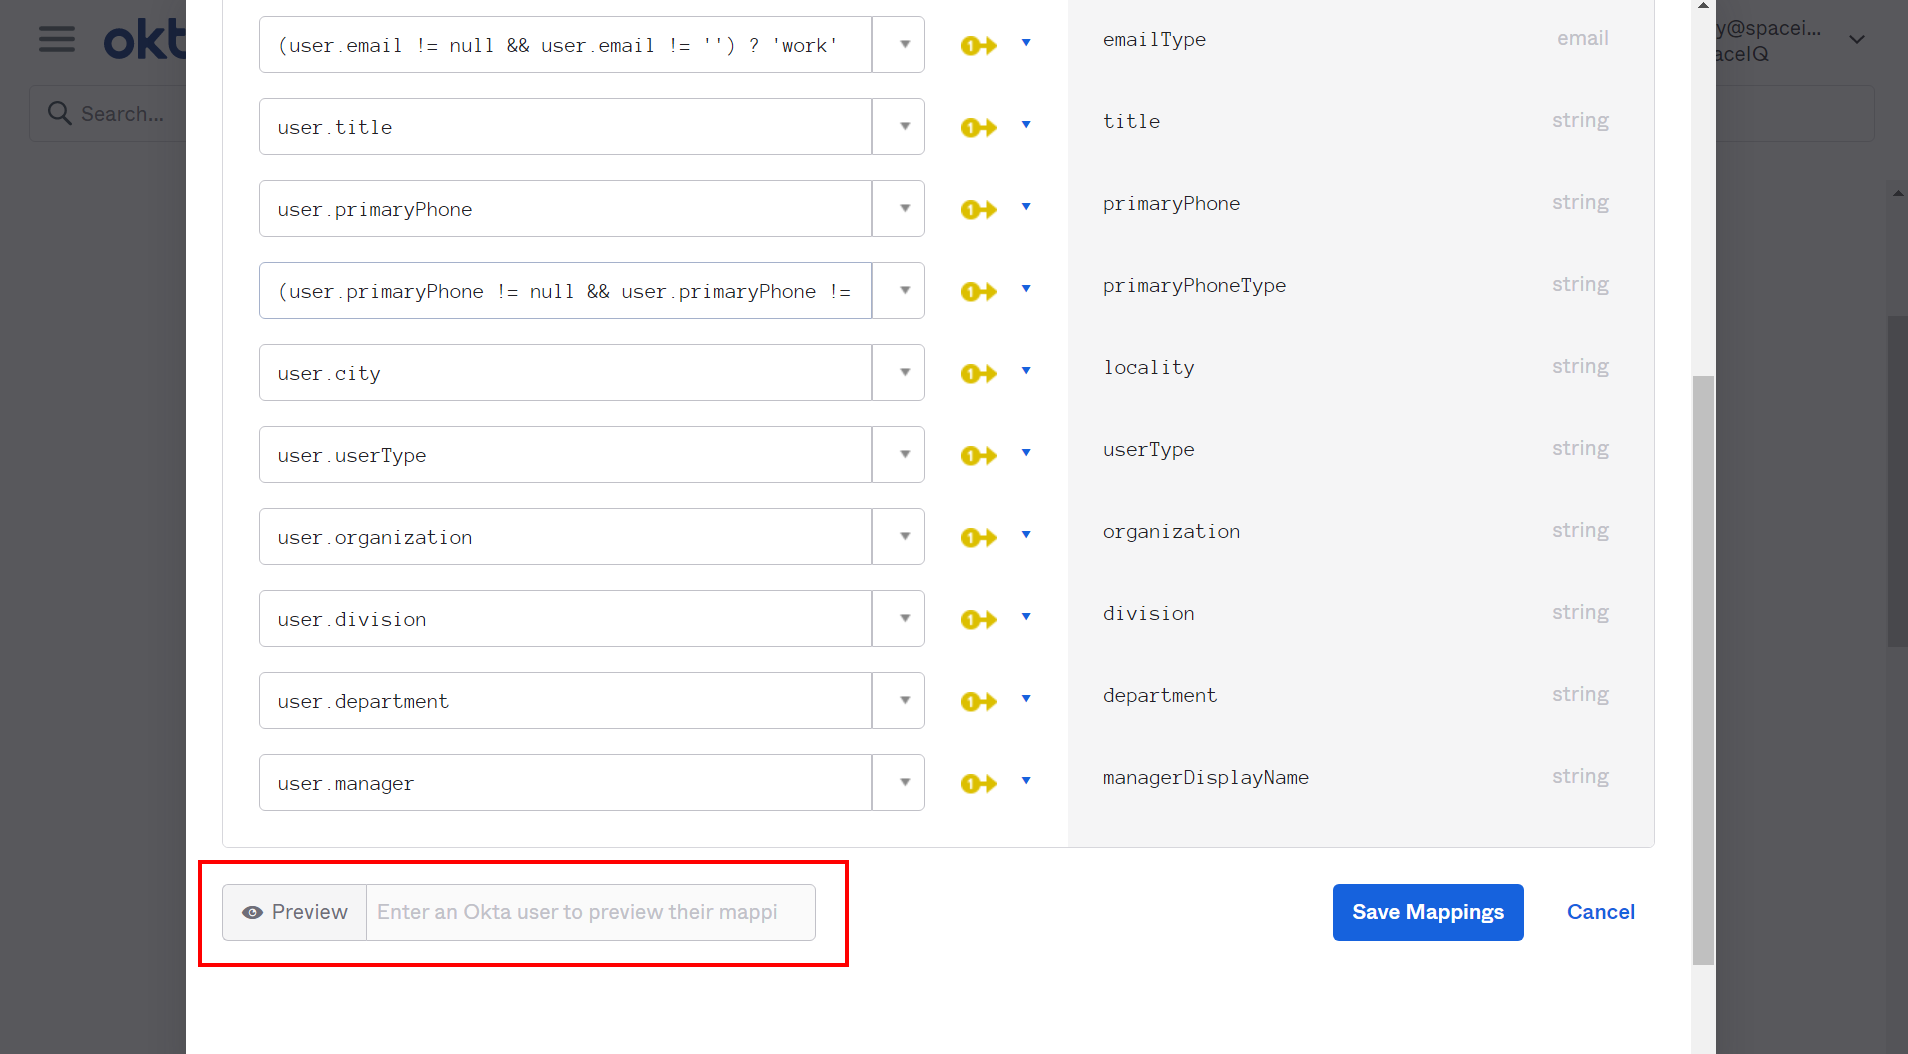
- When you have finished the mappings, click the Save Mappings button.
- Click Back to profiles.
Step 3. Apply Mapped Attributes
When attributes are defined and mapped you will need to take one additional step to force an immediate synchronization.
- From the menu, click Applications > Applications. The Admin Dashboard displays.
- Click on your SiQ Application.
- Click the Provisioning tab.
- In the left menu, make sure the To App is selected.
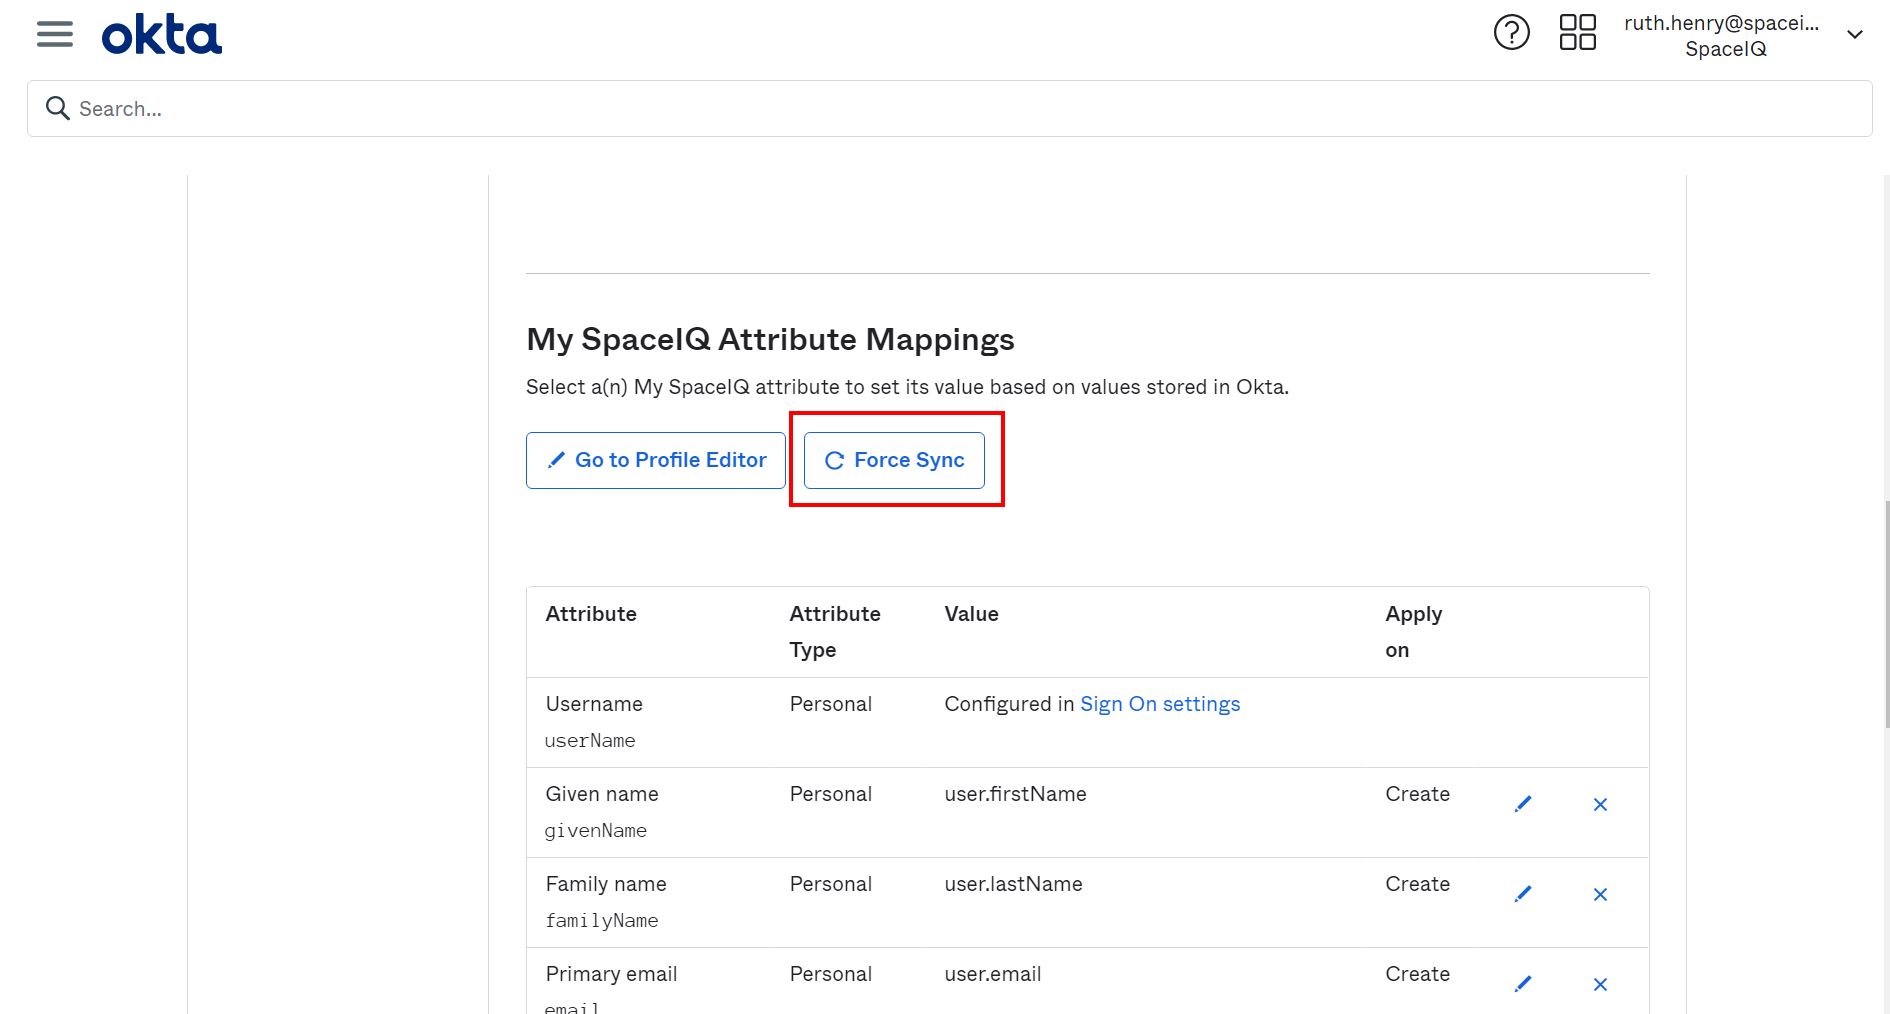
- Scroll down to the <SiQ app name> Attribute Mappings area.
- Click the Force Sync button to update all users.
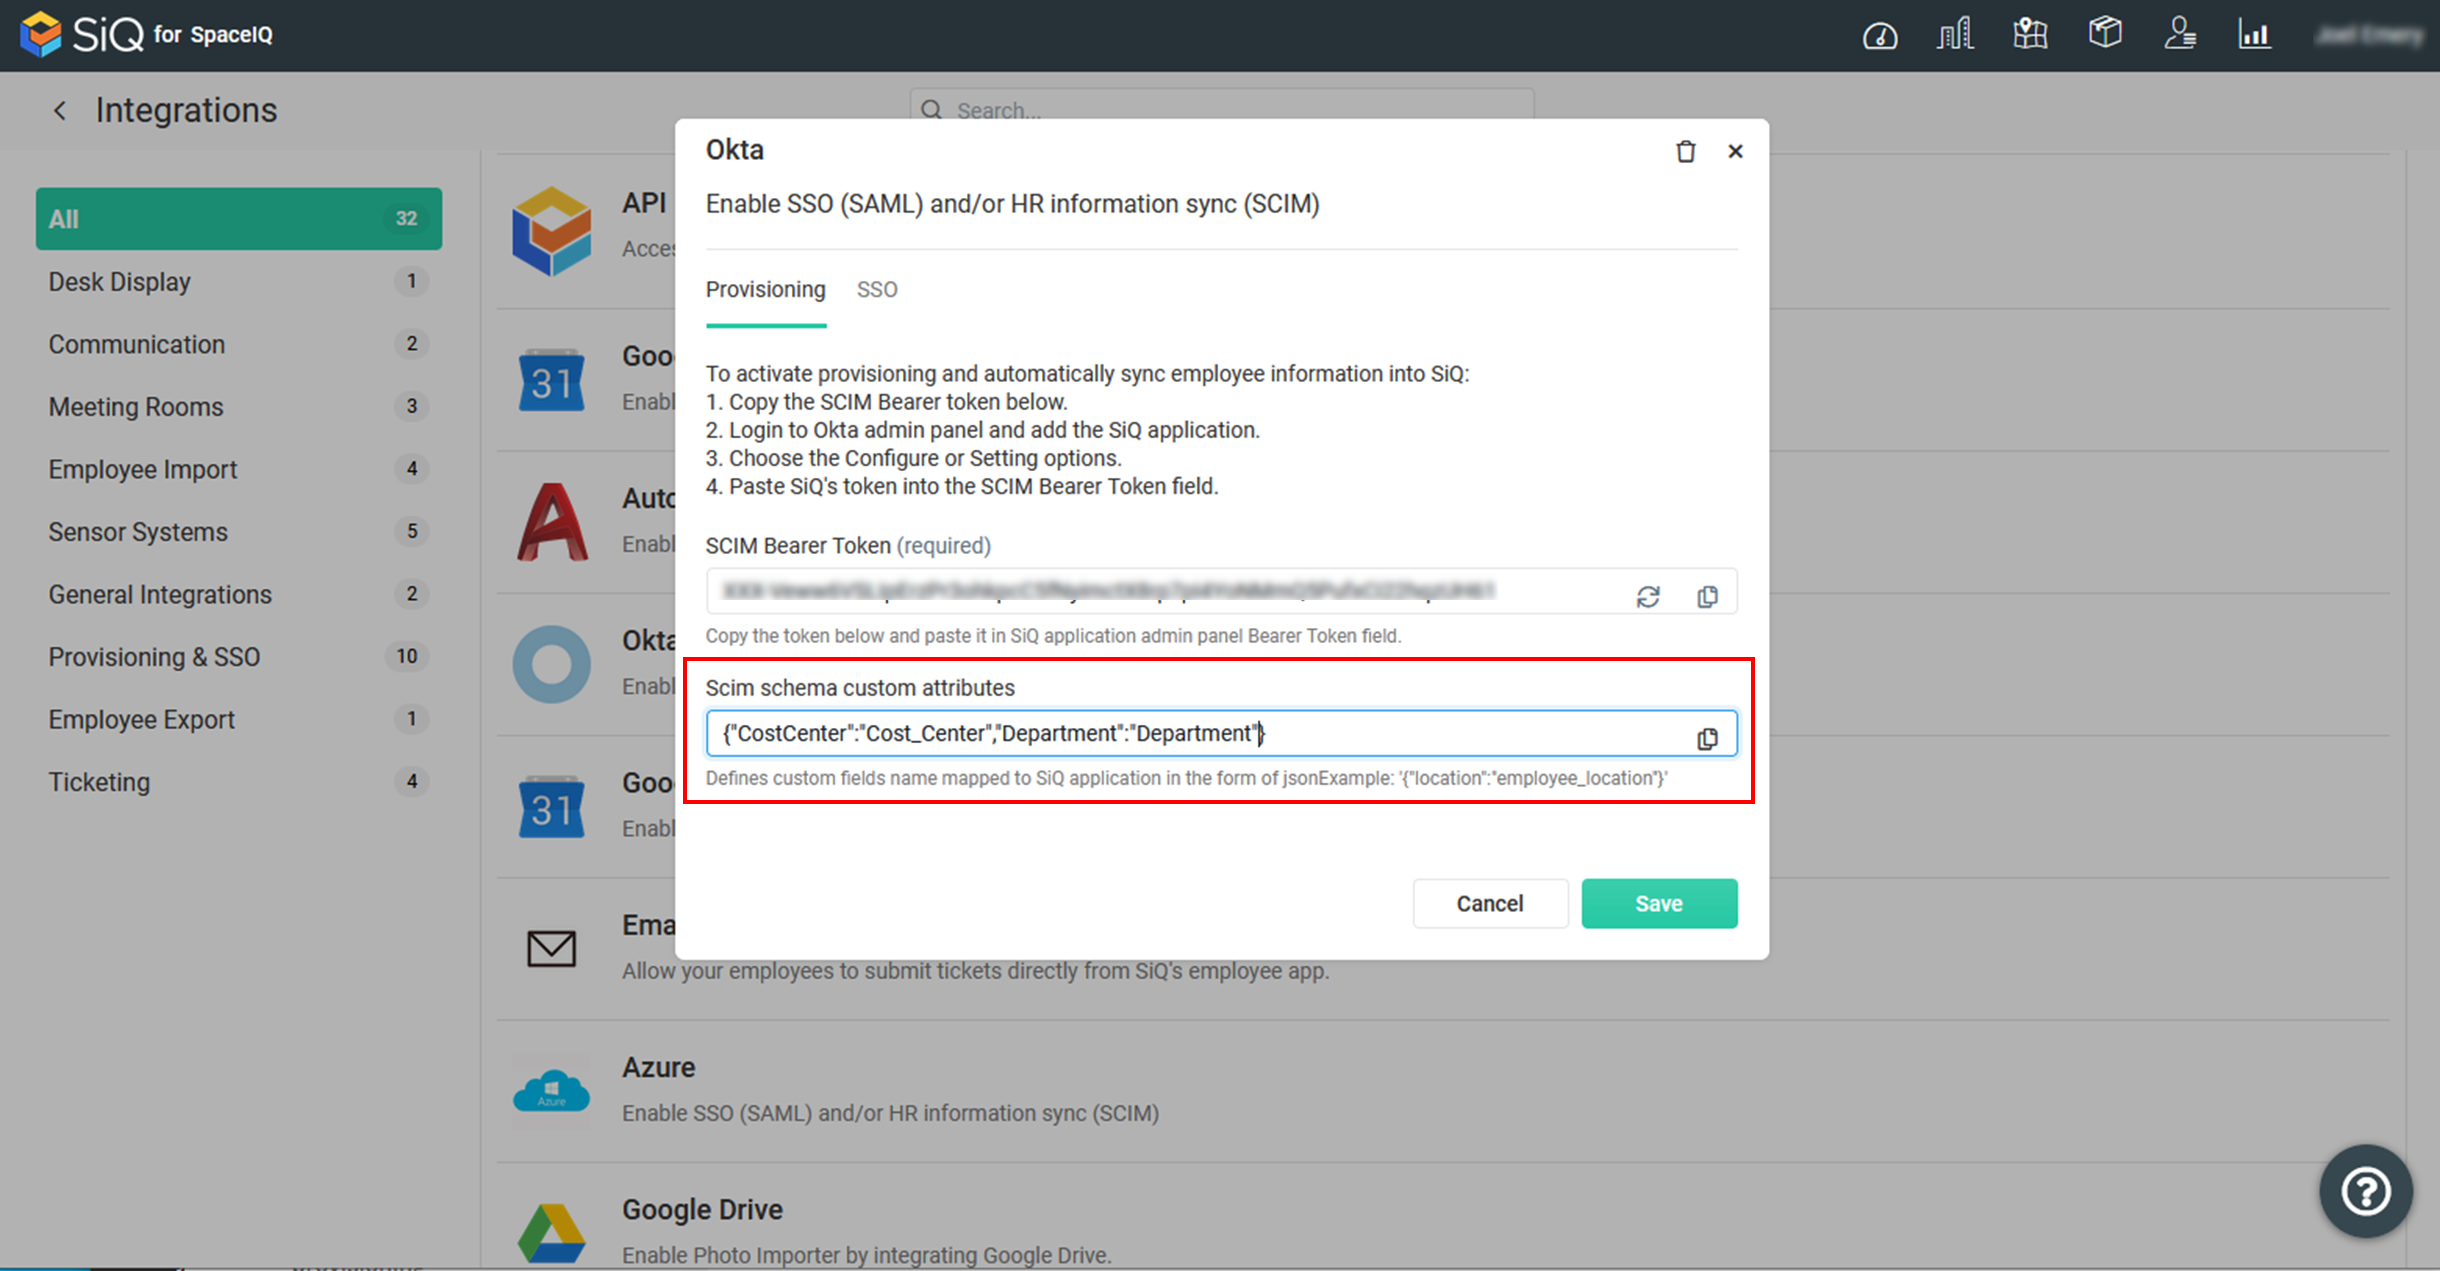
Step 4. Define the Custom Fields in SpaceIQ
Then define the Custom Field Name mappings in the SpaceIQ app. In the SCIM schema custom attributes field, enter the mapping code. For example:
| {"CostCenter*.*Cost_Center","Department*.*Department"} |
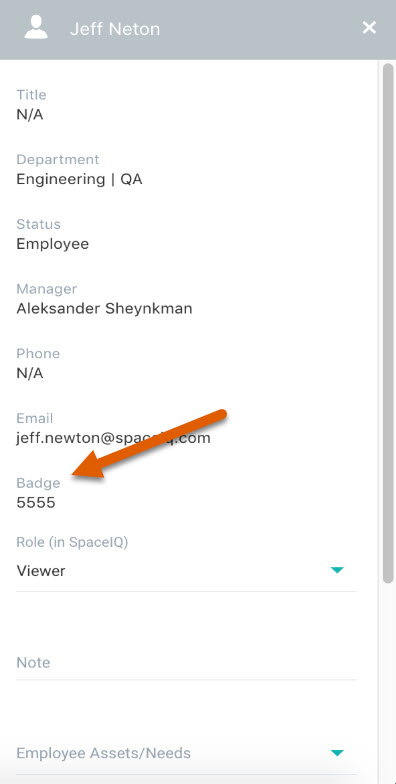
SpaceIQ Data Drawer Example
When an attribute is mapped, it will display in SpaceIQ Floor Map's Data Drawer, for example: