Update the Employee's User Role
By default, every new employee added to the system is assigned the Viewer role; this is the role with the fewest permissions in SpaceIQ. If needed, you can update the employee's role, and details of the roles can be found in:
The employee's user role can be updated via:
- Manage Employees - you can update seated or unseated employee(s)
- Floor Map - you can only update a seated employee(s)
Update the Employee's User Role via Manage Employees
You can update an employee's user role who is seated or unseated.
Single Employee
- From the menu, click the Manage
 icon. By default the Manage Employee screen displays.
 - Search for the employee's name.
-
Click on an employee's name. The employee details dialog displays.
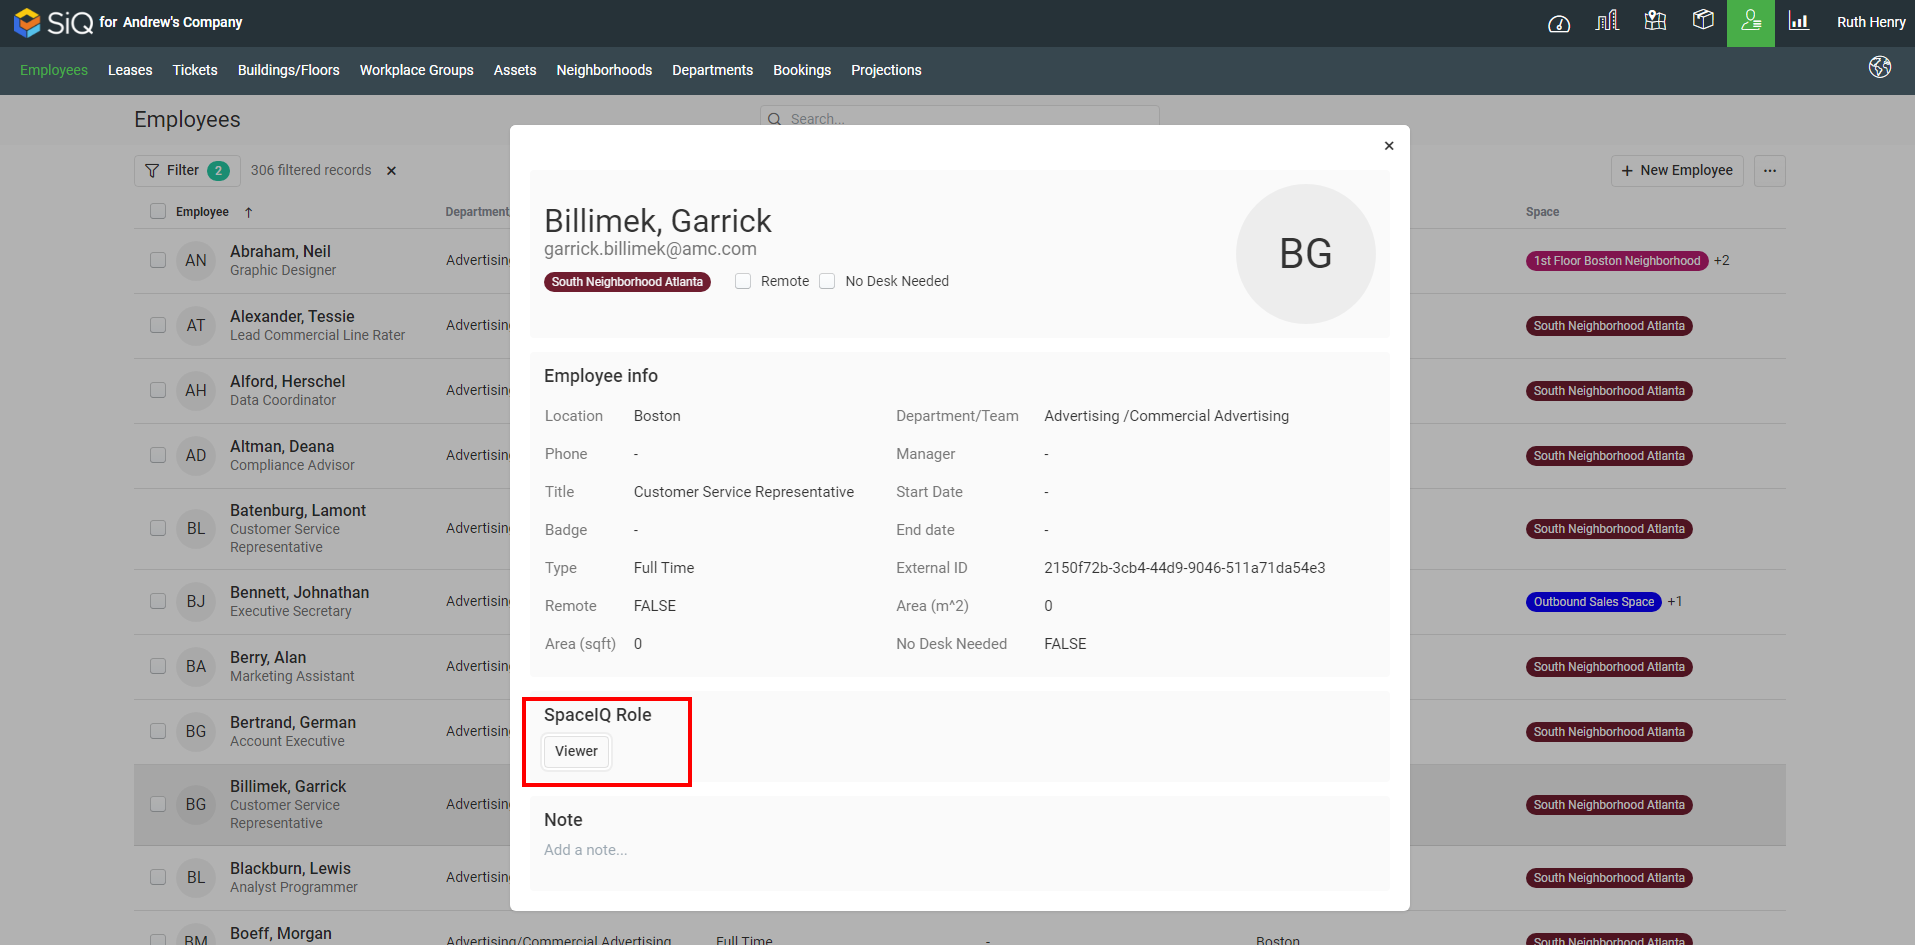
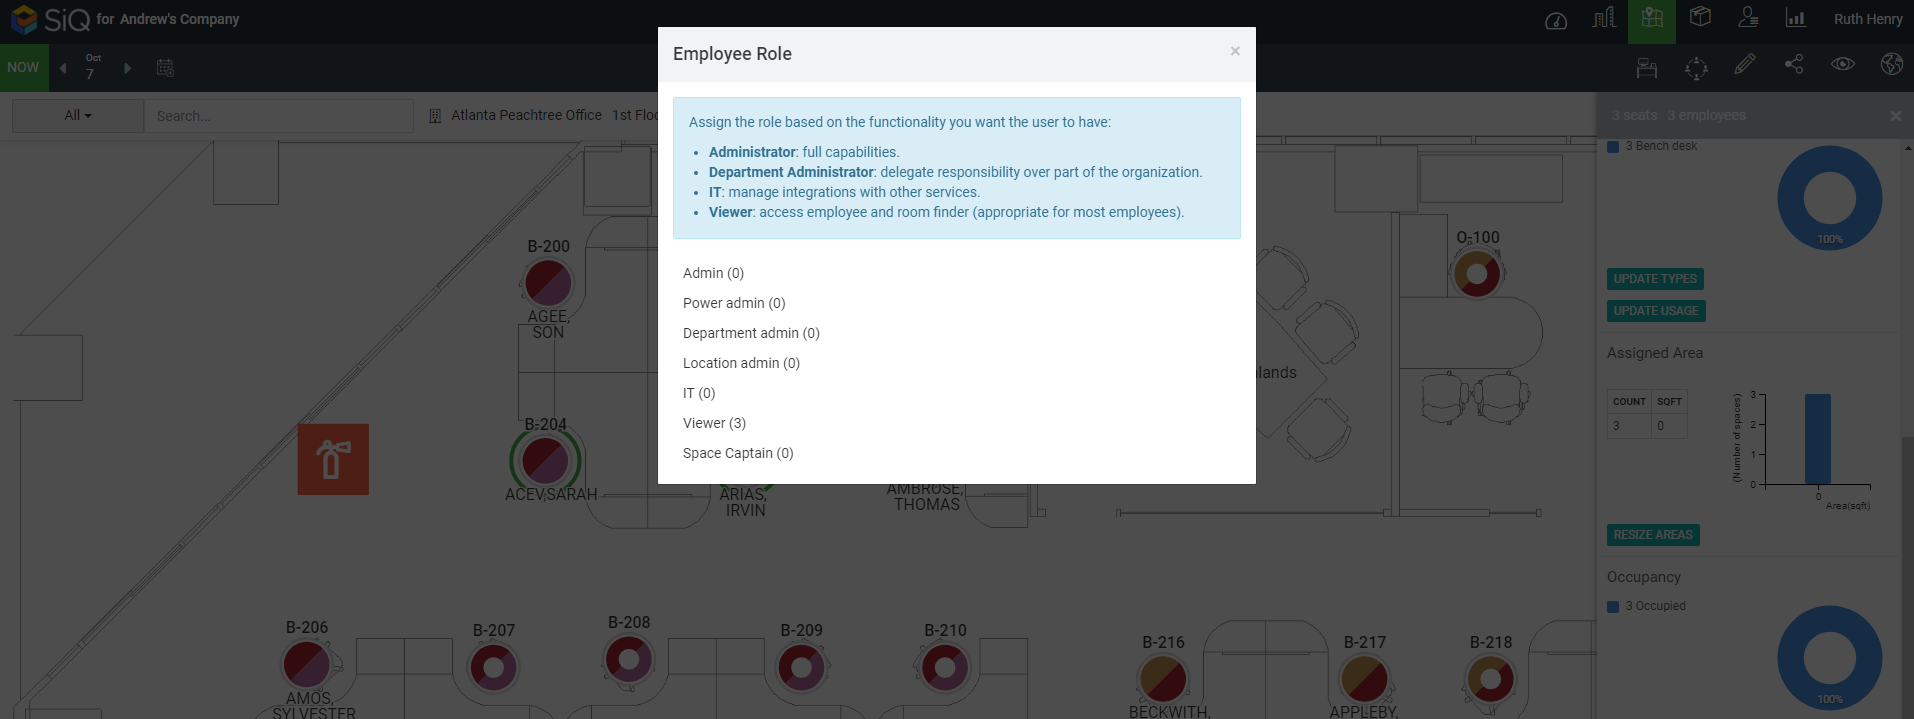
- In the SpaceIQ Role section, click the role drop-down and select either:
- Admin
- Booking Manager - if you select this role you can select them to manage all departments and employees OR you can specify department(s) and/or employee(s).
- Department Admin - if you select this role you will need to specify a department(s).
- Location Admin - if you select this role you will need to specify a location(s).
- IT
- Viewer
- Power Admin
- Space Captain - if you select this role you will need to specify a location(s) and/or department(s).
In this example, the employee is updated to be a Space Captain.
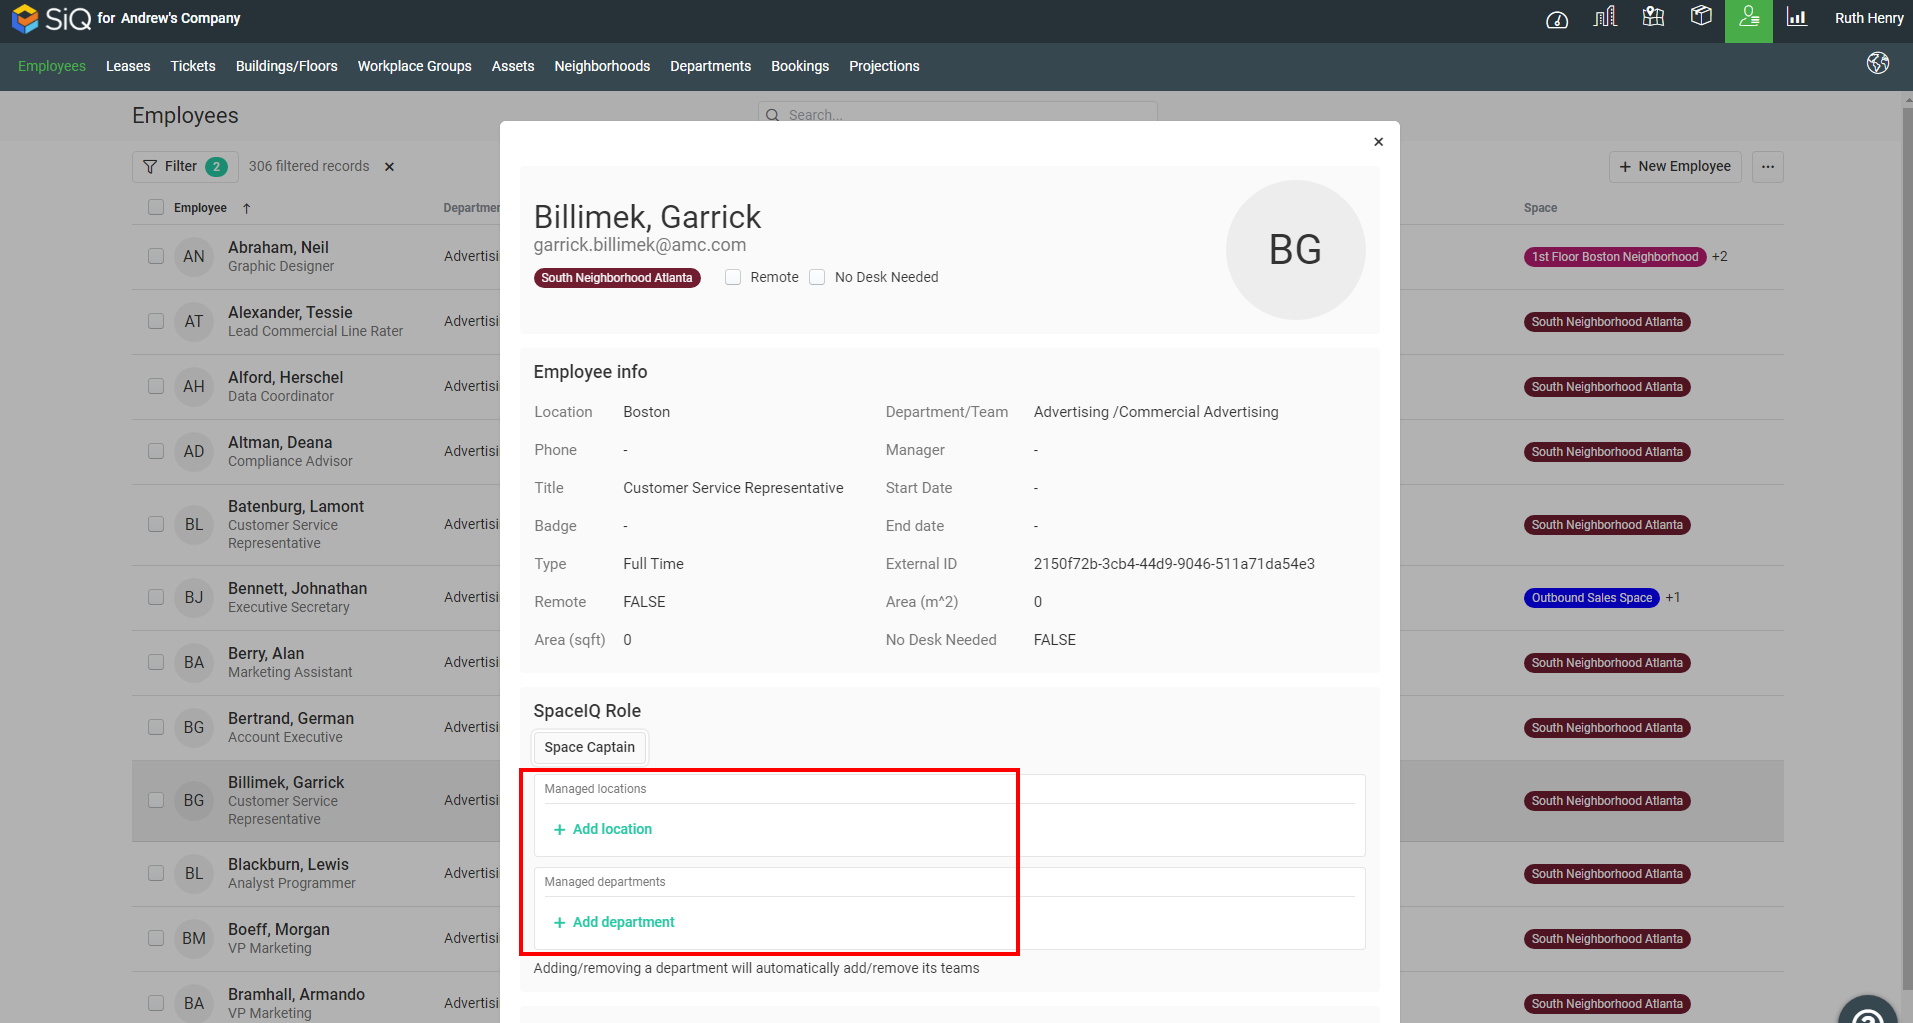
- From the Managed locations area, click the + Add location.
- Either search or browse for the building and floor.
- Select the building and floor. The location will be displayed in the list.
- From the Managed departments area, click the + Add department.
- Either search or browse for the department.
- Select the department. The department(s) are displayed in the list.
The Booking Manager will have different fields to fill out related to their role. The screen will allow users to select which Managed Departments and Employees.
You can add multiple locations and departments, and if needed, you can click the X to remove a location or department.
The employee details are automatically updated.
Multiple Employees
- From the menu, click the Manage icon. By default the Manage Employee screen displays.
- From the Filter icon, select the filters to find the employees.
- For the employees you want to update, click the selection icons.
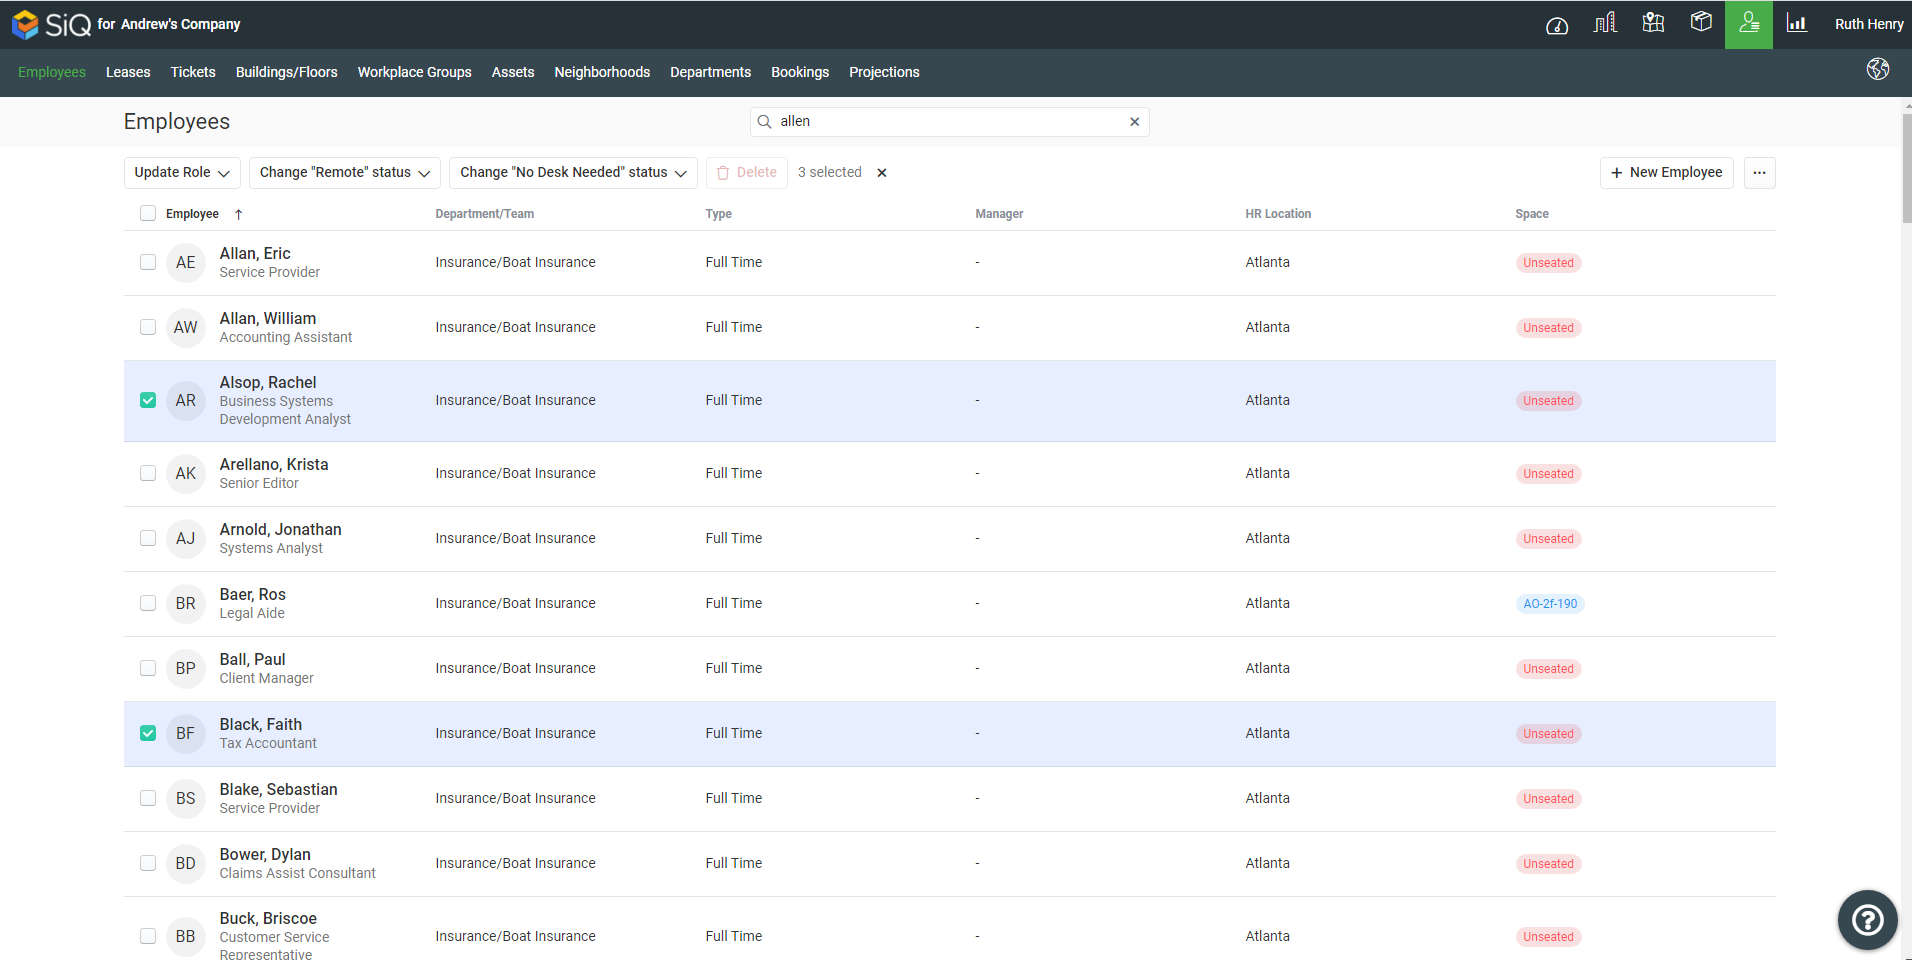
- In the SpaceIQ Role section, click the role drop-down and select either:
- Admin
- Booking Manager
- Department Admin - if you select this role, you must specify a department(s).
- Location Admin - if you select this role, you must specify a location(s).
- IT
- Viewer
- Power Admin
- Space Captain - if you select this role, you must specify a location(s) and/or department(s).
The employee details are automatically updated.
Update the Employee's User Role via Floor Map
You can only update an employee's user role who is seated.
Single Employee
- From the menu, click the Floor Map
 icon.
icon. - Find and select the building and floor, where the employee is seated.
- Click the employee's seat. The data drawer displays.
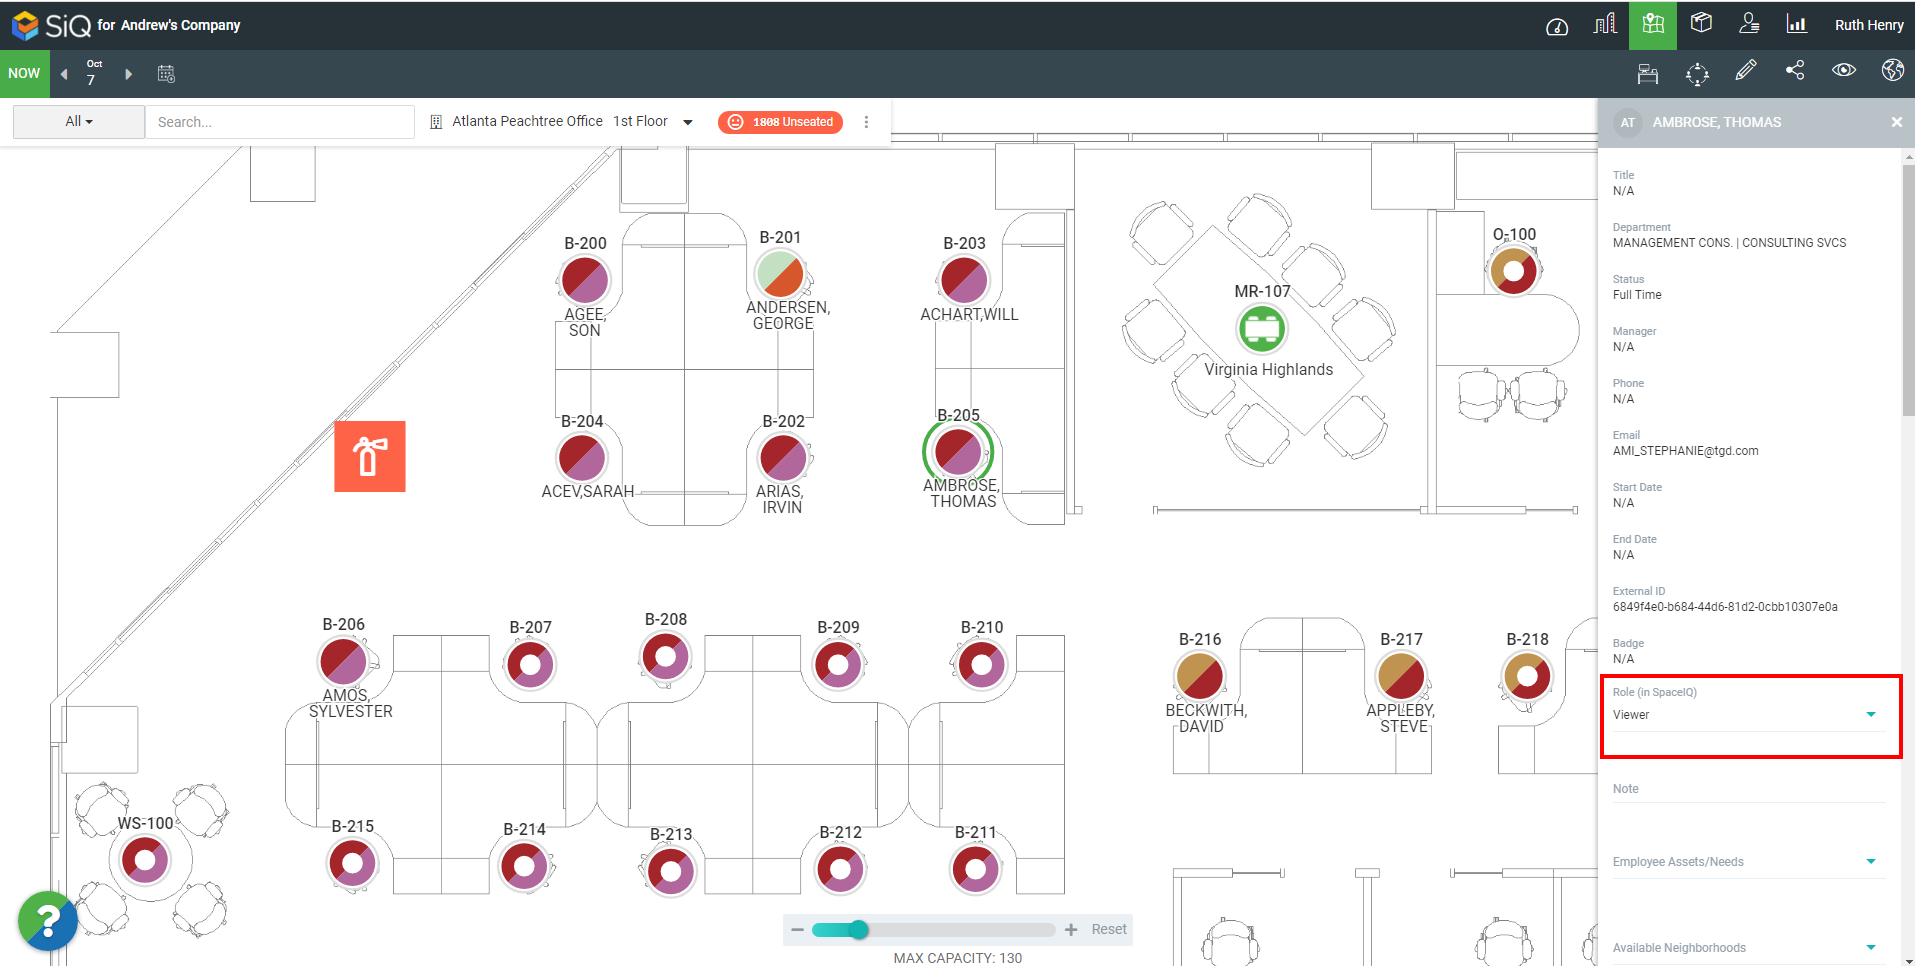
- From the Role (in SpaceIQ) drop-down, select either:
- Admin
- Booking Manager
- Department Admin - if you select this role, you must specify a department(s); refer to the Update the Employee's User Role via Manage Employees section above.
- Location Admin - if you select this role, you must specify a location(s); refer to the Update the Employee's User Role via Manage Employees section above.
- IT
- Viewer
- Power Admin
- Space Captain - if you select this role, you must specify a location(s) and/or department(s); refer to the Update the Employee's User Role via Manage Employees section above.
The employee details are automatically updated.
Multiple Employees
- From the menu, click the Floor Map
 icon.
icon. - Find and select the building and floor, where the employee is seated.
- Select multiple spaces by holding the Shift key down while you click-and-drag over spaces. The data drawer displays.

- Click the UPDATE ROLE button.
- From the Role (in SpaceIQ) drop-down, select either:
- Admin
- Booking Manager
- Department Admin - if you select this role, you must specify a department(s); refer to the Update the Employee's User Role via the Manage Employees section above.
- Location Admin - if you select this role you will need to specify a location(s), refer to the Update the Employee's User Role via the Manage Employees section above.
- IT
- Viewer
- Power Admin
- Space Captain - if you select this role, you must specify a location(s) and/or department(s); refer to the Update the Employee's User Role via Manage Employees section above.
The employee details are automatically updated.