Add or Remove Employees via an Employee Import
Important Notes
You can import your employees via a CSV file however you must first check with your Administrator before creating an import as there could be an existing User Provisioning integration setup or an SFTP setup.
Manual Employee Import
- Every employee you import will overwrite existing selected fields. Therefore, it is recommended to start a new import with an export of your current employee list when you want to add new people.
- Manually added employees are exempted from deletion if they are not included in the import. However, if you include a manually added employee in an import and then don’t include them in a subsequent import, the employee is removed. This occurs because they get updated from manual to imported after showing up on an import.
Approval Threshold
- There is an Approval Threshold for Employee Imports that can be turned on to help protect your data integrity during employee imports; see Turn on the Approval Threshold for Employee Imports.
Notifications
- If you want to receive import notifications then this setting can be turned on; see Turn On Import Notifications.
Follow the Steps
Complete the following steps to import your employees manually.
Step 1. Export the Employee List
- From the menu, click the Manage
 icon.
icon. - From the sub-menu, click Employees.
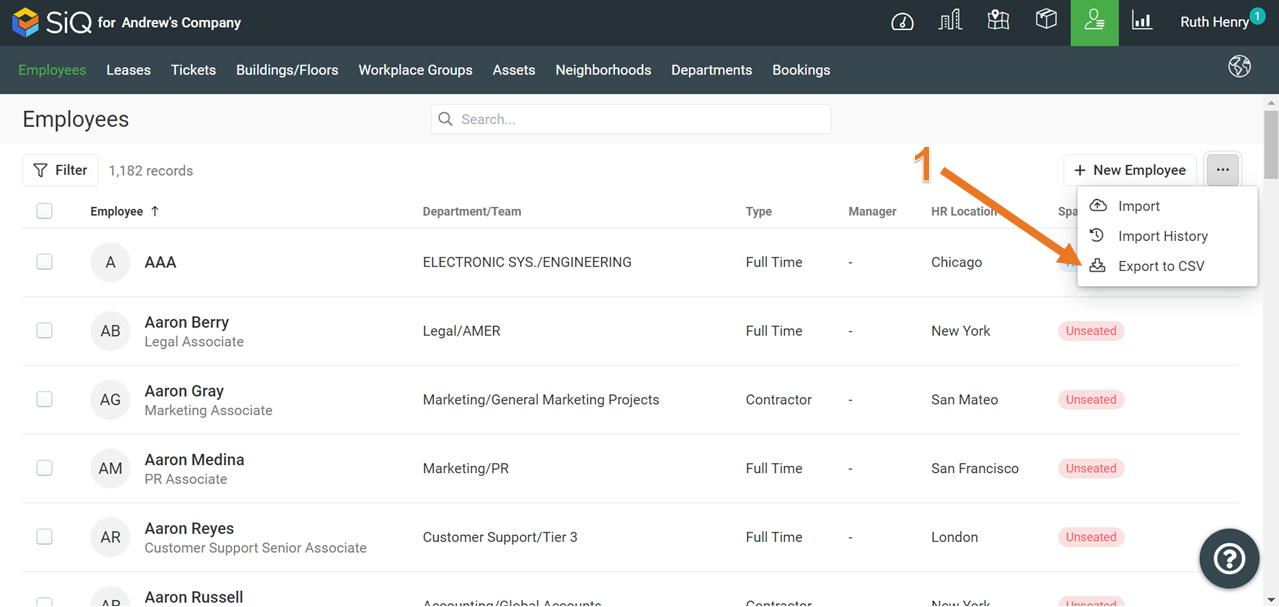
- When on the Manage Employee screen, click the More Actions icon [1] to display more actions.
- Click Export to CSV. The employee list is automatically downloaded.
Step 2. Set up the CSV file
- Open the downloaded CSV file in a spreadsheet editor.
- Add your new employees to the end of the employee list. Ensure the CSV file is set up with the correct columns, see Requirements for Employee Data.
Step 3. Import the Employee List
- From the Manage Employees screen, click the More Actions icon.
- Click Import.
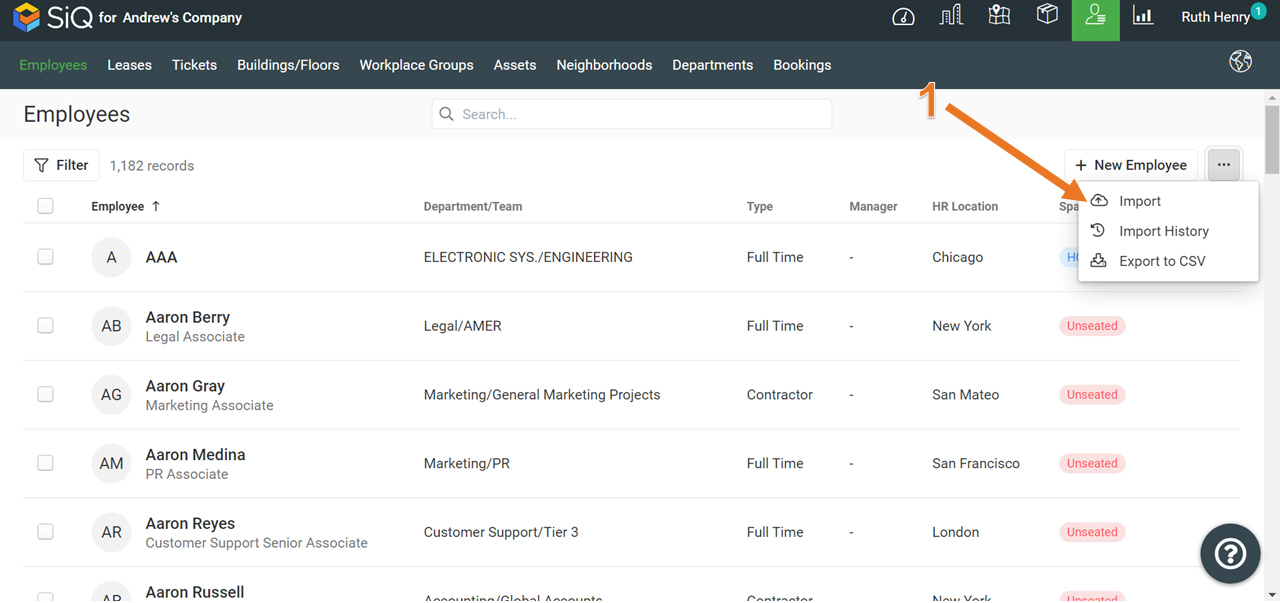
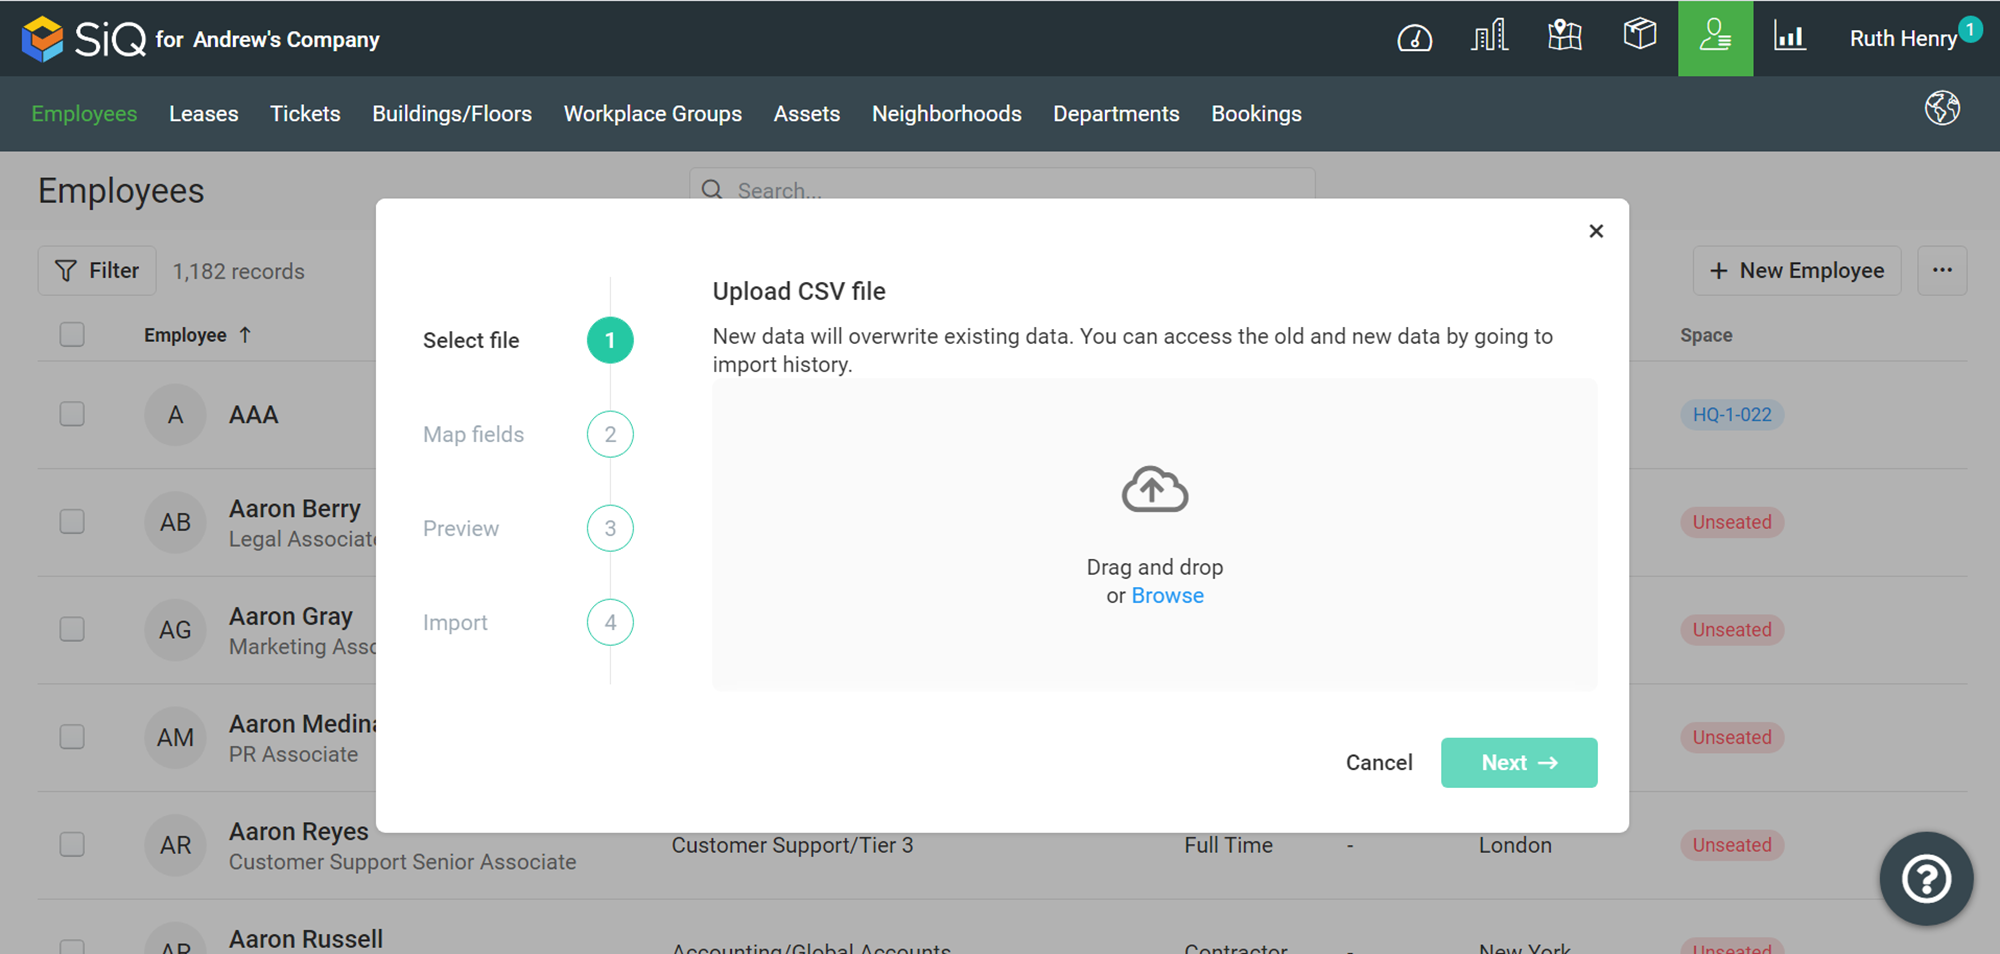
The Upload CSV file dialog displays.
-
Either drag and drop a CSV file into the window or click and browse to select the CSV file.
Step 4. Map Employee Profile
After you have selected the CSV, you'll see an intermediate screen.
This is where you map your import fields to those accepted by the SpaceIQ product.
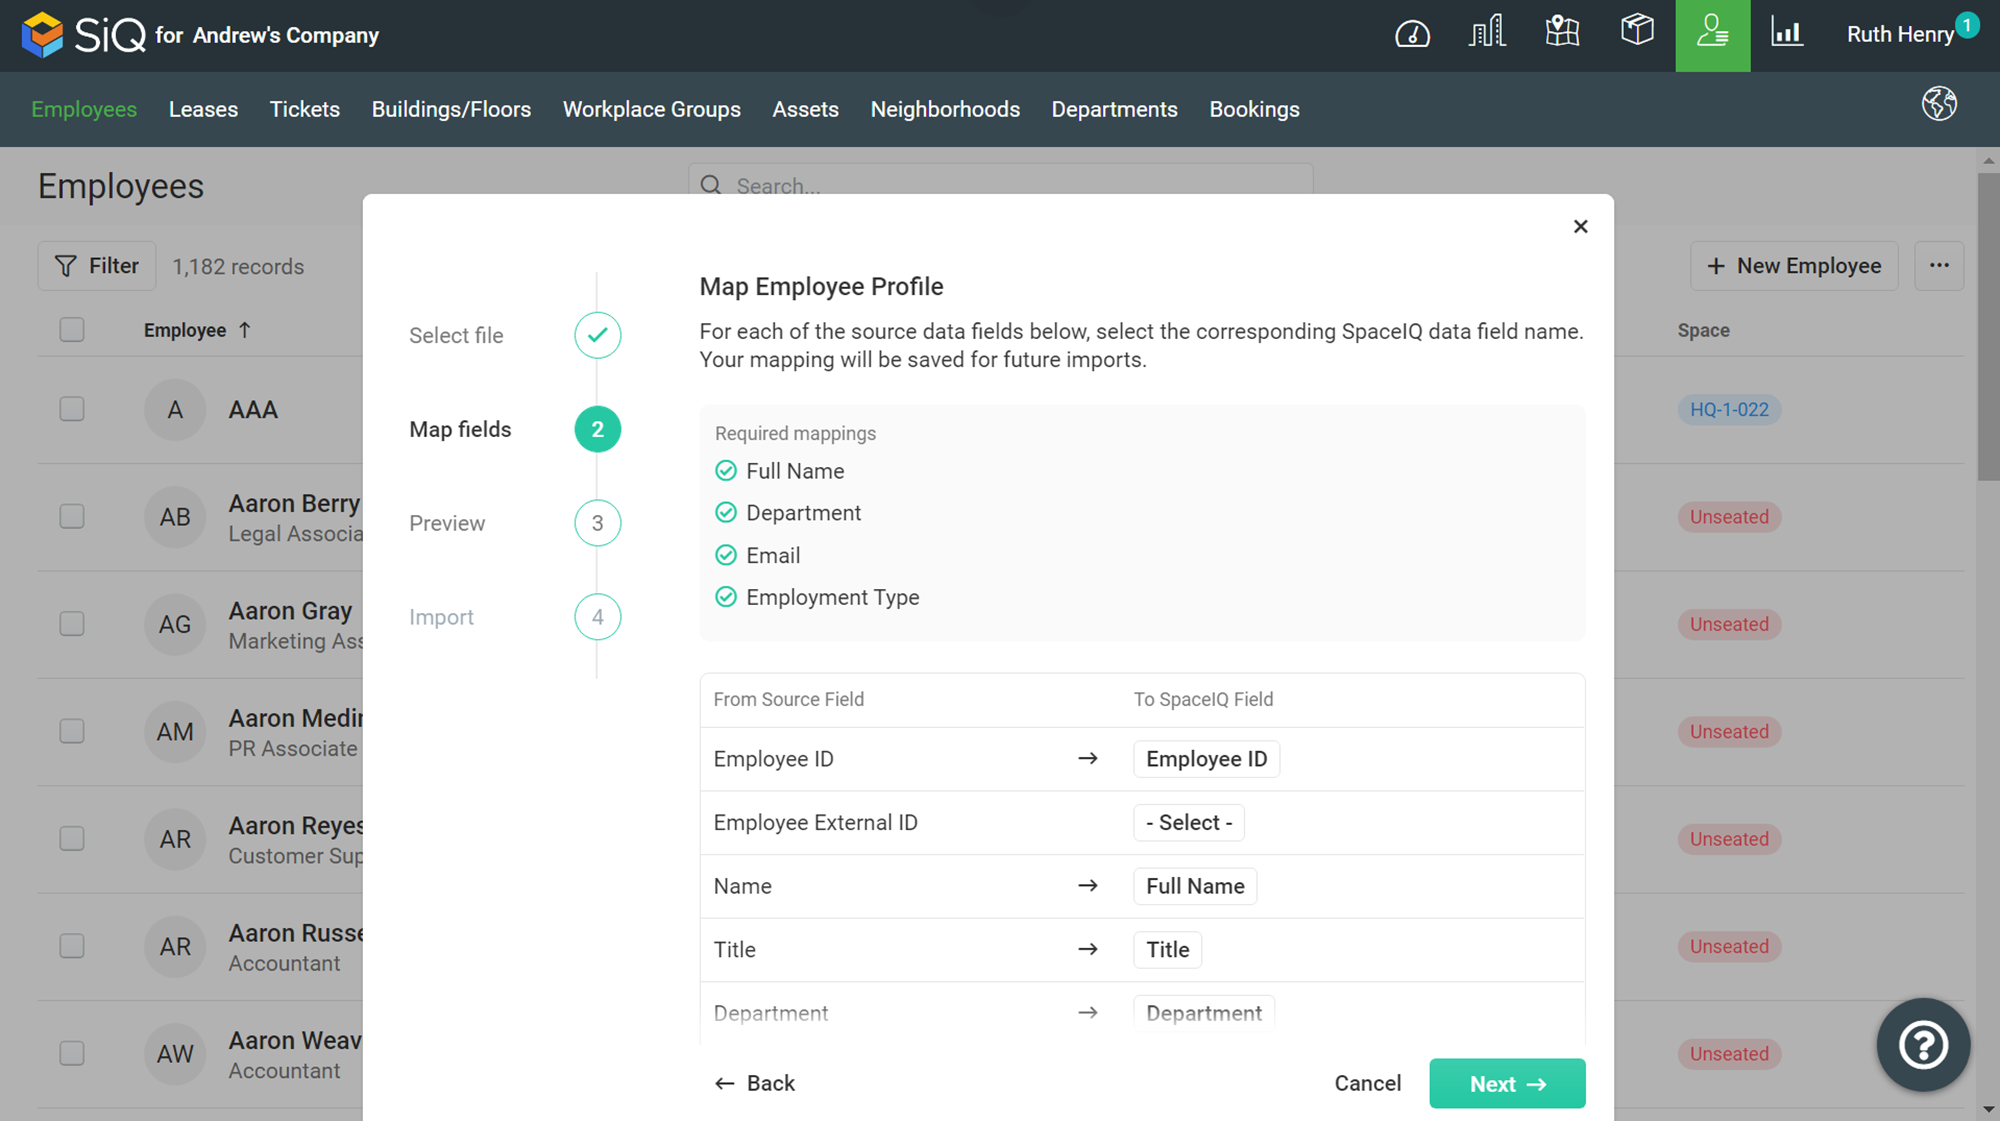
At the top is a list of all required fields, which are:
- Full Name
- Department
- Employee Type
The green check marks indicate you have already mapped the required field.
For the fields that you want to overwrite (update), click the -Select- drop-down either:
- select the field to map to
- select Extra field
- for fields you don't want to map, select Skip column.
Your mappings will be remembered, so your job will be much easier when you import another CSV in the future with the same column header names. If, for any reason, you don't want to update a field, then don't map the source.
When you are ready, click the Next button.
Step 5. Preview
The Preview dialog displays. This shows you a preview of your import data.
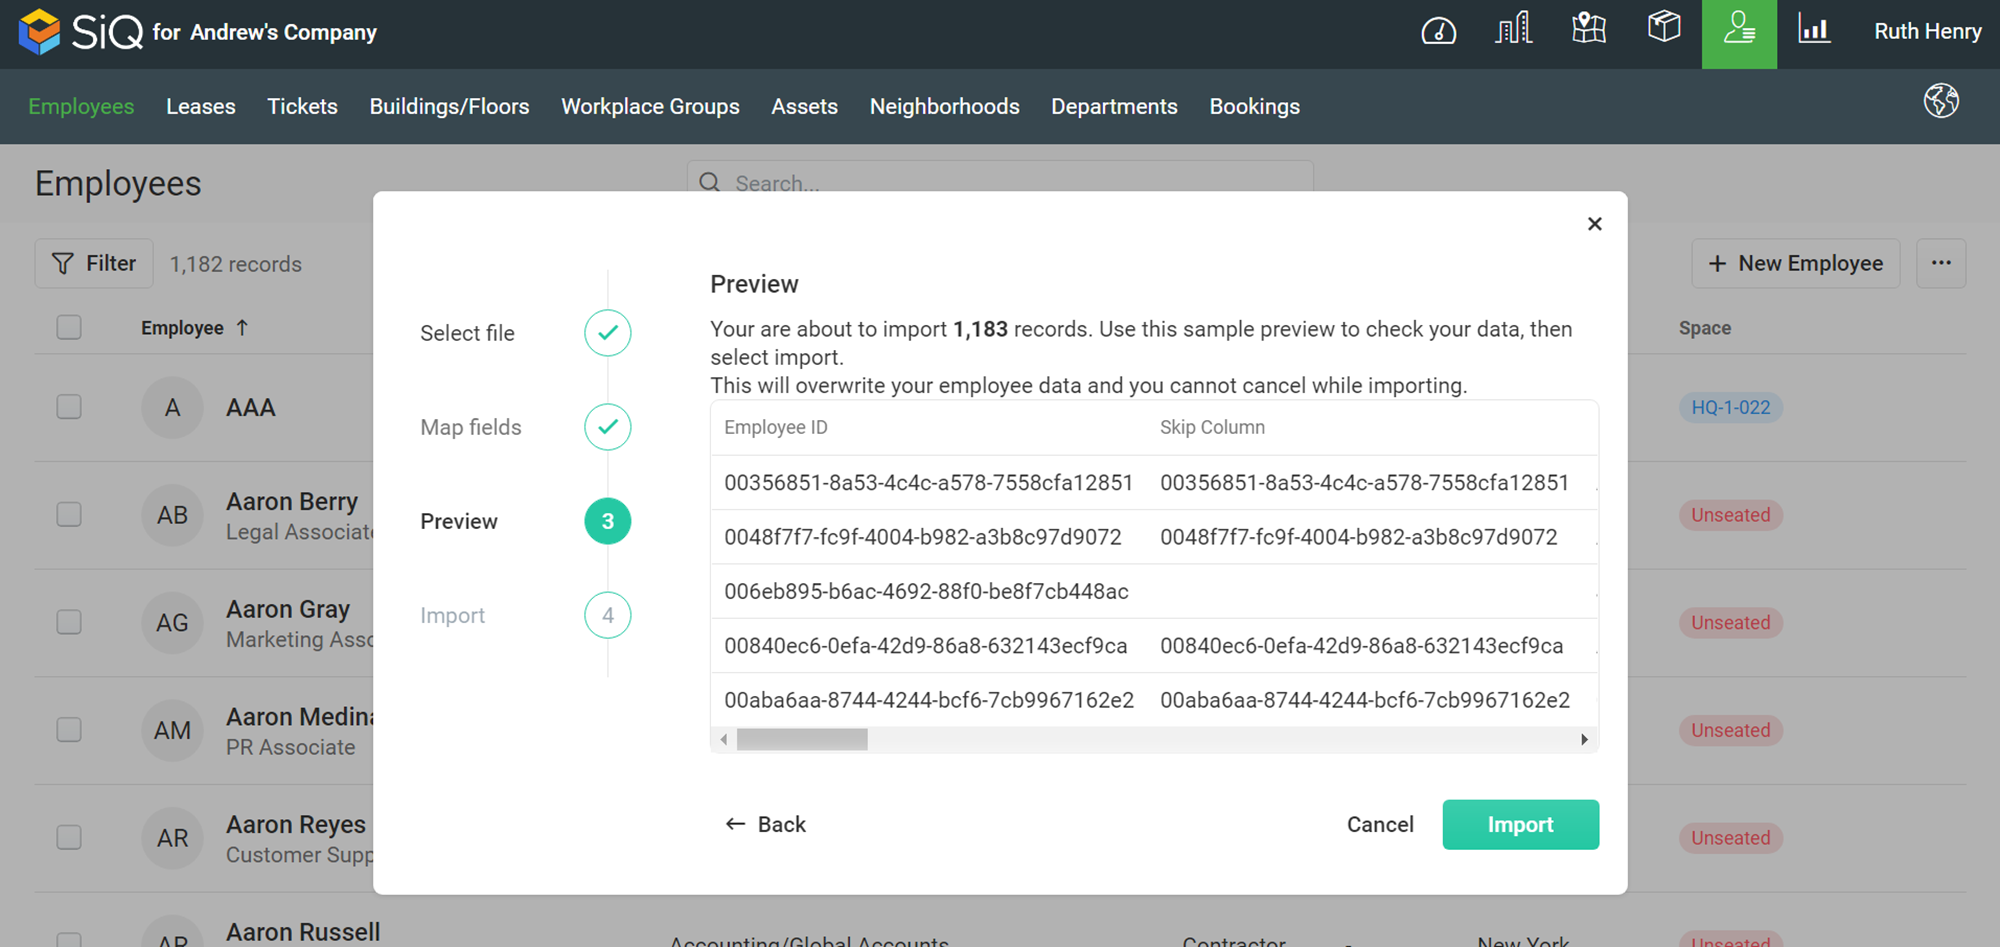
- Double-check to make sure that the values shown make sense with the column title mappings.
- When you are ready, click the Import button, and a warning displays "You are about to overwrite employee data, this action cannot be undone."
- Click the Continue button to import the employees.
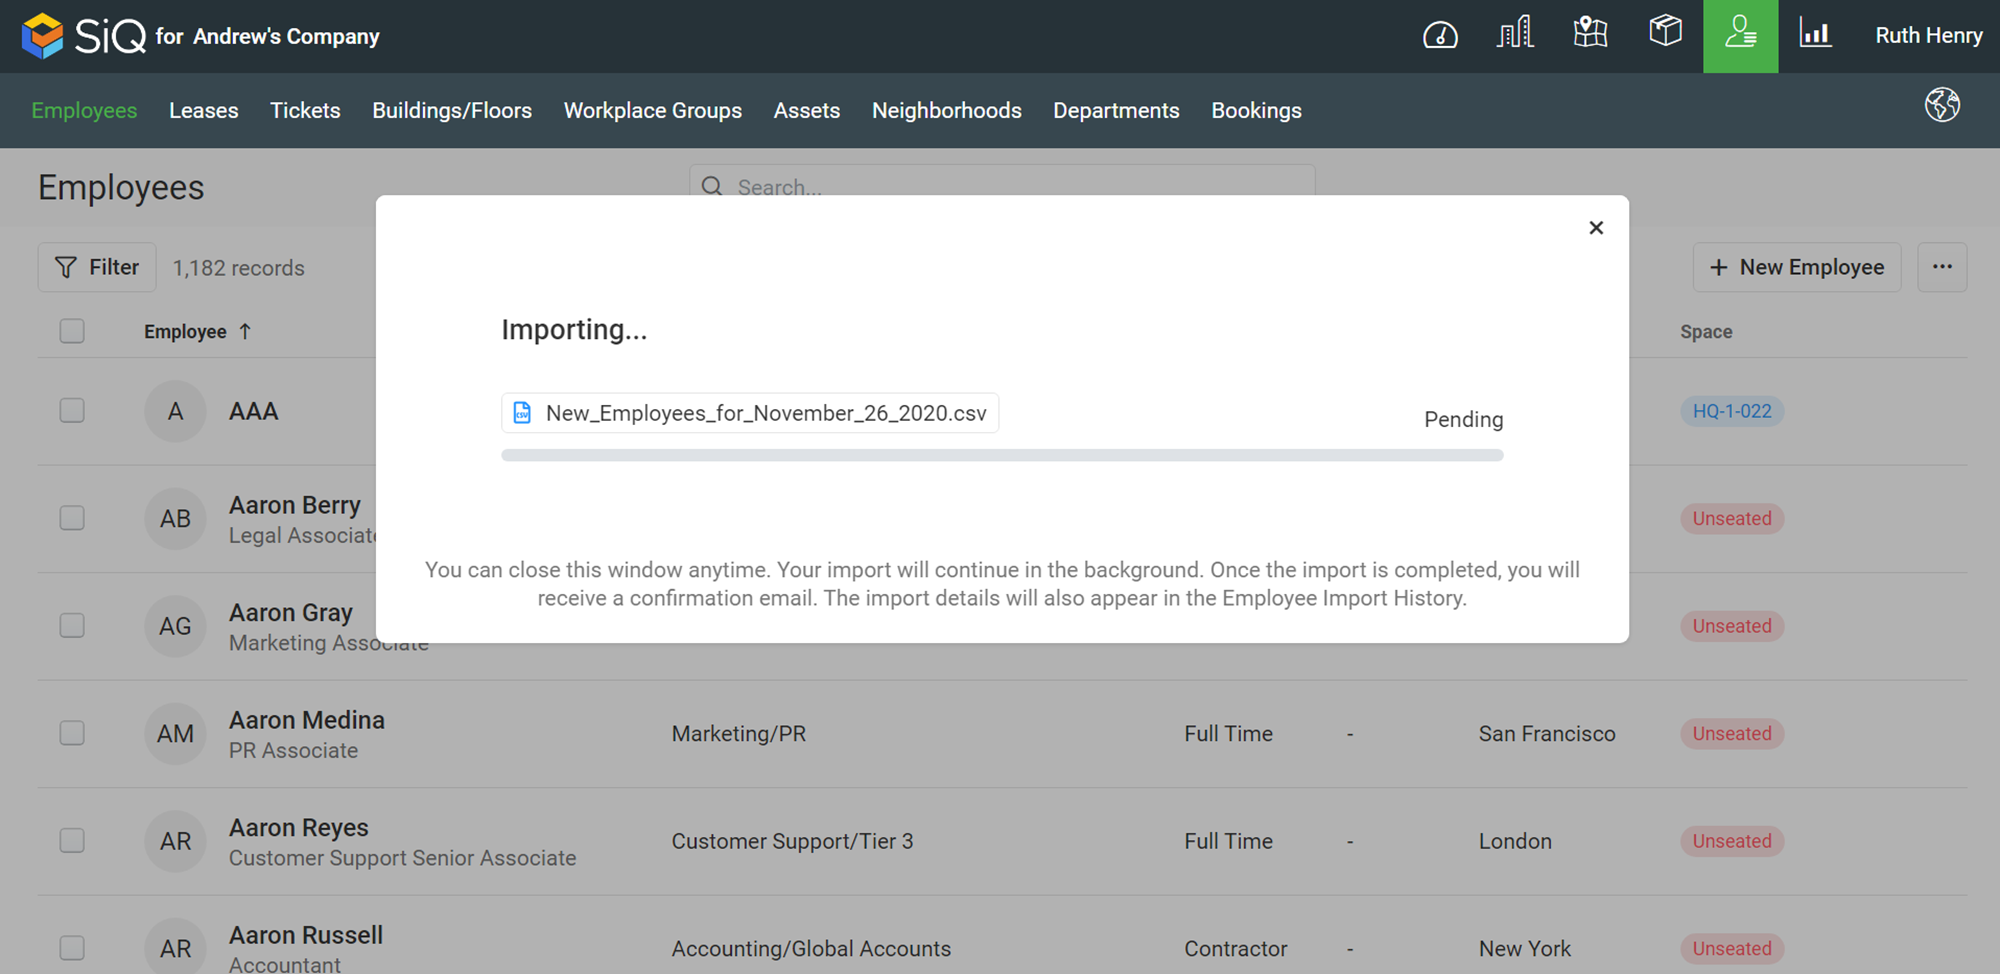
Step 6. Import In Progress
A progress bar displays.
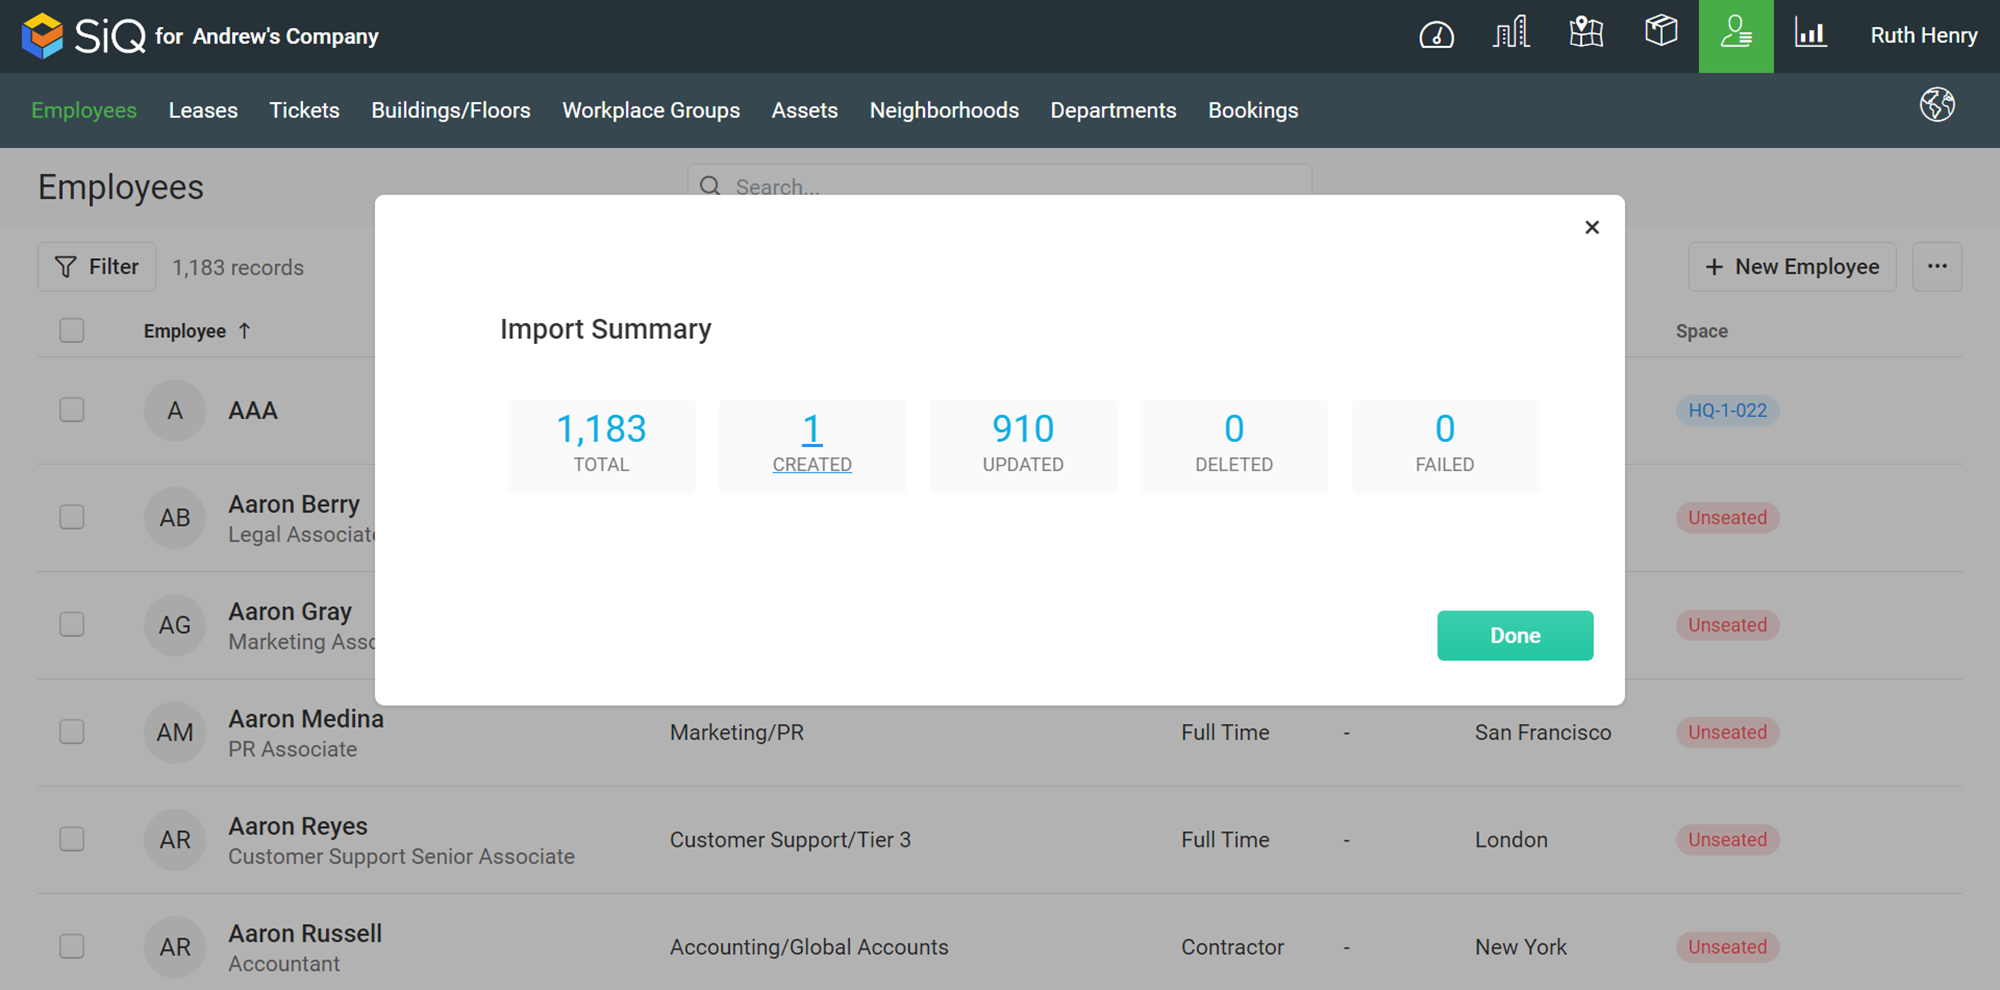
Step 7. Import Summary
When the import is finished, an Import Summary dialog displays the number of rows created, updated, deleted, and failed.