Associate Employees or Spaces to Assets
Assets can be associated with employees and spaces.
- Employees may need to have particular assets; for example, multiple employees may need Ergo Chairs in their workspaces.
- Spaces can have particular assets associated with them. For example, some of your hoteling desks will be a sit-stand desk, and when this asset is associated with the space, your employees can find these when booking quickly.
You can complete this association via:
- Associate Employees or Spaces to Asset Manually
- Associate Employee or Space to Assets in Bulk via an Import
- Directly from the floor map, see Update Space Assets from the Floor Map to learn how to add assets to spaces from the floor map.
Watch SpaceIQ in action see Book a Desk with Assets (Web) or Book a Desk with Assets (Mobile).
Associate Employees or Spaces to Asset Manually
- From the main menu, click Manage
 icon and then click the Assets tab. Here you'll find a complete list of assets.
 - From the asset list, click on the Asset Name. The asset details dialog displays.
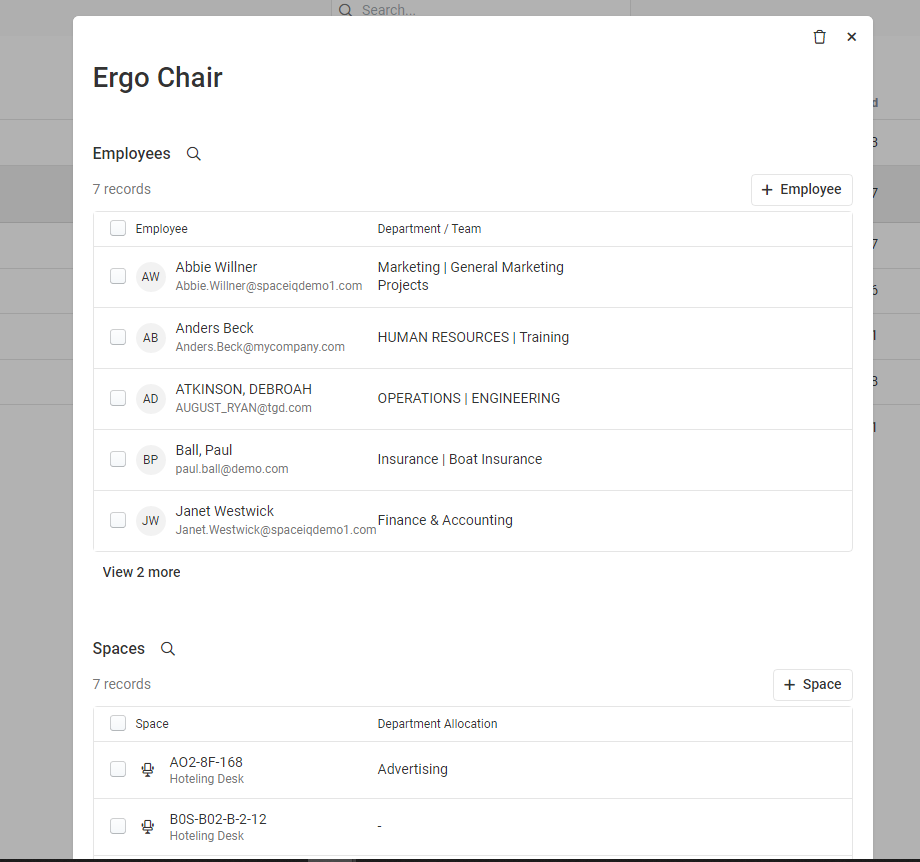
- To add an employee, click the + Employee button, or to add a space, click the + Space button.
In this example, after the +Employee button was clicked, the employee search is displayed. In the search field, enter the employee's name and then select their name.

Remove an employee or space, select an entry, and then click the X icon to remove employees or spaces in bulk. Select multiple entries and then click the Remove button.
Associate Employee or Space to Assets in Bulk via an Import
Follow the steps to associate the employee with an asset(s).
- Step 1. Export the Assets and then set up the Import Asset file
- Step 2. Import the CSV File
- Step 3. Check the Import History
Step 1. Export the Assets and then set up the Import Asset file
- Click the More Actions
 icon and then click Download CSV.

- Open the CSV file in Microsoft Excel.
- This file and information can be used as a template for a new Excel file that will be used to import the information into SpaceIQ.
- Set up a new Asset import Excel file with the following columns:
| Column Name | Description | Column Required? |
|---|---|---|
| Asset Name |
Either:
|
No |
| Employees |
Employee's company email. When you have multiple emails, then separate the email addresses by semi-colons and no spaces. For example: tyrell.foley@amc.com;johanna.mchoul@amc.com;lauren.lewis@amc.com |
This is required when you associate an employee with an asset. |
| Spaces |
Space code. When you have multiple spaces, then separate the space codes by semi-colons. For example: B0S-B01-01;AO2-8F-168;B0S-B02-B-2-12;B0S-B01-09;B0S-B01-010;B0S-B01-021 |
This is required when you associate a space with an asset. |
If you need an Asset Import Template, this can be found in More Actions > Import Assets to Employees or Import Assets to Spaces.
For example:
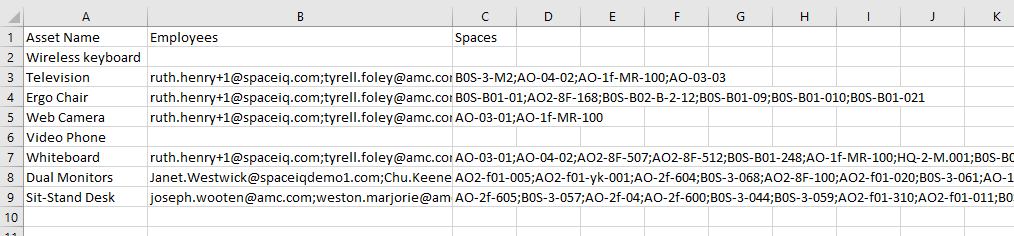
Save the new Excel file with a .csv extension.
Step 2. Import the Asset Import as a CSV File
- Click the More Actions
 icon and then select Import Assets to Employees.
 - When the Import Assets dialog displays, you can upload the CSV file. Do this by either dragging and dropping the CSV file onto the dialog window or clicking the browse link to navigate to and select the CSV file.
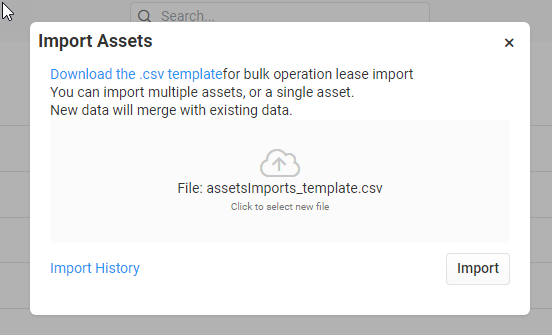
- Click the Import button.
When the import is completed, you will see an import summary.
Step 3. Check the Import History
If needed, you can view your asset import history.
- Click the More Actions
 icon and select Import Assets to Employees or Import Assets to Spaces.
 - From the Import Assets dialog, click the Import History link to display the history.