Set up a Wayfinder Kiosk
Kiosks must be configured on the Floor Map in SpaceIQ, and each Kiosk must be configured with a unique code. This will identify the location of the Kiosk, and employees can use them to help find employees and meeting rooms.
See Using SpaceIQ Web App as a Kiosk.
All selections made on the Wayfinder will be cleared every 1.5 minutes so the next user will have a fresh screen when they use the kiosk.
Prerequisites
Before you set up the Kiosk on a floor map, make sure the following is complete:
- Set up the physical kiosks on a touch screen device will ensure the best visitor experience.
- When meeting rooms are selected, their capacity and assets are displayed along with other information. Make sure the meeting rooms' assets are assigned; see Update Space Assets.
Steps
Complete the following:
- Step 1. Add a Device icon and set it up as a Kiosk
- Step 2. Set up the Kiosk Codes and Authentication
- Step 3. Set the Kiosk Map Rotation
Step 1. Add a Device icon and set it up as Kiosk
You will need to add the Kiosk to the Floor Map.
- Navigate to the Floor Map
 .
. - Select the building and floor you are working on.
- Click the Map Editor
 icon. The Map Editor displays.
 - Click the ADD SPACE icon. The space drawer displays.
- Click the Device
 icon and drop it at the precise location on the map where the physical Kiosk is located. Note: Click Esc to leave the Add Space mode.
 - On the Floor Map, click the Device icon. The data drawer displays.
- If you just added a device, the default Device Type will be a meeting room. From the Device Type drop-down, select Kiosk.
- In the Code field, enter the unique code to identify this Kiosk.
- Repeat steps 5 to 8 for the other Kiosks on the floor map.
Step 2. Set up the Kiosk Codes and Authentication
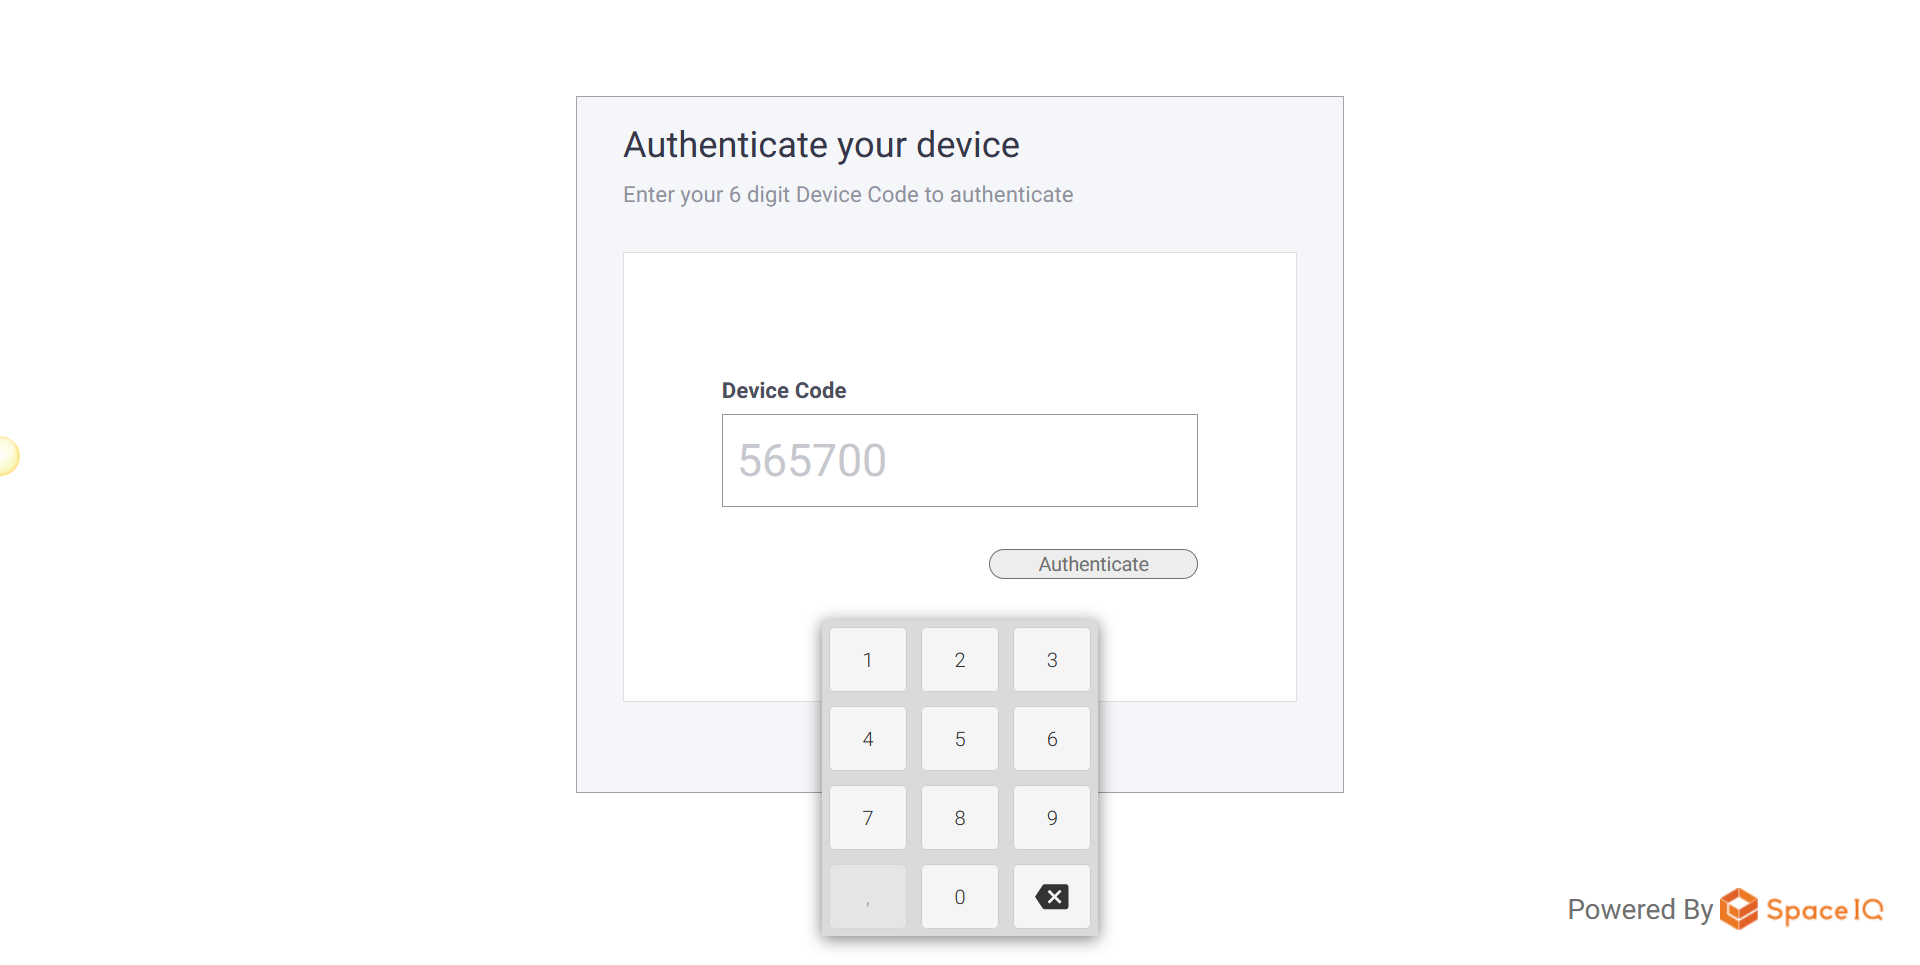
On the physical kiosk or display itself, ensure internet connectivity, and navigate in a web browser to https://main.spaceiq.com/wayfinder. Here you will be presented with a prompt to enter a six-digit Device Code:
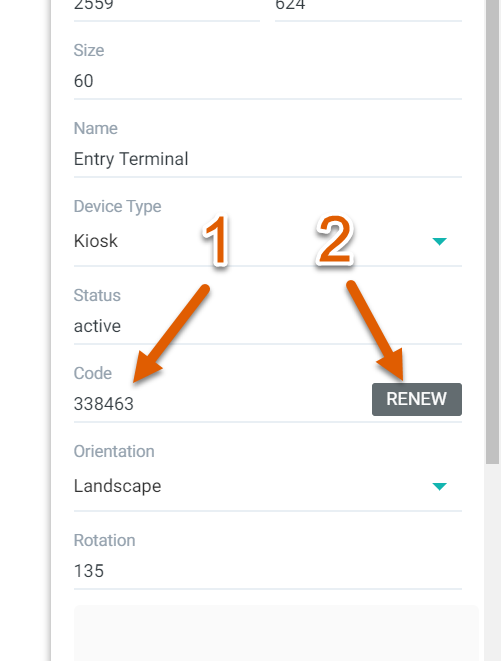
From SpaceIQ's Map Editor, in the data drawer, find the Code [1].
If this field code is blank, or you get an authentication error when entering the code, press the Renew button [2] to generate a new Code.
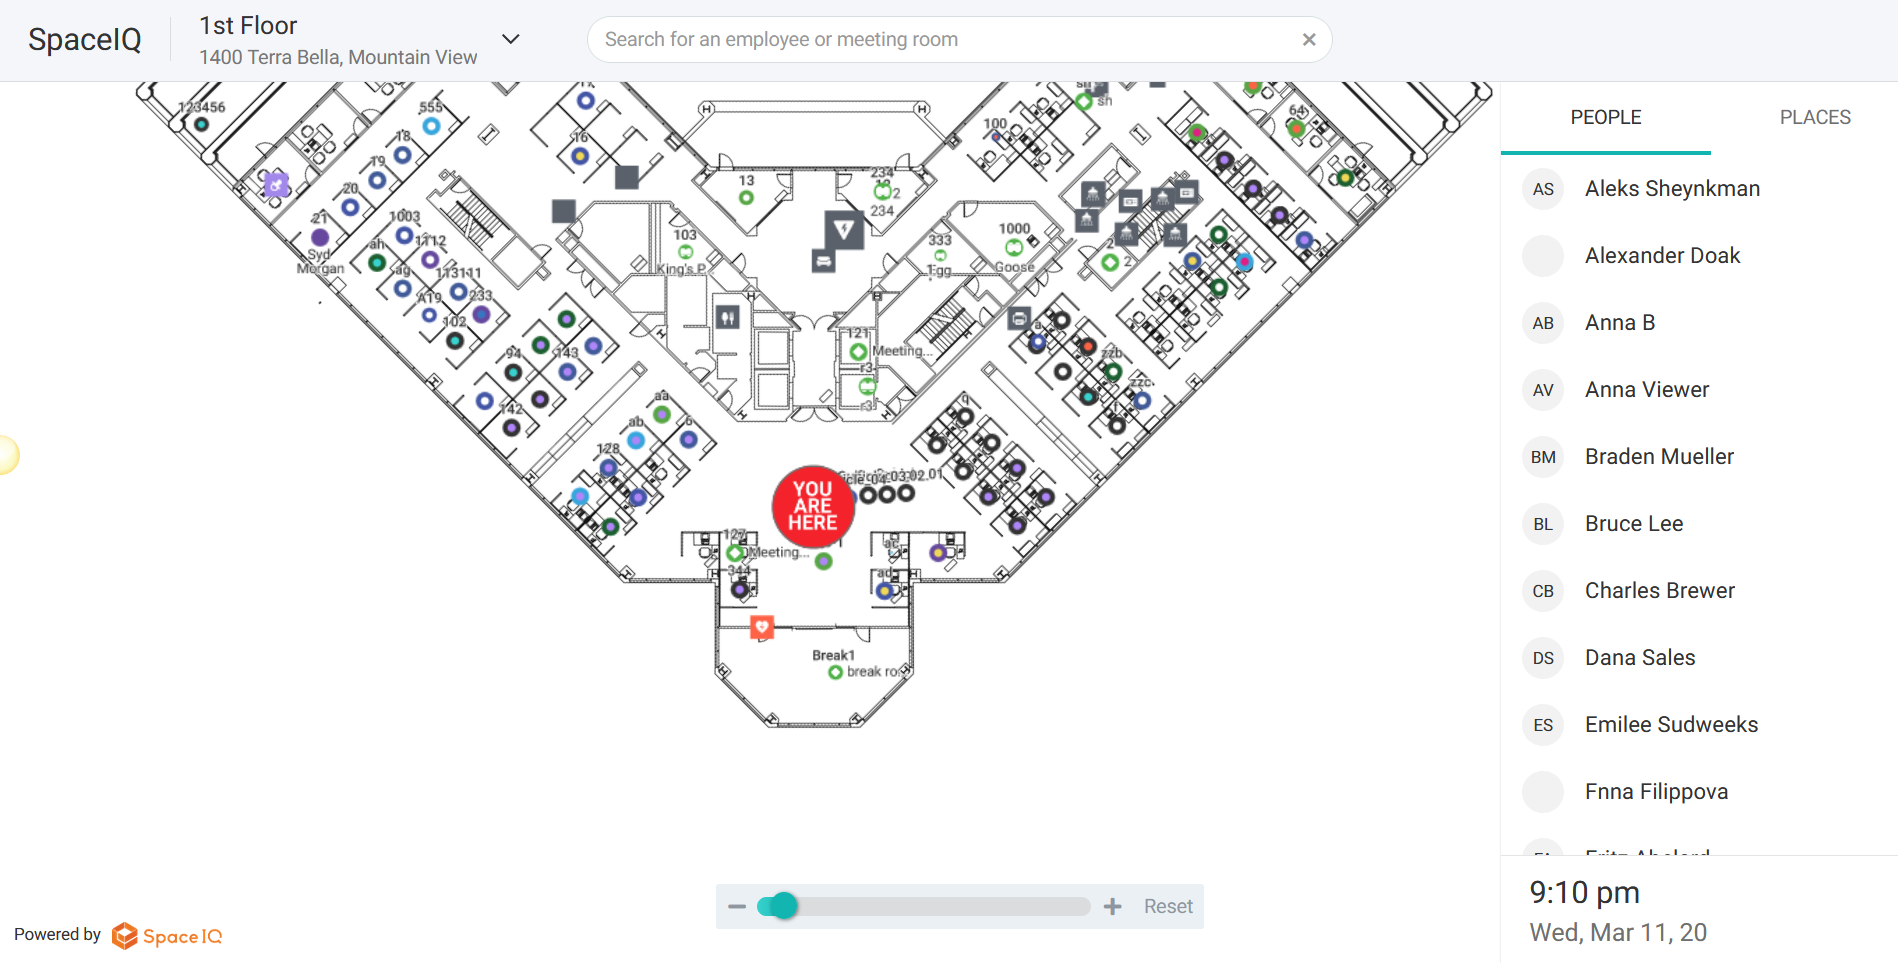
If successful, on your physical kiosk, you should now see your floor map with a big red YOU ARE HERE circle.
Step 3. Set the Kiosk Map Rotation
One more critical setup step is map rotation. Depending on your physical kiosk device's direction, you will want to rotate the map so that it is oriented in a way that makes sense to visitors approaching the display.
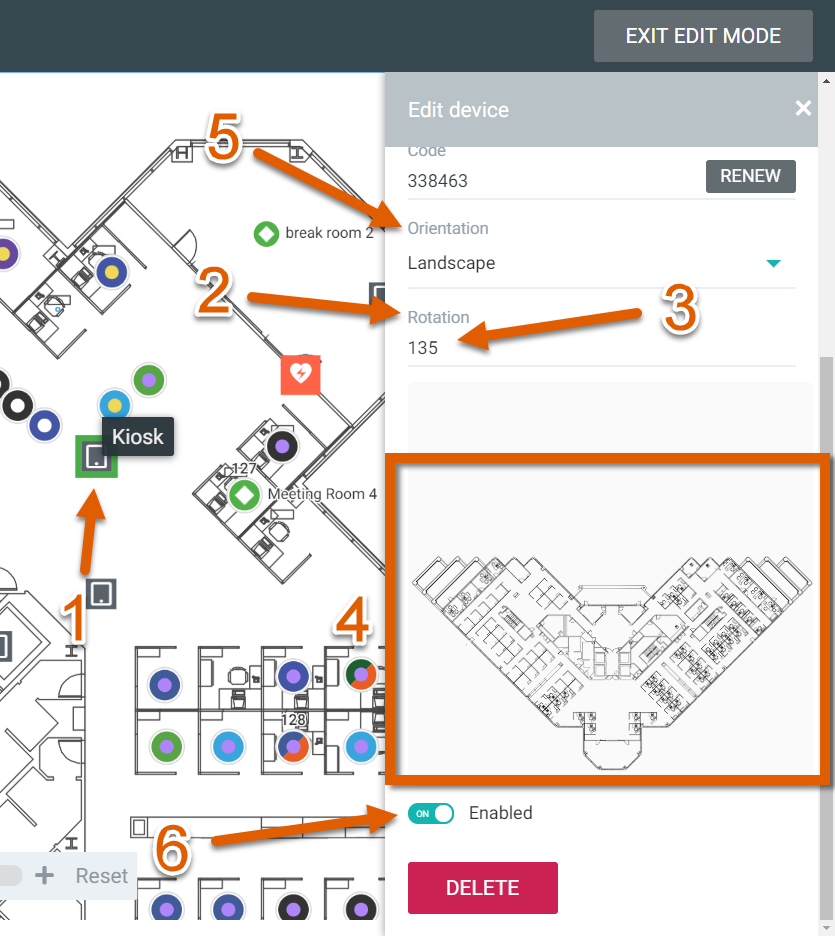
In the SpaceIQ Floor Map Edit Mode, click the kiosk device you want to manage [1]. The data drawer displays.
In the Rotation field [2], enter a number between 0 and 360 degrees. As you can see in our example, we entered 135 degrees [3] so that employees approaching the kiosk from the main entryway would see the building floor plan aligned in front of them [4].
Also, here are the options to present in Landscape or Portrait mode [5], and to Enable or Disable the kiosk display [6].
Remember, any changes made in the data drawer are saved automatically.
Remember to repeat this setup process for each kiosk you have in your organization. Every kiosk or map display device will have its own unique placement on the Floor Map, and each will need a separate kiosk code to show accurate location information.