Add Spaces to Neighborhoods
You can add spaces to neighborhoods from the Floor Map or Manage Neighborhoods.
From the Floor Map
You can add one or multiple spaces to neighborhoods on the floor map.
Add One Seat
- From the floor map, select a space.
The selected space is outlined in green and the Data Drawer displays. - From the Neighborhood drop-down, select a neighborhood.
The neighborhood will save automatically.
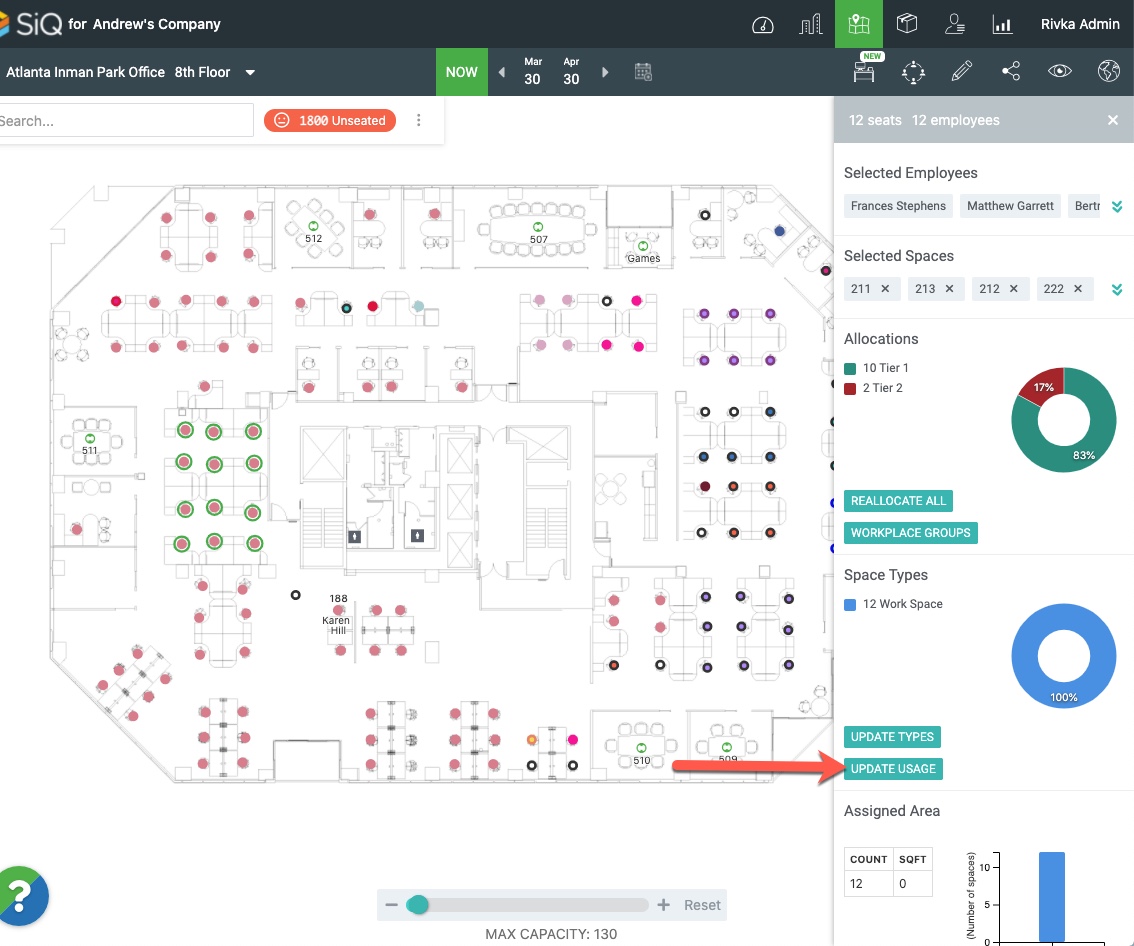
Add Multiple Spaces
Before you add spaces to a neighborhood make sure the seats' usage type is set to Neighborhood.
- From the floor map, hold down the Shift key and then drag across the spaces to select them.
The selected space is outlined in green and the Data Drawer displays. - Scroll down to the Space Types section and click the UPDATE USAGE button.
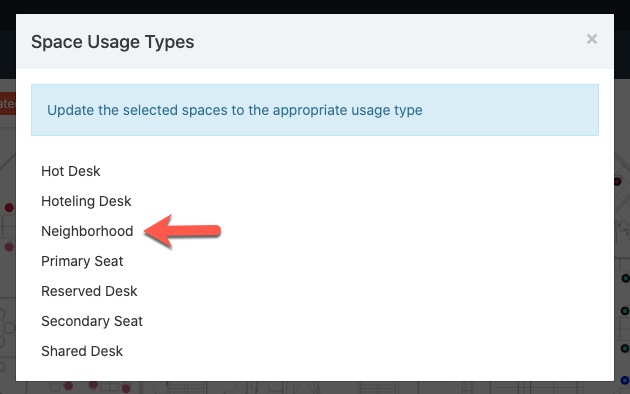
- Select the Neighborhood usage type.
The Neighborhood dialog displays. - Select an existing neighborhood or enter a new neighborhood name and then select that.
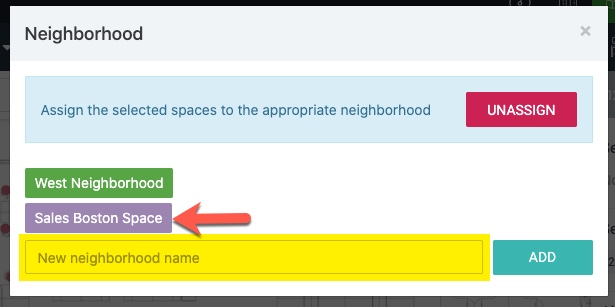
You will see confirmation that seats have been added.
From Manage Neighborhoods
- Navigate to Manage > Neighborhoods.
- Click on the name of a neighborhood. The Neighborhood Details dialog displays.
- Locate the Spaces section and click the +Space button.
- In the Search field, enter the space's name.
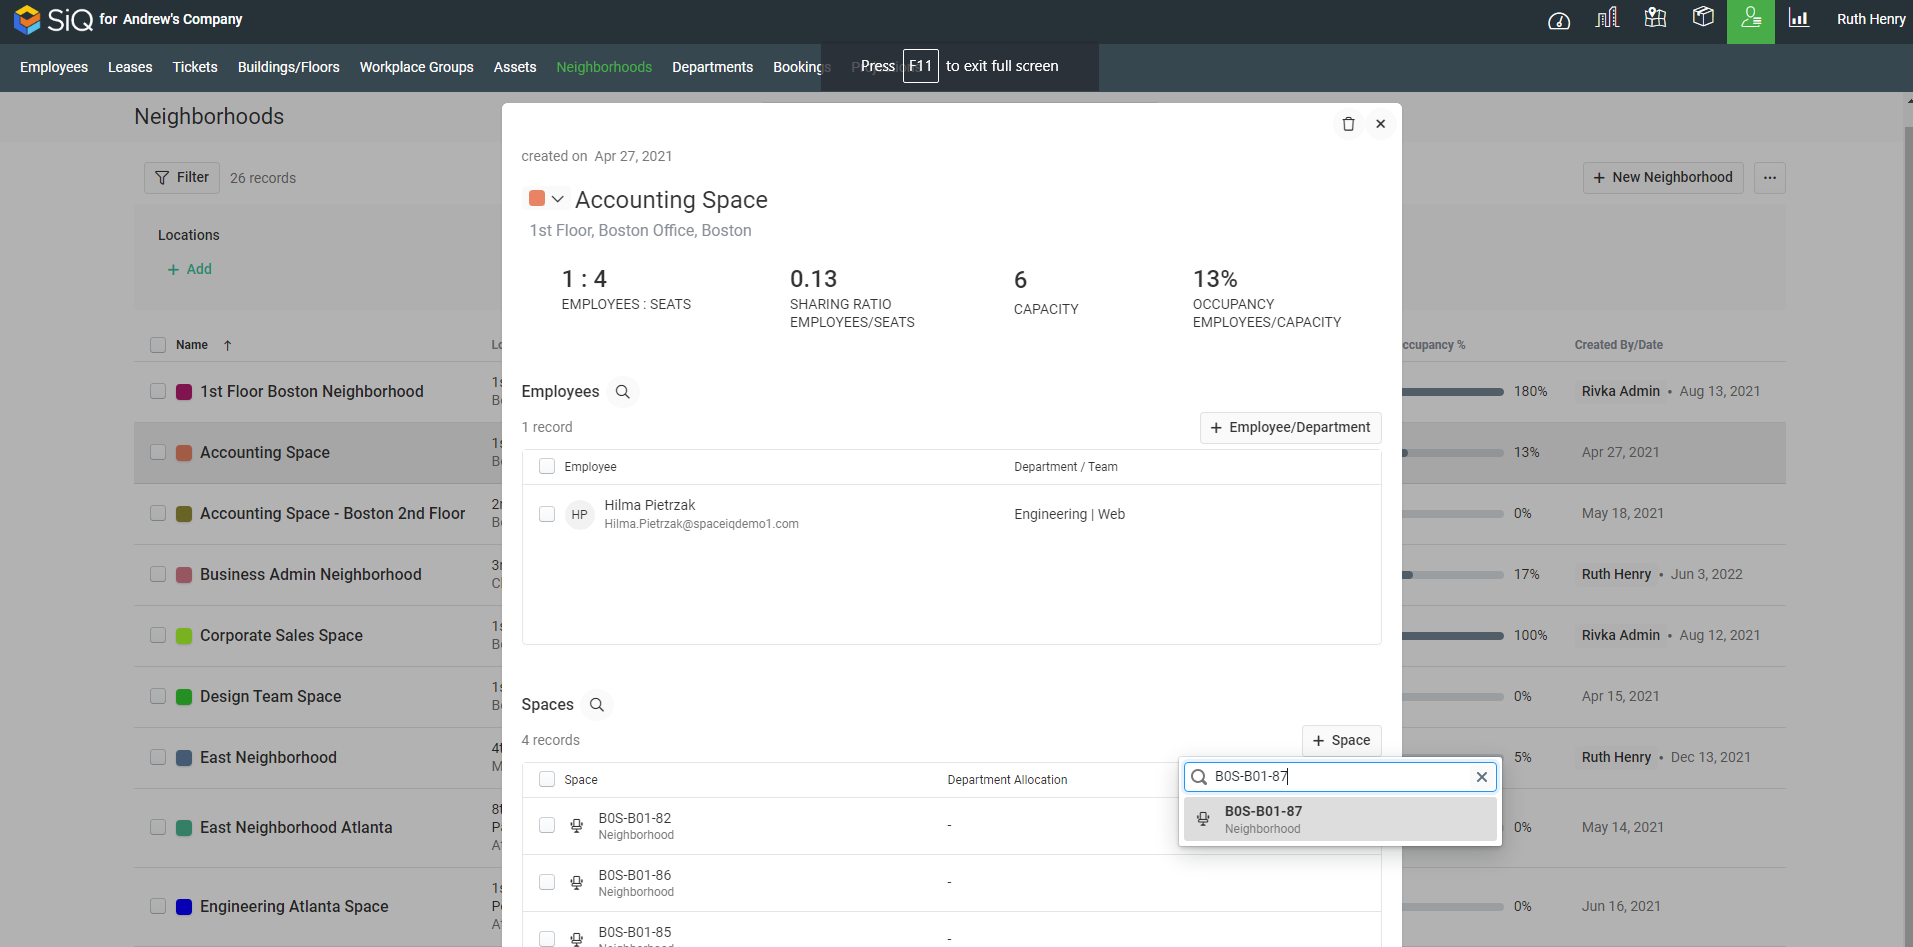
- Select the space's name.
- Repeat the above steps to add more spaces.
The neighborhood details are automatically saved.