Set Up Safe Distancing on the Floor Map
Set up the safe distancing (a radius) around each space on your floor map. This is to ensure your employees maintain a recommended safe distancing spacing for health purposes.
Prerequisites
- Before you start, check what is the safe distancing requirement from your local authority. For example, 6 feet is the requirement in the USA, 1.5 meters in Australia, and 2 meters in the UK.
Follow the Steps
- Step 1. Setup the Safe Distancing for the Floor
- Step 2. Review and Adjust the Safe Distancing in the Map Editor
- Step 3. Adjust the Desks
Step 1. Setup Safe Distancing for the Floor
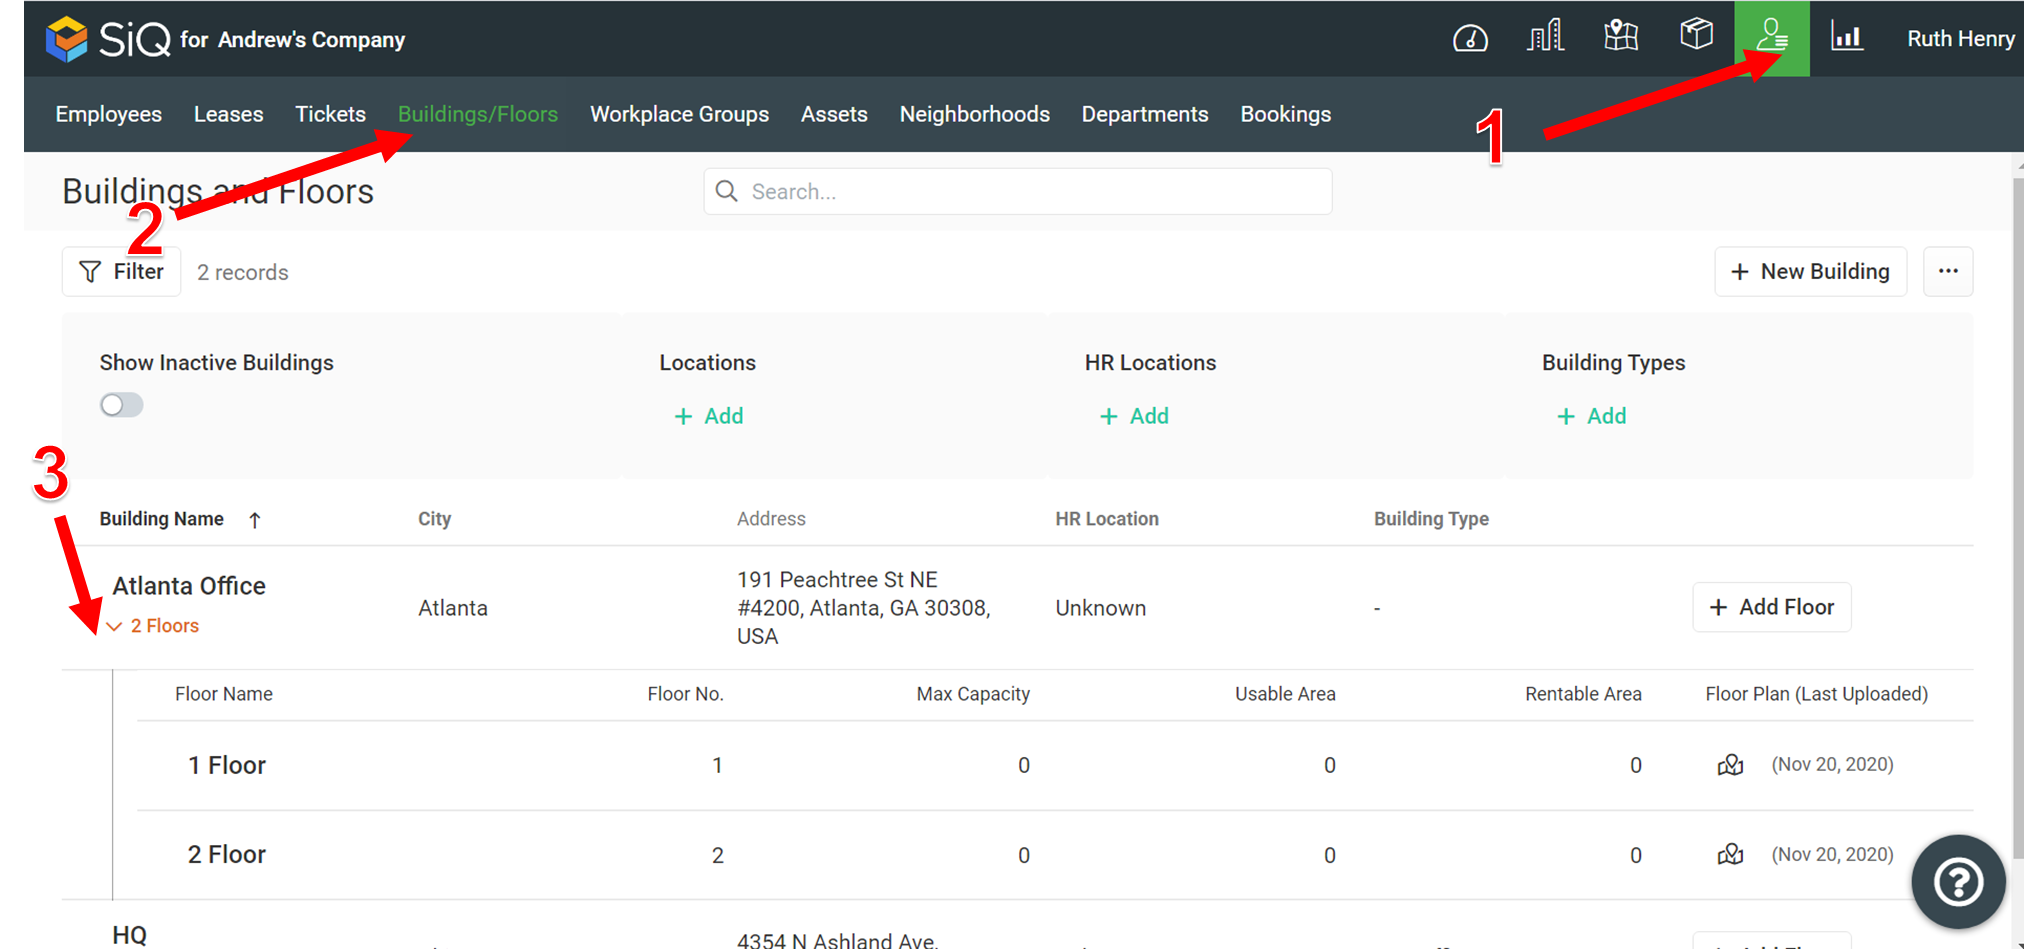
First, update the setting for safe distancing click the Manage [1] main menu item, then look for the Buildings/Floors sub menu [2].
Click the Floor drop-down [3] to display the floors. Now, click the floor you want to set the safe distancing on.
The Update Floor dialog displays.
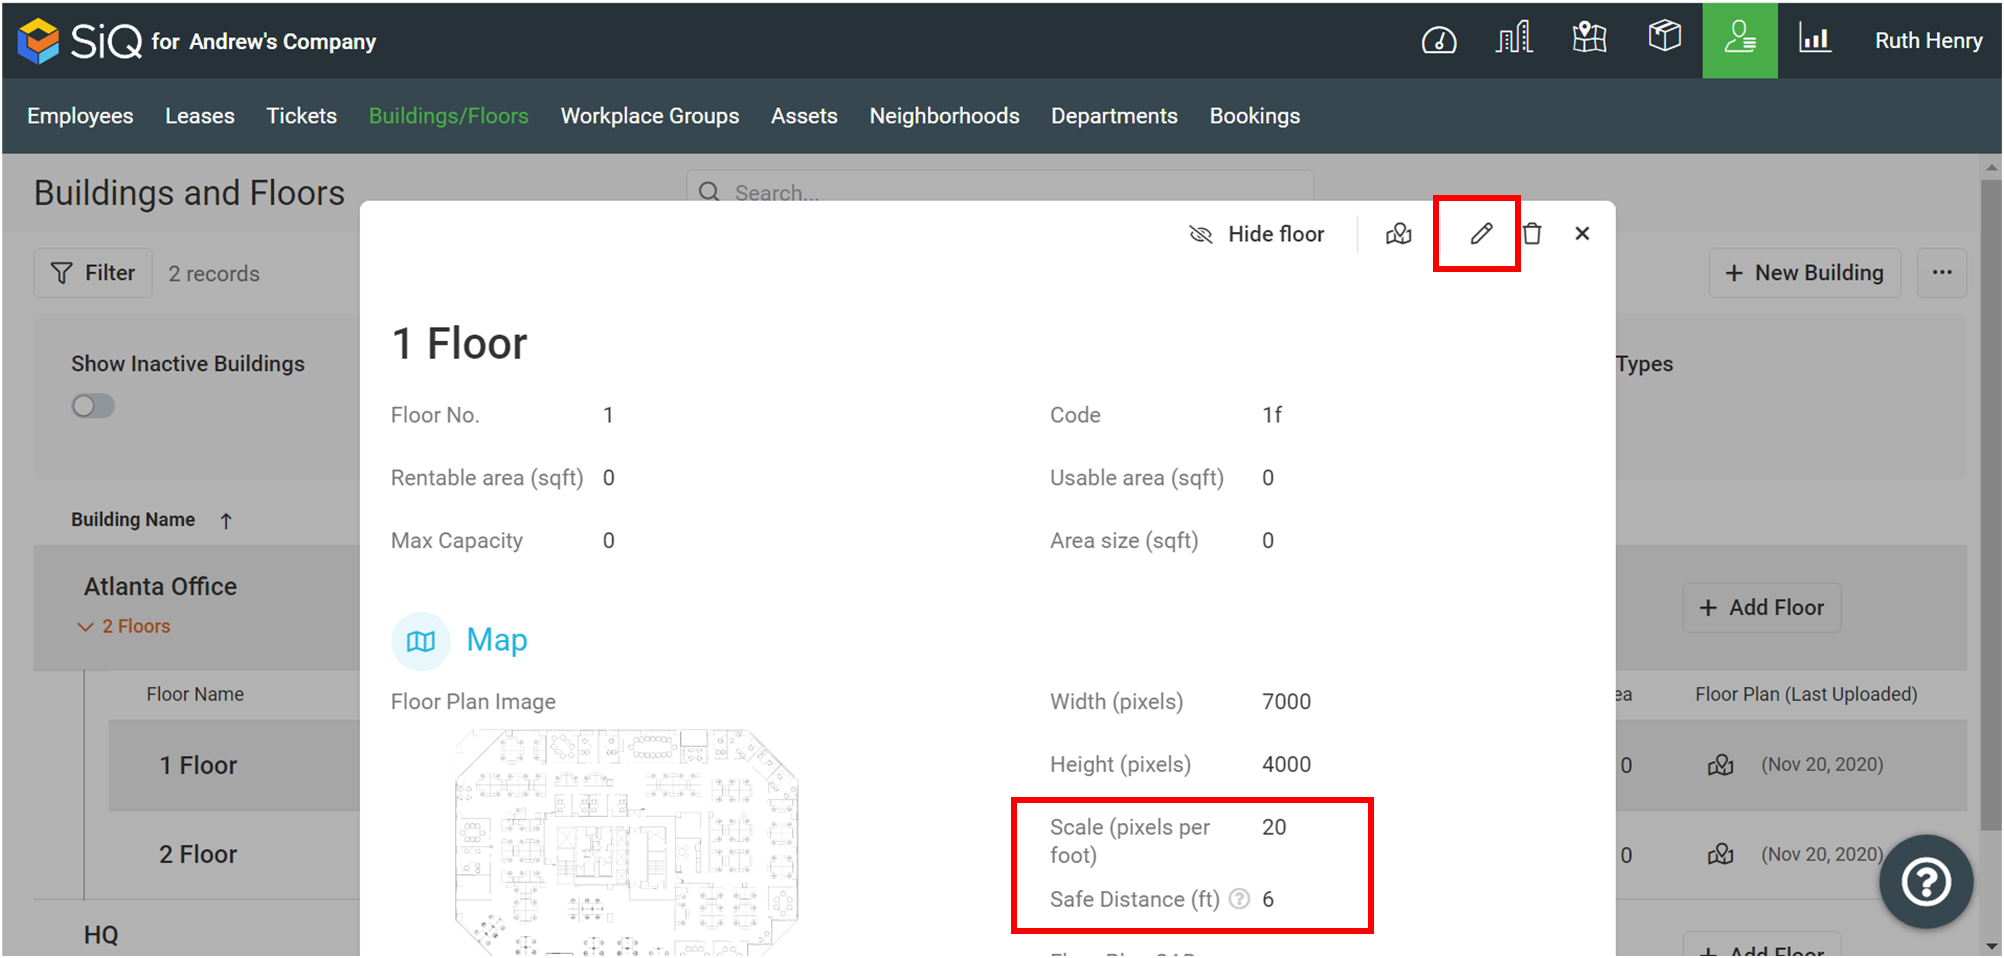
Click on the Pencil icon to edit and scroll down.
In the Scale (pixels per foot) field, enter the scale, refer to below for how to work out the scale for an AutoCAD file or a PNG file.
Scale (pixels per foot) for AutoCAD file
To work out the correct number for the Scale (pixels per foot).
- In AutoCAD, select Output > Plot > Plot to print the floorplan. The Plot dialog displays.
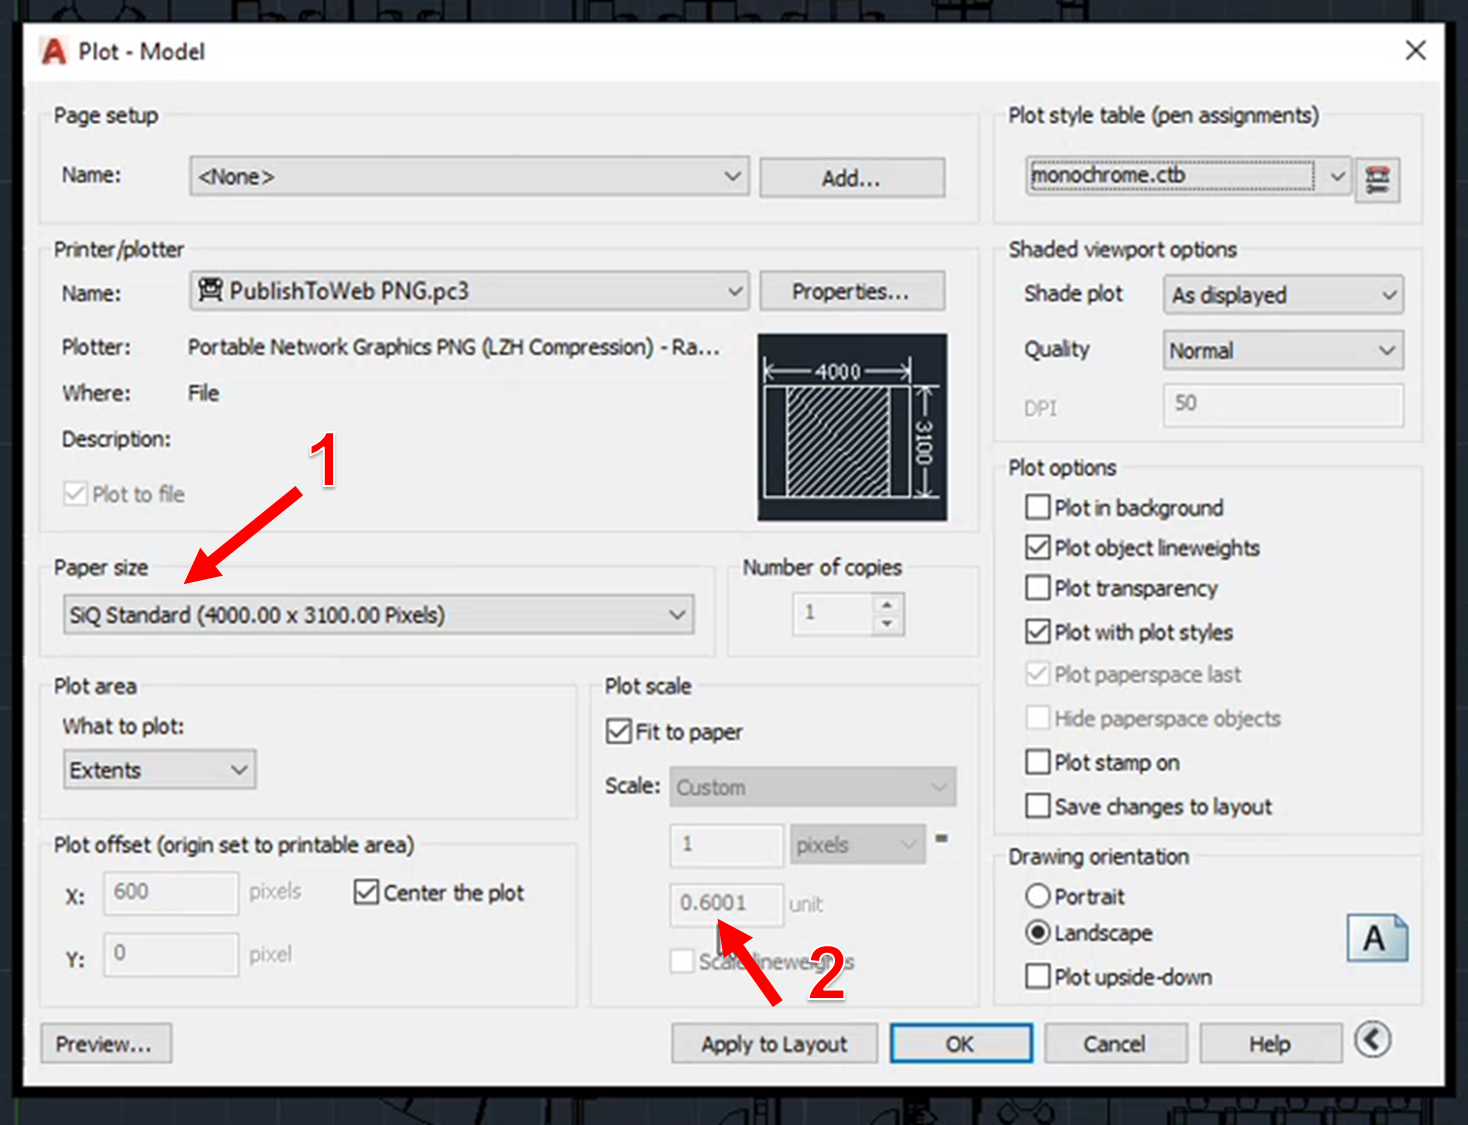
- In the Name drop-down, select PutToWeb PNG.pc3
- Set the Paper size to SiQ (4000.00 x 3100.00 Pixels) [1]. If you don't have this Custom Paper Size set up then see How do I set up the SiQ Paper Size in AutoCAD?
- In the Plot scale section, note the unit number [2].
- As 12 inches = 1 foot and you need to work out the pixels per foot, to do this use the following calculation:
12 inches / Scale Unit = Scale (pixels per foot)
For example:
12 inches / 0.6001 = 19.9966 Scale (pixels per foot)
Scale (pixels per foot) for PNG file
- Download the PNG file.
- Open the floor plan PNG file in a Graphics application for example Paint or Adobe Photoshop.
- Using the line tool, draw a line on a door way [1] and then you will see at the bottom of the screen 63 x 1px [2].
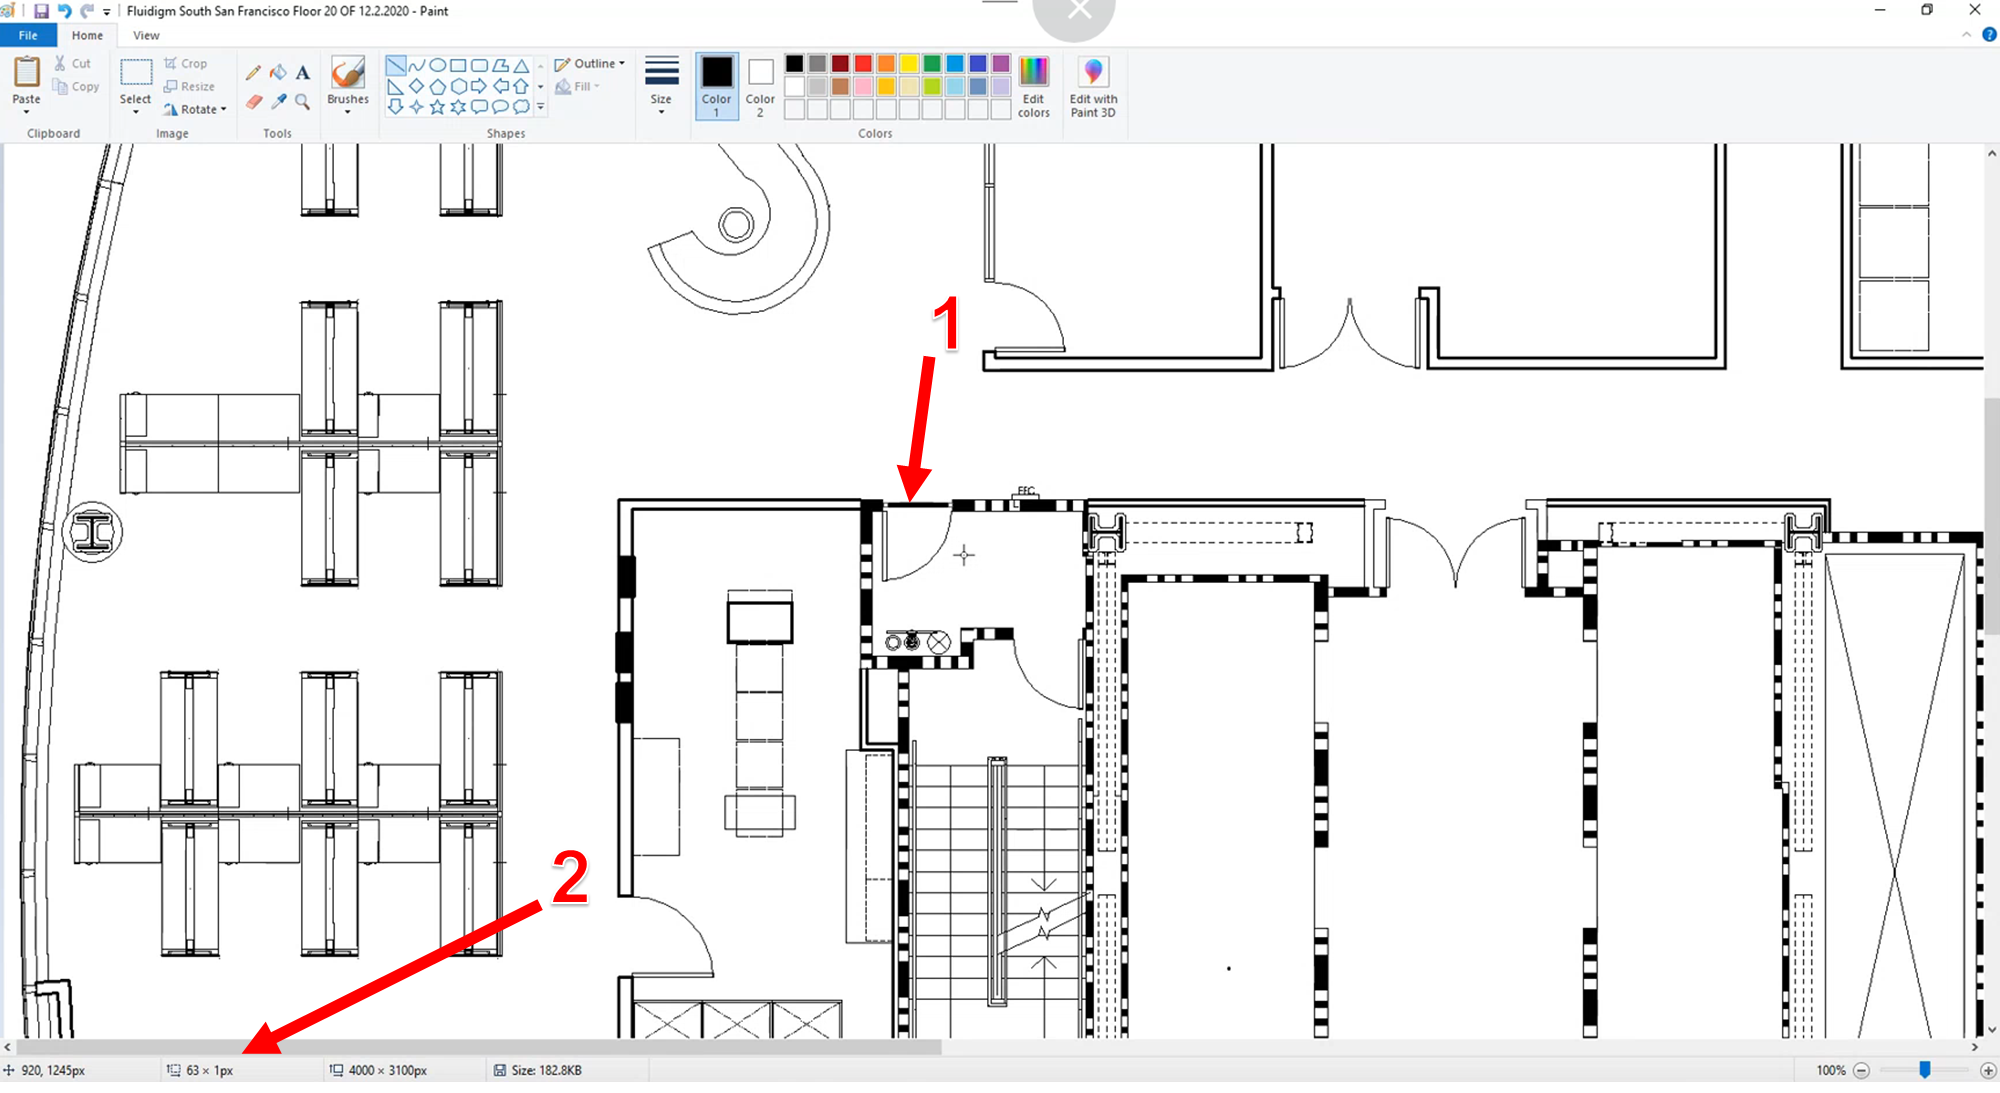
- You need to work out the pixels per foot, to do this use the following calculation:
Pixels (as measured by line tool) / 3 feet (standard door) = Scale (pixels per foot)
For example:
63 / 3 = 21 Scale (pixels per foot)
Finally, in the Safe Distance field enter the safe distance measurement that applies to the floor, and when finished click the Save button.
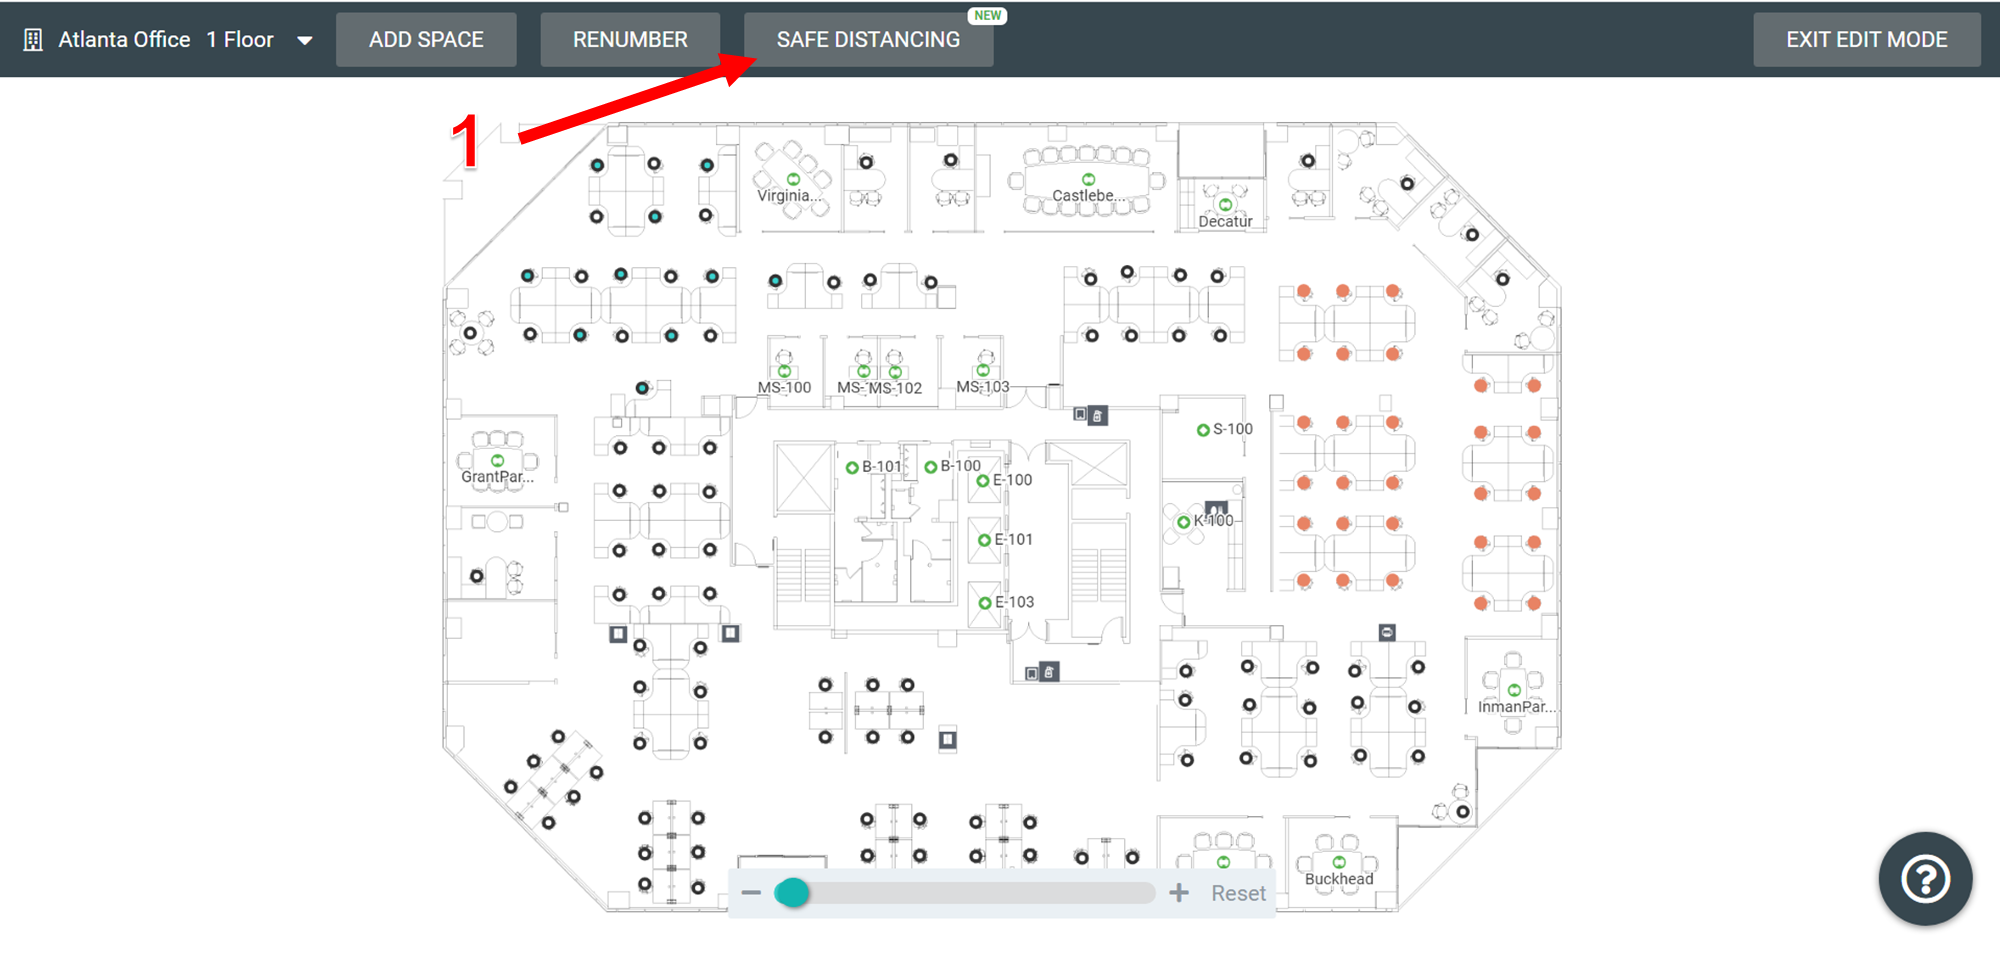
Step 2. Review and Adjust the Safe Distancing in the Map Editor
Navigate to the Floormap's  and then click Map Editor
 ![]() and the Safe Distancing button will be at the top of the screen.
and the Safe Distancing button will be at the top of the screen.
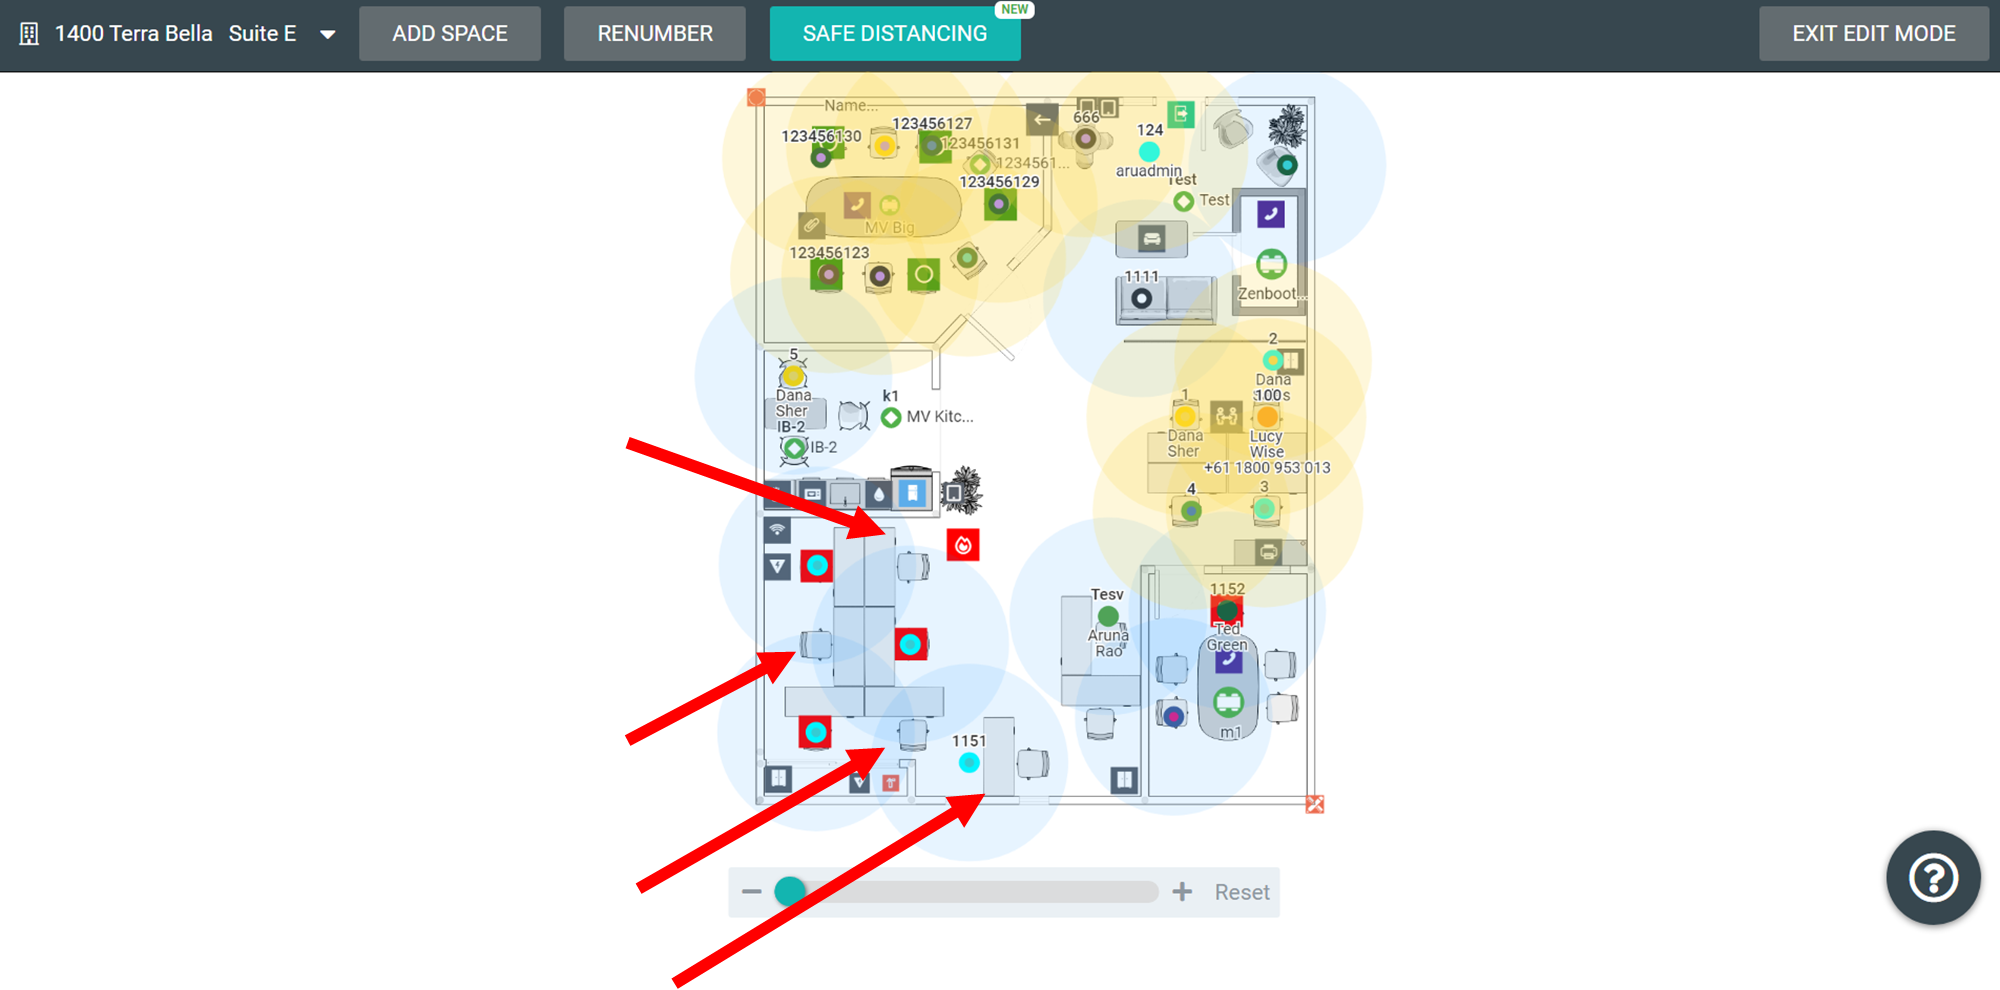
You may assume that this floor plan has enough safe distance between employees.
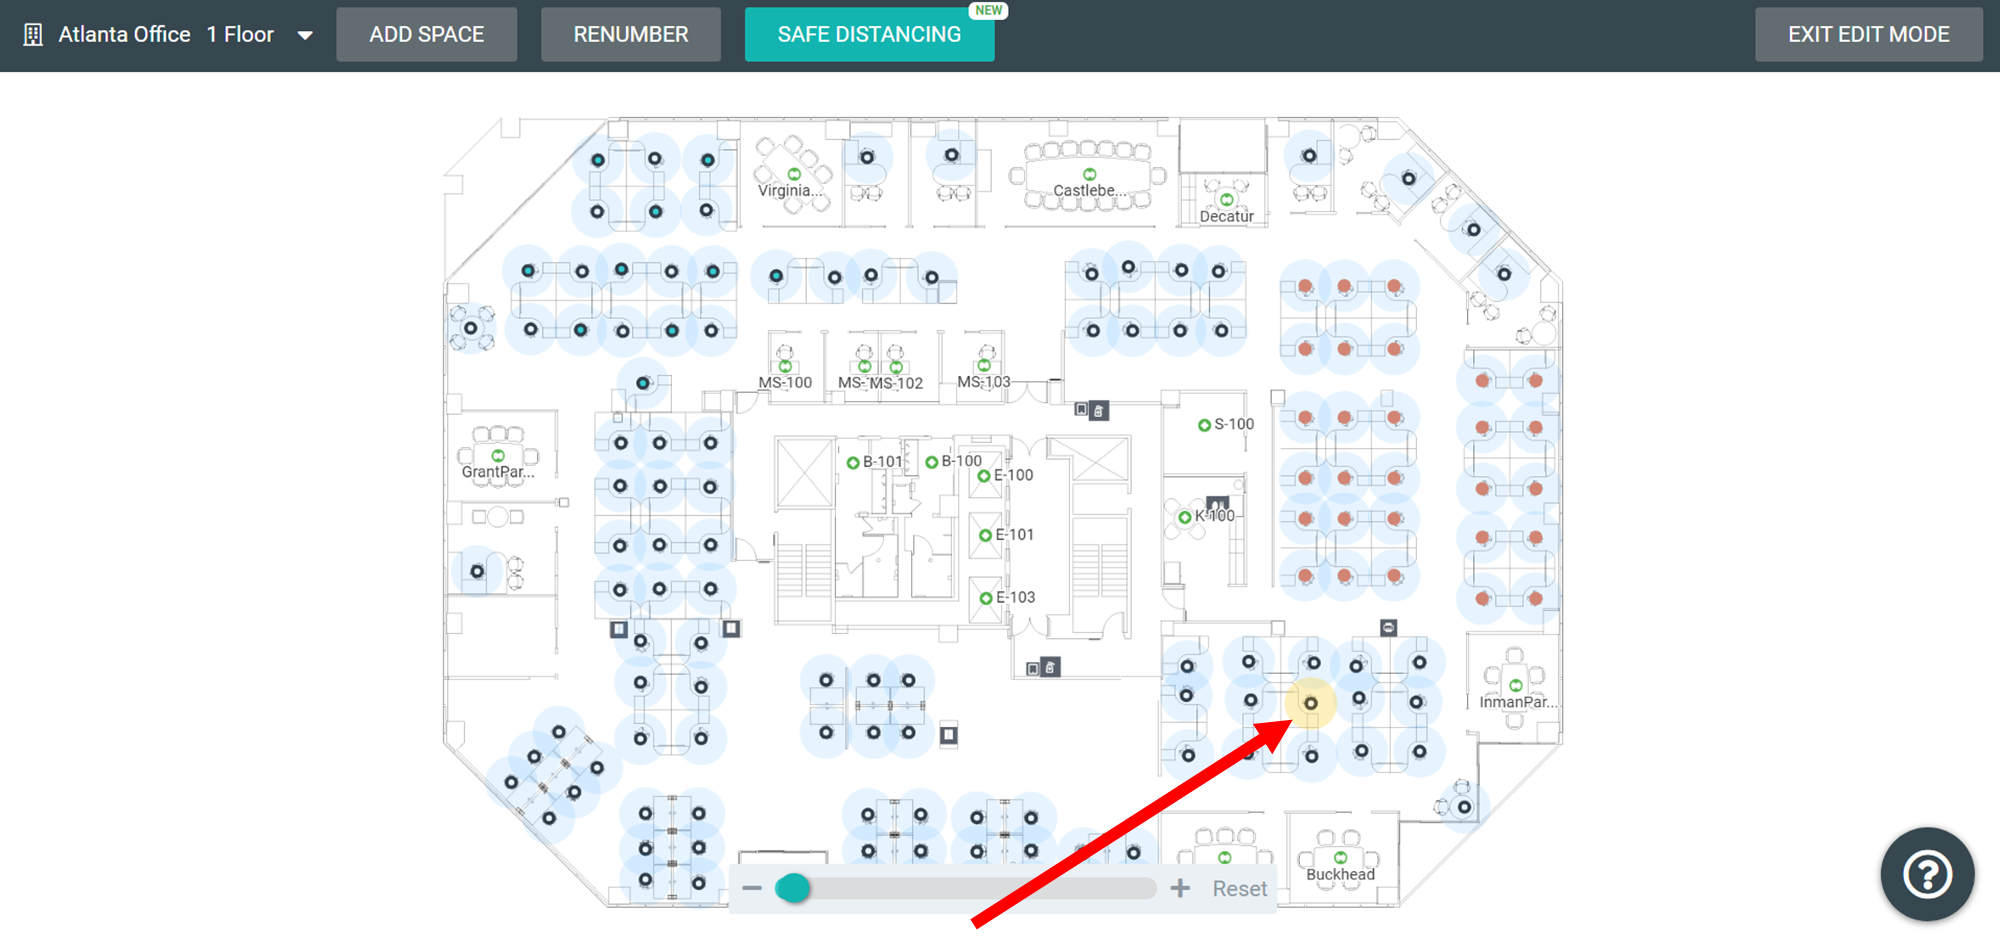
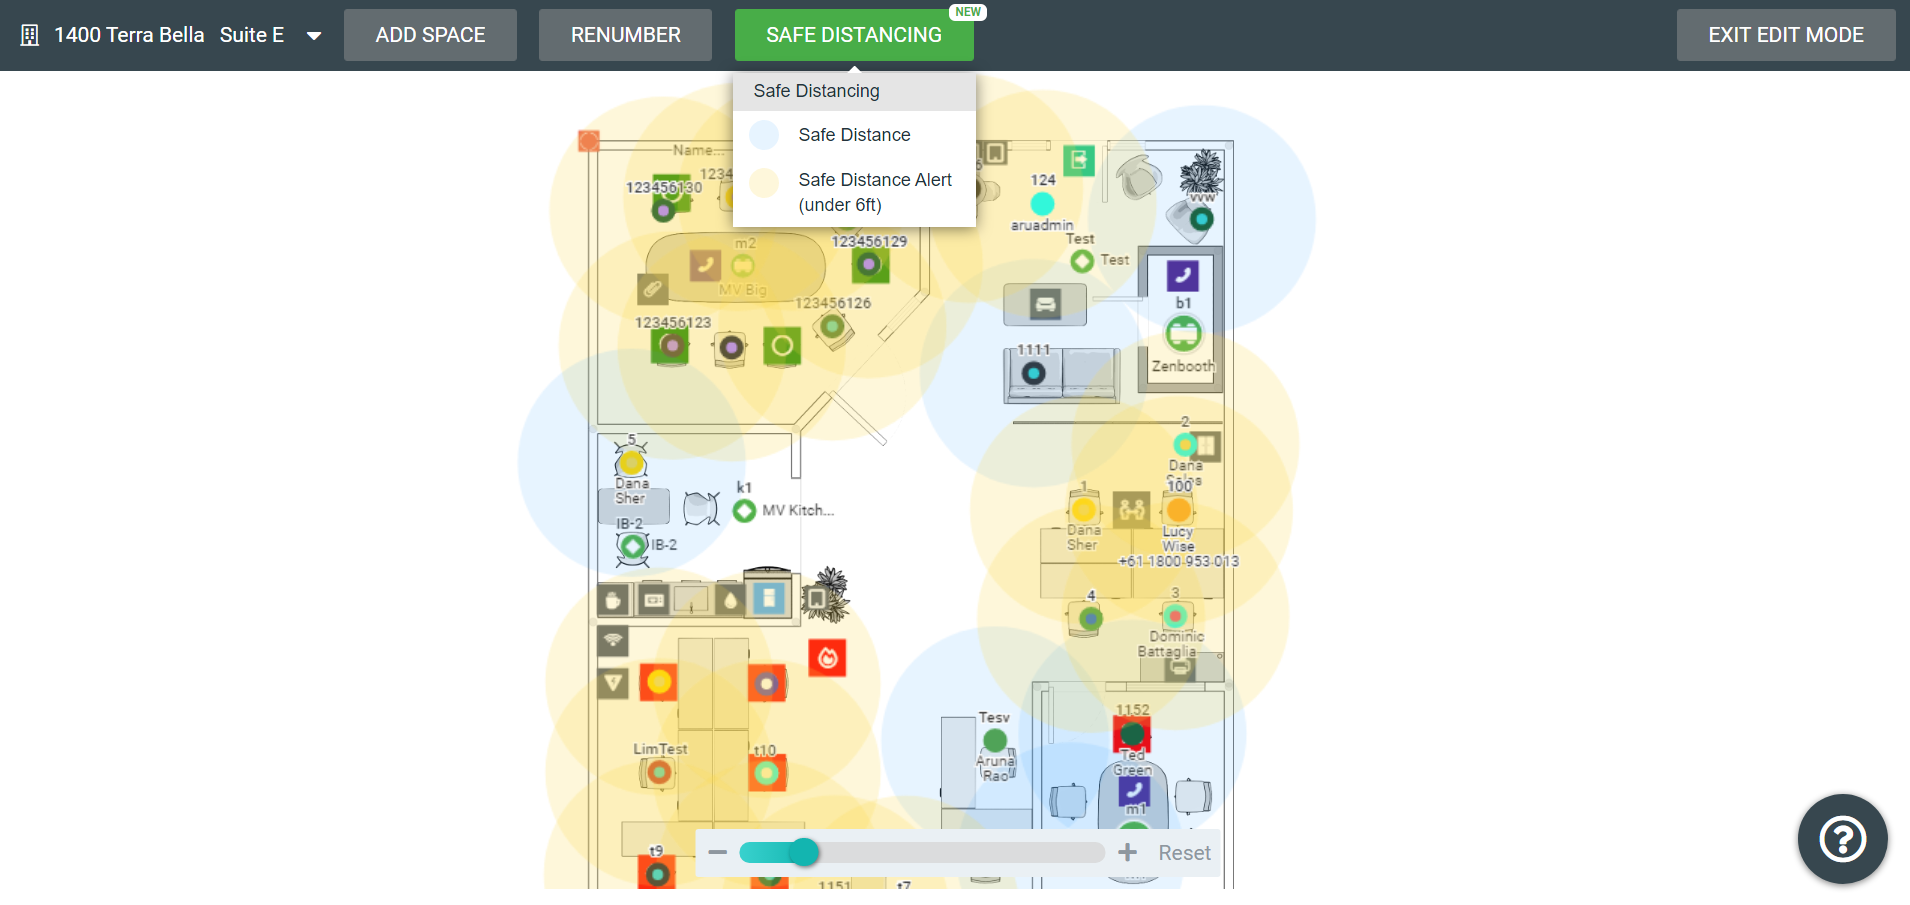
Click the Safe Distancing button to turn it on. This displays a radius around the desks with safe distancing in light blue and desks that have a safe distancing alert in light yellow.
This reveals an alert in light yellow to highlight the unsafe space.
Step 3. Adjust the Desks
You will need to adjust the seating arrangement on the floor map. When you adjust the desks you may need to move employees first, see Move Employees, before you remove the desks to ensure the safe distancing of the employees.
Crowded Space Example
Let's have a look at a busy floor map, in this example, the majority of this floor has light yellow alerts.
Here, you can remove the desks in a checkerboard pattern to ensure the employee has enough space around them.