
Desk booking screens
Setting up desk screens
Follow this process to set up your Condeco Desk Screens v3 for Eptura Engage:
- Review the deployment guidelines
- Check and set your domain allowlists.
- Create Screen Setting Profile(s) to customize behaviors.
- Add desk booking screens to the Device Hub
- Activate your desk booking screens.
See also...
- For administrators: Condeco Desk Screen v3 for Eptura Engage setup guide
- For employees: Condeco Desk Screen v3 for Eptura Engage user guide
View and manage desk screens
To view and manage desk screens, click Device Management in the icon menu on the left and select Desks & Screens.
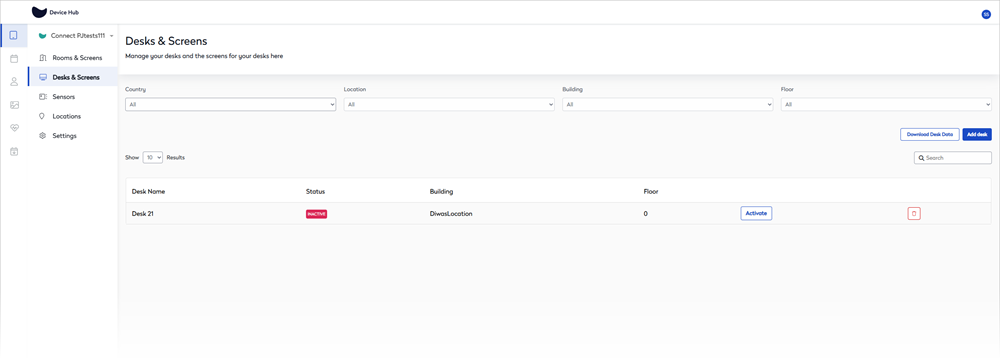
From the Desks & Screens page, you can filter devices by Country, Location, Building, and Floor, or search for a specific device by entering the desk name in the Search box on the right.
Click a desk in the list to view or edit it.
To activate a desk, see Activate your desk booking screens.
Download desk data
The entire desk list can be downloaded as a CSV file.
- Click the Download Desk Data button above the list on the right.
- A message is displayed to confirm the download request has been received "We've received your download request. We will send you an email once your file is ready".
- The email arrives from 'no-reply' with the subject "Your Exported Desk Data is Available" and contains a link to download the report. The download link is valid for 24 hours.

- Click the Download button to download the report to your default download folder.
- The report is a comma-separated variable (CSV) file format with the name - DeskReport_[date and ref number].csv
- The report contains the following columns (not all columns are relevant to desk devices):
- Name
- RoomStatus - (Desk status)
- Mailbox
- Location
- ScreenThemeName
- ScreenThemeAccessLevel
- ScreenSettingsName
- ScreenSettingAccessLevel
- Capacity
- Type