ServiceNow integration
About the ServiceNow integration
When ServiceNow is integrated with Eptura Engage, you can report issues directly from Eptura Engage and create incident tickets in ServiceNow. Issues can be raised for any asset that ServiceNow manages - they do not need to be associated with an Eptura Engage resource. When reporting an issue, details are selected and entered on the Report Issue form in Eptura Engage, and when submitted, a corresponding incident ticket is created in ServiceNow.
Configure OAuth 2.0 in ServiceNow
Configuring OAuth 2.0 in ServiceNow requires the following steps, which are described in detail below.
- Step 1: Activate the client credentials grant type
- Step 2: Create the OAuth client
- Step 3: Copy Client ID and Client Secret
- Step 4: Add required fields to the OAuth application registry form
- Step 5: Set the grant type and OAuth application user
- Step 6: Configure REST API auth scope
- Step 7: Assign the Scope Restriction to the OAuth application
The following steps involve features and interfaces provided by a third‑party application. Options and screens might vary depending on the vendor’s updates.
Step 1: Activate the client credentials grant type
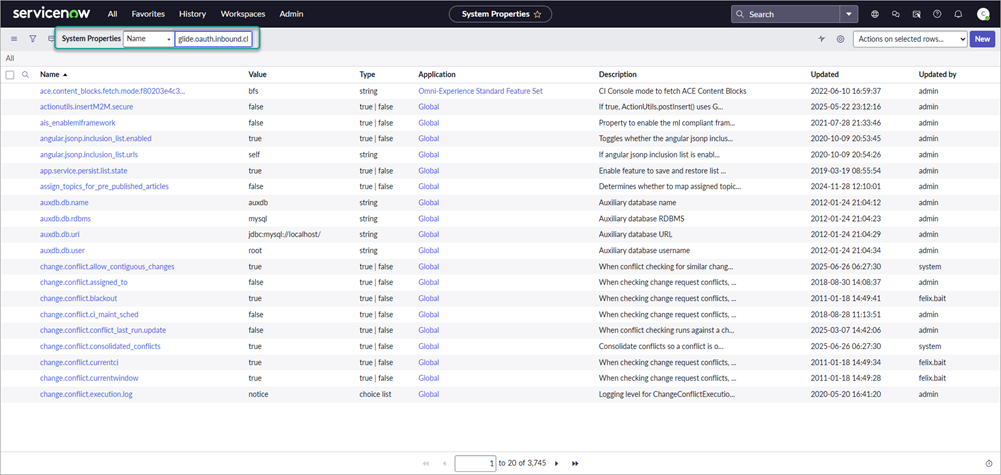
- Sign in to ServiceNow. Click All to display the search box and enter sys_properties.list in the search box (no results will show), then press Enter to open the System Properties.

- Locate and open the property glide.oauth.inbound.client.credential.grant_type.enabled If the property doesn't already exist, click New in the top right-hand corner to create it.
- Set the properties as follows:
- Name: glide.oauth.inbound.client.credential.grant_type.enabled
- Type: Select true | false from drop-down list
- Value: Enter 'true' (without quotes).
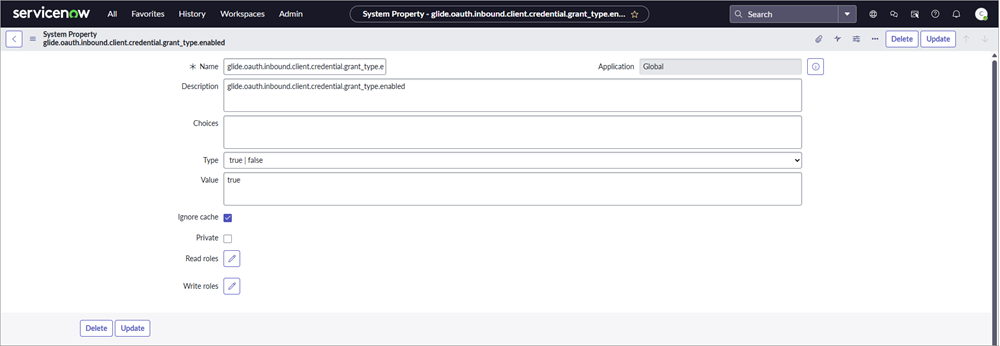
- Click Update or Submit..
Step 2: Create the OAuth client
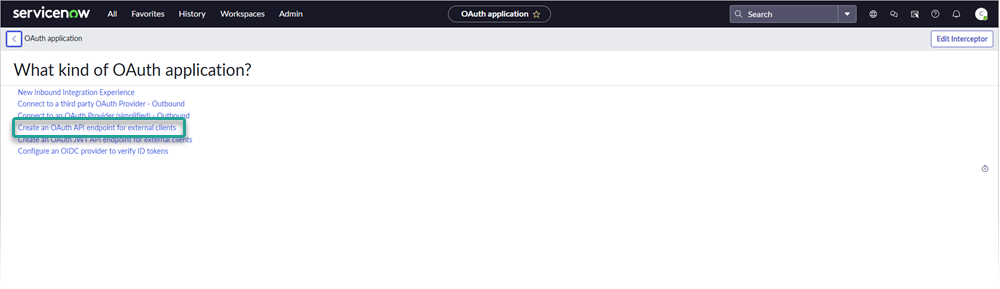
- Click All and go to System OAuth > Application Registry.

- Click New in the top right-hand corner to create a new OAuth application.

- Select Create an OAuth API endpoint for external clients. (Some versions of ServiceNow might show this as 'Depreciated UI' but it can still be used).
- Enter a name for the OAuth application (example: EpturaEngageOAuthClient).
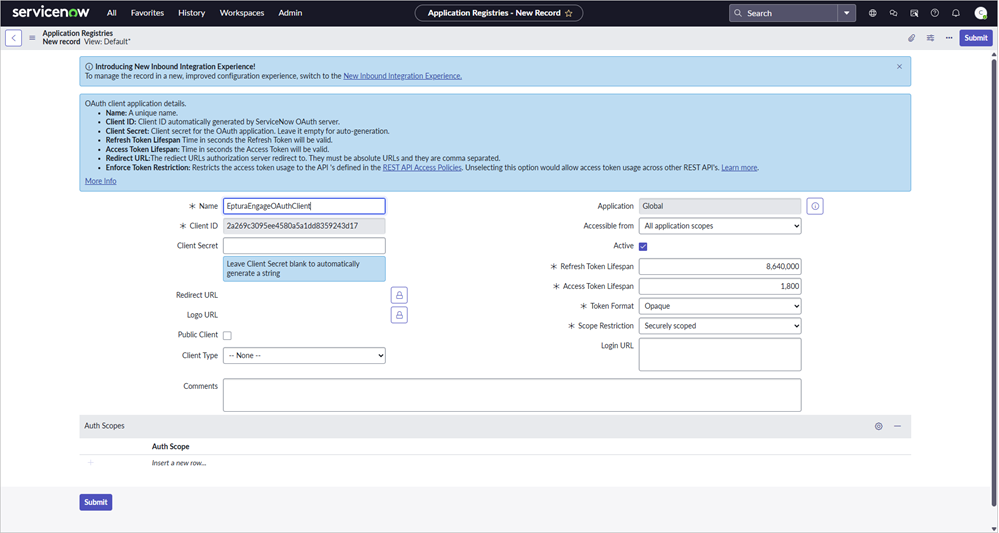
- Keep the remaining fields as default and click Submit.
Step 3: Copy Client ID and Client Secret
Eptura needs to know your Client ID and Client secret to enable the integration. Follow the steps to copy the values:
- Open the new OAuth application record from the Application Registry, and save the following values (they need to be passed to Eptura by your agreed method):
- Client ID: Copy the client ID string and store it so that it can be retrieved later.
- Client secret: Click the Copy icon to copy the hidden secret - the client secret might only be visible once so make sure to save it securely. If you want to view the client secret, click the padlock icon.

Step 4: Add required fields to the OAuth application registry form
Now add the Default Grant Type and OAuth Application user fields to the new OAuth application registry form so the values can be set.
- With the new OAuth application record open, right-click the gray bar at the top (below the main ServiceNow menu bar), and select Configure > Form Design.

- The Form Design page opens in a new browser tab. In the Fields tab on the left, search for and add (drag) the following fields to the 2-column section of the form:
- Default Grant Type
- OAuth Application User
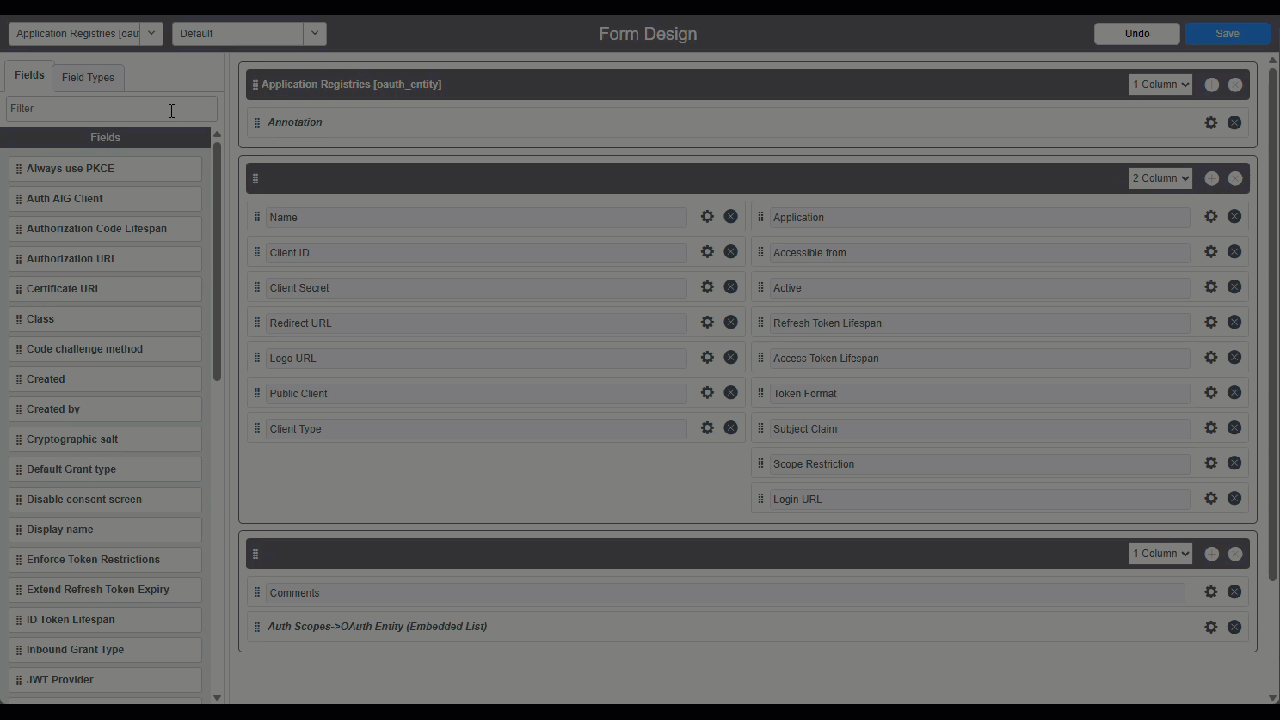
- Click Save to save the additional fields to the OAuth application registry form.
Step 5: Set the grant type and OAuth application user
- Return to the browser tab with your new OAuth application registry, and refresh the page to display the fields you just added, then set the following values:
- Default Grant type: Select Client Credentials.
- OAuth Application User: Select the System Administrator (or any authorized user).

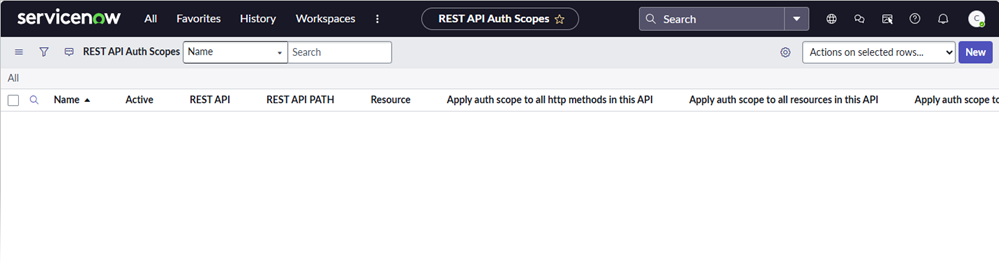
Step 6: Configure REST API auth scope
The OAuth token needs explicit permission to access ServiceNow APIs. Without this, API calls will return 'User Not Authorized - Access to unscoped API is not allowed'. First, configure the REST API auth scope as described below, and then assign the Scope Restriction to the OAuth application (Step 7).
- Click All and go to System Web Services > API Auth Scopes > REST API Auth Scope.

- Click New to create a new auth scope.
- Set the following values:
- Name: Enter 'Table API - Incident'.
- REST API: Select Table API.
- Auth Scope: Enter 'useraccount'.
- Apply auth scope to all http methods in this API: Tick to Enable.
- Apply auth scope to all versions in this API: Tick to Enable.
- Apply auth scope to all resources in this API: Tick to Enable.
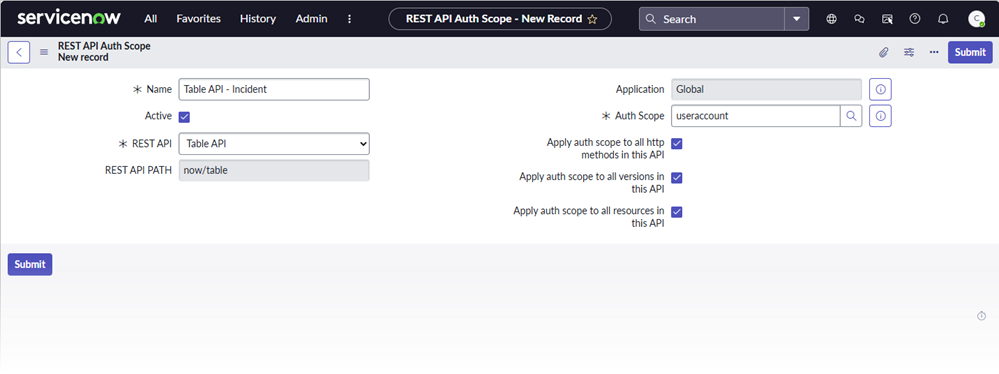
- Click Submit.
Step 7: Assign the Scope Restriction to the OAuth application
Navigate back to the new OAuth application created earlier and assign the Scope Restriction:
- Click All and go to System OAuth > Application Registry, then open the OAuth application created earlier.
- Scroll to Auth Scopes section at the bottom, and double-click Insert a new row.

- Enter 'useraccount' and select it when it appears.
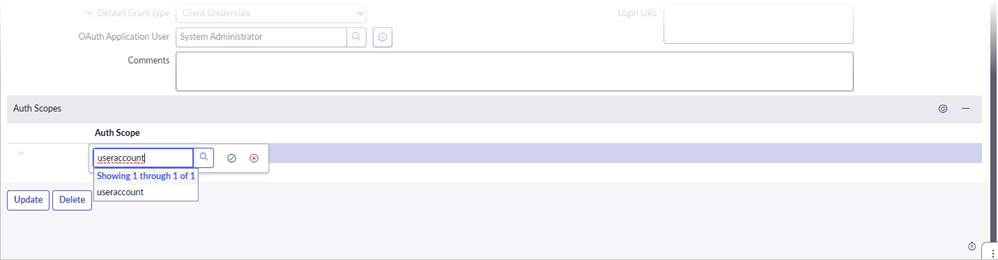
- Click Update.
- The Scope Restriction value is now 'Useraccount scoped'.
