Screen settings and booking rules for desk booking screens
Manage screen settings profiles
- Sign in to the Eptura Device Hub - https://westeurope.condecoconnect.com/. The Device Management page is displayed, showing the Rooms & Screens information.

- From the Device Management menu, click Settings to display the settings profiles for desk and room screens.
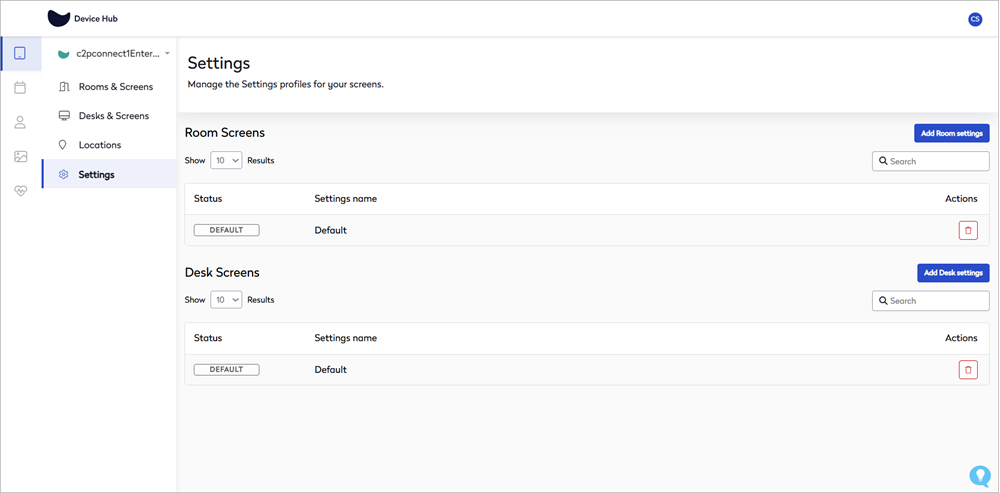
Settings Profiles
From the Settings page, you can:
- Set the default profile: Click Set as default next to the profile you want to make default.
- Delete a profile: Click the bin icon to the right of a profile to delete it.
- Rename a profile: Select the profile, edit the name in the Settings name box, click Next then Save.
- Find a profile: If you have several settings profiles, you can use the search box at the top of each list to quickly find the profile you want to edit.
Create or edit a screen settings profile for desk booking screens
- Sign in to the Eptura Device Hub - https://westeurope.condecoconnect.com/. The Device Management page is displayed, showing the Rooms & Screens information.
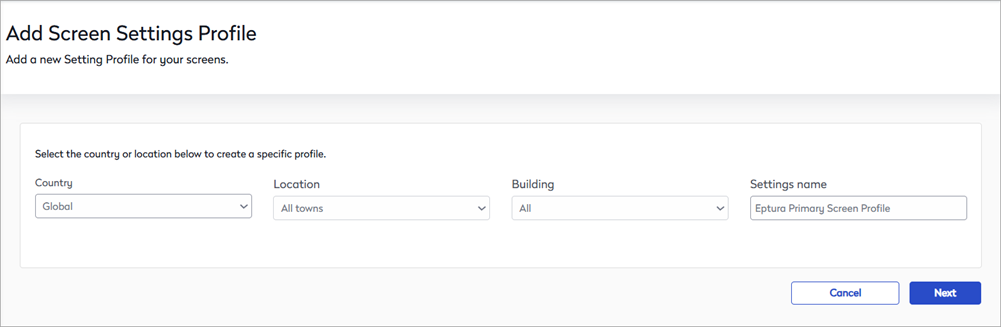
- From the Device Management menu, click Settings to create a new profile or edit an existing profile.
- Create a new profile: From the Settings page, click Add Desk settings. You can make the profile available globally or select the specific location details from the drop-down lists. Enter a name for a new screen settings profile, then click Next to set the booking rules and screen settings.
- Edit existing profile: From the Settings page, select the profile to edit, then click Next to edit the booking rules and screen settings.
Booking rules and screen settings
The options for the screen profile are described in the table below.
Screen settings |
Description |
|
Name of settings group |
Displays the name of the Screen Settings Profile. You can edit the profile name on the previous page. |
|
Screens are active on |
Select the days of the week the screens are active. Eptura screens move to power-save mode outside the business hours defined in the desk and room settings profiles. You can set the active days and times (business hours) in the Device Hub. |
|
Screens are active between |
Set the from and to times the screens are active, or select All day. Outside these times, the screens are in power-save mode and the lights and display are switched off. Users can wake up the screens by tapping on the display. If All Day is selected, the screens will not check for updates, and if the inactive time is too short, updates might not complete. |
|
Enable AM/PM bookings |
|
|
Users need to authenticate to |
Select the actions that require a user to authenticate using a PIN or by presenting their RFID card. The following actions can be set to require authentication:
If an action is not enabled, anyone can complete the action on the screen. |
|
Time format |
By default, the 24-hour time format is set. To change the display to AM/PM disable the option. |
|
Screen security PIN |
Enter a custom PIN for the on-screen setup. We recommend changing this from the factory default to avoid unwanted tampering with the screen settings. |
|
RFID card types |
Select the RFID card types that can be registered to use the screen. The following card types are supported:
|
|
Booking hours |
|
|
Set this as default |
Enable to make this profile the default settings profile. |
Click Save to update the settings. It typically takes a few seconds for the new settings to be applied to your screens.