Using the Google Chrome Teem Calendar Extension to Book a Desk
With the Chrome Extension for Google Calendars, employees can book rooms based on availability, capacity, location, and amenities. This calendar also offers a drop-down menu that lives in the browser menu that can be accessed at any time to help stay on top of scheduled meetings.
Launch, Sign in, Current location, and other settings
1. Open your Google calendar and create a new event.
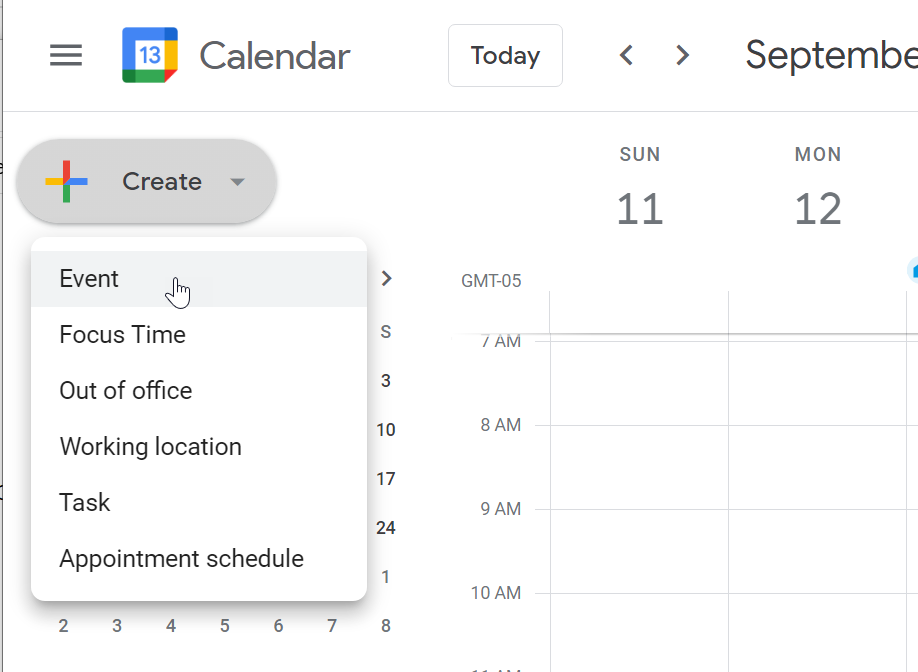
2. Click More Options to see meeting details.
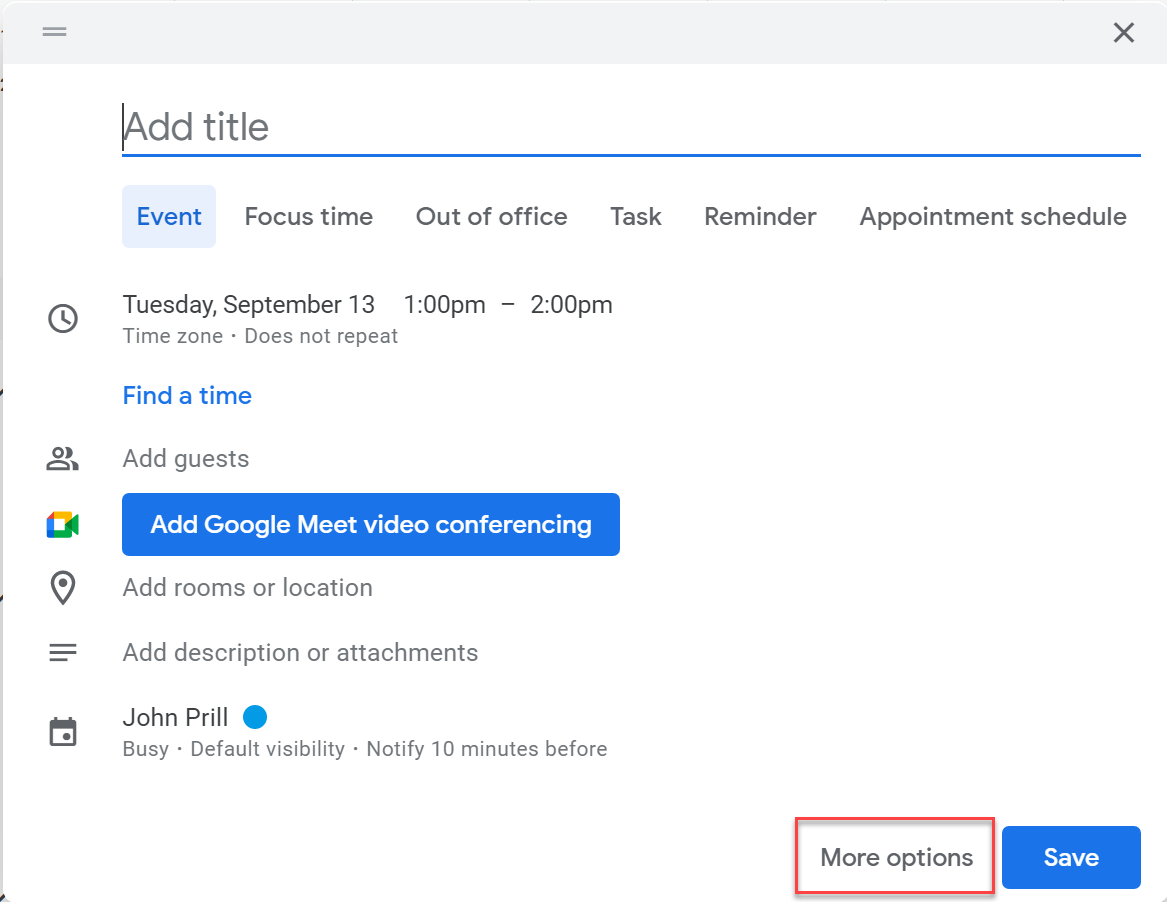
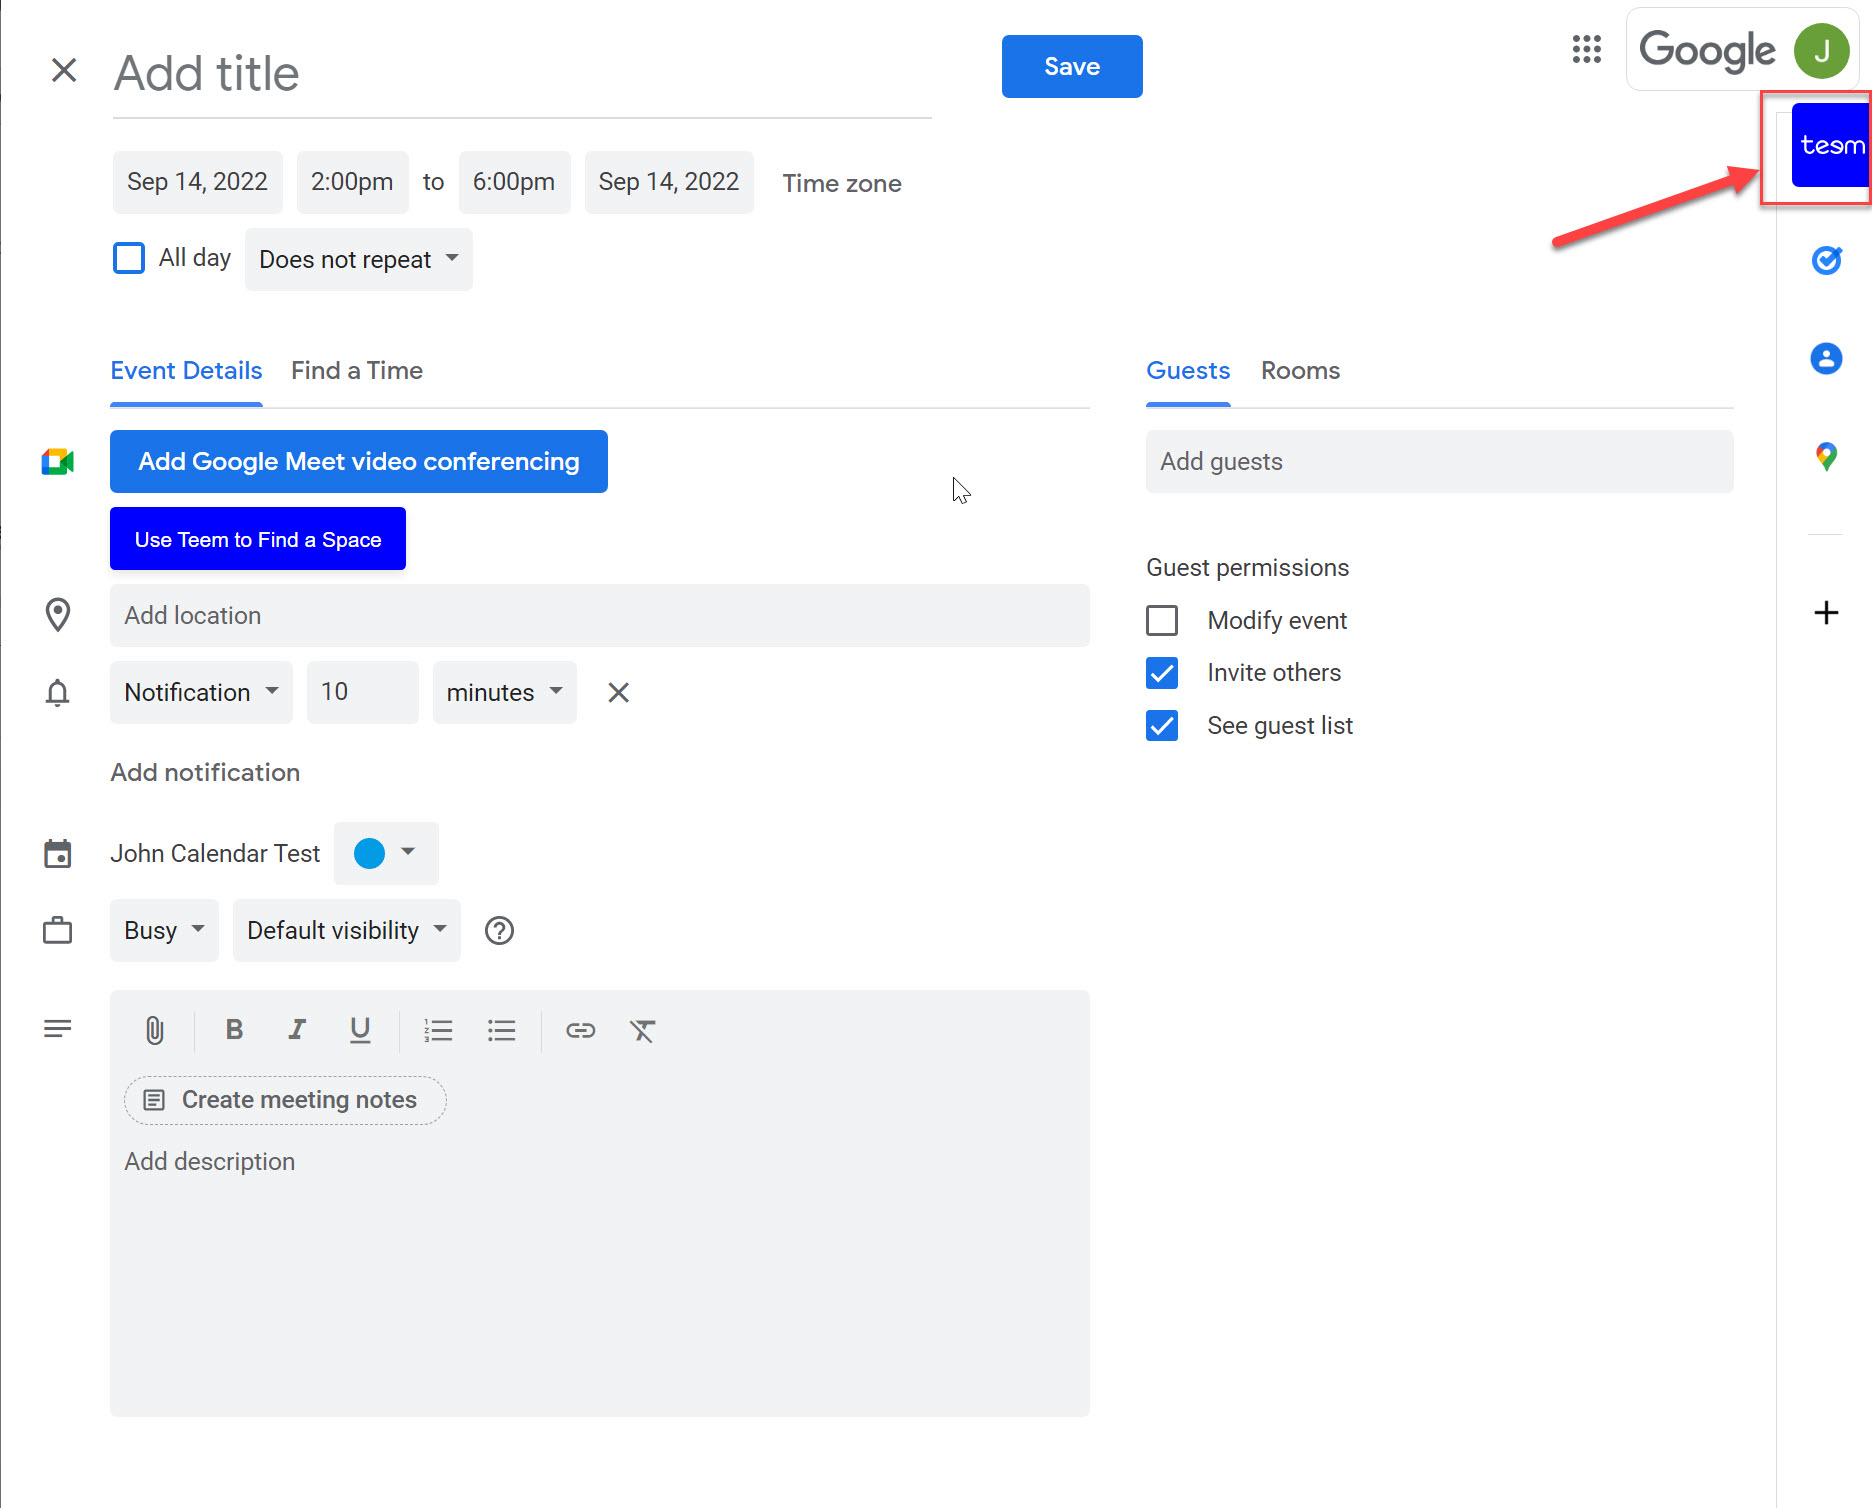
3. On the right side of the screen, you'll see the Teem icon. Click on the icon to open the plugin.
If the Teem icon is not present, please see the Installing the Teem Extension for Google Calendar instructions document.
4. If this is the first time using the Teem Extension in Google Calendar, the user will need to sign in to their Teem account.
Click the SIGN IN button. The Teem Sign in to your account dialog displays.
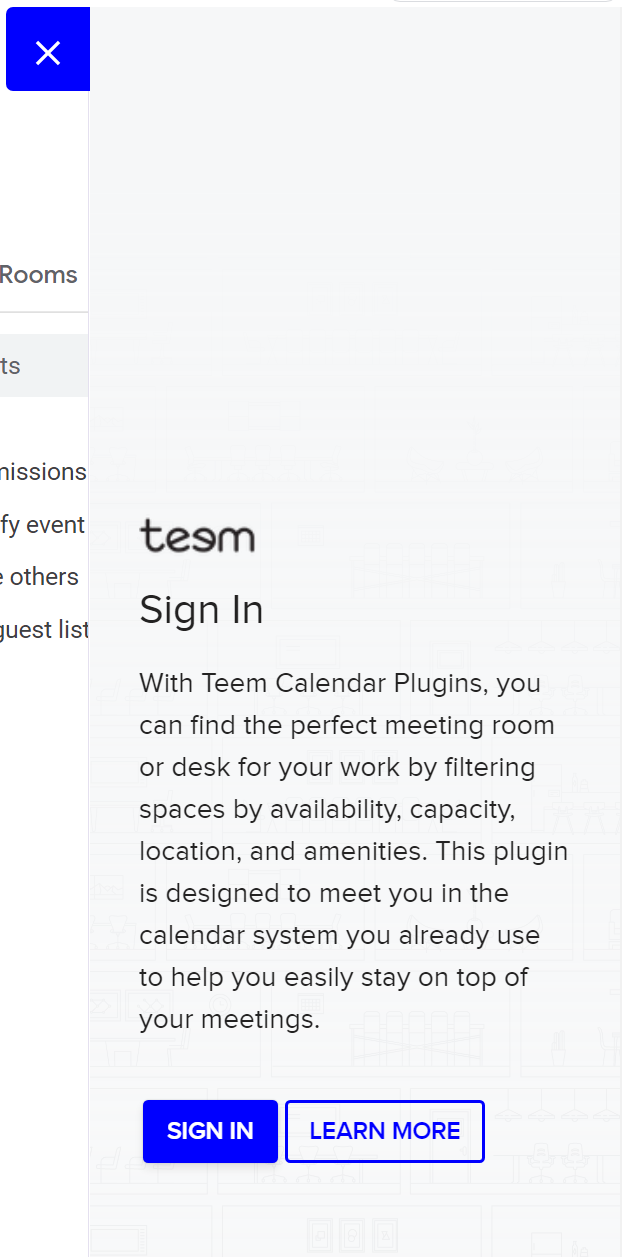
The Teem Sign in to your account dialog is a pop-up window; therefore, check that Chrome allows pop-ups and will not block them.
Also, if using a dual monitor setup, the window may appear on another monitor.
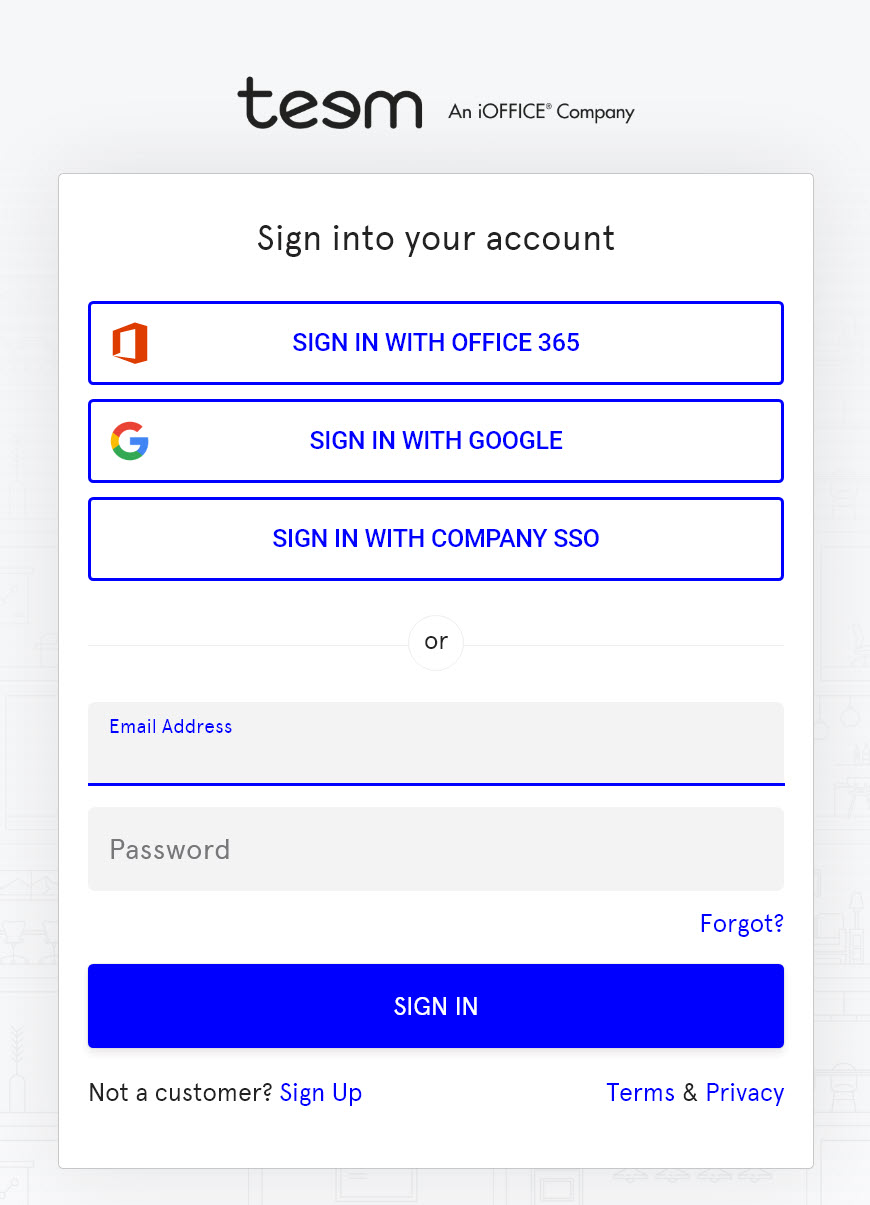
Choose the correct method to log in by clicking on the Sign in with OFFICE 365, Sign in with Google, or Customer SSO buttons, or sign in manually.
After using the sign-in information and clicking the Sign In button, the Teem extension will open right away. There will not be a confirmation window that opens.
4. Click on the Settings icon to the right of the screen.
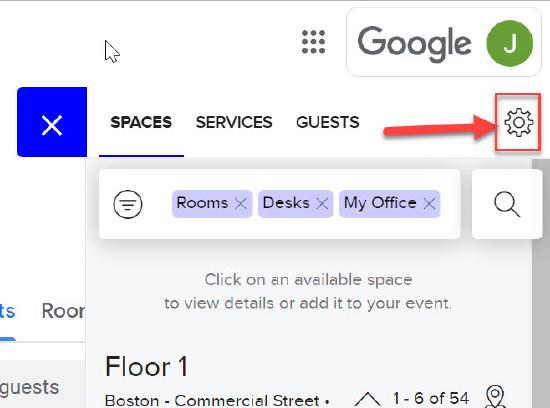
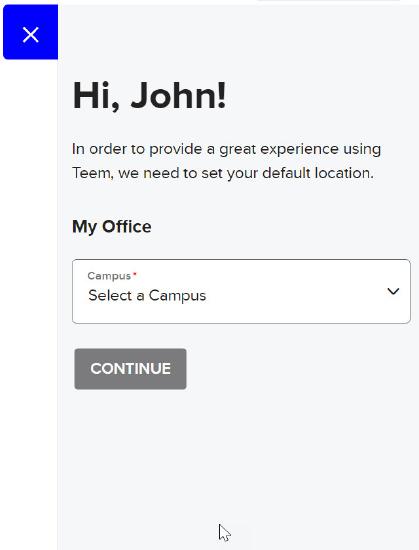
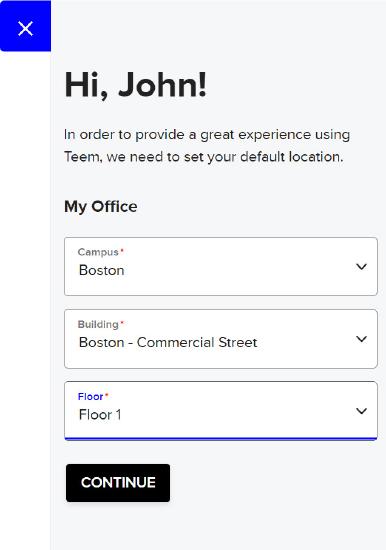
5. Set the preferred office location. These are the Buildings, Floors, and Rooms that are most commonly used, although only one location can be used at a time. This location preference will also be the default when using the drop-down feature of the Teem Extension.
 |
 |
6. Make sure the Auto Launch feature is on. If it is off, it will look grey. This will ensure that the Teem Plugin will auto-open each time you create an event, making adding an event just one click away.
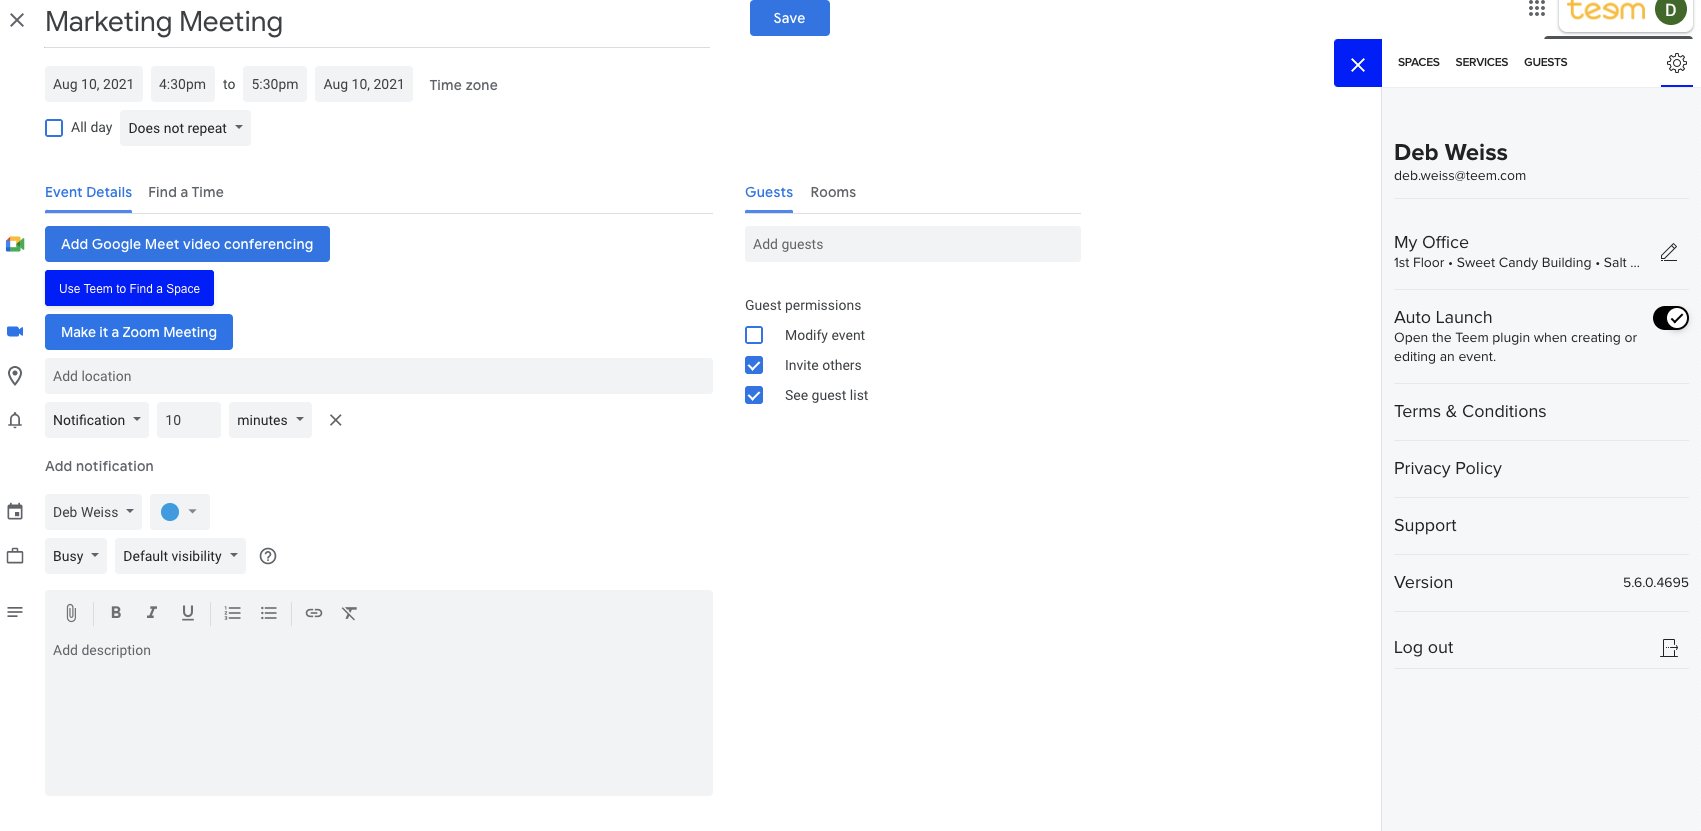
7. Click on the X in blue to close the Teem Window for the moment.
Book a Desk
Booking a desk to work at is very similar to the process of booking a meeting space. The difference is simply choosing a different space, where the user will choose a desk instead of a room.
1. Open Google Calendar
2. Create a new event.
3. Click on More Options at the bottom of the event window.
4. Open Teem (if it is not open).
5. Click on a desk that is available. Use the filter as needed.
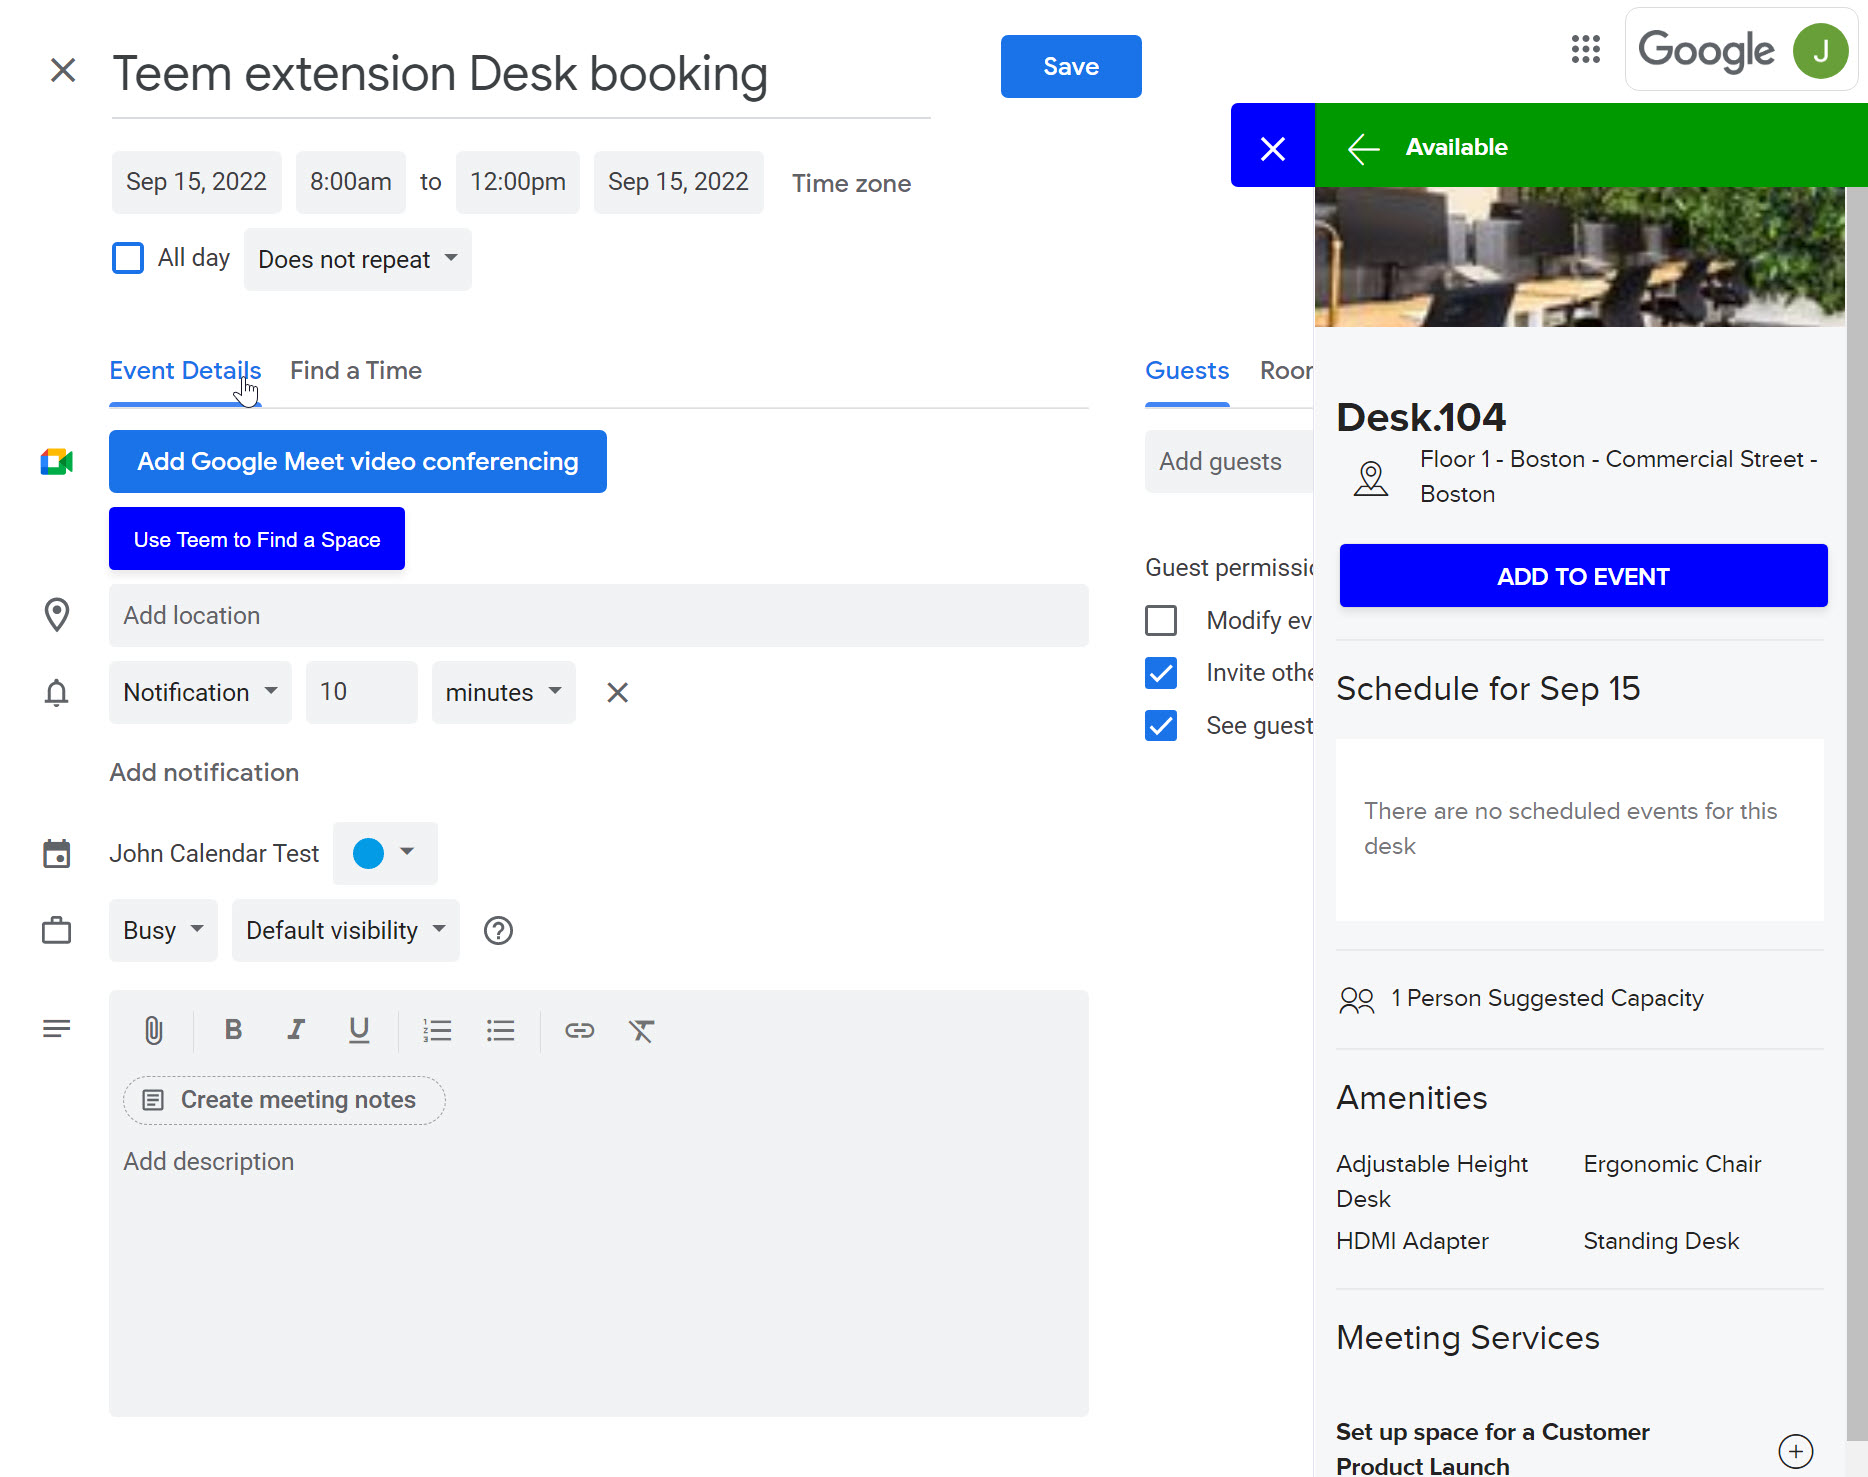
6. Click on Add to Event.
Note: Only one desk can be booked at a time.
7. Click on the X to close the Teem sidebar.
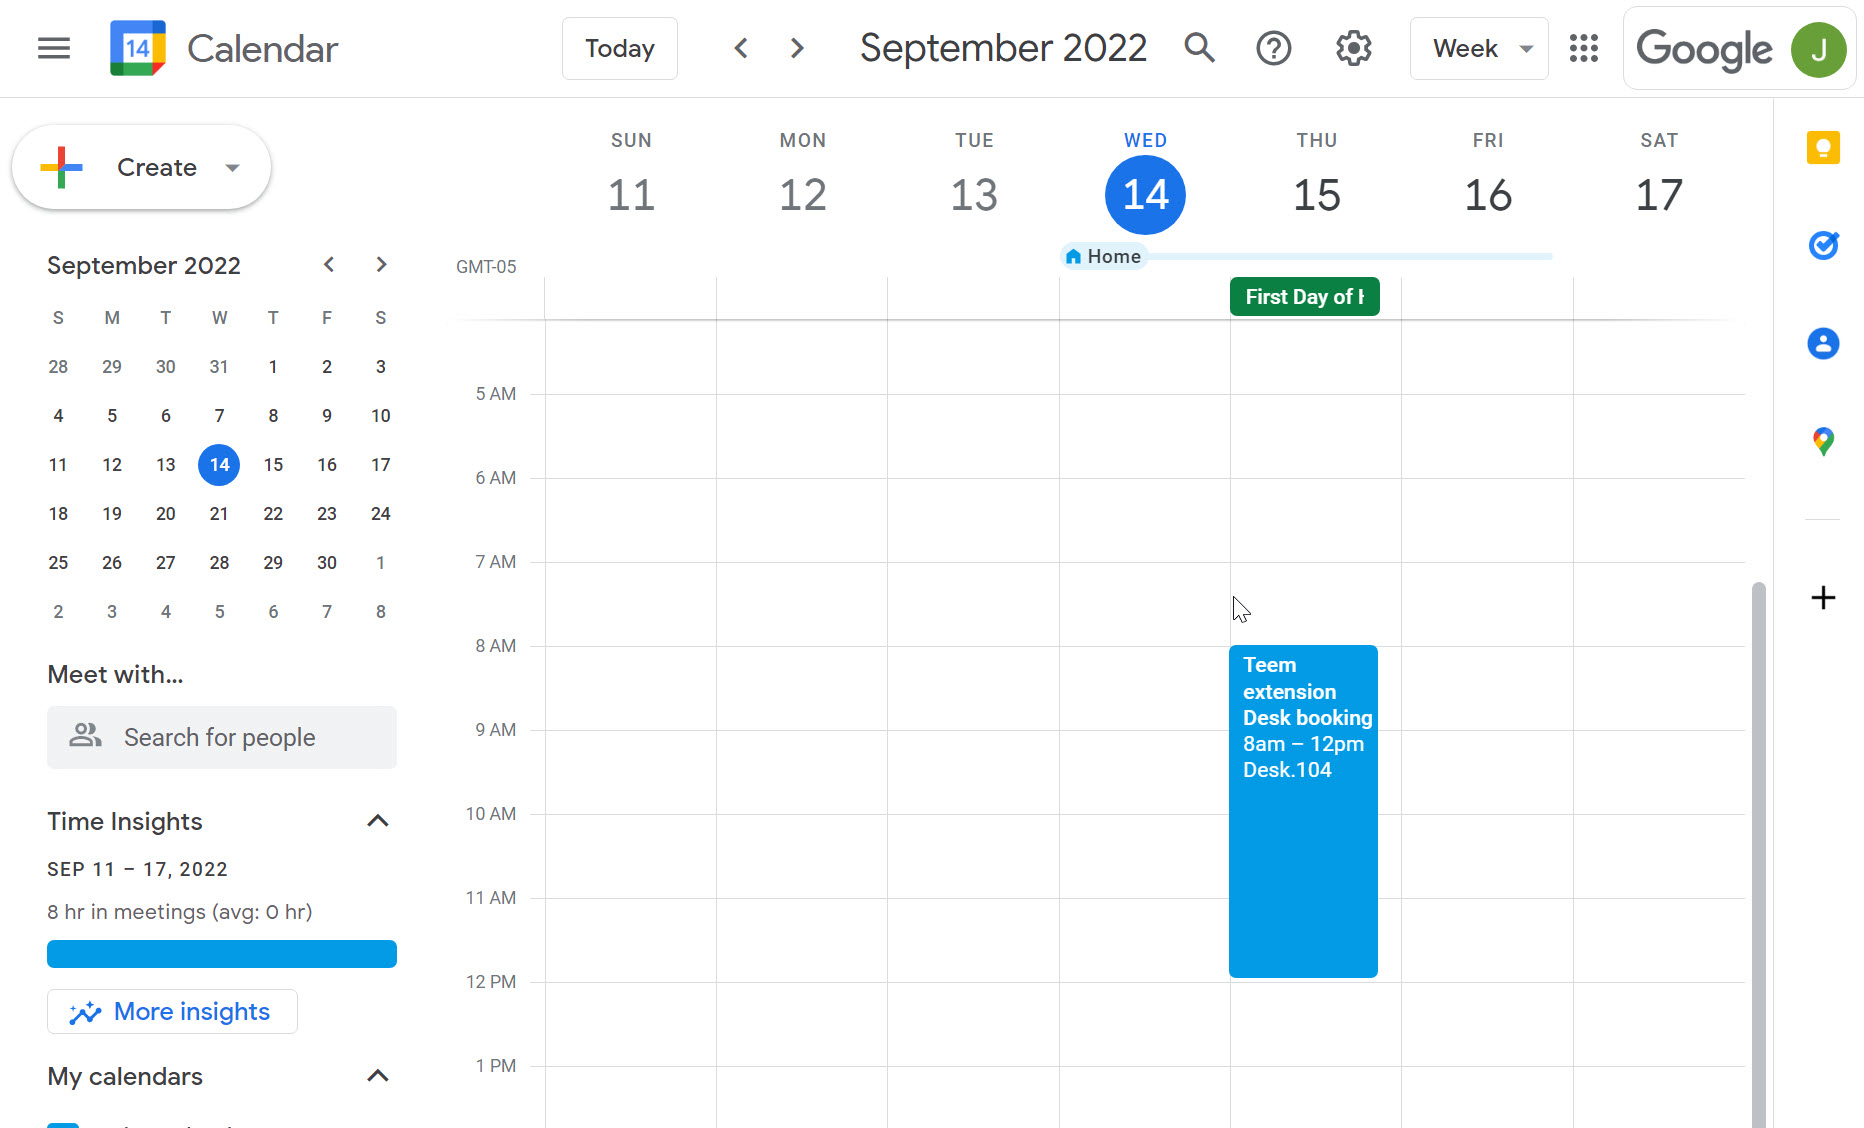
8. The desk location will be listed as both the location and as a desk.
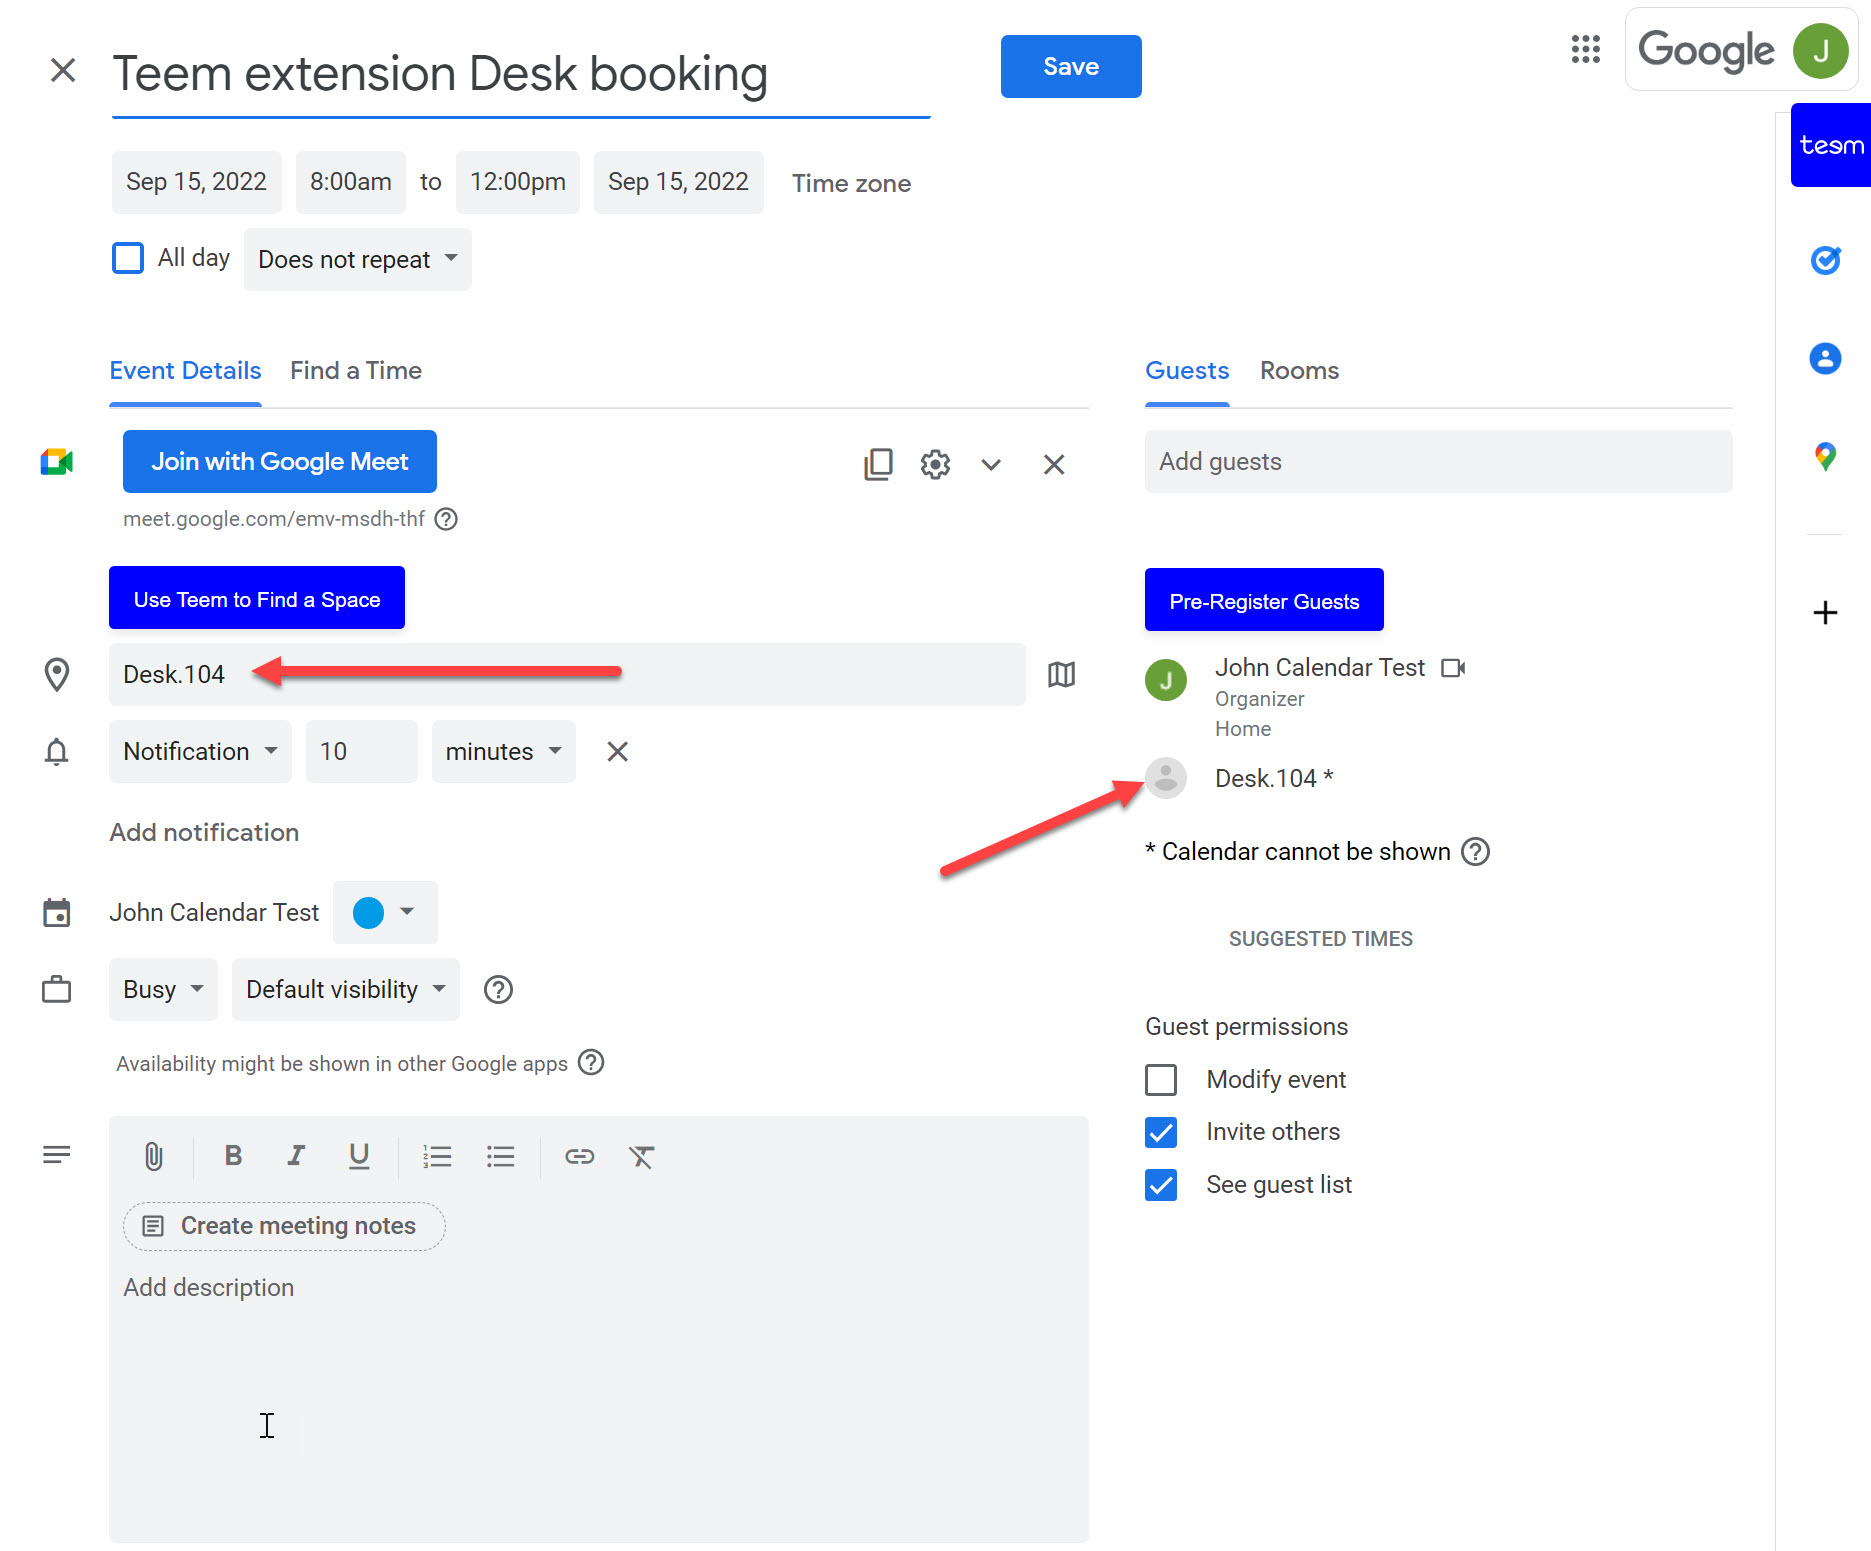
9. Fill out the rest of the information that is needed for the meeting.
Keep in mind most desks are for one person. If the user tries to add a second person, Teem will send a message back saying the space cannot be reserved for that many people.
10. Click on the Save button to send it off to guests and place it on the calendar.
An email will be sent out to the visitors about the booking.

Find a room using a map
Sometimes finding a location to sit, or choosing where to meet with others, requires the use of a map.
Based on the functionality and setup of the Teem server, there may be the option to use a map to find a desk or meeting space.
For information on using the map functionality, please take a look at this information on How to Use the Teem Calendar Map.
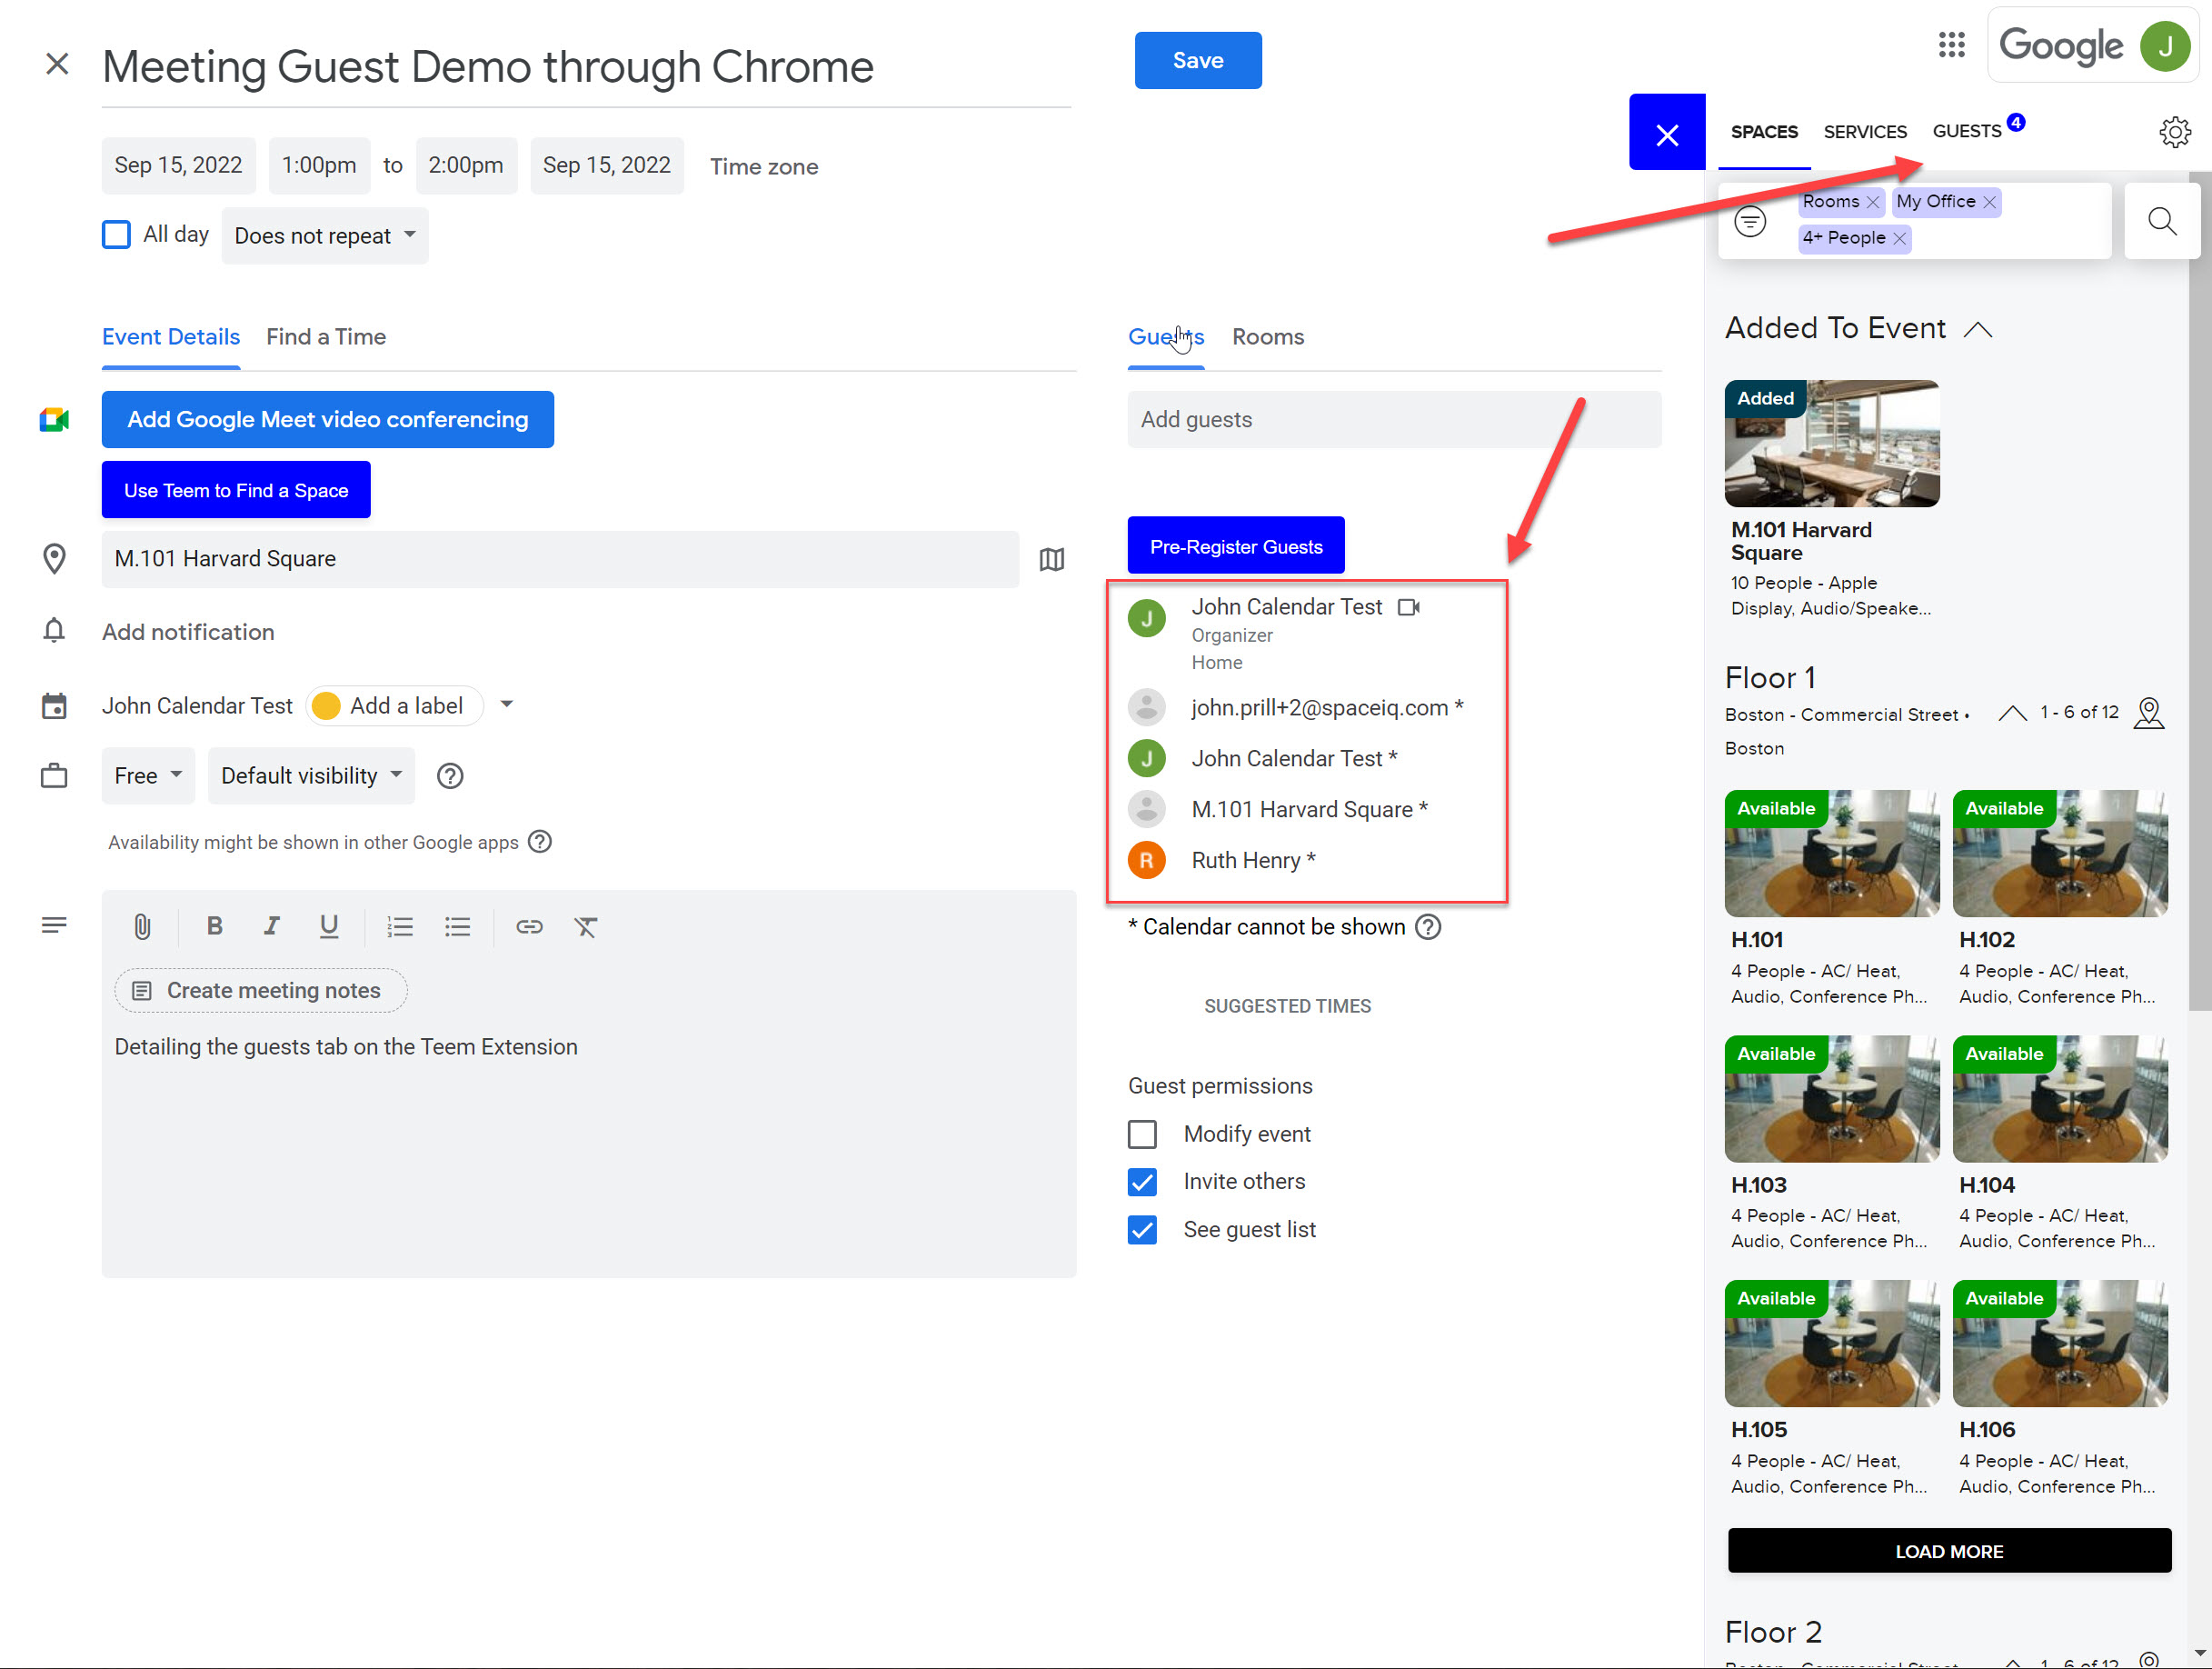
Inviting Co-workers, Guests, and the rest
When a guest who is outside of the organization, or email domain, is added to the space booking using the Google Chrome calendar extension, the number of guests will appear as a highlighted number on the Teem Extension on the right.
This feature is only available for customers with LobbyConnect set up on their Teem account. This feature helps organizers pre-register their guest when visiting the company so that when they arrive at the lobby, their check-in process is a faster experience.
That number is a little hard to see on the extension.
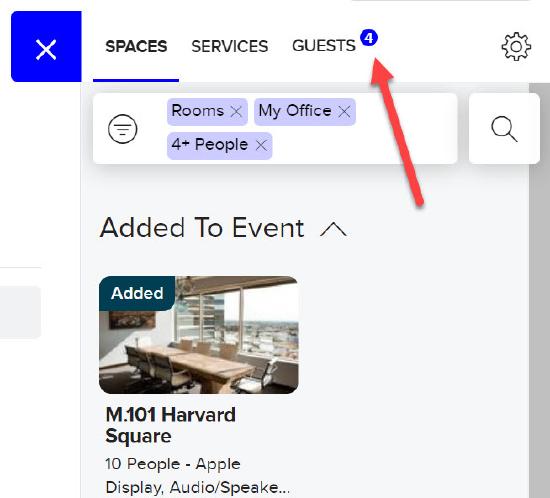
There. Notice that the organizer is not counted as a guest.
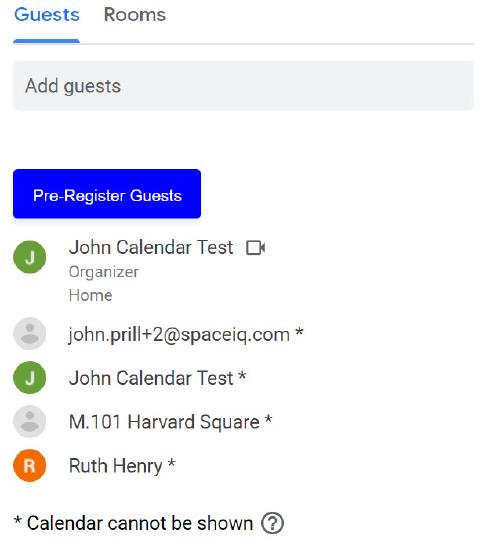
Okay. If the user clicks on the Guests text in the extension, the guest list is shown.
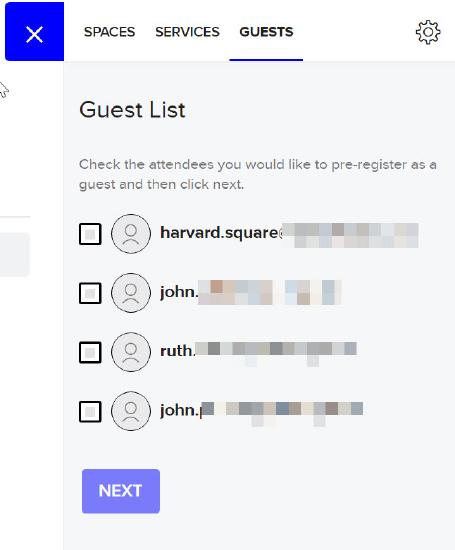
Now, if one of these individuals has not visited the location for the meeting previously, click the box next to their name, and then click on Next.
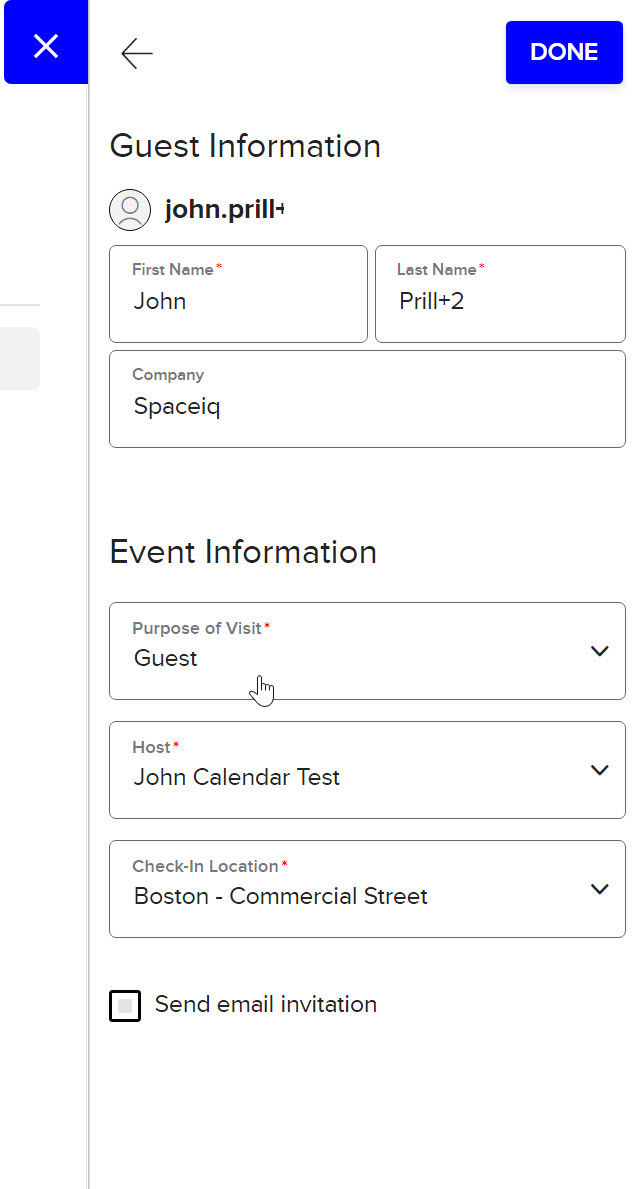
Click on the Send email invitation, and that individual will get an email sent to them, along with the eventual meeting invite, about the specific location details.
Add a Meeting Service
Meeting Services allows the meeting creator to request services for the meeting when using the add-in to book a room, allowing the meeting coordinator to include things like catering or a specific tech setup. Admins can also add custom categories for unique service requests that the organization would like to support.
1. Open Google Calendar.
2. Create a new event.
3. Click on More Options at the bottom of the event window.
4. Open Teem (if it is not open).
5. Teem will display the available resources for the time frame specified in the appointment window. Select a space.
6. If the space has Meeting Services set up, they will appear on the space details screen. Click on the + to add the service to the meeting.
Sometimes the Meeting Service will need additional information, you will then be prompted to fill out any extra information about the service you need.

7 Details of the Meeting Service will show up and are determined by what your Teem admin has set up for that space. Add any details for the meeting service you require and click "Add to Event". You'll see a guest with the name of the meeting service. This is what will trigger creating the Meeting Request to your Office Manager or person responsible for the request.
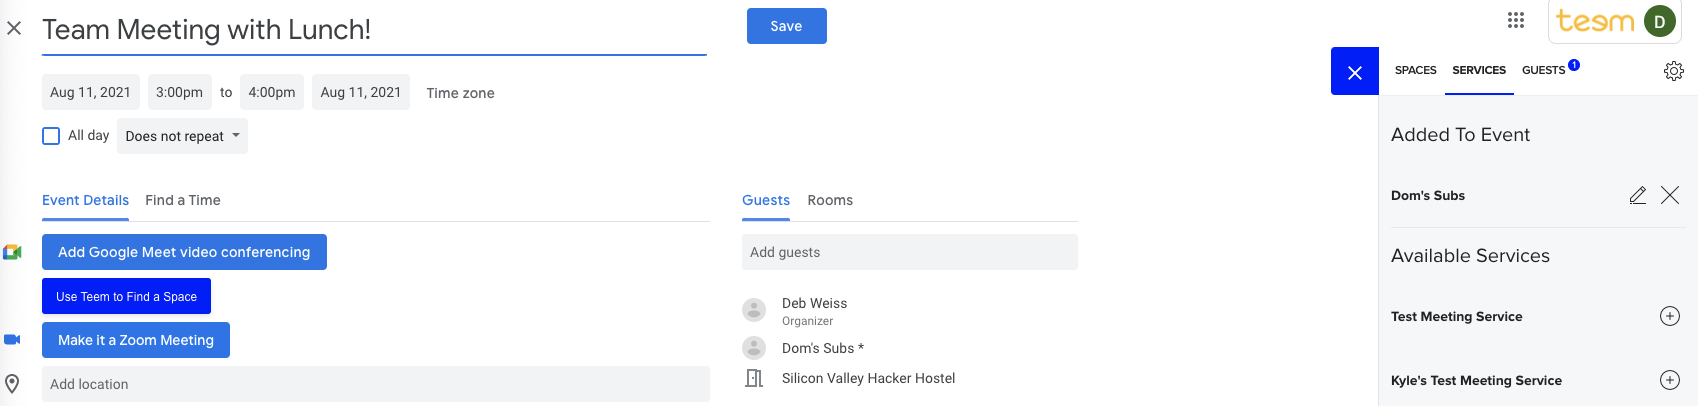
6. When you save the event, you'll be asked if you want to invite "external guests" make sure to say "yes" as this will send the Meeting Service request to the Teem Admin tools.
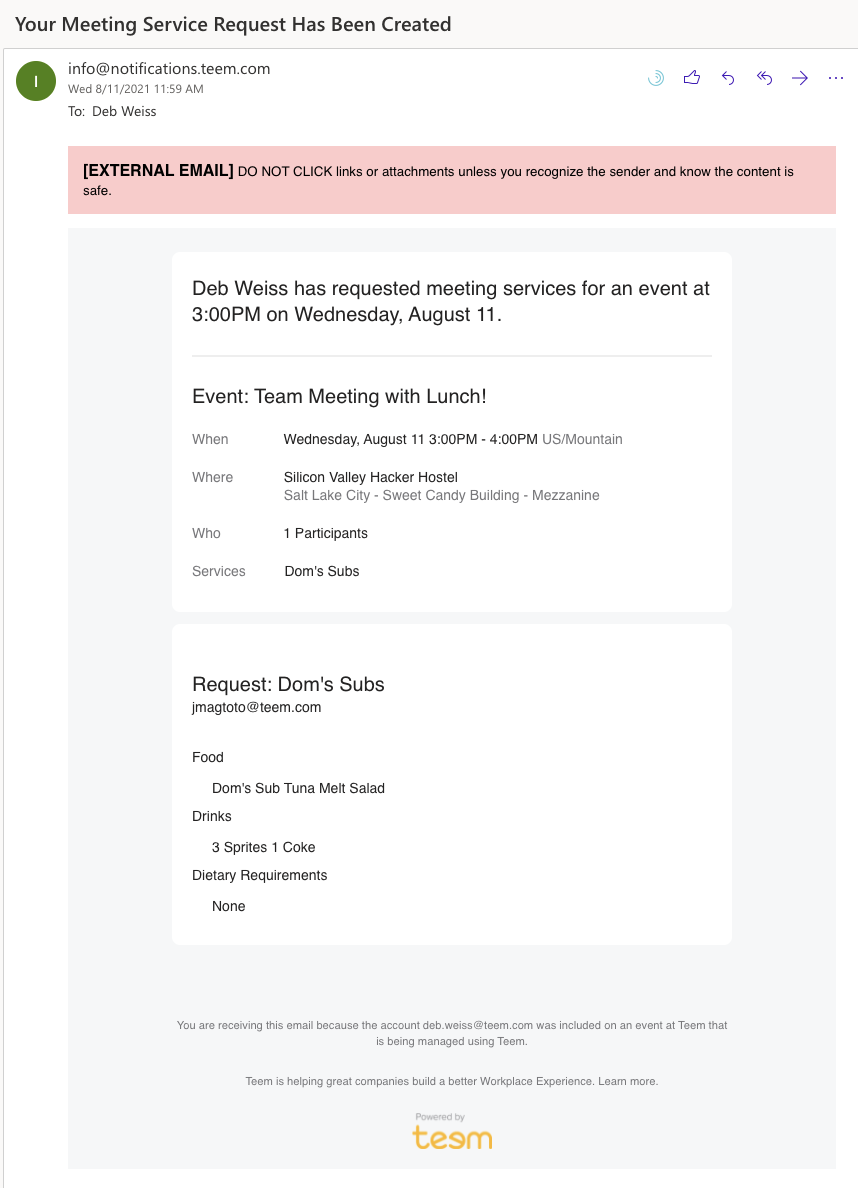
You'll get a confirmation email indicating the meeting request has been created. The service contact will also receive an email notification.
Note that an admin can restrict Meeting Services by location, so not every service may be available for the space you select.
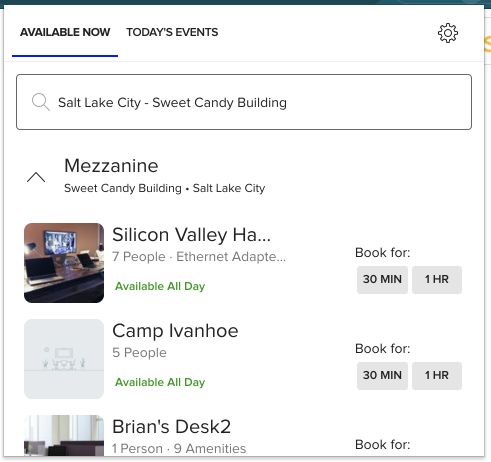
Quick Booking
After the installation of the Teem Chrome Extension, a small Teem Logo will appear in the plugins bar of Chrome  . When this is clicked on, it will display a drop-down with spaces that are available for the next 30 min or 1 hr. This option allows the user to quickly select a space and create a reservation.
The following steps will walk the user through this process:
|
Teem Chrome Quick Booking/Drop Down showing spaces available now
|
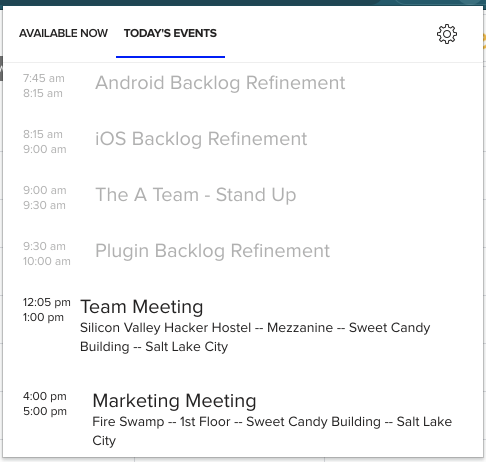
Teem Chrome Quick Booking showing upcoming events and reservations.
|
- Make sure the Teem extension is pinned to the Chrome browser (see the install instructions for Google Chrome.)
- Click on the Teem icon in the top right of the Chrome browser.
- Scroll through the spaces displayed or use the search field to search for other buildings or floors. Selecting a new building will then show available spaces for that location.
- Click 30 min or 1 hr. When you do this, the extension will automatically open a Google event for the next 30 min or 1 hr, with the space added.
- Add a meeting title, invite participants and save the event to secure your reservation.