Add a Space Profile for a Meeting Room
Space Profiles use a template-based model rather than location inheritance to apply settings and space attributes to a room such as a meeting room or conference room. You can use the space profiles to set attributes like capacity or amenities that had to be manually set at every space now can be configured at the profile level and applied to spaces.
This example will explain how to define a space profile for a 10 Seat meeting room that contains particular amenities such as Digital Whiteboard, Apple Display, Chromecast, Audio/Speakers, etc. When you define amenities this will allow employees to be able to search quickly for a meeting room that contains the equipment they need to ensure their meeting is a success.

Step 1. Add a Space Profile for a Room
From Teem Web complete the following:
1. Navigate to Manage > Locations > Space Profiles.

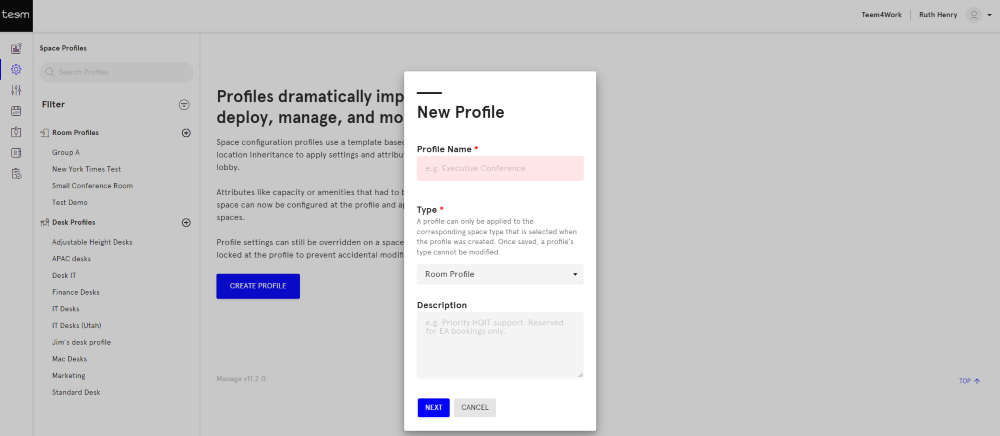
2. Click the Create Profile button. The New Profile dialog displays.

3. In the Profile Name field, enter the name.
4. For the Type drop-down, use the default Room Profile.
5. In the Description field, enter a short description.
6. Click the NEXT button.
Step 2. Set up the Attributes
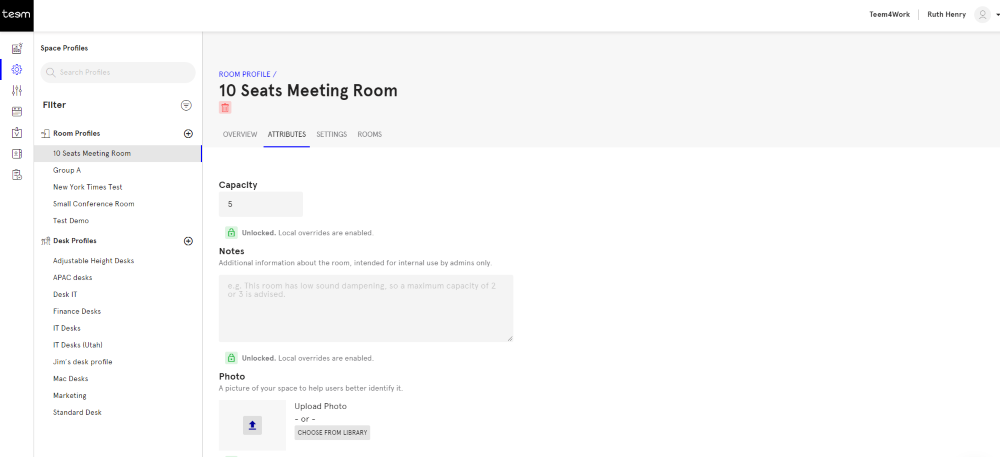
The room space profile is saved and the Attributes tab displays.

You can lock an attribute or setting at the space profile level or leave it unlocked, which means:
- Unlocked attributes can be overridden at the space level.

- Locked attributes cannot be overridden at the space level.

By default, the attributes are unlocked and if you want to lock an attribute then click the unlocked  icon (and to unlock an attribute click the Locked
  icon).
Learn more about Space Hierarchy and Override Settings.
7. In the Capacity field, enter the number of seats for the room.
8. In the Notes field, enter additional information about the space and this is for internal use by Admins only.
9. In the Photo area, click the CHOOSE FROM LIBRARY button.
10. Either upload an image or select a previously uploaded image from the library. Note: The file size must be less than 2 MB.
11. In the Amenities area, tick the equipment and resources for the space.
12. Click the SAVE button.
Step 3. Set up the Booking and Display Settings
Next, you will set up the booking and display settings for the Space Profile.
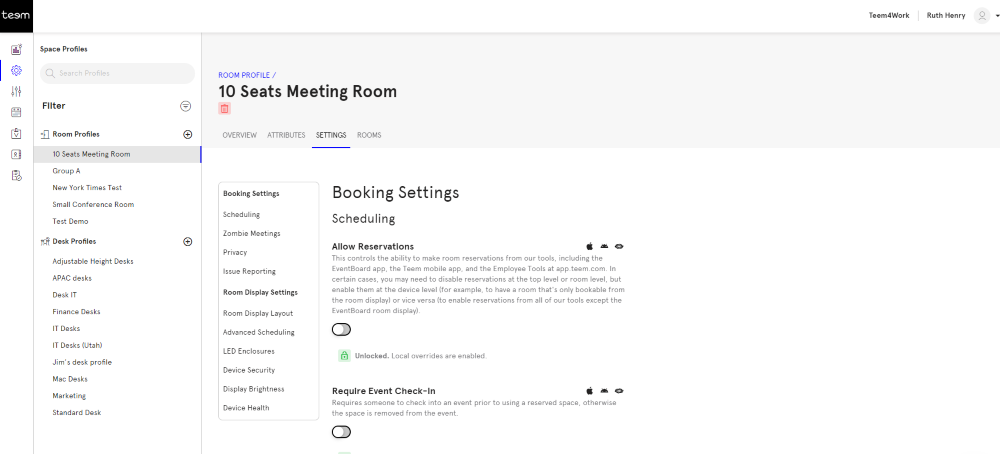
13. Click the Settings tab.

14. Complete the settings:
- Booking Settings
- Scheduling
- Zombie Meetings
- Privacy
- Issue Reporting
- Room Display Settings
- Room Display Layout
- Advanced Scheduling
- LED Enclosures
- Device Security
- Display Brightness
- Device Health
Learn more about the Booking and Display Setting in the article called Booking and Display Settings Overview.
Step 4. Assign the Space Profile to the Room(s)
When you first set up your rooms during Onboarding your room(s) will not exist yet. We recommend that you create your space profile first (which are you doing now) and then add your rooms. When you add the rooms this is where you will assign the room(s) to the space profile.
Learn how to assign the space profile to a room then head over to Edit or Delete a Space Profile.
