Prepare and Submit a Floor Plan
Overview
We provide customers with the ability to submit a request to have their floor plans created into the Teem product during and after onboarding. The floor plan request will need to include the floor plan drawing and a marked-up floor plan.
Learn about where the floor plans are used in Teem, jump down the section Floor plans Usage in Teem.
Read this First!
Step 1. Mark-up the Floor plan
First, you will need to mark-up the floor plan before you submit a floor plan request. Jump to Marked-up Floor plan to find out how to provide the details of your organization's floor plan(s). The marked-up floor plan file will include the floor plan with the spaces’ numbering and names. Additionally, include any items, such as kitchens, printers, etc that you would like as a pin.
Step 2. Create the Floor plan as a PDF File
Secondly, you will need to source the floor plan file in a PDF format; learn more in Set up the floorplan as a PDF File.
Step 3. Submit a Floor Plan Request
Now, you are ready to submit the floor plan request to our Professional Services team.
Step 3.1 Submit Support Ticket
You can create your Support ticket in our Teem Support Portal.
The question to complete are:
- Your email address
- Subject
- Description
- Does the PDF version of your floor plan have all desks and rooms clearly and cleanly labeled?
- Are all Rooms and Desks labeled on the Floor Plan PDF created within Teem's Dashboard AND named the same as the PDF Floor Plan?
- How many rooms\desks are you requesting changed\added?
- Do you acknowledge the ETA timeline of 10 business days after quote is signed off?
Remember to attach your files.
The Support Ticket is created and forwarded to our Professional Services team for evaluation.
Step 3.2 Evaluation
During the evaluation, our Professional Services team will review the request and contact you through the Support ticket with an initial quote and scope of work.
We estimate we will respond with a quote within 5 business days*.
Step 3.3 Review and Accept Quote
When you have reviewed the initial quote and provided approval, our Professional Services team will generate and send a sales order directly to you for approval through DocuSign.
Step 3.4 Schedule Work
Upon acceptance, our Professional Services team will queue up the request for our drafting team to complete the request.
We estimate the work will be complete within 10 business days*.
*These estimates are guidelines and the wait time can be sooner or later depending on the volume of requests.
Step 3.5 Work Completed
When our Professional Services team has completed the work the Support Ticket will be updated and this will send you a notification. Now, your floor plan will be ready to be used in Teem.
Marked-up Floorplan
Below lists important reminders for the floorplan and Teem setup:
- Provide a marked-up floorplan with the spaces’ numbering and names and this must be fully legible, so our drafting team can interpret the information.
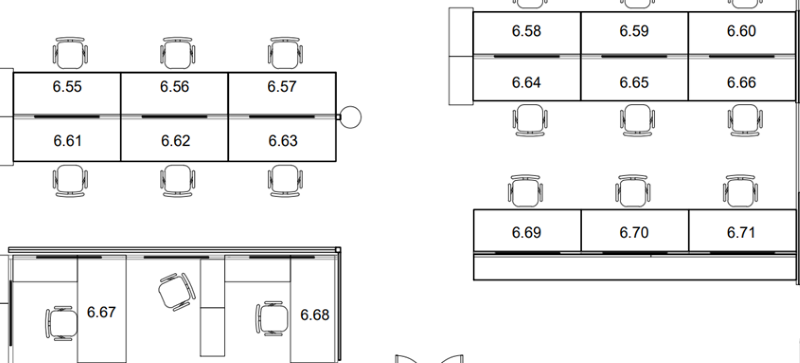
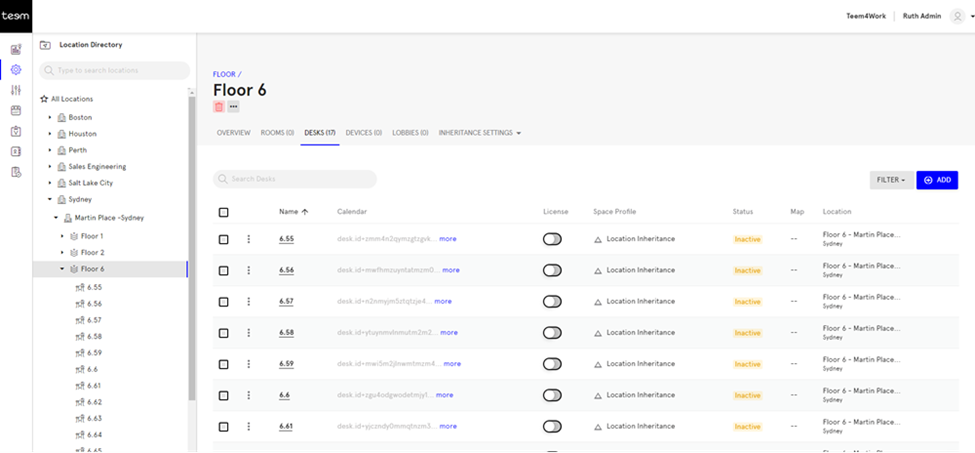
- All spaces such as desks and rooms found on the floorplan must already be created within Teem such as room names (South Beach Conference Room, Training Room) or desk numbers (6.55, 6.56).
- All space names or numbering (for desks and rooms) found on the floorplan must exactly match the space’s name or numbering that has been created within Teem.
- Only the spaces (rooms and desks) with matching names found on the floorplan and in Teem can be linked.
Numbering, Names, and Pins
Desk Numbering, Space Names, and Pins are unique identifiers so that employees can quickly find the spaces they need. The sections below use examples to explain the setup.
Unique Identifiers Example
If your business already uses identifiers for its desks and offices with unique space names, then provide those space names on the marked-up floorplan.
In this example, the marked-up floorplan contains numbering.
Then the Implement team will first create the desks with exactly the same numbering so that it is ready to be linked up to the floorplan.
No Unique Identifiers Example
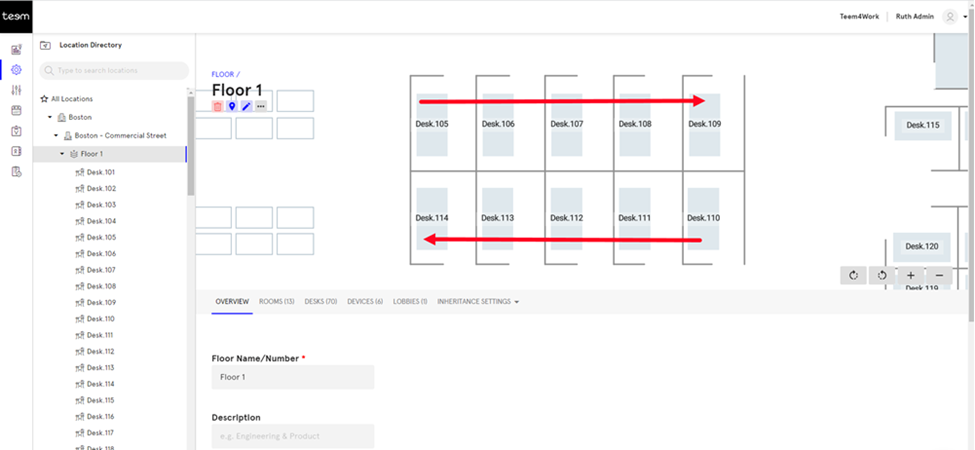
If you do not have unique identifiers for desks and offices, then we will label the desks and offices in numerical order from left to right on the floorplan. The Implementation team will first create the desks in numerical order so that it is ready to be linked up to the floorplan.
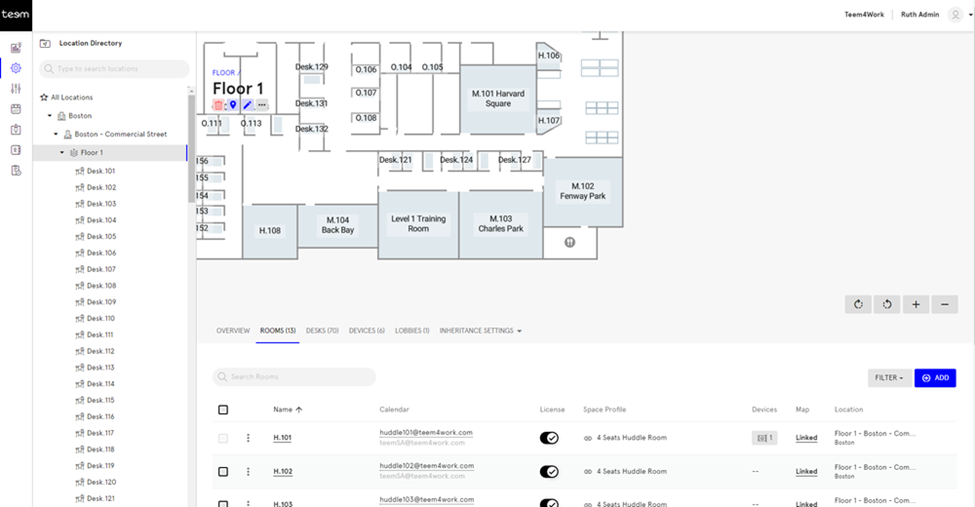
In this example, the Implementation has first created the desks, in Teem, as Desk.1.105 to Desk 1.110 and then they will be linked up to the floorplan in numerically order from left to right on the floorplan as shown in the screenshot below:
Room Names Example
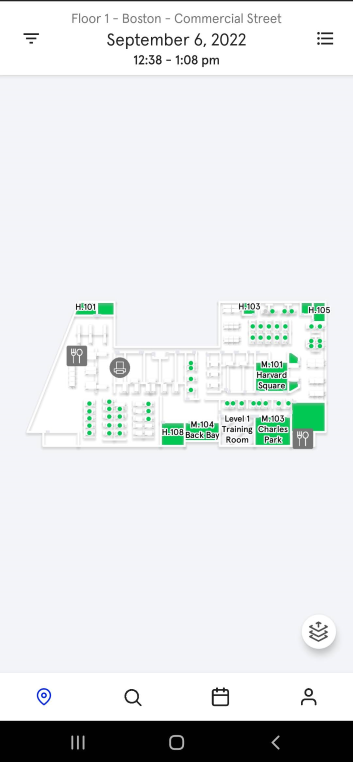
Include the room names on the marked-up floorplan such as Huddle Room, Fenway Park, Harvard Square, Training Room.
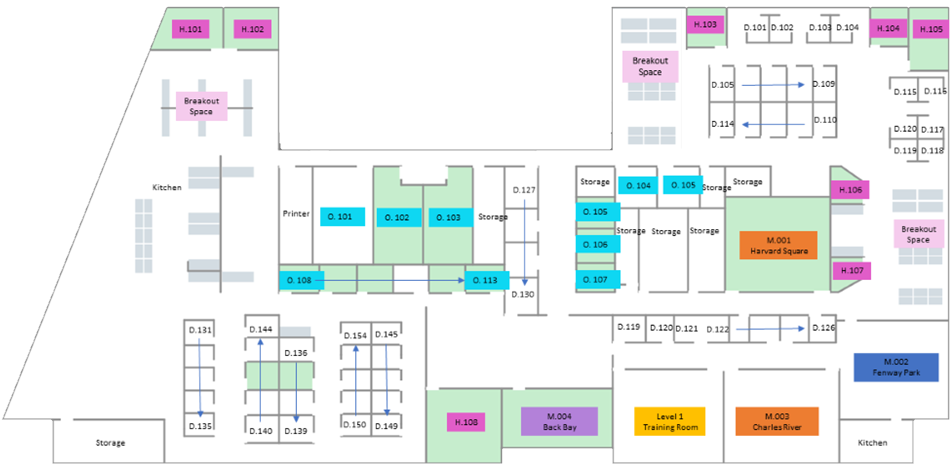
Then the Implementation team will create these rooms with exactly the same names so that it is ready to be linked up to the floorplan. Also, note they will complete the relevant calendar implementation too.
Pins Example
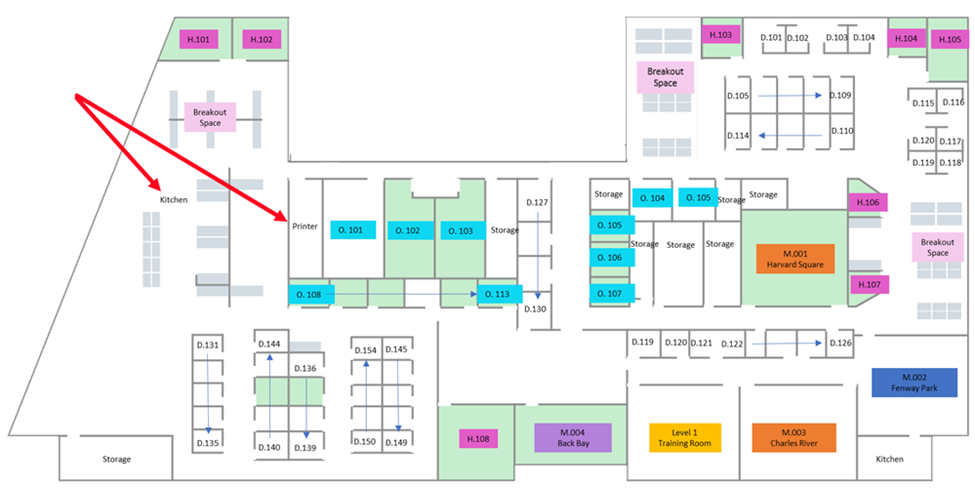
We can add Pins for printers, food, drink, fountain, office supplies, first aid, and fire extinguishers. The marked-up floorplan does not need to include every detail, however, make sure you add the items that are important to your organization.
In this example, the kitchen and printer have been marked-up and the Implementation team will add the required pins.
Set up the Floorplan as a PDF File
Use the following file naming convention so that we can identify the building and floor the drawing relates to:
- [Campus]_[Building_Name]_[Floor_Name].pdf
Also, make sure the floorplan has the following:
- Image Resolution - the best resolution that you can provide.
- Scale - include the scale of the floorplan, this can be done with a measurement placed on a wall within the floorplan and then we can scale against a visual representation.
We will then use this floorplan to create a simple and intuitive floorplan to be displayed throughout the Teem platform. You will be contacted by your Account Manager when Teem has completed the maps for your organization to use. This can take 10-14 business days for the Implementation team to complete this.
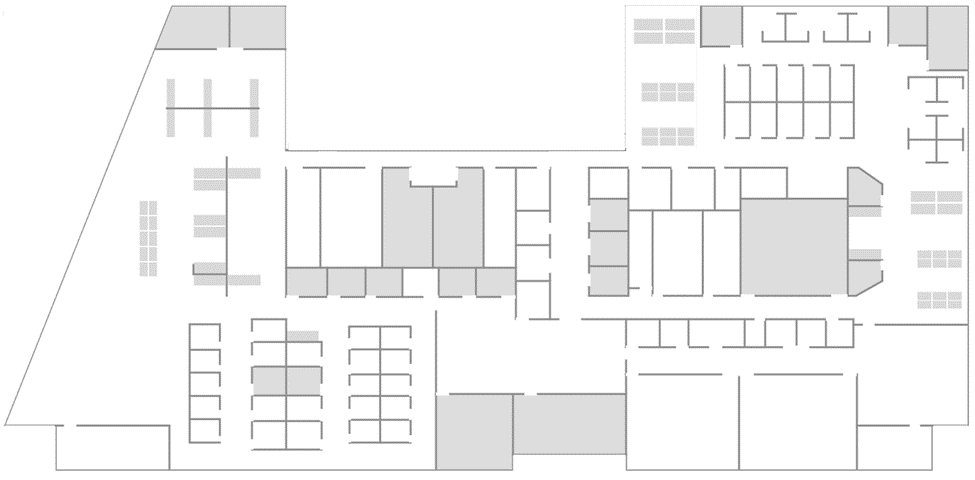
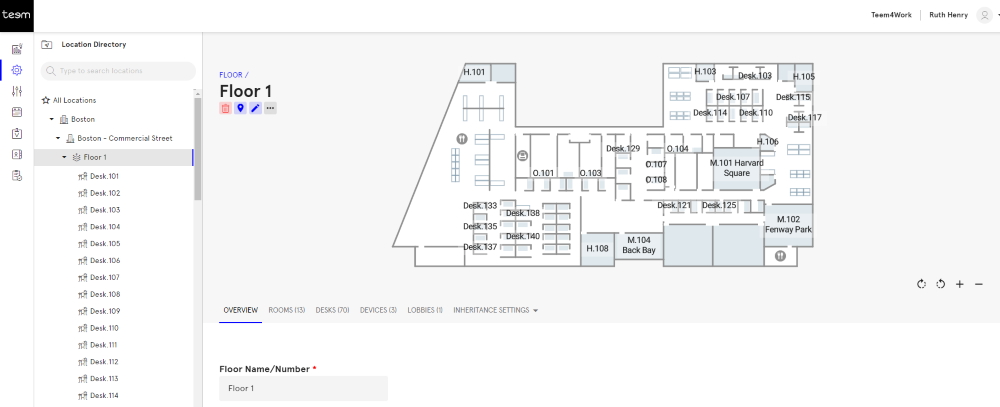
Below is an example of a floorplan.
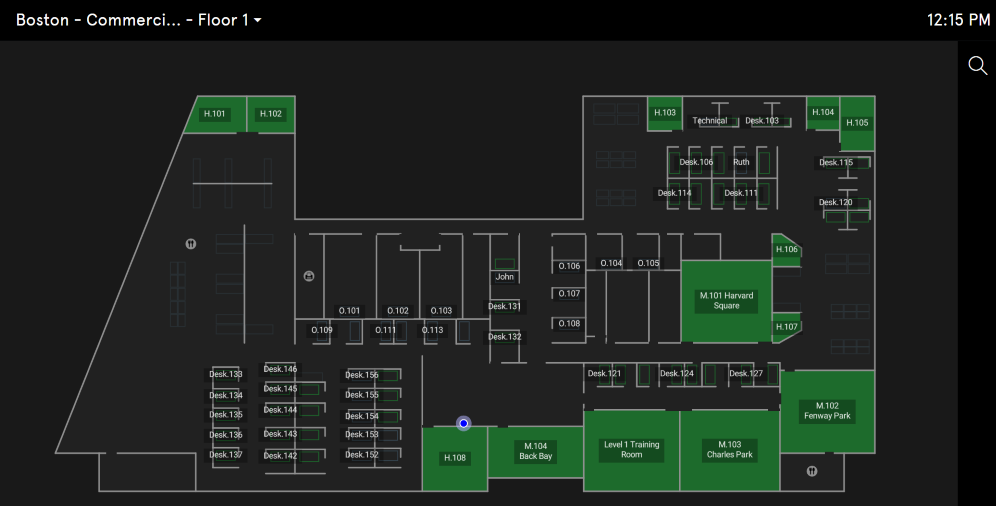
Floorplans Usage in Teem
Floorplans can be set up as maps which are used to help employees find and see space's availability and to easily find their way around the office. Below lists where the floorplans are used in Teem.
Teem Web
When the map is set up in Teem the floorplan displays Teem Web. This is a view-only display where you can rotate the floorplan and zoom in and out.
Room Display (EventBoard)
Make sure the device using Maps is running the EventBoard app version 2.8.6 or newer.
When the physical devices are set up outside the room then your employees can use the maps to book a room.

Finder
Make sure the Maps setting is enabled before using the Finder's map views see Create, Edit, and Deploy Finder Views.
When the physical touchscreen is set up on the floor then your employees can use the maps to find and book a desk or book a room.
Teem Mobile
When the map is set up in Teem the floorplan displays Teem Mobile. Now you employees can find and book a desk or book a room.