Okta SAML
Teem’s integration with Okta allows mutual customers to log in to Teem via Okta.
Prerequisites
In order to use Okta SAML and/or User Provisioning, you’ll need to fulfill a few requirements as listed below:
- SAML is not available with all subscription levels. See our pricing page or reach out to your Teem representative for more information
- The Teem account you’re using to log in must have admin-level permissions.
- Your company’s Teem account should have its structure built out to match your organization’s physical space.
- You must have Admin level permissions within your Okta environment.
- Be logged into your Teem account and Okta account within the same browser session.
Got all that? Now you’re ready to set up and use Okta services!
Okta SAML Integration
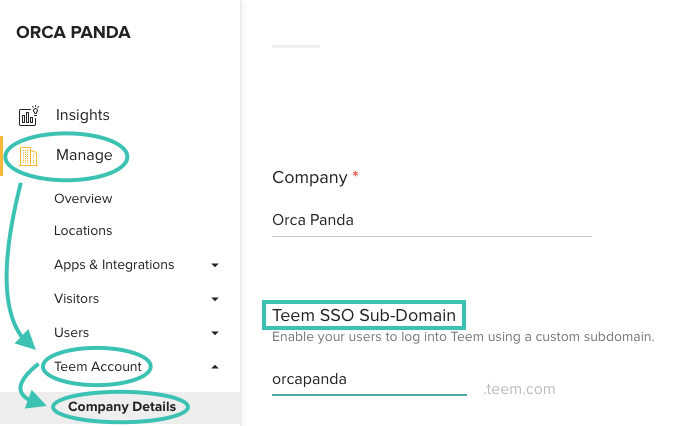
Set Your Sub-Domain
Navigate to teem.com and click on Manage from the menu to the left. Click on Teem Account, then Company Details. In the field for Teem SSO Sub-Domain, enter your preferred sub-domain. This is typically the name of your organization. For example, if my company were called Orca Panda, I'd enter "orcapanda" in the sub-domain field, and it would make my sub-domain site https://orcapanda.teem.com. Heads up: spaces and symbols are not allowed in sub-domains.
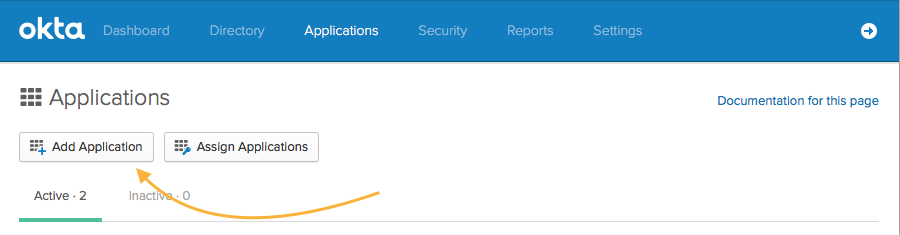
Add the EventBoard SAML app within your Okta Admin Dashboard
Open the Okta Admin Dashboard and click on Applications, then "Add Application."
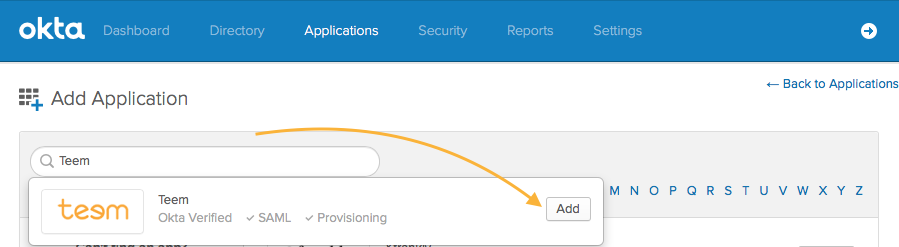
Then search for "Teem" and click "Add" to begin the setup process.
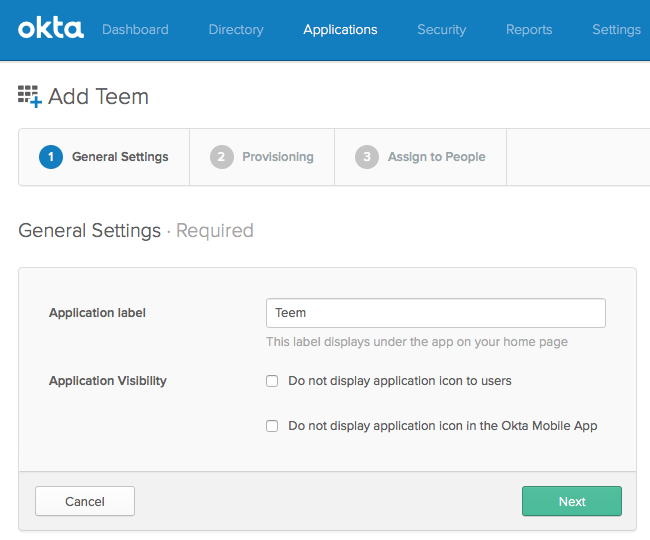
You'll be taken to the following setup screen, where you can choose a custom name for the application and where users will see the app:
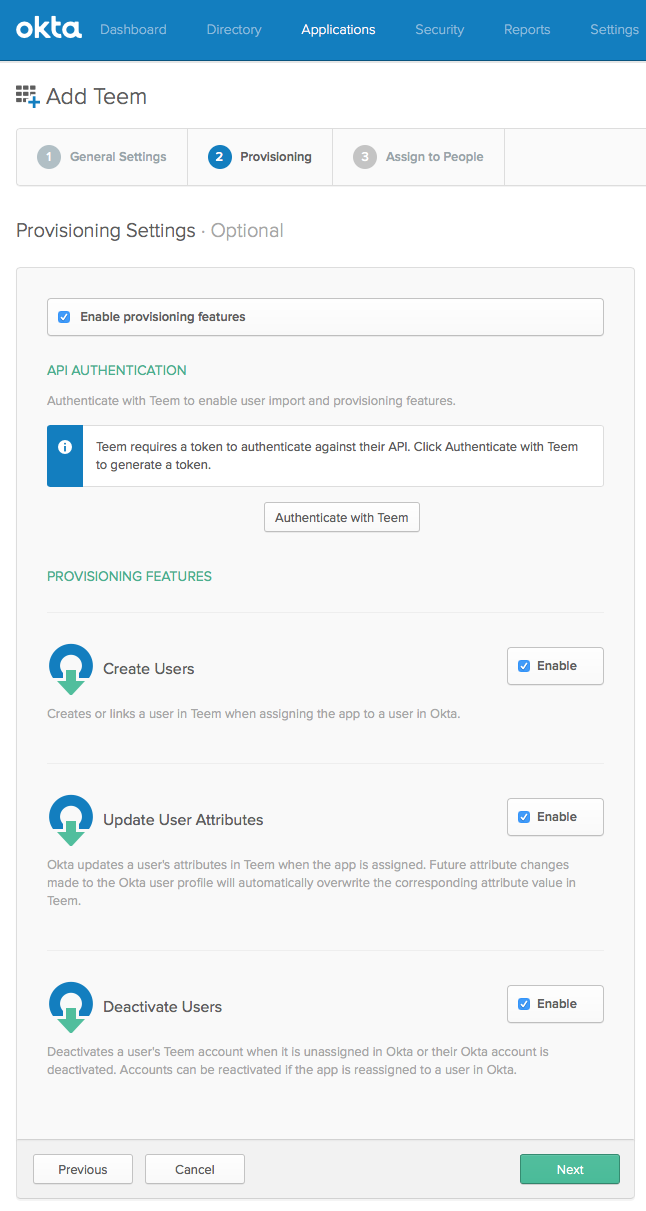
Next, you'll see the following page, where you can authenticate with Teem and enable provisioning:
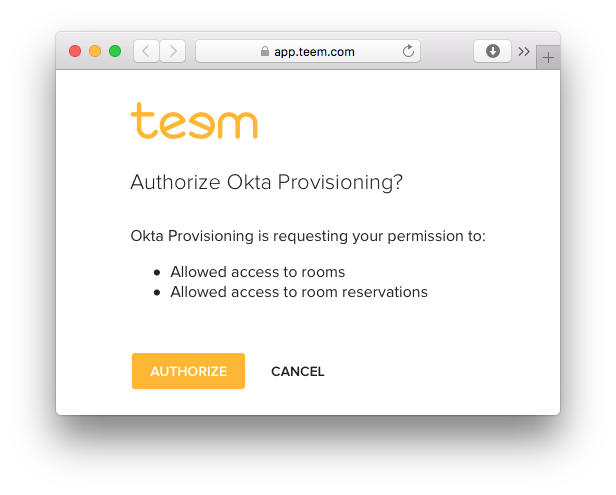
First, click "Authenticate with Teem" and click "Authorize" when asked:
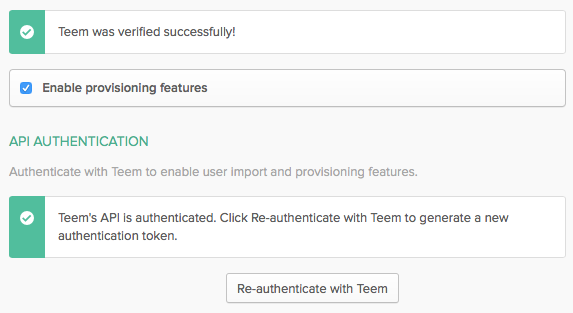
Once you've authenticated, you'll see that Teem is now authorized:
You can now enable Provisioning to automatically pull your users into Teem from Okta (rather than setting them up one-by-one):
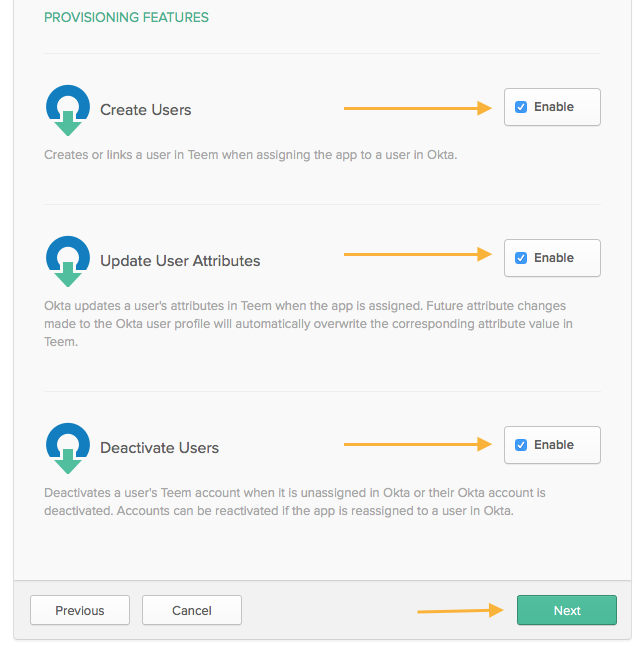
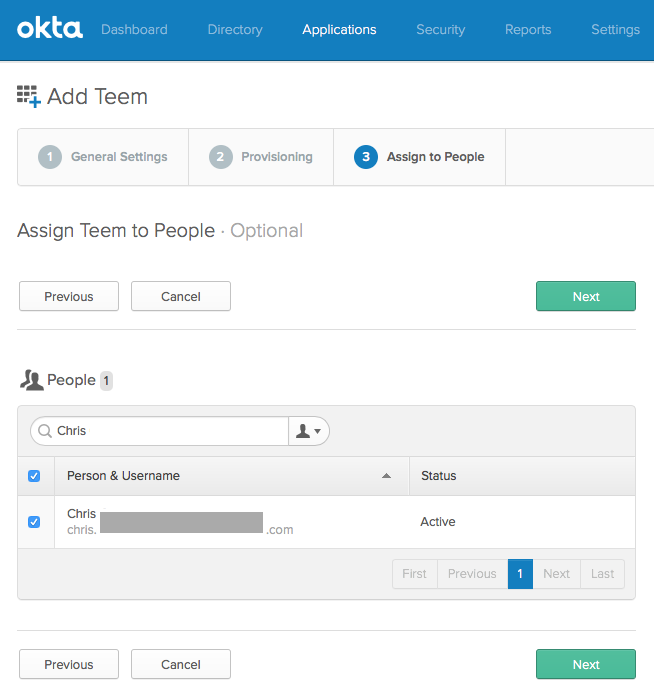
Now that provisioning is set up, you're ready to enable the Teem app for your Okta users and finish setup:
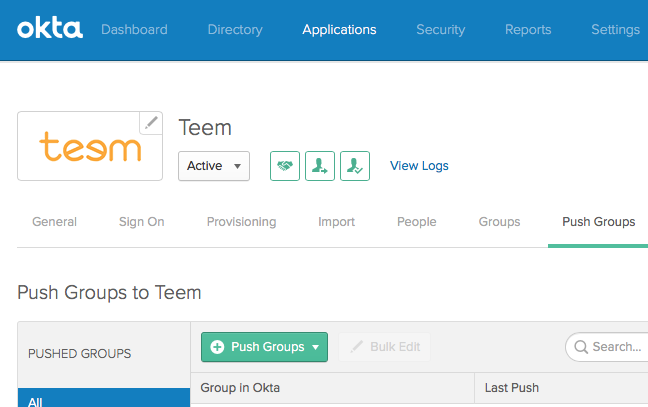
Push Okta Groups to Teem
If you'd like to push your existing Okta groups to Teem, you can do so by selecting the Application, and then selecting "Push Groups." You can then select Okta groups to be used in Teem's admin dashboard.
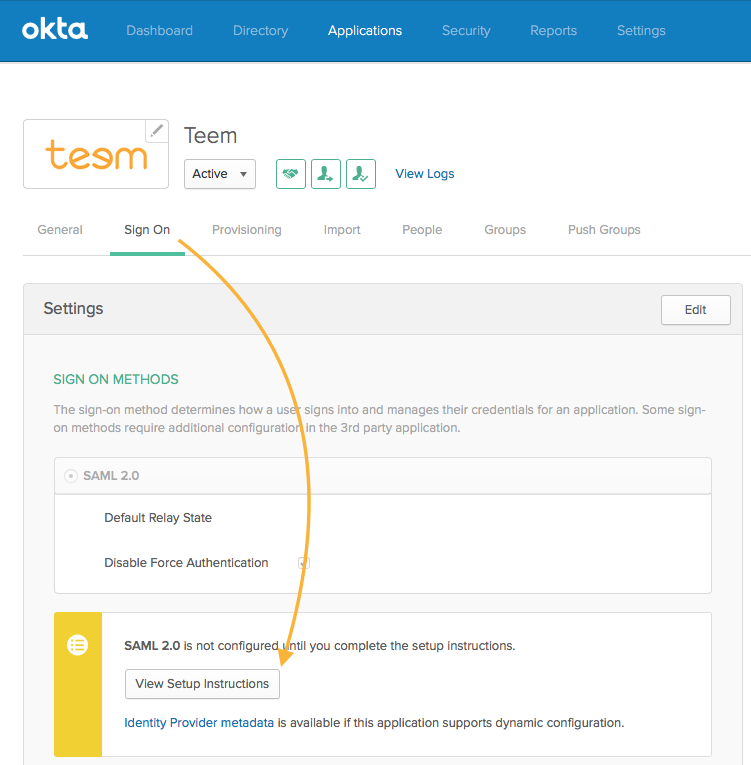
Get Okta Settings
Next, we'll need to add your company's Okta settings to your Teem dashboard. These settings can be found in Okta under "Sign On" -> "View Setup Instructions":
This will pull up a page with all of your personalized Okta setup instructions. We will map those instructions directly to your Teem Dashboard at https://app.teem.com/integrations/settings/SAML/ (Note: SAML User Management is only available on our Enterprise and Premium EventBoard plans)
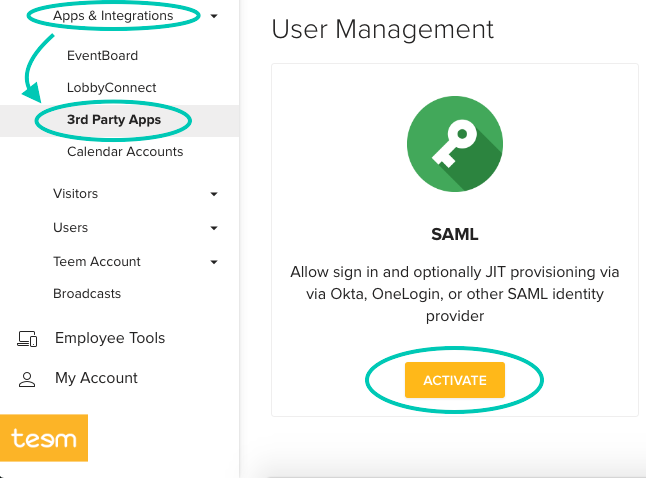
Add Okta Settings to Teem
Click on Manage → Apps & Integrations → 3rd Party Apps and select the Activate button under the SAML logo.
You will see the following form:

You will fill in these fields from the Okta setup page we accessed above, like so:
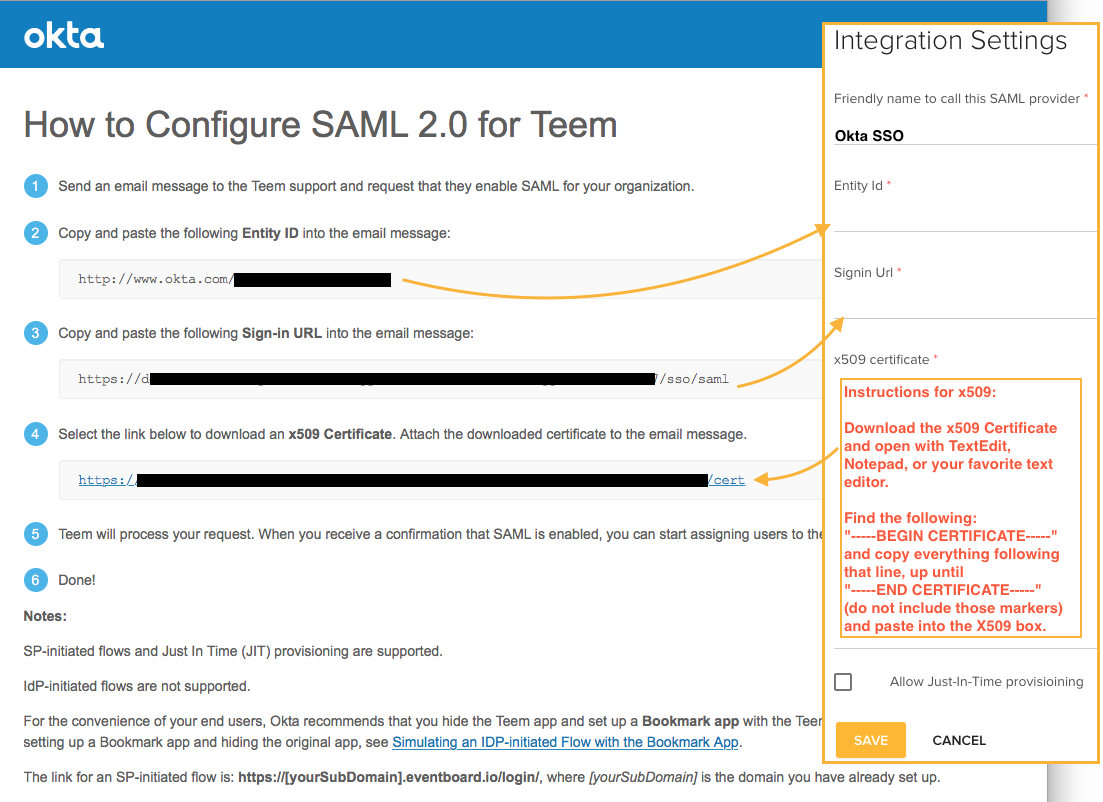
Friendly Name to call this SAML provider: You can put whatever you like. Please note: you should only have one SAML account, and we won't be able to differentiate between the two.
Entity ID is copied directly from the Okta Setup Instructions
Signin Url is copied directly from the Okta Setup Instructions
The X509cert is an excerpt from the .cert file that is accessed through the setup instructions. To get that:
- Open the .cert file linked in the Setup Instructions with TextEdit, Notepad, or your favorite text editor
- Find "-----BEGIN CERTIFICATE-----" and copy everything after that line until "-----END CERTIFICATE-----" (do not include it those markers) then paste that in the X509Cert box.
Select Save.
If you go back to the Integrations page the SAML settings can be edited or viewed by clicking on Settings.
Note: When Okta Provisioning is enabled, we recommend leaving the (redundant) "Allow Just-In-Time provisioning" checkbox unchecked
Test Login
Navigate to your sub-domain login page that you set up in the first step. (https://xxxxxxx.teem.com/login). This will navigate you to your identity provider. If your email matches up and you are authenticated to Okta, you will be logged in.
Enabling IdP-initiated Login
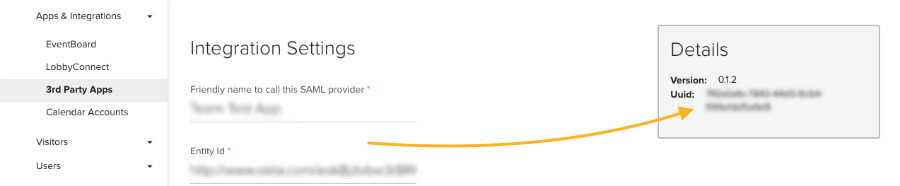
If you'd like to enable IdP-initiated login, you can do so by following these quick instructions. First, we need to get your default relay state. In Integrations (noted above) select Configure and look in the details section. Copy the UUID shown there.
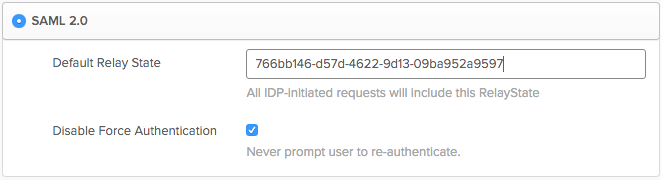
Next, go to the Okta admin portal, in the Teem SAML application, and under Sign On select the Edit button for Settings.

Paste the UUID into the Default Relay State, change "Force Authentication" to match your needs, and then select save.
Troubleshooting Tips
This list of common errors can allow you to troubleshoot on your own. If you have other problems please reach out to Teem support.
- We do not currently support syncing the Admin status from Okta into Teem
- I get a 500 error (page that says we are performing maintenance) during IdP-Initiated login. This is often caused by a missing RelayState.
- Users get an error Teem account not found during IdP or SP initiated login. This can happen for a couple reasons:
1. Has the user been successfully provisioned from Okta so that an admin can see the user within their Teem Dashboard? If they have not please provision them OR enable JIT provisioning (checkbox at the bottom of the Okta Integration Settings page in your Teem admin dashboard).
2. The email is not coming within the SAML Assertion. Please use SAML Tracer, a firefox plugin, to get a SAML Trace and see the assertion. You can use this to send troubleshooting to both Teem and Okta. If the Assertion does not contain the email we don't know who to actually log on.
With these steps done, your users can now sign in or authenticate using Okta!