Condeco Flash Utility tool
'Condeco' was renamed 'Eptura Engage' in June 2025, however, 'Condeco' is still referred to by this process.
The Condeco Flash Utility makes it easy to quickly upgrade one screen after another. You can upgrade the following screen types to the latest version of the Android operating system and the latest release of Eptura Engage using the Condeco Flash Utility:
- Eptura (Condeco) Room Screen v2
- Condeco Desk Screen v3 for Eptura Engage
Eptura screens running the Android operating system receive OTA (over-the-air) updates, but occasionally it may be necessary to manually update or factory reset an Android device which can be done with the Condeco Flash Utility. Learn more about over-the-air updates
WinCE devices must be manually updated which can be done with the Condeco Flash Utility.
Prerequisites
Prerequisites for the Eptura (Condeco) Room Screen v2
- The Condeco Flash Utility downloaded. (Contact Support o request access to the Screen Flash Utility download file).
- PC running Microsoft Windows 10 or above.
- USB port.
- A micro USB cable.
- Either a POE injector/switch and network cable or a 12V PSU and cable.
- A small tool to change the DIP switch settings.
- PZ0 screwdriver.
Prerequisites for the Condeco Desk Screen v3 for Eptura Engage
- The Condeco Flash Utility downloaded. (Contact Support o request access to the Screen Flash Utility download file).
- PC running Windows 10 or above.
- USB-C port (Or a USB-C to USB-B adapter).
- USB-C cable.
- SIM-ejector tool or similar.
How to download and prepare the Condeco Flash Utility
The Condeco Flash Utility is provided in an 850MB compressed file. Contact Support to request access to the Screen Flash Utility download file.
The Condeco Flash Utility.zip file contains two folders, CONDECO FLASH UTILITY and Images, which must be extracted before the Condeco Flash Utility can be run.
- Navigate to the downloaded Condeco Flash Utility.zip file and use a compatible tool such as WinZip to extract the folders and files to a destination folder on your laptop.
- If the zipped files do not extract, right-click Condeco Flash Utility.zip > select Properties > tick Unblock > click Apply.
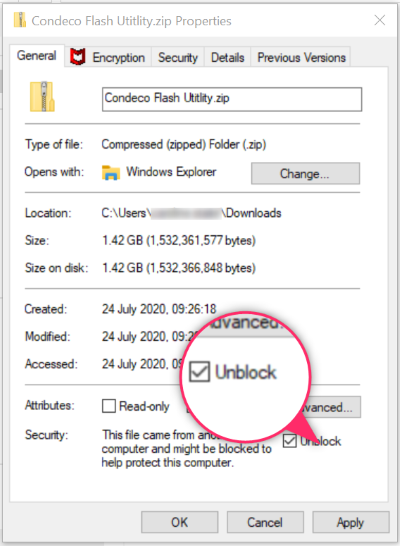
- If the zipped files do not extract, right-click Condeco Flash Utility.zip > select Properties > tick Unblock > click Apply.
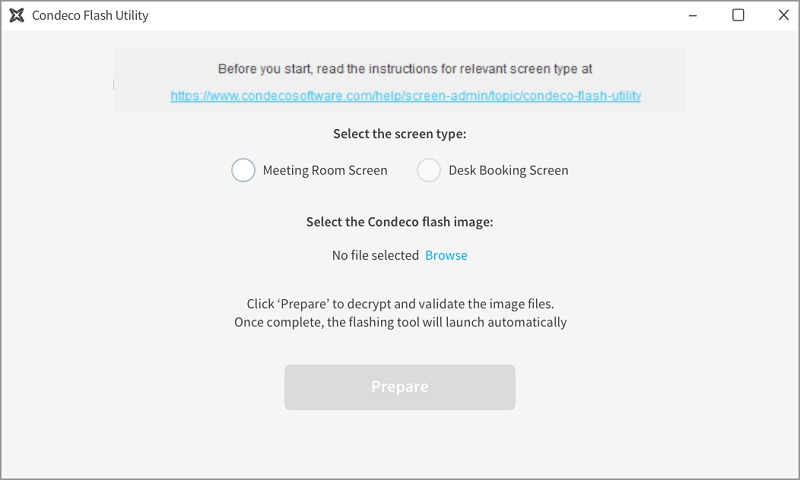
- Navigate to the destination folder and open the extracted CONDECO FLASH UTILITY folder (the program will not run from the zipped folder). Double-click CondecoFlashUtility.exe to launch the Condeco Flash Utility.
- If the program does not run, Windows users with admin accounts can right-click CondecoFlashUtility.exe and click Run As Administrator, otherwise right-click CondecoFlashUtility.exe > select Properties > click Security tab > select the user account and check Read & execute permissions are allowed.

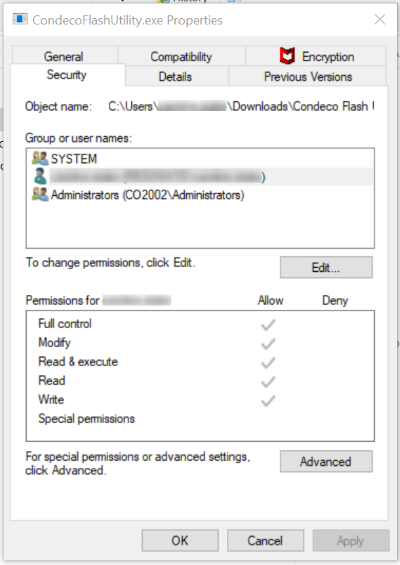
- If the program does not run, Windows users with admin accounts can right-click CondecoFlashUtility.exe and click Run As Administrator, otherwise right-click CondecoFlashUtility.exe > select Properties > click Security tab > select the user account and check Read & execute permissions are allowed.

The security settings applied by your organization or by anti-virus controls on your computer might prevent extracting and/or running the CondecoFlashUtility.exe file. If problems are still experienced after unblocking the zip file or read & execute permissions to the program file are restricted, contact your IT department.
- Select the screen type to update and click Browse to navigate and select the image to install.
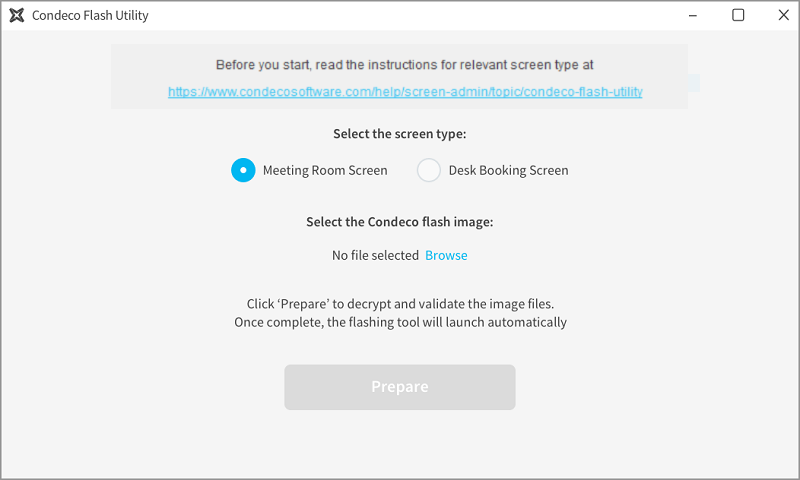
- Click Prepare.

- Wait for the image to finish unpacking.
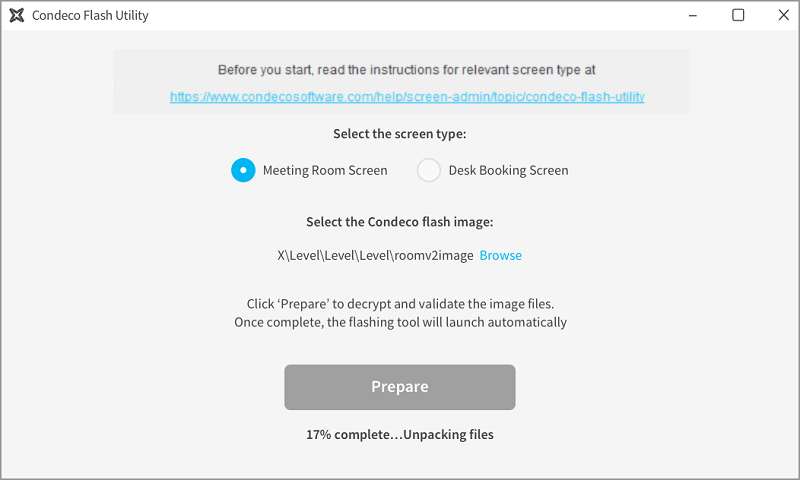
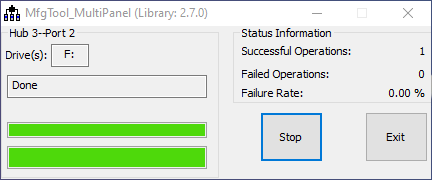
- MfgTool will automatically launch when the unpacking is complete.
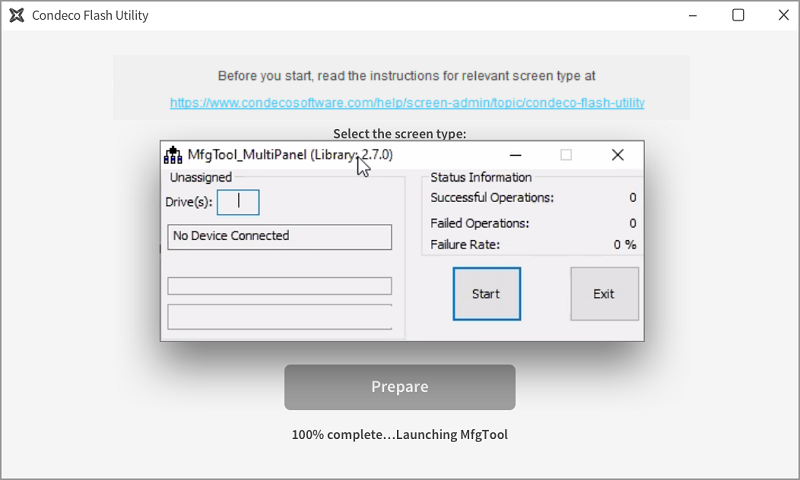
- Follow the steps below to connect and update your screens with the MfgTool.
How to connect your desk booking screen or meeting room screen to MfgTool.
Desk Booking Screen
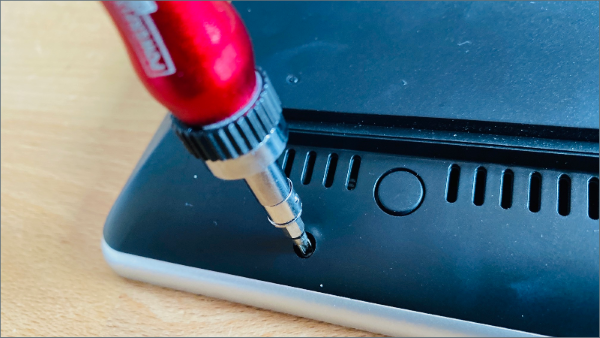
- Disconnect the screen from the power source and insert a SIM-ejector tool into the small hole on the top edge of the screen and gently press the button inside.
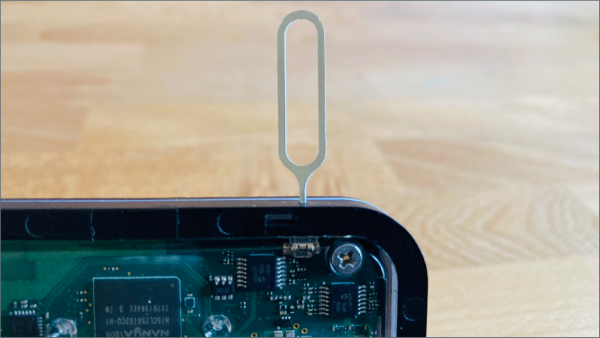
- While keeping the button depressed, connect the USB cable to the laptop then release the button. When the screen is powered up and recognized by MfgTool click Start.
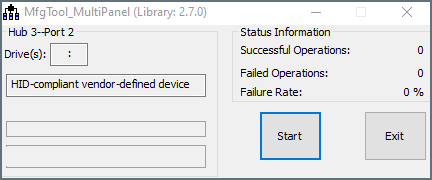
- The device is formatted and the image installed. When the process is complete the status bars display green. Click Stop to connect another screen to update or Exit to close MfgTool.
- The desk booking screen can now be reconnected to your network.
- With MfgTool launched you can continue to connect and update screens one after the other.
Meeting Room Screen
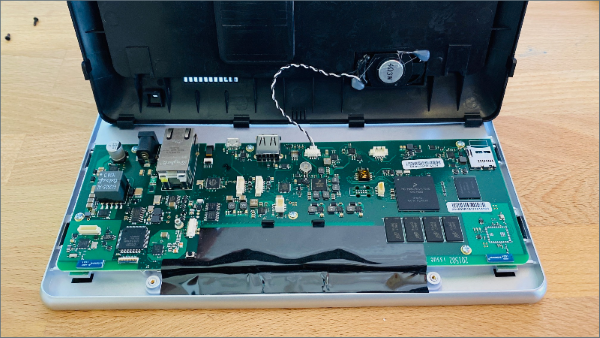
- Power off the screen and remove the two screws from the rear of the device.
- Slide the cover to release and lift it off, being careful not to pull the speaker cable which is connected to the cover.
- Position the DIP switches to Off, On, Off, Off (ON = dip switch to the right).
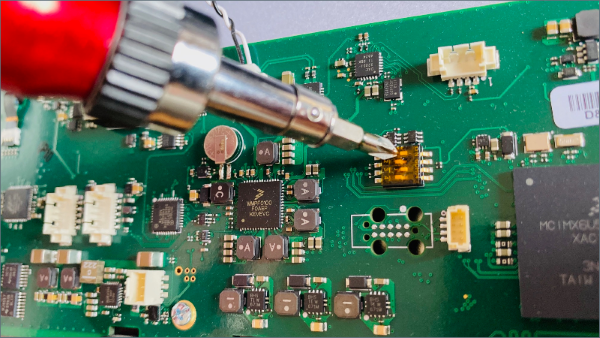
- Connect the screen to power either via the POE cable or 12V PSU adaptor and connect the micro USB cable to the screen and laptop.
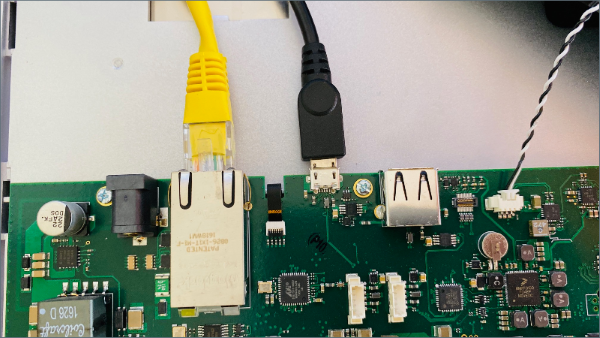
POE and micro USB cables connected to screen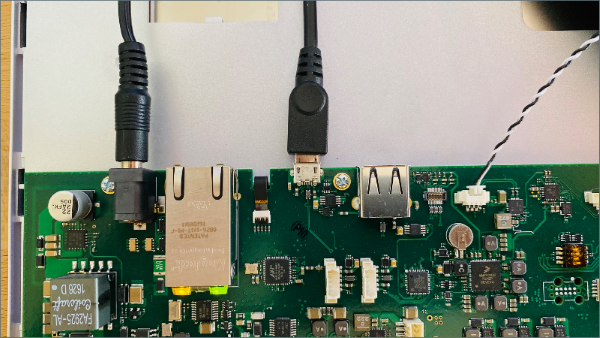
12V PSU and micro USB cables connected to screen
- MfgTool will recognize the device and display the device name. Click Start
- The device is formatted and the image is installed. When the process is complete the status bars display green. Click Stop to connect another screen to update or Exit to close the MfgTool.
- Disconnect the cables and change the DIP switches back to their original setting On, Off, On, Off (ON = dip switch to the right).
- Replace and secure the cover. The meeting room screen can now be reconnected to your network.
- With MfgTool launched you can continue to connect and update screens one after the other.