Set up an Agreement
Sometimes, a visitor will need to review and maybe even sign a document during the check-in process, such as a NDA (non-disclosure aggreement).
This area of settings allows the admin user to add in documents, control when to show the documents, and determine where to store the documents.
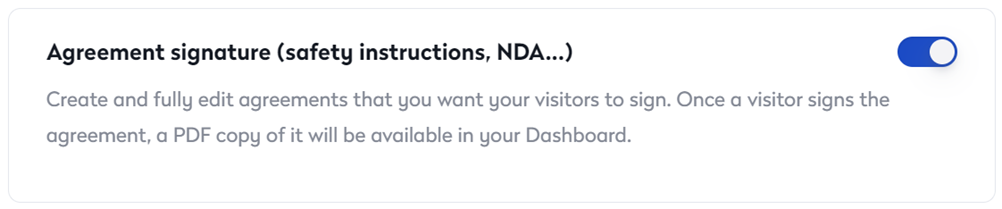
Enable the Agreement Signature
To get to this area of Settings, use the following steps:
- Login to the Proxyclick web application.
- Click on Settings, go to the Visitors area, click on Configure Kiosk, then Agreement (NDA ...).
- Turn this feature off and on with the toggle in the upper right corner.
The agreement or any other documents will be listed here.

Each column entry, except for Show To, can be clicked on for an additional menu.
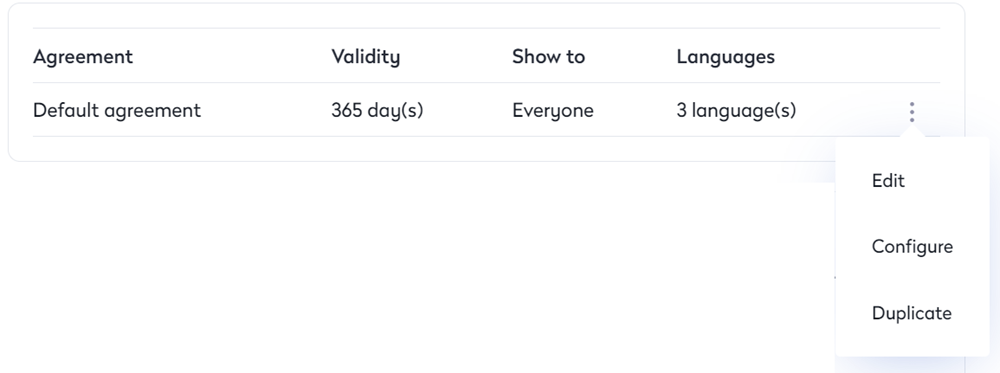
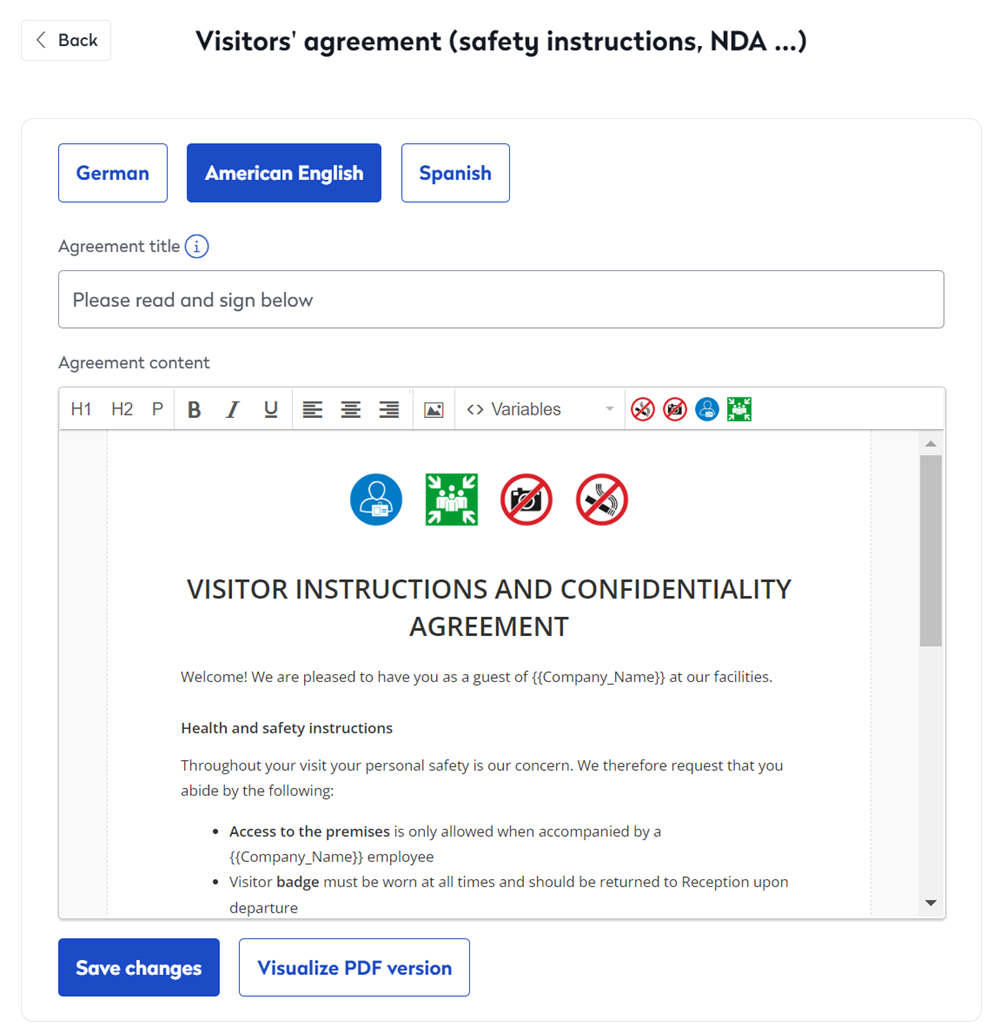
Edit the Agreement Form
This option allows changes to the form. Forms can be added and edited on this screen, and specific languages can be selected to see how the document will look to visitors during the process.
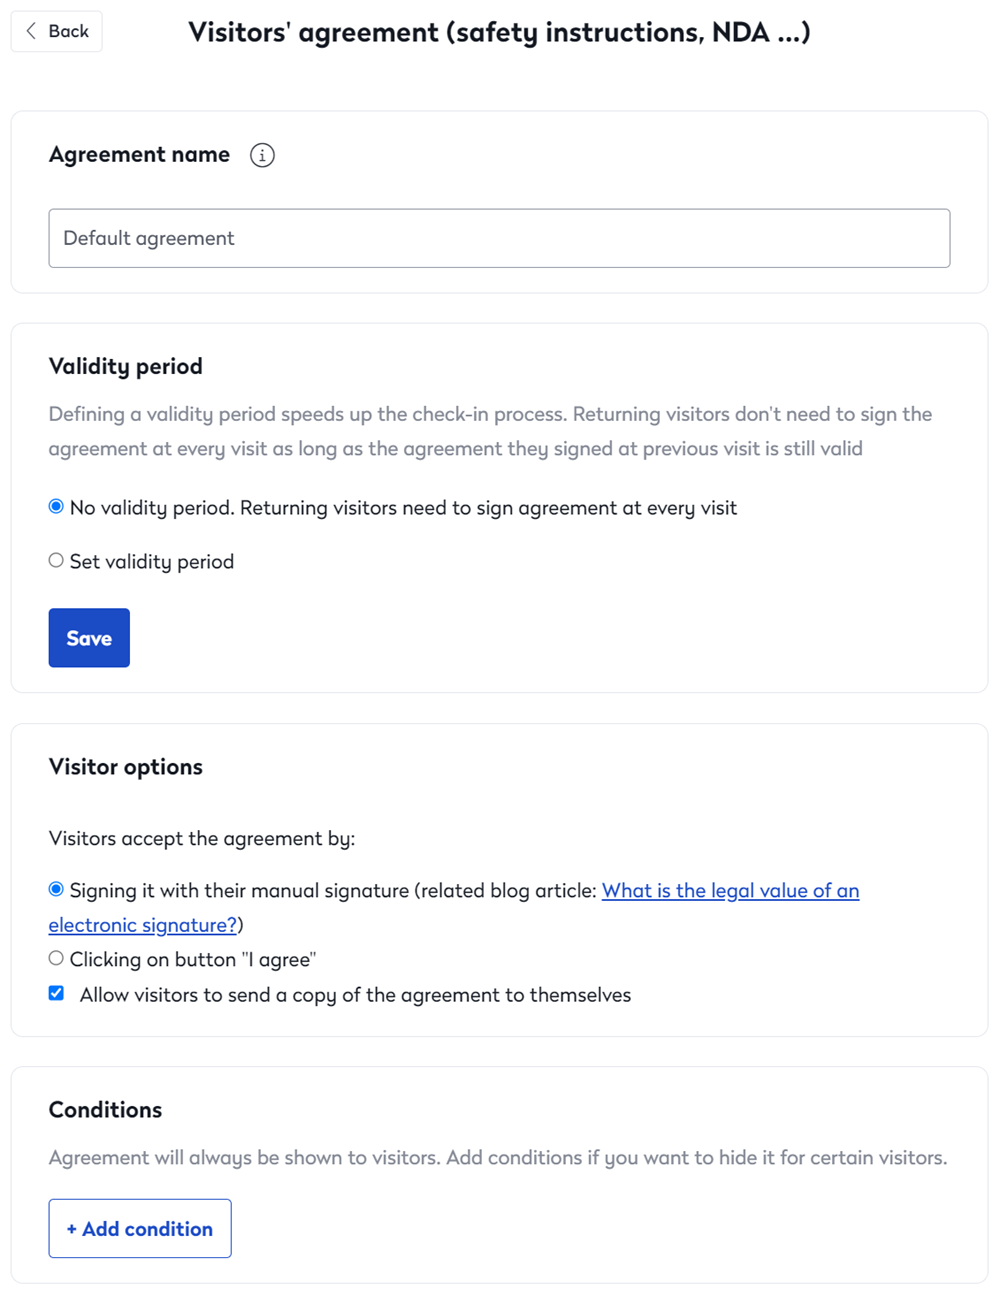
Configure the Agreement Form
This area will allow the user to name the document, define the time frame of when the agreement is valid (and if the document needs to be signed at every visit,) set signing options, and determine if the signed document will be sent to the visitor. Lastly, there's an area to set conditions on when the form will be seen and what will happen after the form is filled out.
Be sure to click the Save button in the Validity period section after making any changes.
Duplicate the Agreement Form
Select this option will copy the form and settings (Validity, Show to, and Languages) immediately.
Delete an Agreement
This option will only be seen if two or more agreements are listed.
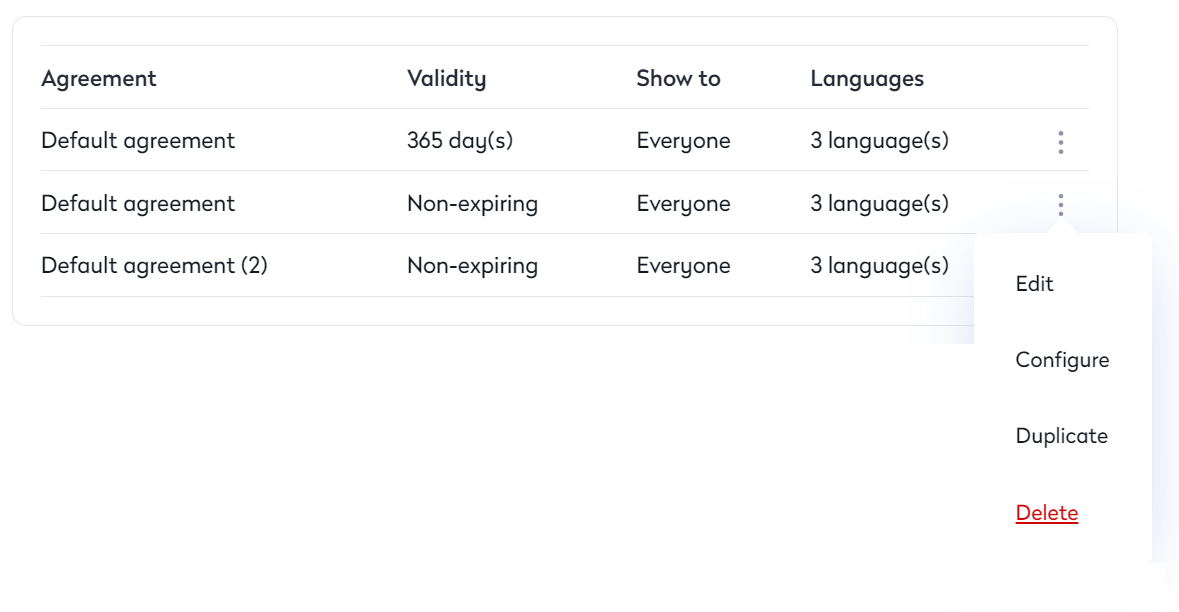
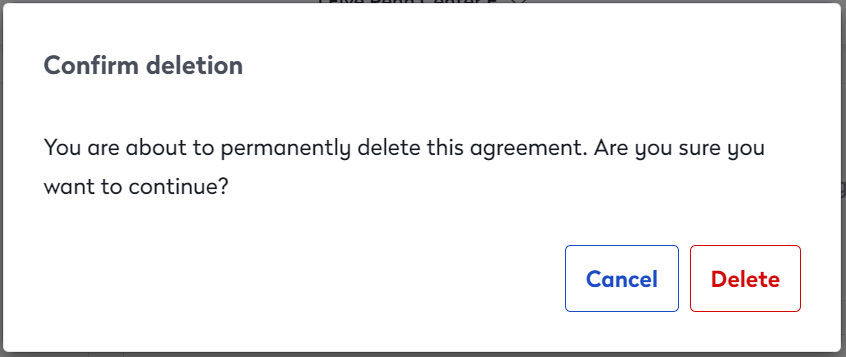
Click the Delete link and this will bring up a confirmation window.
They have completed one agreement; will there be another?
Most of the time, only a single agreement will be shown to the visitor. If there needs to be another, then rules need to be set up for when the next agreement will appear.
Click the Add an Agreement link will create a new "Default agreement" listing in the section above.
Where to store these digital papers
The ideal way to store the documents visitors will have to look through (and possibly sign) would be to store them on a cloud drive.
This section allows you to configure which cloud drive will be used for storing those documents.
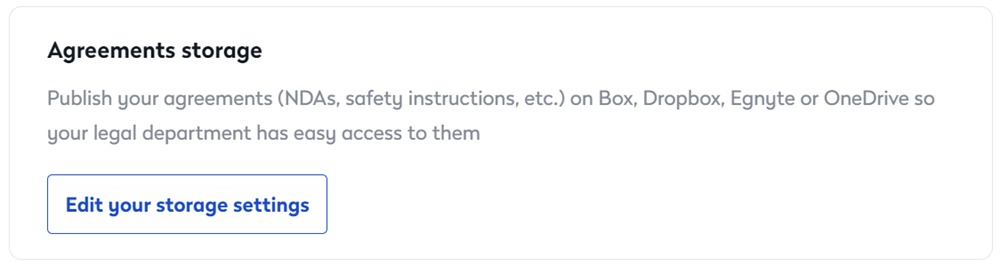
Click the Edit your storage settings link will open a new window to the Proxyclick Integration and Apps marketplace. Check out the Integrations pages for more information.