Set up a Watchlist
Watchlists are used to alert your security staff for specific users, when a visitor matches a record.
The watchlist sources can be from:
- Internal
These are managed by your company and you can create one or more internal watchlists with records of unwanted visitors or restricted parties. Or for an important visitor, such as a EO of another company, where you want the reception or security staff to be aware of this person and make sure they are not kept waiting in the lobby. If you have a multi-tenant building, then see Set up Watchlist for Mult-Tenant.
- External
These are managed by third-party providers. They are very powerful if you must comply with specific or global regulations. External watchlist providers maintain an incredible amount of records in different watchlists. The providers update their lists often and their matching methods are highly configurable. Here are a few examples of such lists:
- Export-related Restricted, Denied, and Blocked Persons Lists (e.g., Department of Commerce, Department of State, and the Treasury)
- Law Enforcement-related Wanted Persons List (e.g., FBI’s Most Wanted).
- Sanction Programs-related Blocked Persons List (e.g., United Nations consolidated list).
- General Service Administrations Lists (domestic).
- Multiple additional lists related to Wanted Persons, Politically Exposed Persons, as well as International Terrorists, and Blocked Persons.
External watchlists are not managed inside Eptura Visitor and you can’t add or remove records from it directly in Eptura Visitor. Instead, you create a link between an external watchlist provider and your Eptura Visitor account. Learn more in Screen Visitors with External Watchlists.
Set up a Watchlist
Before you add a watchlist, make sure the setting is turned on. Learn more in Building Security.
Step 1. Add a Watchlist
You can create one watchlist or multiple watchlists, and these can be used to differentiate between the levels of threats posed by visitors and you can name them accordingly.
Complete the following:
- Navigate to Watchlists.
- Click the Add watchlist button.
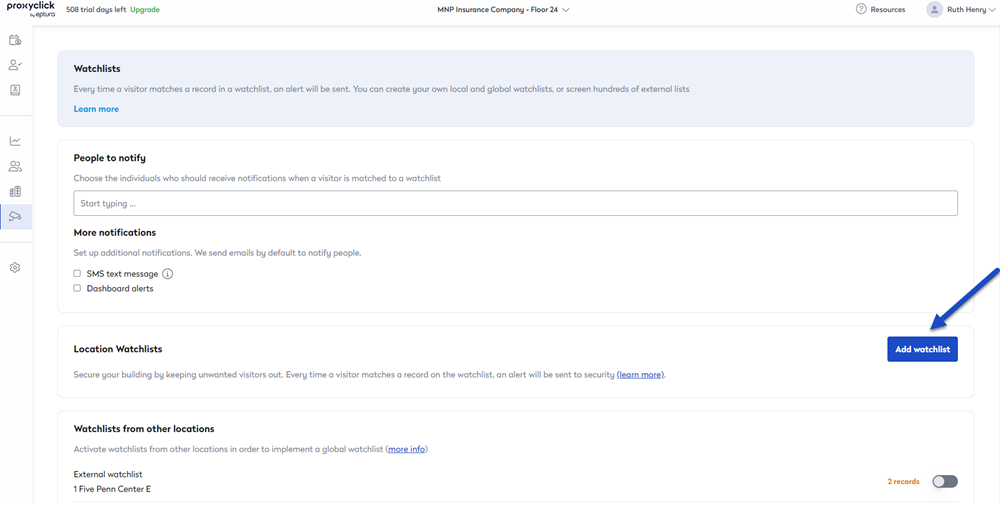
- In the Watchlist name field, enter name (this name will appear in the email alerts, text message alerts, and in the exports).
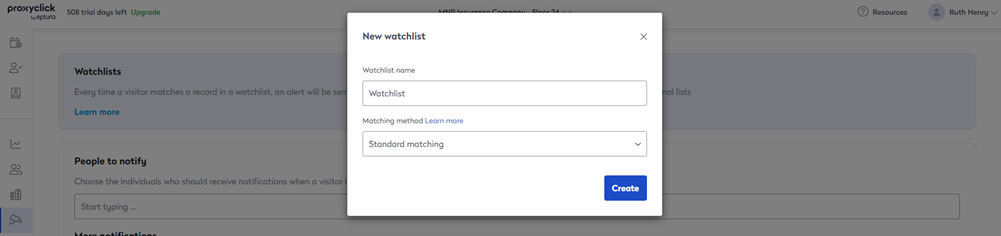
- From the Matching method drop-down, select either:
- Standard Matching - By default, we apply a standard matching algorithm that is triggered if the visitor's details are identical or similar enough to a record in one of your watchlists.
- Narrow Matching - If you feel you may receive too many “false positives,” then the standard matching method may be too broad. If so, you can change the matching method to the narrow matching option.
The table below describes the standard and narrow matching:
| Standard | Narrow | ||
|---|---|---|---|
| Check 1 |
First name | First letter match | Phonetic match |
| Last name | Phonetic match | Exact match | |
| Check 2 |
Last name | Phonetic match | Exact match |
| Company name | Phonetic match | Exact match | |
| Check 3 | Exact match | ||
Click the Create button. A watchlist is created.

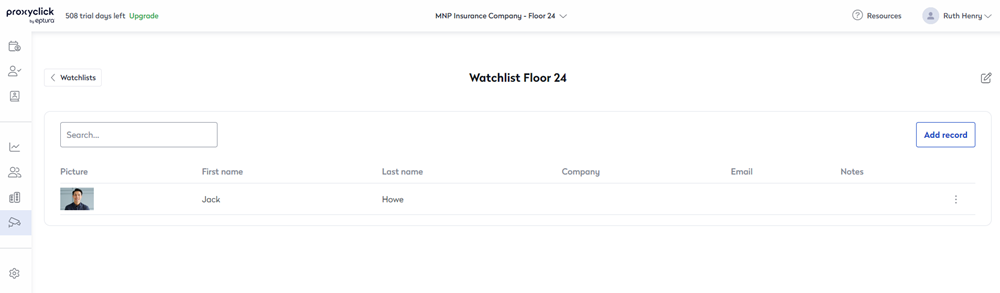
- Click on the Add Record button. A New record dialog displays.
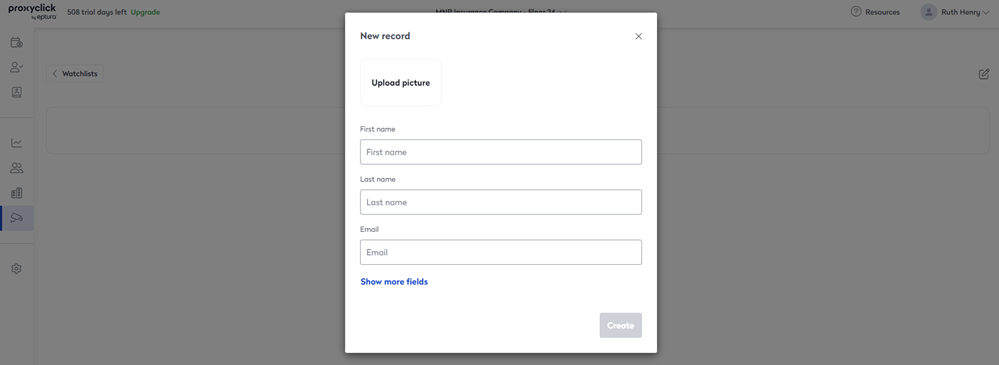
- If needed, you can upload a picture, click the upload picture button, and then navigate to the image and select it. This can be used to compare it with the picture taken by the Kiosk app.
- In the First Name field, enter the visitor's first name.
- In the Last Name field enter the visitor's last name.
- In the Email field, enter the visitor's email address.
- Click the Show more fields to display the fields.
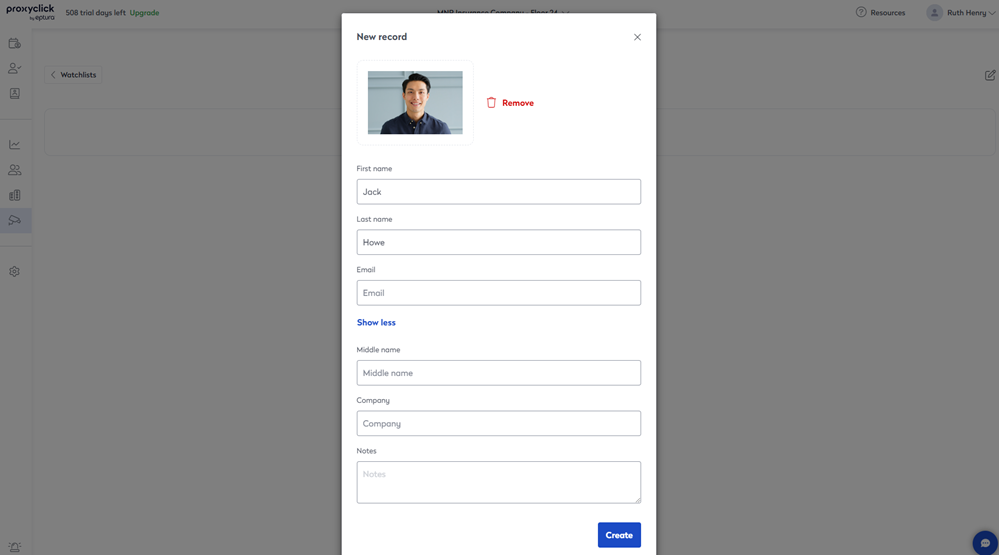
- Complete the relevant fields.
- Click the Create button.
Step 2. Set up People to notify
Now, you can set up the people to notify. Every time a visitor matches a record in a watchlist, an alert is sent to the recipients defined in people to notify.
- Click the Watchlist button to return to the main Watchlist screen.
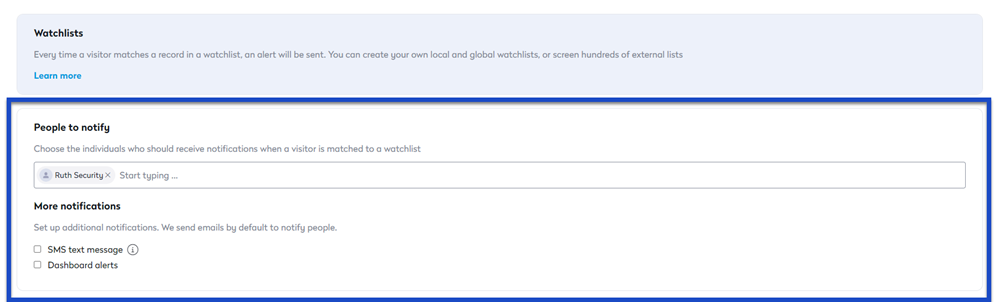
- In the People to notify field, enter the person's name.
- When the search displays the name, then select it.
- Check the SMS text message checkbox to send a text message to the recipients, which can be handy if the alert requires immediate attention.
- Check the Dashboard alerts checkbox for your security staff to receive an alert popup in the Logbook.
The name and settings are saved automatically.
Edit Watchlist
After your records have been added, it is easy to edit or delete them.
- For the watchlist you want to edit, click the watchlist name. The watchlist displays.
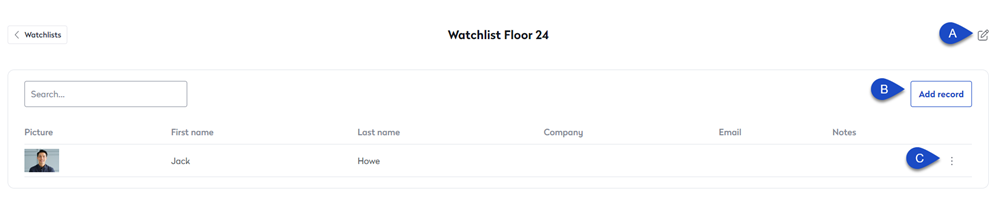
From this screen, the following can be completed:
- (A) Click the Edit icon to change the watchlist name or matching method. Also, you can delete the watchlist.
- (B) Click the Add record button to add another person's record to the watchlist.
- (C) Click the Move Actions icon to edit or delete the person's record.
Delete a Watchlist
If you no longer need a watchlist, it can be quickly deleted.
- For the watchlist you want to delete, click the More Actions
 icon.
icon. - Click the Delete option. The message, "Are you sure you want to delete this watchlist?".
- Click the Delete button and it is deleted.
Export the Watchlist Matches
Information about the watchlist matches is also provided in the exports where you’ll find the following information:
- Whether or not the visitor triggered the alert (see column S in the screenshot below)
- The name of the watchlist (you can have more than one, see further)
- What record in the list actually triggered the alert

Exports can be generated directly from the Logbook.
Alerts are only visible to the recipients and always visible in the exports. Visitors will never know that they triggered an alert from Eptura Visitor. Your reception team will see what they need to see in the Logbook based on their user rights. The goal is to provide a check-in experience that is seemingly normal for the visitor and receptionist (in order to prevent an inappropriate response, especially in the event of a false positive) while at the same time alerting security.
Use a Watchlist across Multiple Locations
In this example, you want to have one central watchlist (managed from the New York office) that triggers an alert in case of a match in any of the three locations (New York, Paris, and Singapore).
Let's show you how to set this up:
- Switch to the New York location and then set up the watchlist for that location.
- Switch to the next location and create a watchlist for that location.
- In the Watchlists from other locations section, toggle the watchlist on for the locations you want.
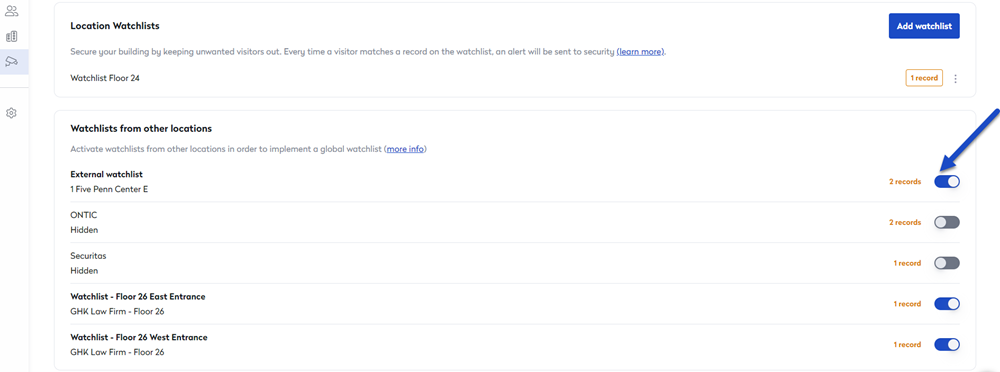
Visitors matching the list in any of the three locations will trigger the alert.
Remember Eptura Visitor is very flexible and will allow you to create:
- multiple shared lists.
- lists that are linked to some of your locations only (not all).
- a shared list and local lists.