Print from the Visitor logbook
Visitor badges can be printed from the Visitor logbook via the Eptura Visitor printing proxy (Proxyclick Print Proxy software). Badges can be set to automatically print when the visitor is marked as 'Checked In' on the Visitor logbook, or manually from the Visitor's Status drop-down menu.
System requirements
- Windows version 7 or above.
- Supported web browsers: Chrome, Edge, Firefox.
The Proxyclick Print Proxy software is not supported on an Apple Mac, but it can run on a Windows Virtual Machine installed on the Mac.
The Eptura Visitor printing proxy is called the 'Proxyclick Print Proxy'. It is downloaded as part of the installation process below or you can click https://static.proxyclick.com/_/pupp....0-win-x86.exe to download it to your PC now.
Contents
Install the Eptura Visitor printing proxy
Follow the steps to download and install the Proxyclick Print Proxy software on your Windows PC and activate printing.
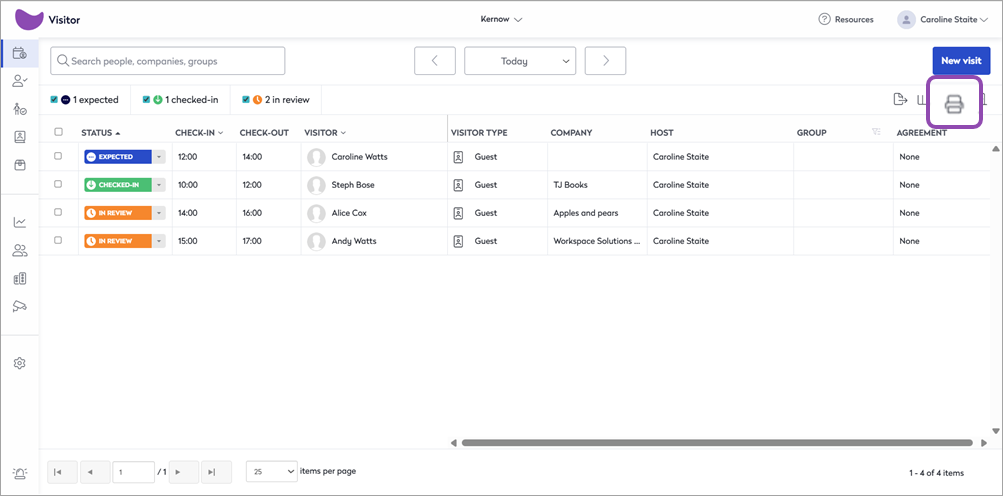
- From the Visitor logbook, click the Printer icon.
If the Proxyclick Print Proxy software is already installed, the selected printer is shown, with an option to enable or disable automatic badge printing when the visitor's status changes to 'Checked In' from the Visitor logbook.
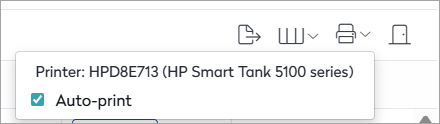
Click the printer to select a different printer to print badges to.
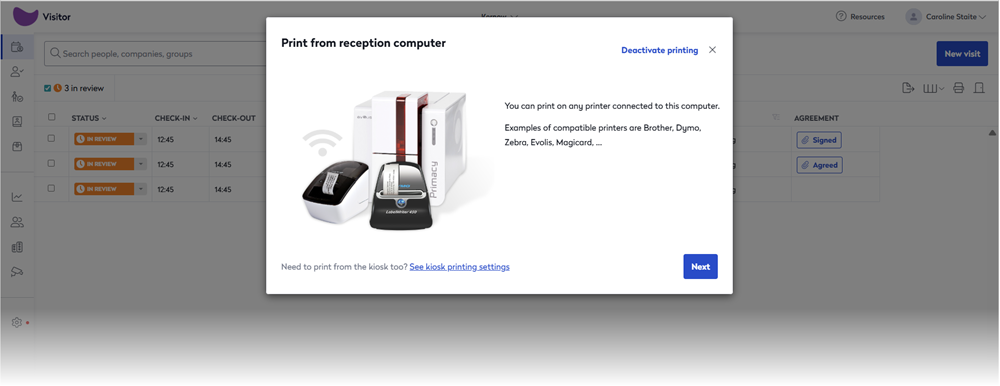
- If the software is not installed, the 'Print from reception computer' dialog box is displayed. Click Next.
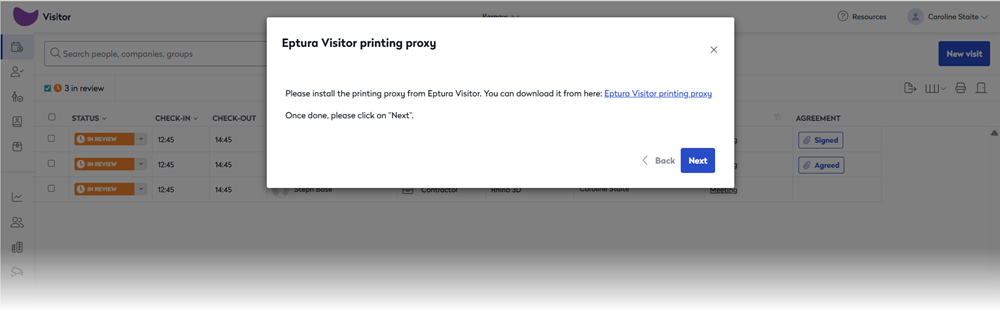
- Click the Eptura Visitor printing proxy link to start the setup wizard - do not click Next until after the software is installed.
- Welcome to the Proxyclick Print Proxy Setup Wizard: Click Next.

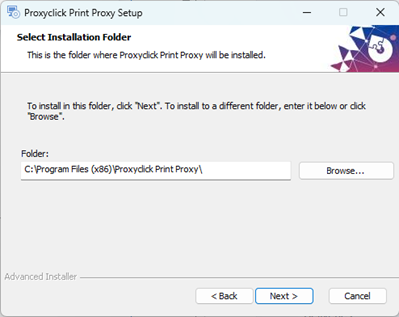
- Select Installation Folder: By default, the software is installed to C:\Program Files (x86)\Proxyclick Print Proxy\. Click Browse if you want to select a different folder for the installation. Click Next to continue.
- Ready to Install: Click Install to start the installation.

- When the installation is complete, click Finish.

- Now return to the Eptura Visitor printing proxy setup in the Eptura Visitor logbook, and click Next.
- Select your printer from the list and click Next.

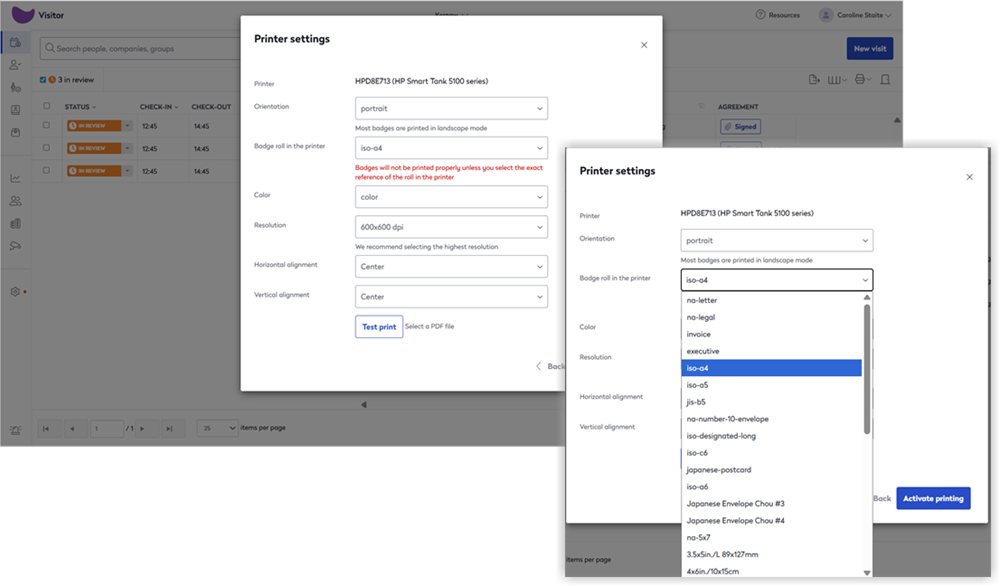
- From the Printer settings, make sure to select the correct badge roll for your printer, and set any other print options as required.
- Test print: To test the printer connection, click Test print. Navigate to the installation folder selected earlier (usually C:\Program Files (x86)\Proxyclick Print Proxy\) and open the \samples\ folder. Select an example badge template PDF. The PDF is sent to the printer.
- Click Activate printing when done.
Your printer is now ready to print badges from the Visitor logbook.
How to manually print badges from the Visitor logbook
From the Visitor logbook, you can print badges individually or select multiple visitors to print their badges in a single batch.
- From the Visitor logbook, select the visitor or visitors you want to print a badge for.
- There are two options to print the badge(s):
- Click the Status drop-down menu for any of the selected visitors and click Print.
- The number of selected visitors is shown at the bottom of the screen. Click the Print badges option to print the badges.

Badges for all the selected visitors are sent to the printer.