Customize Badges
Use the Badge Editor to design a badge and add safety icons, images, and QR codes, as appropriate for your visitors.
Watch the Video
Audio: Sound Length: 1:05 mins
Create and customize your badge
Follow the steps to customize your visitor badge.
- Navigate to Settings > Visitors > Badge and Printer.
- Click Customize or click Choose a new template and select a different card design from the examples shown, to open the badge editor.

Badge editor
Start by selecting the Printer settings from the right-hand side. Choose your printer type (black & white or color) and the badge measurements. The unit of measurement can be set to either metric (millimeters) or imperial (inches).
![]()
To ensure the best quality badge, set the criteria in line with your printer's capabilities. Your printer documentation will provide the necessary details.
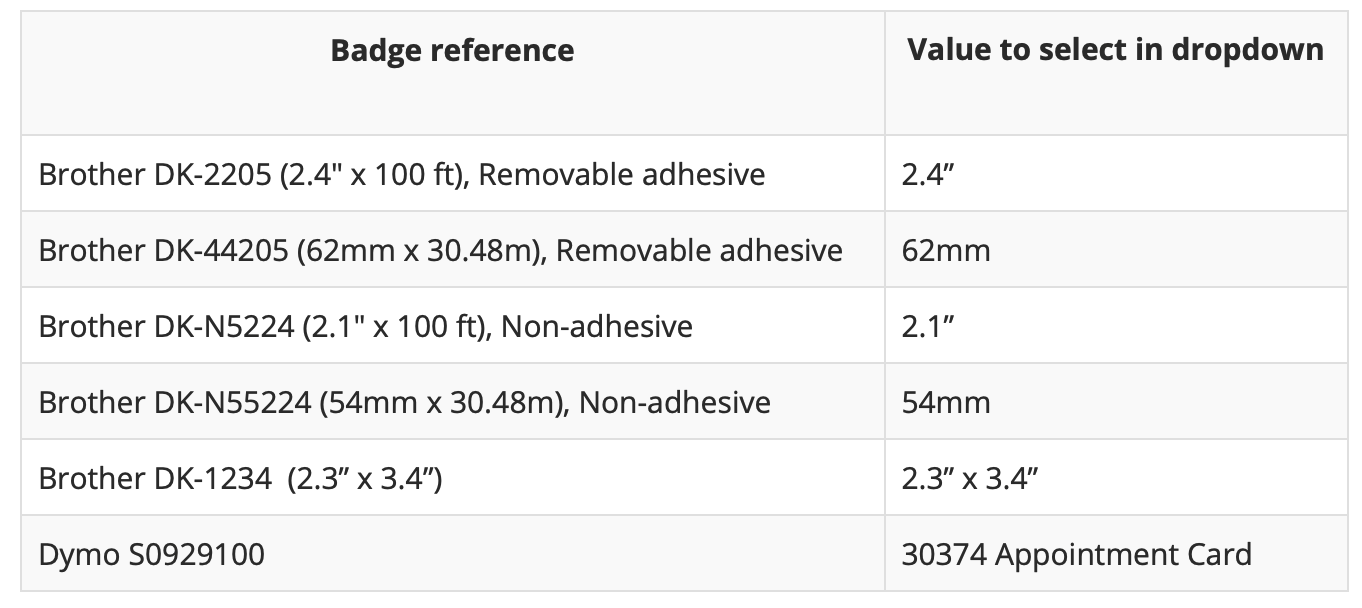
The values of some typical badge types are shown in the table:
Customization options
Customize your badge from the selectable options shown on the left.
![]()
Click the arrow to the right of each option to view the fields available. The most common customizations are:
- Visit info: Add the visitor's name, visit date, and host name.
- Image: Add your Company logo and the visitor's photo.
- QR code: Add the QR code image to the badge. (Available with Security +)
When editing your badge, you can use the left and right arrows under the badge example to view how the customizations look with different contact details displayed.
You can also add the following to your badge:
- Custom fields: Up to 10 custom fields can be created to suit your requirements. Learn more: Add or edit custom fields
- Custom text: Click to place a text box on the badge and then enter your text in the box.
- Icons: Add icons to the badge, such as a no-smoking symbol, Wi-Fi icon, or ear protection, etc.

- Shapes: Add a rectangle, circle, or line to the badge.
QR codes
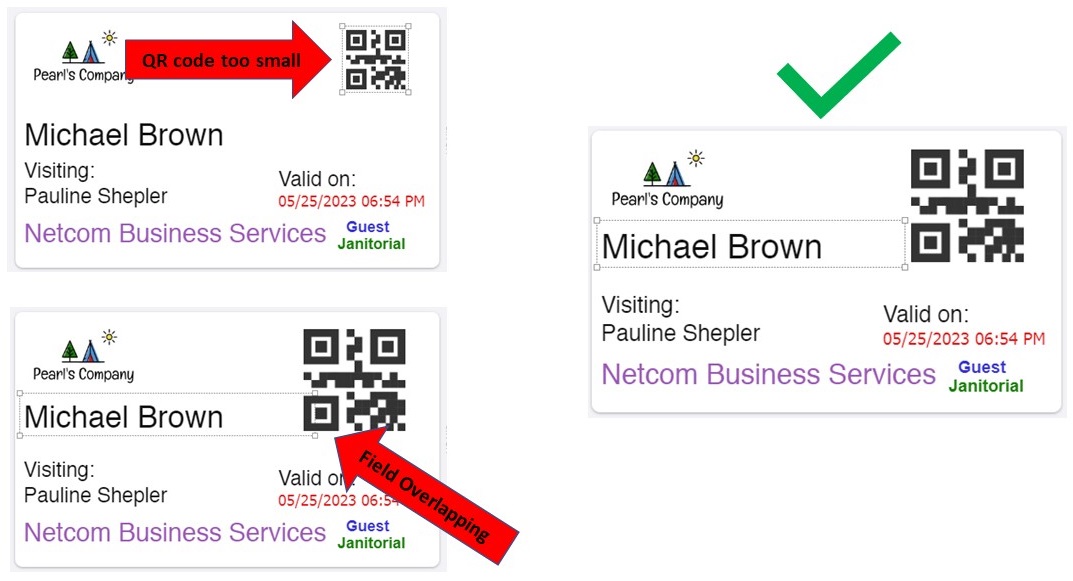
To offer your guests the best check-in experience, make the QR code on the badge as large as possible. Ideally, you'll want the QR code to be a minimum of 1 inch or 25 mm. Make sure no other fields overlap the QR code, as this can cause data to print over the QR and prevent it from scanning properly.
Text
To modify the text styles of fields on the badge (font, color, alignment, etc.), click the field you want to modify on the badge to open the Text properties on the right.
![]()
Moving a field
To move a field to a different position on the badge, click and drag the field around the badge and drop it where you want it.
Resizing a field
To resize a field, click the field to select it, then drag the corners of the field box to resize it.
When resizing, remember to allow sufficient space to accommodate all information to be displayed, such as a long first or last name in the visitor name field. If the field is not large enough, data will be cut off.
Rules
You can add rules to remove specific information from the badge if a given criteria is met. To apply a rule, click the field on the badge that you want to hide under certain conditions, and click +Add rule.
Your custom fields provide the criteria for your rules. Learn more: Add or edit custom fields
In this example, we have added a rule to hide the QR code if the type of visitor is an employee:
![]()
Save the badge
After any changes, click Save at the top-right to apply the customizations to your badge and return to the 'Badge and printer' settings.
Copy settings to all locations
If you want to apply the badge to all the locations you are an administrator of, click Copy to all locations under the 'Customize your badge' section in the 'Badge and printer' settings.
A list of locations you are an administrator of is displayed. Click Save to apply the settings to all listed locations.
![]()