Manage Employees
Level: Administrator
The Employees area contains and maintains the list of employees registered within Eptura Visitor and can act as visitor hosts. Users can be added and managed individually, in bulk, or automatically via user provisioning.
- Manually - add or edit an individual.
- Import users in bulk - update a large user base. (No input from your IT team required).
- User Provisioning - ideal for automatic updates. (Requires implementation by your IT team).
See also: User groups and rights
Manually add, edit, or delete a user
Add a new user
You can manually add a new user to Eptura Visitor from either the Employees module or the Settings module. Here we'll explain how to start the process from the Employees module.
- Click the Employees icon from the left menu to open the 'Employees' page and display the current list of Eptura Visitor users
- Click Add user.

The 'Add a user' popup is displayed. You can now follow the same process as when adding a new user from the Settings module, as described below.
Add a new user
Edit a User
- Click Employees. from the left icon menu to open the Employees page and display the list of users.
- Type the user's name in the Search box at the top and press Enter to search for the user, or find the user by navigating the A-Z page links below.
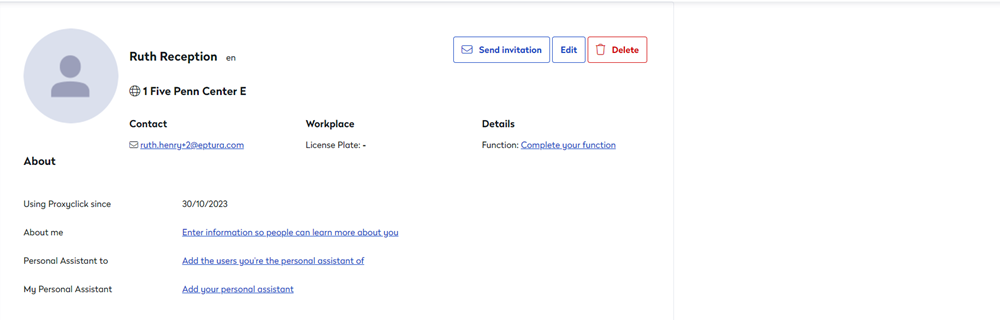
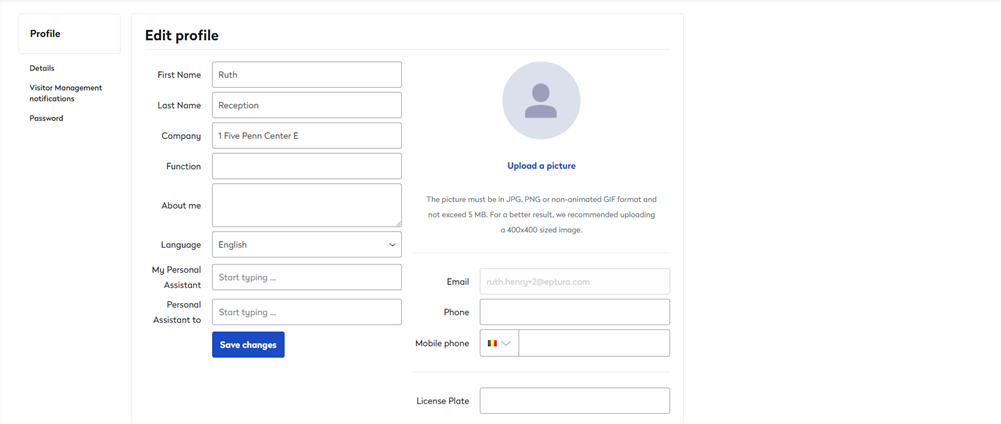
- Click the user's name to open their user profile then click Edit.
- Edit the user details and upload a profile picture. (A 400x400px JPG or PNG is recommended. Images must not exceed 5MB). All changes are saved automatically.
- Click Visitor Management notifications from the Profile menu on the left to edit the notification options.
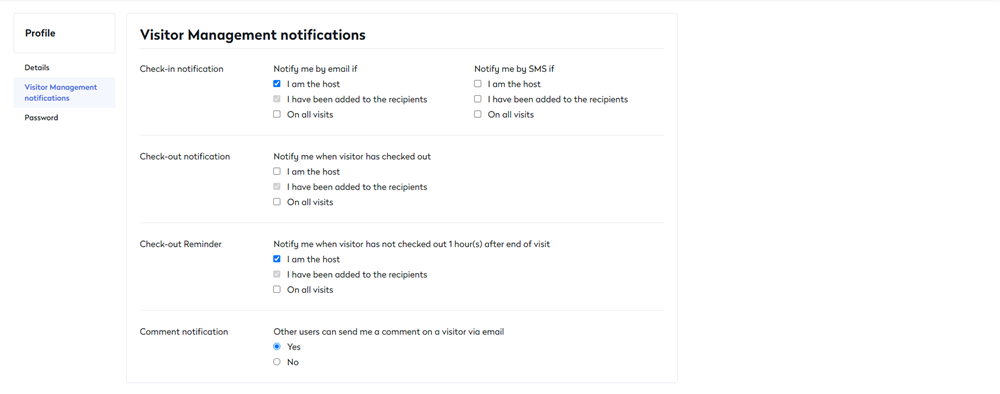
All changes are automatically saved.
Delete a User
- Click Employees. from the left icon menu to open the Employees page and display the list of users.
- Type the user's name in the Search box at the top and press Enter to search for the user, or find the user by navigating the A-Z page links below.
- Click the user's name to open their user profile then click Delete.
- A warning message is displayed 'Are you sure you want to delete this user?' Click Delete to confirm.
Import Users in Bulk
User Provisioning