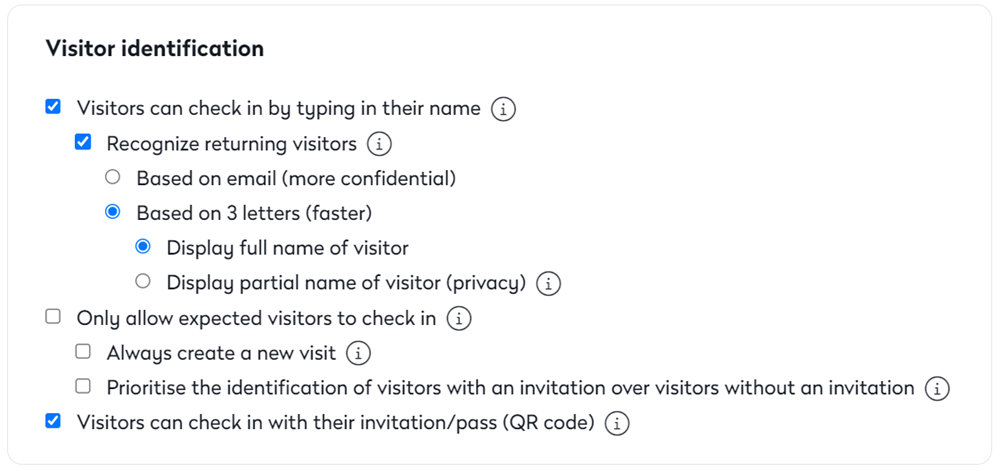
Set up Visitor Identification
The Visitor area of settings allows specific configurations for visitors, both expected and unexpected, as they go through the check-in process.
To get to this area of Settings, use the following steps:
1. Login to the Eptura Visitor web application
2. Navigate to Settings > Visitors > Configure Kiosk > Visitor Identification.
These settings are used during check-in while the visitor interacts with the kiosk device.

- Complete the following:
| Setting | Description |
|---|---|
|
Visitors can check in by typing in their name |
When the visitors are pre-registered, this will assist with creating a guest pass/badge for the visitor. Visitors can only check in with their invitation/pass if not selected. Recognize returning visitors check box - All visitors created will be automatically recognized on the kiosk when returning. When this is check then you can set the following:
It is highly recommended that a visitor picture is used so visitors can easily recognize their profile. |
|
Only allow expected visitors to check in |
For security reasons, you can prevent visitors not pre-registered in the system from checking in (they'll see a message inviting them to go to the reception team). Most companies do not activate this setting.
|
|
Visitors can check in with their invitation/pass (QR code) |
Allow visitors to scan the QR code they received in their invitation (works with printed invitations, invitation email, and Wallet.) |
Information to ask unexpected visitors
When unexpected visitors check in through the kiosk, specific settings can be set and required.

Complete the following:
| Setting | Description |
|---|---|
| Full name | This option cannot be disabled. |
| This can be turned off or on. It can be used to send visitation emails and customize those emails. | |
| Visitor's Company | This can be turned off or on. This will record where the visitor comes from. |
