Kiosk Layout
Configure kiosk: Layout
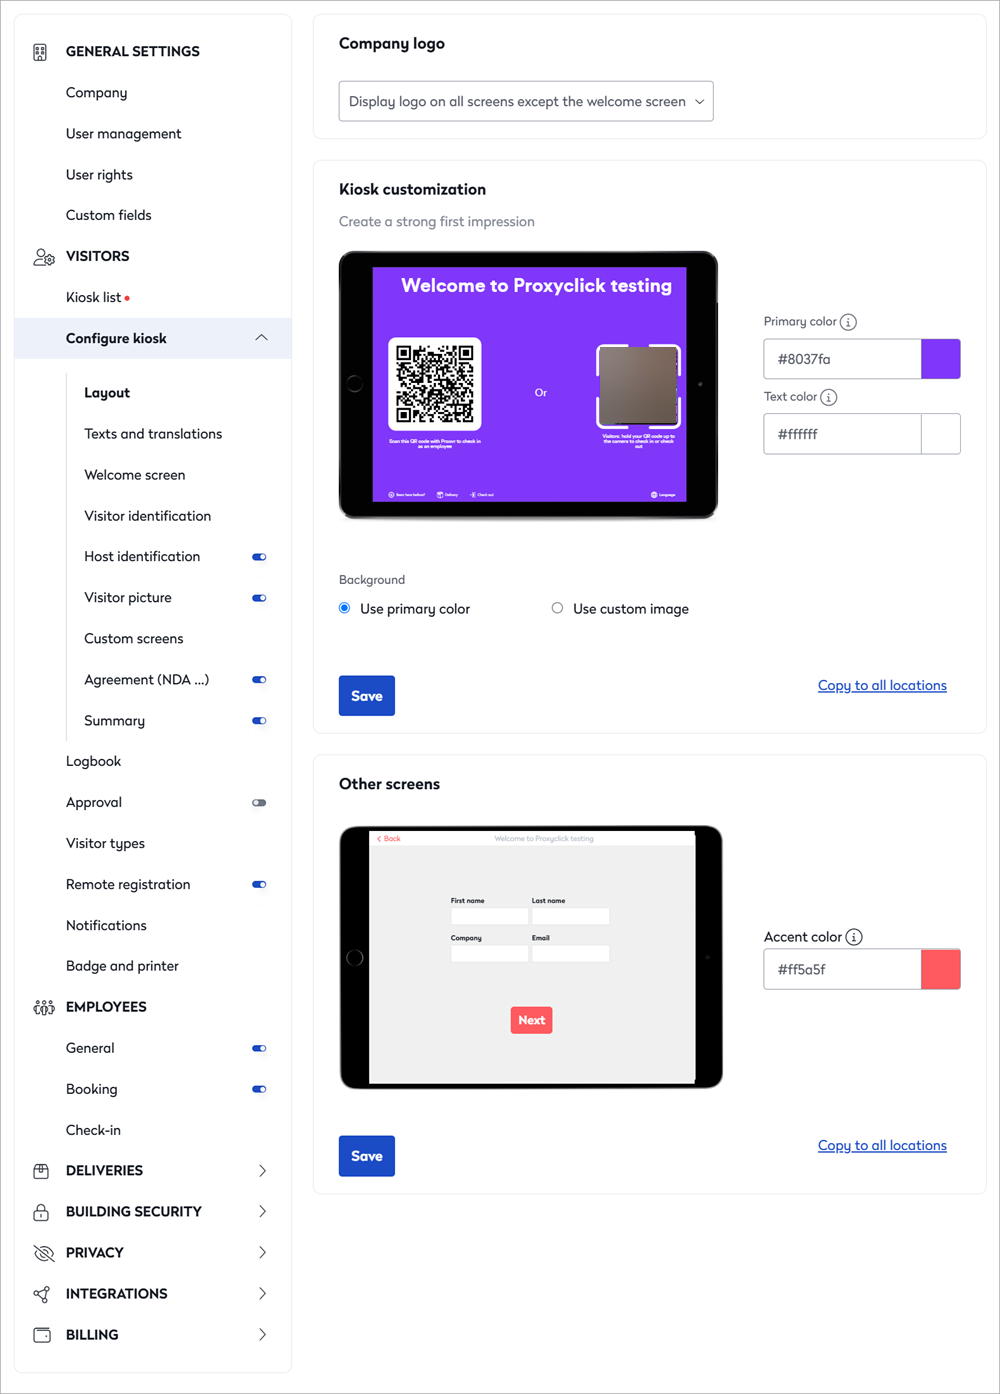
The kiosk can be customized with your organization's brand colors and images. Navigate to the 'Configure kiosk' settings to get started:
- Navigate to Settings > Visitors > Configure kiosk to view the Layout settings.
If settings are grayed out and cannot be edited
When settings have been previously saved via the Global Admin Dashboard, none of the multi-location settings are configurable locally from the Settings module. The options are grayed out and a message is displayed; 'Please contact a Global Admin to alter this setting'. Learn more: Global Admin Dashboard
- Company logo: Click the drop-down to choose whether to display your company logo on all screens, or on all screens except the welcome screen.

Your company logo is uploaded in the Company section of General Settings. Learn more: Company settings
- Kiosk customization: You can customize the colors and upload a background image to the welcome screen, and choose an accent color to apply to buttons and links displayed during the visitor check-in process.

- Primary color: Set the color to use as the background if a custom image is not uploaded. This is also the color of the text on the check-in button.
- Text color: Choose a color that will stand out against the background.
- Background: Select Use primary color to use the primary color set above as the background, or select Use custom image to upload an image to display.
- Custom image: If a custom image is selected, click Change image to upload an image to use as the background. Click the drop-down menus to apply filter and/or blur effects to the image.
- Click Save to save your welcome screen customization.
- Other screens: Choose an Accent color to apply to buttons and links displayed during the visitor check-in process.

- Click Save to save the accent color.
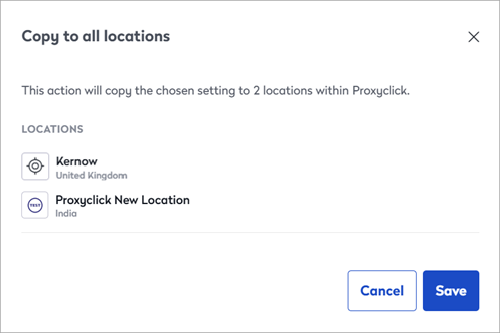
Copy settings to all locations
If you want to apply the settings to all the locations you are an administrator of, click Copy to all locations to the right of the 'Save changes' button.

A list of locations you are an administrator of is displayed. Click Save to apply the settings to all listed locations.
From the Global Admin Dashboard, Global administrators can manage this setting and more for multiple locations. Learn more: Global Admin Dashboard