Add a new location to my account
If you are a host and need access to multiple locations, you can check your current access by going to the Dashboard and using the Location Navigator.
If you can't find the location then your company's Administrator can set up the locations.
When your Administrator sets up additional locations this let's your company to have:
- Consistent branding - When adding new locations, you can transfer your check-in process and settings to your new accounts so that each one of your locations proudly displays your brand.
- Universal access - If you need to, you can have an overview of all expected, checked-in, and signed-out visitors across locations.
- Localized - Greet your guests in their own language. So far, the Eptura Visitor kiosk app has a large range of different languages available. Adding another one is easy; just let us know which one you want.
- Customized usage rights - Each user can have different usage rights in different locations. Someone can be registered as an administrator in one place and have standard user rights in another.
- Remote management - You won’t need an additional project manager for your new accounts. One person can manage all your locations remotely.
- Reporting - You can easily compare all your locations’ visit data. You can also aggregate all your data to analyze your global statistics.
Add a new Location
Watch the Video
Audio: Sound Length: 0:55 mins
Follow the Steps
You can add another location and if you want you can copy the original location's settings and logo.
From the Eptura Visitor web app:
- Log in to the administrator account.
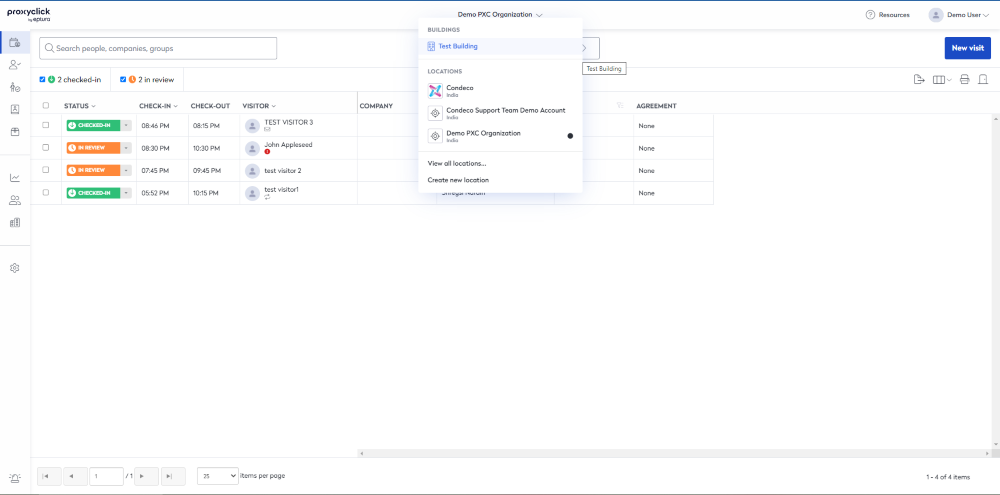
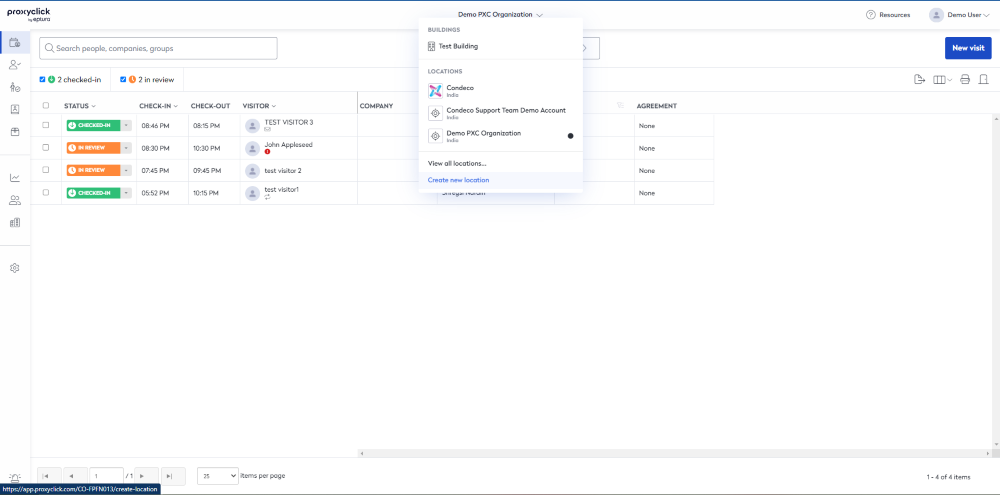
- Click on the current location at the top, middle of the screen.
- Click the Create new location.
The Enter your location information screen displays.
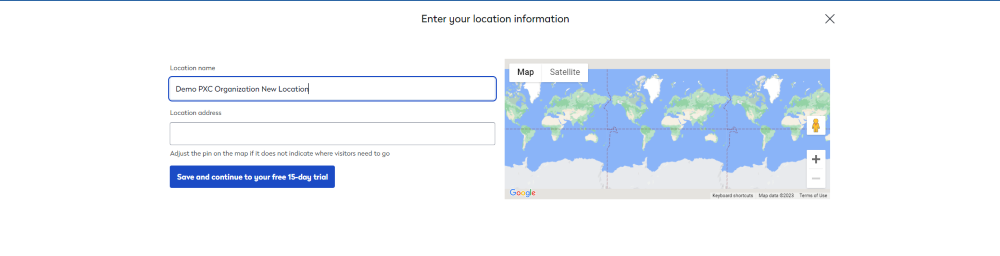
- In the Location name field, enter the location's name.
- In the Location address field, enter the location's address and select the correct address.
- Click the Save and continue to your free 15-day trial button.
The Configure your location's account screen displays.

- Select the check box to copy the settings and/or copy the logo from the existing location to the new one.
The settings that are copied during the creation of the new location include:
- General visit settings: invitation email, SMS/text reminder, the default duration of visit, company preferences regarding check-in notification, check-out notification, check-out reminder, auto-check-out
- Most kiosk settings: branding, custom screens, agreements / NDA, and languages. Only two kiosk settings are not copied: custom texts and the (local) printer settings.
- Custom fields
These settings can only be copied in bulk upon creating the account (not afterward). The settings that can be copied after the creation of the new location are the Watchlist and Users.
- Click the Create location button.
Then your new location is created, and you have instant access to it.