Manage a multi-company kiosk
This article’s objective is to define and set up a multi-company kiosk. The multi-company kiosk is helpful at the reception of a multi-tenant building allowing visitors to choose the company they visit in a multi-company building.
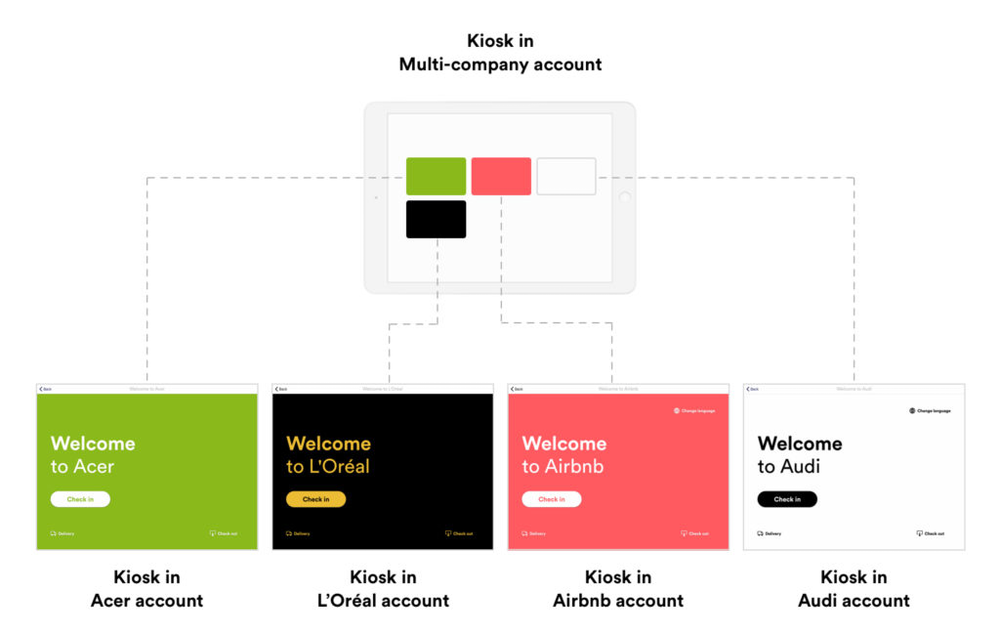
In this configuration, one Eptura Visitor account is used to manage the multi-company kiosk. All companies in the building will have their own account, and all accounts will be linked to the multi-company account.
The multi-company account can be set up to customize the multi-company kiosk. This way, you can customize the landing screen of the multi-company kiosk with a custom image, and each company in the building will be able to customize its own kiosk experience.
The same configuration can be deployed on one or more kiosks. But you can also configure different multi-company kiosk in the same multi-company account. For instance, you could have a different multi-company kiosk on each floor of a multi-company building with only the companies from that specific floor.
Steps
Step 1. Account creation and linking
First, make sure to create one Eptura Visitor account to manage the multi-company kiosk. Then, you can either create new locations for each company in the building making you the first admin of those new Eptura Visitor accounts, or you can have each create their own Eptura Visitor account and invite you to their account as an admin.
The multi-company admin must have admin rights on all company accounts.
Click the location switcher on top to ensure every company account is correctly linked to the multi-company account. You should see all the accounts you have rights to within the drop-down. If you do not, you will need to reach out to the specific company that is missing and request admin rights. Eptura Visitor will be unable to grant you admin rights.
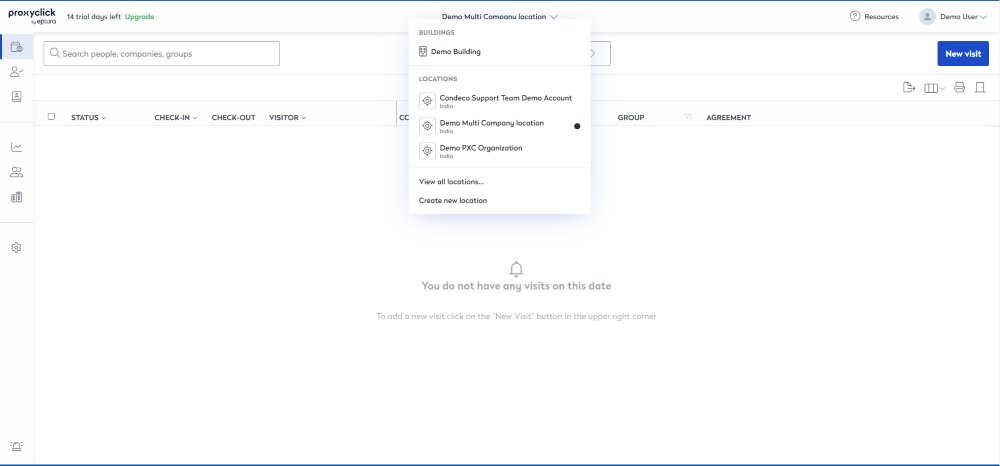
Step 2. Multi-company kiosk creation
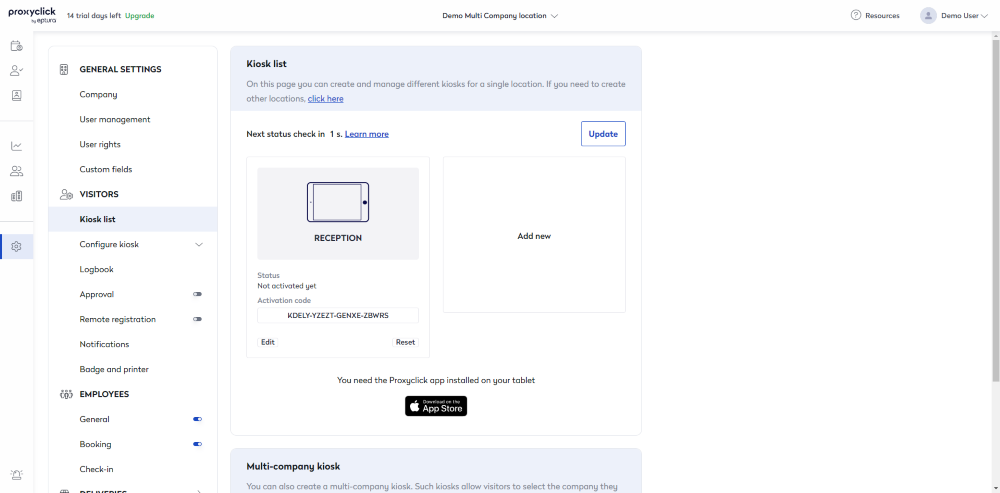
From the multi-company account, go to Settings > Kiosk list. You can add a new kiosk or edit the default one.
Edit the kiosk and check the This is a multi-company kiosk box. The list of locations you’re linked to will appear. Select the locations that need to appear on the company selection screen of the multi-company kiosk.
Be sure to check the multi-company “master” kiosk, and the visited company accounts.
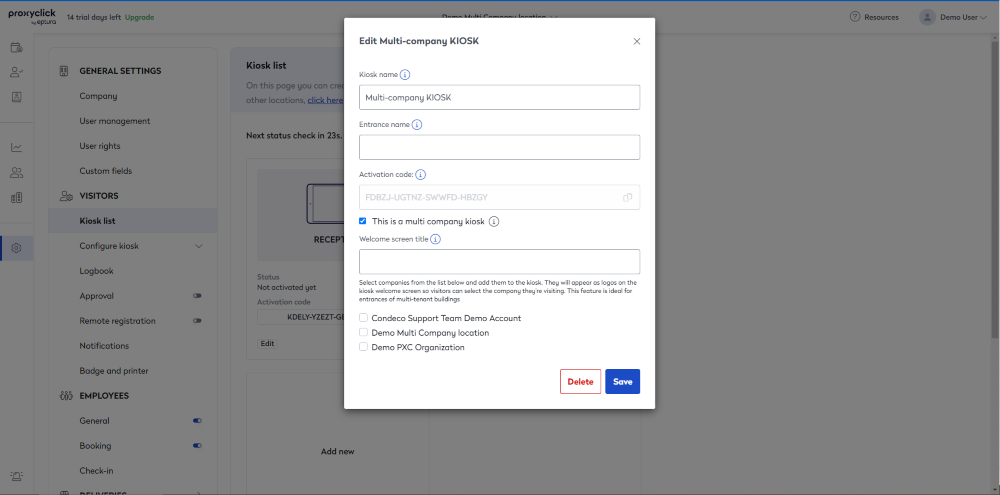
From here, you can also create other multi-company kiosks by adding additional kiosks. This can potentially help avoid long lines by using only one kiosk.
You can also configure each kiosk by selecting only some available companies. This is especially useful if there are multiple lobby entrances or desks for specific tenants or floors dedicated to a group of tenants.
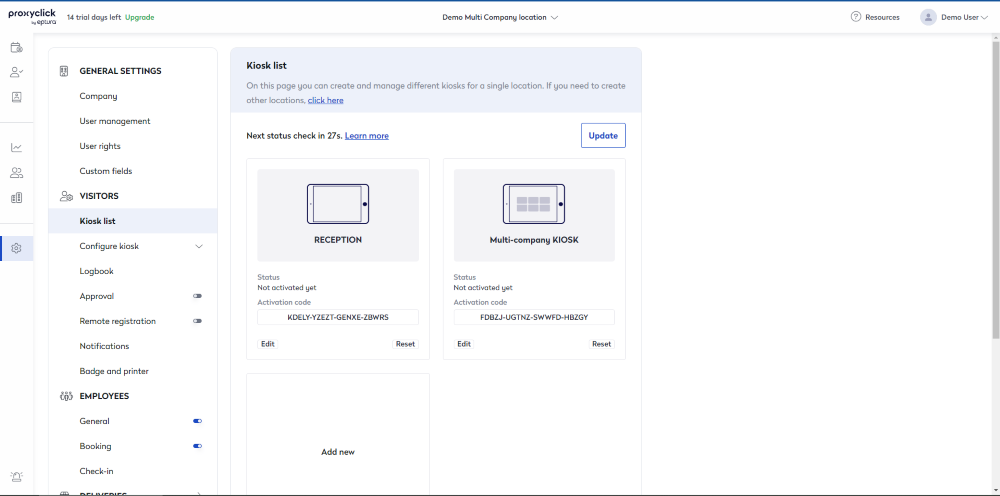
Multi-company kiosk activation
On the kiosk that will be placed at the reception, download and launch the Eptura Visitor kiosk app. Then log in using the unique activation code found in your kiosk list.
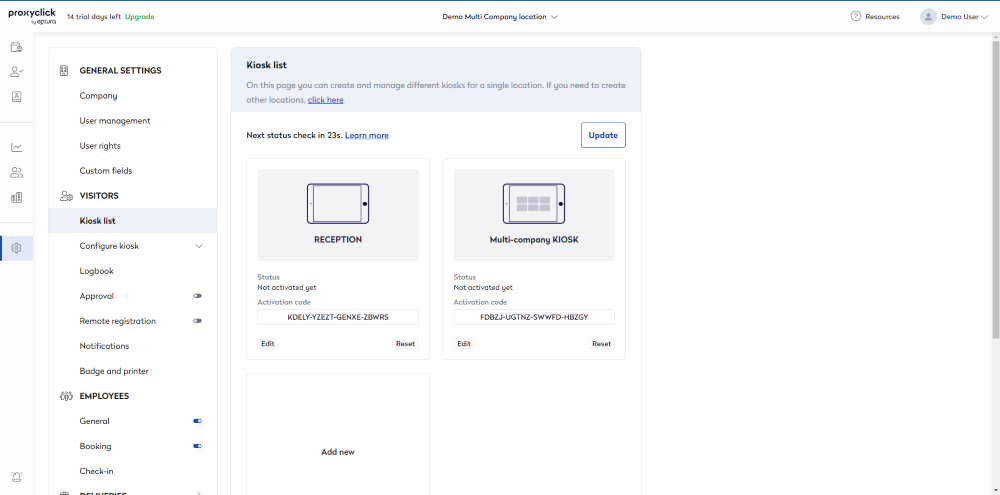
This allows staff that may not have Eptura Visitor credentials to activate the kiosk, such as third-party lobby staff or security teams.
Multi-company kiosk configuration
You can customize the landing screen of the multi-company kiosk with a custom image. This is done in Settings > Configure Kiosk > Welcome screen.
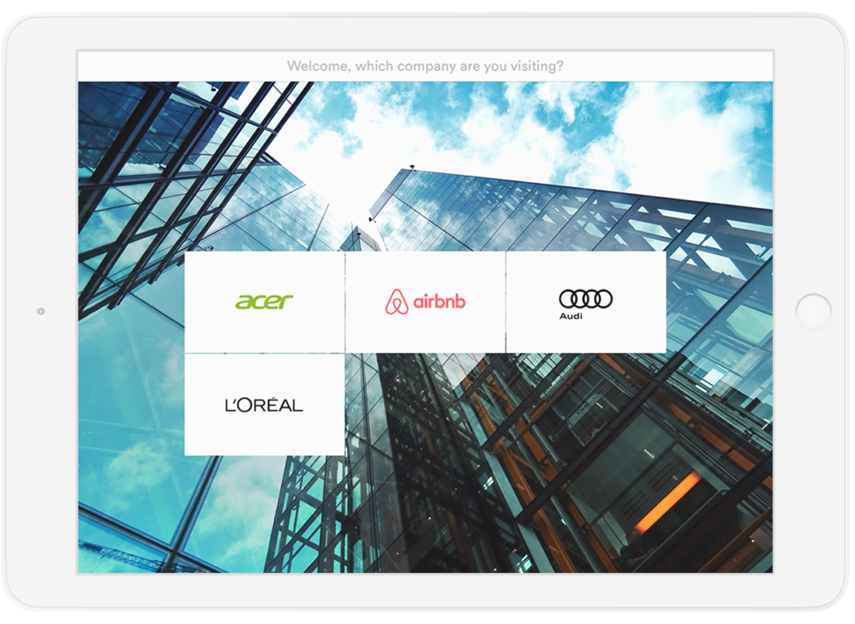
In the Text and Translations tab, you can customize the text on top, asking “Welcome, which company are you visiting?” in the Welcome screen section.
The order of the company on the company selection screen can’t be changed and is displayed alphabetically.
Each company, such as Acer, Airbnb, Audi, and L’Oréal, will have to customize its kiosk to reflect its company branding. The logo of each company will be used on the company selection screen. We recommend using a logo with a transparent background.
When more than nine companies are linked to the same multi-company Kiosk, a search field becomes available.
