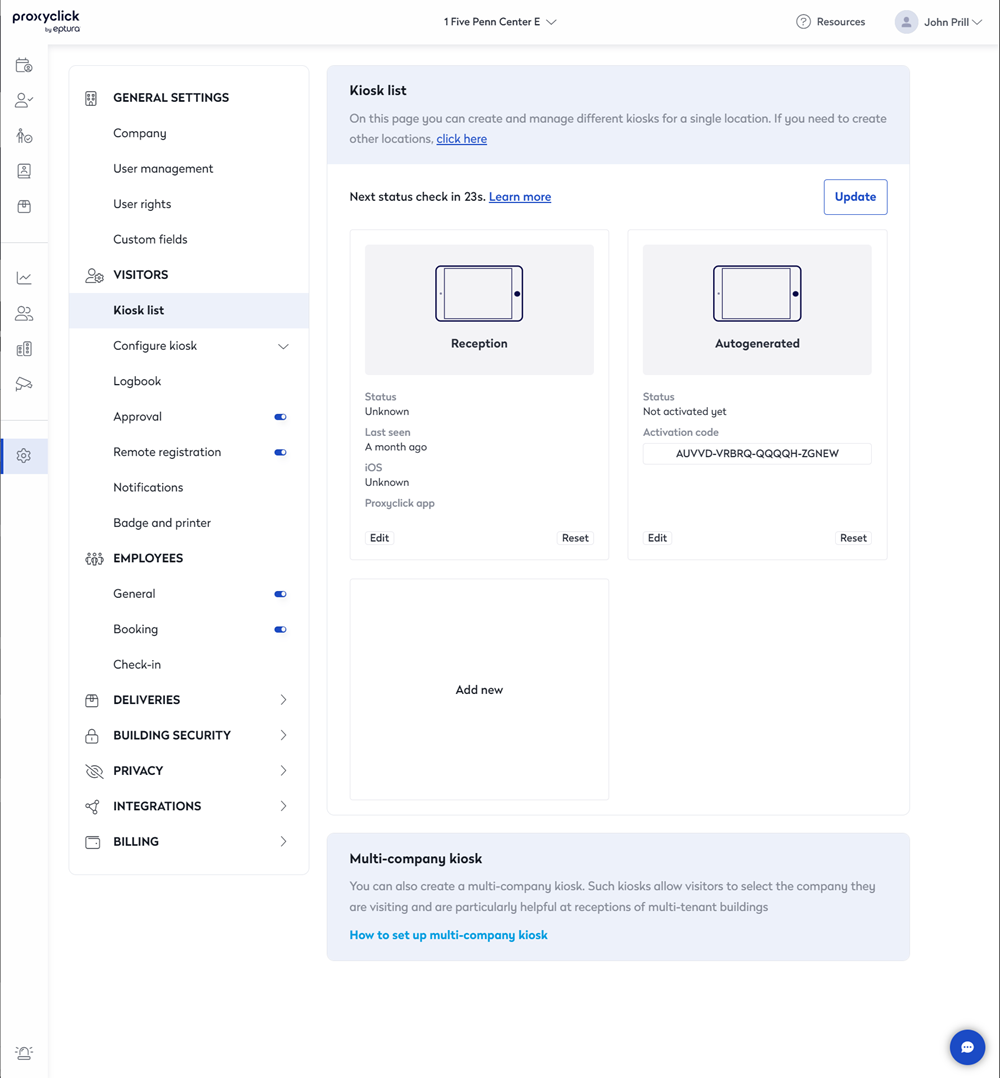
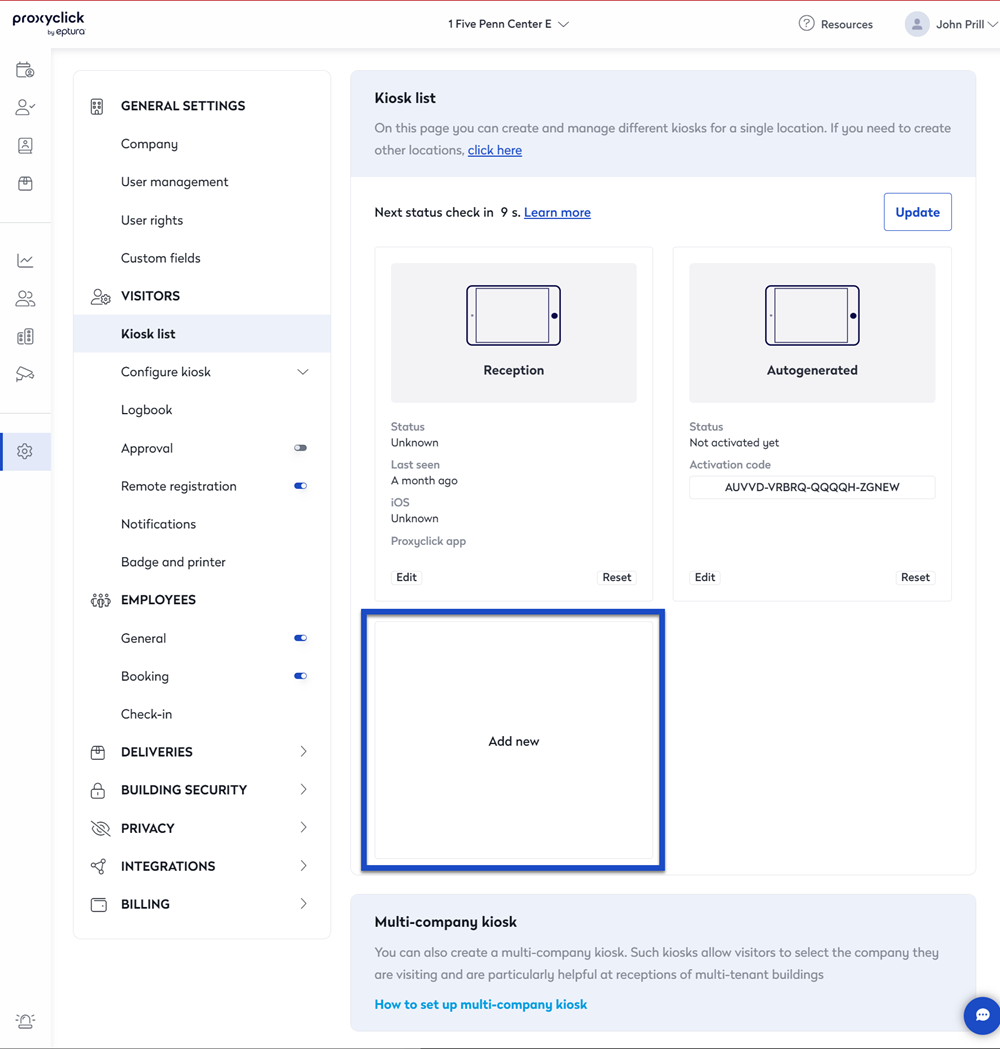
Kiosk List
The Kiosk list in settings provides information on how many devices are set up as a check-in kiosk using the Eptura Visitor Kiosk app on an iPad.
Access the Kiosk List
Each device set up as a kiosk is stored within one place on the Eptura Visitor dashboard on the web.
To find this information, use the following steps:
1. Log in to the Eptura Visitor Dashboard using the link and login details provided.
2. Click on Settings, and then under Visitors > Kiosk list.
The devices that are set up will be shown on screen.
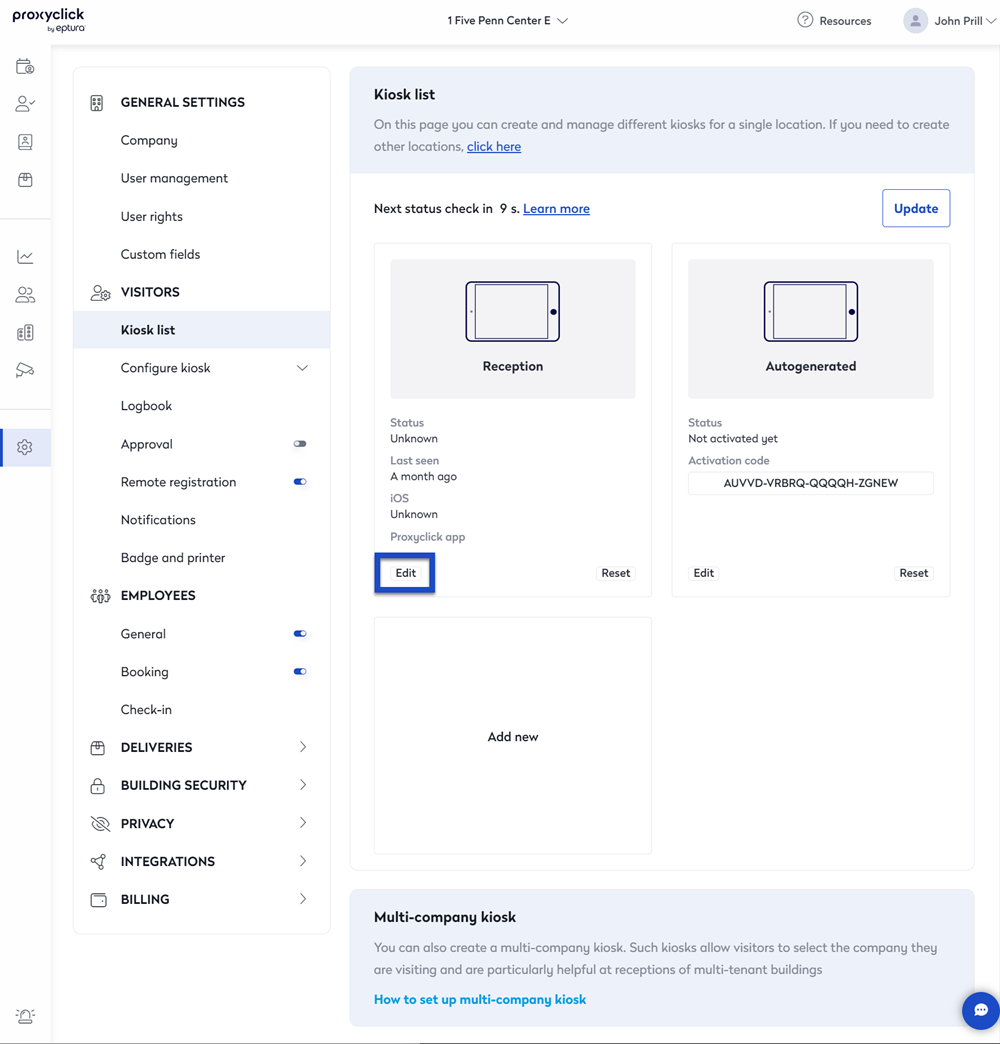
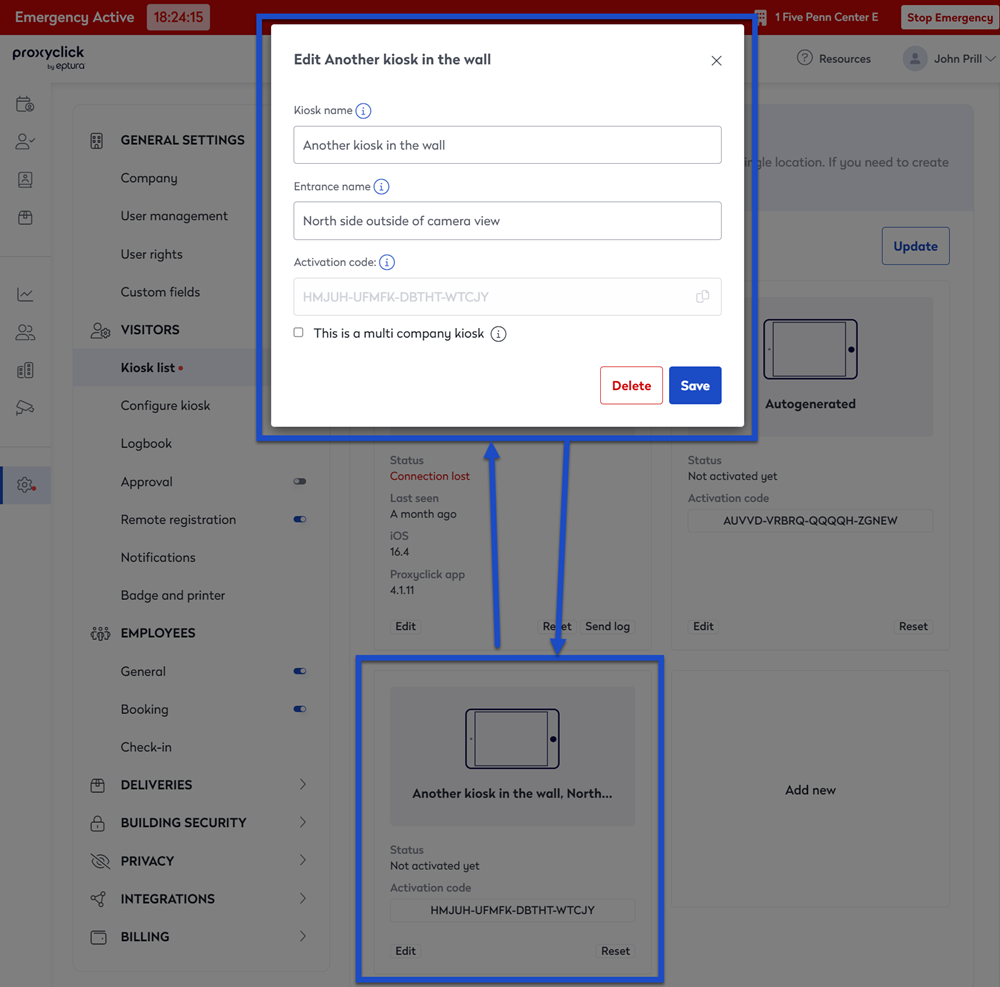
Edit the Kiosk information
To edit the information related to a particular kiosk, click the edit button in the appropriate area.
A window on the screen allows you to change specific items about the Kiosk device.
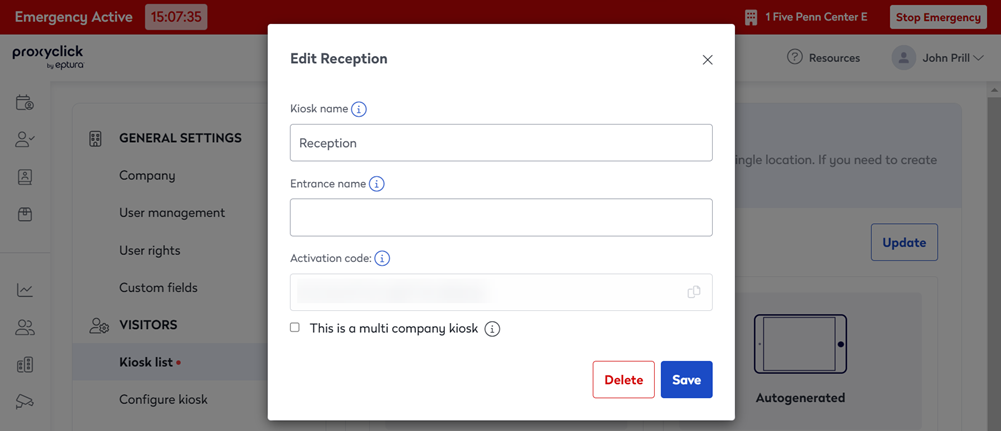
The following items can be changed:
- Kiosk Name: a specific name used for the device to help determine its purpose.
- Entrance Name: where in the building the device is used.
- This is a multi company kiosk: if this particular kiosk device is used for multiple companies within a building.
- The Activation code will usually be displayed, but this information cannot be changed.
- Click the Save button after any changes have been made.
If you want to delete the kiosk, then click the Delete button.
Reset the Kiosk information
When you reset the Kiosk it can be reset to the current location or if you have moved the Kiosk it can be reset to another location.
- For the kiosk you want to reset, click the Reset button. The Reset dialog displays.
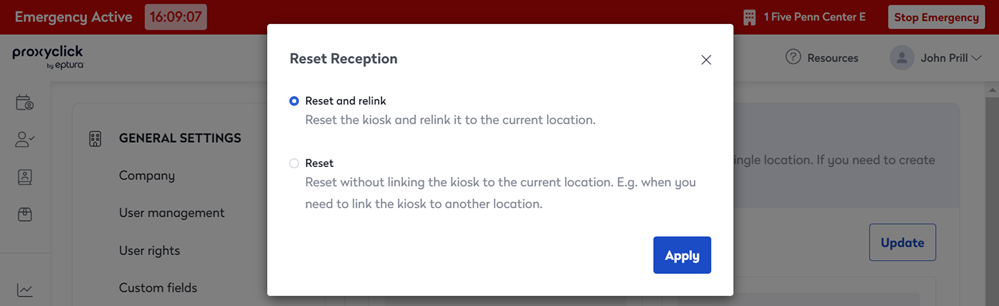
- Reset and relink option - This will reset the kiosk and reattach it to it's current location.
- Reset option - This will reset the kiosk and allow it to be moved and reused at a new location.
- Click the Apply button.
Add a Kiosk Device
- Click the Add new square to add and attach a new iPad device to use as a kiosk.
- A new window will appear on the screen, offering options to assist with adding a new device as a kiosk.
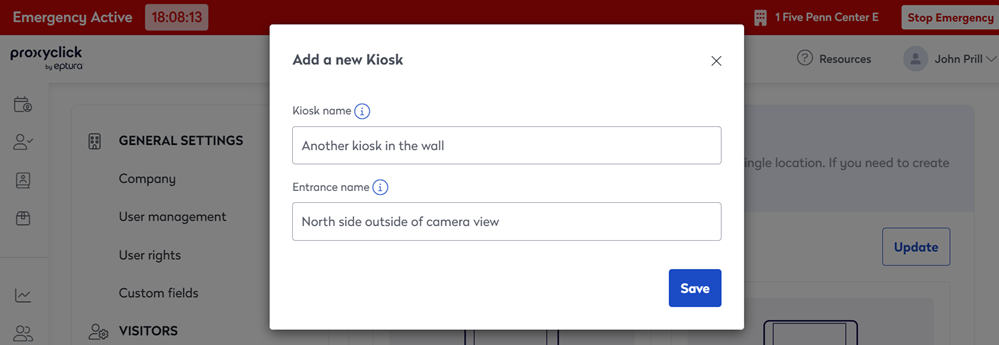
- When you click the Save button, the window will change slightly, providing an activation code. With the tablet nearby running the Eptura Visitor Kiosk app, enter the activation code to enable the program on the tablet.
- Click Save to save the details in the window.
Click Delete to remove this kiosk setup. The following window appears when the Delete button is clicked.
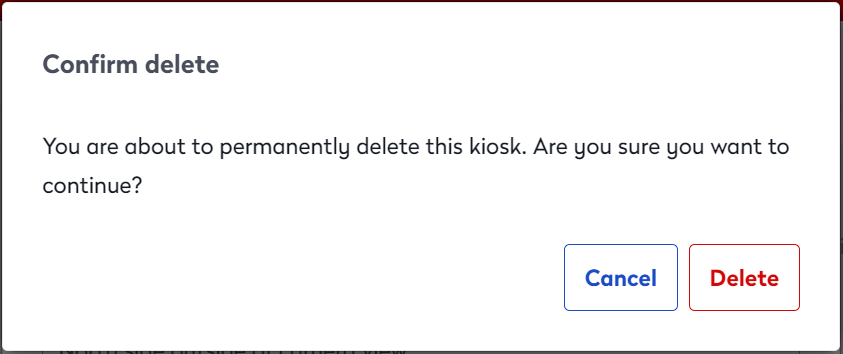
Clicking the Delete button will remove the kiosk entirely from the system.
Set up a multi-company kiosk
Use this link for information on setting up and using a kiosk for multiple companies.